A página está carregando...

1
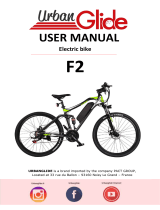
MANUEL D’UTILISATION
MANUAL
URBANGLIDE is a brand imported by the PACT GROUP,
Located at 33 rue du Ballon - 93160 Noisy Le Grand - France
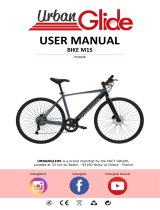
USER MANUAL
BIKE M7
PO3068

2

3
Safety and precaution
Please read the manual carefully before using the product and read the risks and safety tips in the manual. The
use of an electrical product can be dangerous if the user is not watchful. Misuse and non-respect with the safety
instructions does not affect the company in event of accident. Self-judgment and common sense are necessary
for users to detect the possible dangers.
Please verify the current regulations and laws in your country to know where and how to use your product legally.
You must comply with the rules and laws that applicable to vehicles and pedestrians.
• Protective equipment
Always wear the following protective equipment:
- Approved and certified helmet according to your location
- Knee pads and elbow patches
- Long sleeve t-shirt and long pants
- Gloves
- Shoes with rubber soles, never drive in barefoot or sandal. Verify to make the laces made and keep
them as far as possible from the wheels and the internal system.
• Driver’s advice
The user must not be more than 120 kg, the size and weight do not fully certify that the user will have full control
of the vehicle. It is your responsibility to make sure that all users are aware of the risks. The recommended age
for using this product is 14 years. It is your responsibility to put a younger child into consideration by taking into
account their skills, maturity and ability and following the rules. Do not touch the engine or the brakes of the
product immediately after use, these parts may be extremely hot.
• Procedures and driving conditions
Please verify the current laws and rules in your country before using the product. In France, the linear speed on
level ground and a person not exceeding the maximum permissible load is 25km/hour. Look around when using
the product and pay attention to all possible risks. It is important to respect the rights and properties of everyone.
For your safety do not start the accelerator if you are not on the product. This product is not designed to make
jumps, acrobatic tricks and skids.
Never drive on roads, near vehicles, stairs, hills, swimming pools or other streams. Please hold the handlebars
with both hands. Never go on the product with more than one person. Be sure to keep your fingers and other body
parts away from hot parts during use (Brake, motor, chain). Never use the product with a Mp3 player, or with your
smartphone at hand.
Never use the product to pull anything, as this may damage the components and wear out the battery. Never put
the product in contact with water, the electrical components can be damaged and create a dangerous situation.
Roll only on flat and solid surfaces. Avoid surfaces with gravel, holes, ice, which can lead to loss of control of the
product. Do not drive at night or in areas where visibility is reduced. Do not ride indoors where there are carpets
as they can interfere.
The A-weighted emission sound pressure level at the driver's cab shall not exceed 70dB(A). The total value of the
vibrations to which the hand-arm system is exposed does not exceed 2.5m/s², the maximum frequency-weighted
root mean square value of the acceleration to which the whole body is exposed does not exceed 0.5m/².
(Measurement accuracy is uncertain)
After each use, verify that each piece is in its proper place, and that it is not damaged. Before each use, verify the
following points:
- The brakes are in good condition
- All components are in good condition and in their places
- The parts with defects in the last use have been repaired or replaced according to the manufacturer's
conditions.
- The maximum tyre inflation pressure is 6.40 bar.
People who have medical follow-up or treatment such as: cardiac people, pregnant women, irresponsible people
with back or neck problems, should not use the product.

4
• Usage of the charger
Before using the product, it is necessary to charge it. A long charge may be necessary before the first use. Please
refer to the battery indicator, you can charge your battery at any time to ensure the constant power. It is not
necessary to wait until the battery is completely empty to charge it.
Please do not use the charger of other brand, these can damage the battery of your product. To ensure a normal
life cycle, it is important to charge your battery at least once every 3 months, even if you are not using the product.
Avoid shocks and contact with water, these are factors not covered by the warranty that may damage the battery.
The supplied charger is "smart", it will stop at 100% of the charge and not damage the battery.
The charger must be in perfect condition during each use, verify the wires, the condition of connection ends and
connectors. If the product does not charge, the charger may be defective, it needs to be replaced.
The charger must be used only by an adult, it is important to unplug it from both sides when not charging.
• Battery
Please do not store the battery in extreme temperatures. Store it below 30 ° C and above 0 ° C. If you do not use
your product for 60-90 days, the battery may get worse. This loss of autonomy is due to lack of use and is
therefore not covered by the warranty.
At the end of its cycle, the battery must be discarded separately from the undifferentiated generic waste. Discard
the batteries in the containers provided for this purpose. The recovery and recycling of batteries contributes to
protect the environment and material resources conservation. This product contains a Li-ion battery, the extinction
of a possible fire must be done with a powder extinguisher (Fire class D).
• Maintenance
Please store your product in a dry, dust-free place, and avoid leaving it in a humid area or under the sun for too
long. To clean your appliance, use a damp cloth and mild detergent. Do not use alcohol, gasoline, kerosene, or
other corrosive chemical solvents to clean your appliance, which will damage its appearance and structure.
Constantly verify the condition of components of your product, if any part is damaged, please replace it before
using the product. If a part is not working, falling, and injuring may occur.
• Transport
If you wish to transport your product by air or other means of transport as well as its battery, please contact the
local authorities and the carrier beforehand to obtain the possible prohibitions and limits of transport. Lithium
batteries are considered dangerous in many countries. Please make sure that the access and transport are
allowed before travelling. International law prohibits the transport of lithium batteries by air.
• Use of the product
To turn on your product, press the Power button on your handlebars. To move forward, press the accelerator also
located on your handlebars. Place both feet on the product and squeeze the accelerator trigger. To brake, use the
manual brakes located on the handlebars. You can also use the rear mudguard if your product is equipped with
one. Before each use, please check that the wheels are not jammed and that the brakes are working. In order to
carry out some basic adjustments, in particular the brake control play, please go to our tutorial videos available on
our YouTube channel: URBANGLIDE CHANNEL.
The use of this type of product over a long period of time can cause vibrations which can be unpleasant, take
regular breaks. To warn other users of your presence, use the horn on your handlebars, if your product is
equipped with one.
• Rebus
THIS PRODUCT CONTAINS LITHIUM BATTERIES THAT MUST BE SAFELY RECYCLED: The battery must be
removed before disposal. Before any work is carried out, remember to switch it off and unplug it from the socket.

5
• Listing of parts subject to wear:
Some parts require replacement depending on the degree of wear and tear and the time of use, you can obtain
spare parts at the following address (Section eBike M7)
https://boutique.urbanglide.com
Spare parts
Replacement
criteria
Acceptability
criteria
Replacement method
References
Tire
Loss of original
shape, cracks,
splinters or other
signs of wear and
tear
Online video on YouTube
Urbanglide Channel
On request to customer
service
Disc brake
Abnormal noise
when braking, low
thickness (<2.5mm)
Drive at 15Km/h
Brake on 1m, the
scooter must stop.
Online video on YouTube
Urbanglide Channel
On request to customer
service
Brake
Abnormal noises
when braking or
abnormal rubbing
noises
Online video on YouTube
Urbanglide Channel
Brake cable
Fraying cable
Online video on YouTube
Urbanglide Channel
On request to customer
service
Reflectives sticker
When it comes off
Online video on YouTube
Urbanglide Channel
On request to customer
service
Bearings
Abnormal noises
Contact our customer service
On request to customer
service
The serial number has the year of manufacture as a prefix on the information label of your product.
YYYYMMXXXXXXXXXXXX
Year
Month

6
Introduction
Before using your URBANGLIDE electric bicycle, it is important to read this user manual carefully. It is important to find
out about the regulations in place in your city, town, municipality, or country before using the product. Do not lend your
bike to anyone who is not familiar with this type of product.
Before using it for the first time, as well as for all other uses, check that all parts are properly assembled and in good
condition. If you have any questions, do not hesitate to contact us. You can also visit a specialist near you to analyse
and adjust your bike as best as possible. It is essential that the parts you assemble yourself: seal, handlebars, pedal,
are well assembled and checked regularly.
This bike is designed to be used on flat roads and slopes, but also on mixed surfaces such as mountain roads, forest
roads and gravel roads. However, it is not designed for jumping or tricks. Any user who does not respect these rules
will be held responsible in the event of an accident.
a) First use
- Check that the handlebars and stem are correctly tightened.
- Check that screws, bolts and other nuts are properly tightened.
- Check that the brakes are working properly.
- Check tyre pressure and condition
- Check the operation of the lights and reflectors
- Make sure the battery is fully charged
- Insert the battery into the bike, turn the key to turn on your battery.
- Start your bike by pressing the ignition button on the left handle for 2 seconds.
- Once the screen is switched on, it will display the battery status, assistance level, time, distance and speed.
- The engine starts when you start pedalling. Before starting to pedal, make sure that the assistance speed is at 0.
- To adjust the assistance level, press the "+" and "-" buttons on your display. The higher the level, the greater the
assistance.
b) Before each use
- Check the condition of your tyres
- Check your tyre pressure
- Check that no parts, bolts, screws, etc. are missing.
- Check that the brakes are working properly
- Check the functioning of the electronic parts
- Check that the lights are working and that the reflectors are in place.
- Check the condition and operation of the battery.
c) Recommended tightening
- Front axle nuts: 46N.m
- Rear axle nuts 70N.m
- Handlebar and stem clamping bolts 12N.m
- Handlebar stem expansion bolt 10N.m
- Seat column clamping nut 5-8N.m
- Saddle clamp nut 24N.m
- Gear lever nut 4N.m
- Rear support nut 8N.m
- Mudguard support nut 8N.m

7
Different parts
Editing
Before using your bike, there are a few simple assembly steps. Please follow these steps to assemble your bike.
STEP 1: UNPACKING
Remove all items from the carton and check that none of them are damaged. Remove all foam protection. Be careful
not to scratch or damage the product when cutting the clamps.
STEP 2: MOUNTING THE HANDLEBARS
Using the spanner supplied, unscrew the 4 screws at the point where the handlebars are to be inserted. (1)
Insert the handlebars in this position, use the marker to centre your handlebars and install them as best as possible.
(2)
1
2

8
Put the part you unscrewed previously on the handlebar (3), then screw it back in place using the 4 screws. When
tightening, make sure you are aligned with the mark on the handlebars.
STEP 3: ASSEMBLY OF THE SADDLE
Loosen the clamp by pulling the handle. (4) Then insert your saddle at the desired height. Please note that there is a
mark on the stem indicating the minimum height at which you should insert the saddle. (5) If you do not follow these
instructions, you may damage your bike and endanger yourself. Then tighten the clamp firmly and check that your
saddle is stable. Make sure that the saddle is properly aligned with the frame of your bicycle.
3
4
5

9
STEP 4: MOUNTING THE PEDALS
On each pedal is indicated the indication of its location. (6) "R" for right and "L" for left. Once the position has been
determined, start screwing the pedals onto the crankset. The direction in which the pedals are screwed on is also
indicated on the label. (6) Next, screw your pedals more firmly using the spanner provided. (7)
STEP 5: MOUNTING THE FRONT WHEEL
To mount the front wheel, use the black metal rod with the locking lever at the end. (8) Unscrew the round end of the
metal rod and also remove the spring.
Insert the metal rod in the centre of the wheel. (9) WARNING:
The locking lever must be opposite the brake pads on the wheel.
Once the rod is inserted in the centre of the wheel, replace the
spring and screw the round end back in place. Tighten the round
end securely and check that the spring is correctly seated.
7
6
8
9

10
Then take the front fork. Remove the cover in the centre of the fork.
(10)
IMPORTANT! The brake system is integrated in the fork. Before
starting the assembly, remove the protective tab located in the brake
system. (11)
Then insert the front fork into the front wheel. (12) CAUTION: Make sure that the brake pad on the wheel is inserted
into the brake system. The brake pad must be inserted where you removed the tongue. Place the two hooks of the fork
on either side of the metal rod.
10
11
12

11
Once the wheel is securely inserted into the fork, tighten the metal
rod using the locking lever on the fork. (13)
Once the assembly is finished, make sure that all parts are tight and
properly adjusted. Check that the brake system is correctly positioned
and that the brake pad is inserted.
Check that the handlebars are straight and tight.
Check that the saddle is aligned with the dial on the bike, and that it is
tight.
13

12
DISPLAY
The display gives you all the information about your bike. It shows the battery level, the gear
level, the speed you are at and the number of kilometres you have ridden.
To turn on your display, press the power button on the left side of your handlebars. To increase
the speed level press the top button. To decrease the speed level, press the bottom button.
Hold the top button to turn on the front light of your bike.
20
3
00001 km
Speed in Km/h
Battery level
Speed level
Distance travelled in Km
Increase the speed/light level
Reduce the speed level
Turning the display on/off
Km/h

13
USING THE SCREEN
Your screen has a multifunctional display.
ODO: Shows you the total number of kilometres you have cycled with your bike.
To reset this data, simply enter the menu of your bike. To do this, press the "+" and "-" buttons on your bike. Then
press the power button to move from setting to setting. Once you have reached the P16 setting, press and hold the
"-" button to reset your mileage counter to 0.
You can also record the distance travelled on two separate trips (e.g. out and back). To do this, press the power
button to switch from ODO to TRIP.
TRIP A: Record the distance travelled on the first trip.
TRIP B: Record the distance travelled on the second trip.
You can also get more information about your speed. Above the speed in km/h, there are different functions:
SPEED: Shows you the actual speed you are travelling at.
MAX: Shows you the maximum speed you have reached during your journey.
AVG : Shows you the average speed of your journey.

14
Charger
Connect your charger directly to your bike.
The charger displays two indicator lights : Charge and
Power
Power tells you that the charger is connected to a
power source and can therefore be used.
Charge tells you the charge level of your battery.
In charge
Charge
WARNING! Disconnect the charger when the battery is charged. This will avoid shortening the life of
the battery.
WARNING! Failure to use the battery for an extended period of time may cause irreparable damage
to the battery. Make sure to recharge the battery every 3 months for half an hour.
WARNING! If you do not use the bike for a long period of time, we recommend removing the
battery.
WARNING! When the battery is completely empty, you must recharge it immediately. Cells that
remain empty for a long time can suffer irreparable damage.

15
Use
1. The electronic gear change
To assist you electronically, your bike is equipped with 8 electronic speed levels.
- Position 0 = No assistance
- Position 1 and 2 = Economic position. Thanks to these positions, your bike consumes less energy. The
power is ideal for progressing on a flat surface. These two power levels will probably not be sufficient to tackle
a steep climb.
- Position 3 and 4 = Medium position
- Position 5 and 6 = High position. Your bike consumes more energy and is also more powerful.
- Position 7 and 8 = Maximum position. Your electrical assistance is at its maximum. These two speeds are
reserved for regular and speed-conscious users.
To scroll through the assistance level, press the "+" and "-" buttons on your bike's screen.
2. The operation of the electrical assistance
Your electric-assisted bicycle is equipped with an electric motor located in the rear wheel. This motor starts
automatically (if the ignition is switched on and the battery is charged) when you pedal and only when you pedal.
The motor switches off when :
- You apply one of the two brakes
- You reach the speed limit of 25km/hour.
This principle allows the engine to give you full power when you need it and saves battery power when you are
descending or launching on flat ground. This energy management allows you to acquire greater autonomy.
The range of your bike depends on several factors:
- The weight carried: The performance of your bike is given for an average load of 80kg.
- The outside temperature: The performance of your bike is given for an outside temperature of about 20°C.
- Battery wear and tear: Your battery is designed to deliver stable performance for 750 charge cycles, i.e. an
average use of 3 years.) After these 750 cycles, it is still operational, but its performance may decrease.
- The nature of the route: The range displayed is calculated on flat or slightly hilly ground (10 to 20% odds).
Autonomy varies according to the type of ground, the number of hills and descents on your course.

16
Troubleshooting
Problem
Possible cause
Solution
It does not work
The battery is not charged.
Charge the battery, check if the red
light is on.
Connections or cables are
disconnected.
Check that the battery is firmly seated
in the product
It does not work
continuously
The battery needs to be charged.
Charge the battery, check if the red
light is on.
The battery is not fully charged.
Make sure the power cable is well
connected.
The battery may need to be replaced.
It suddenly stopped
working
Overload, cut-off
Overloading may result in product
failure. Turn off the product, wait 15
seconds, then turn it on again.
Fuse burnt
Prior to this, check the condition of all
cables and connectors.
It is moving slowly
The brakes are not properly adjusted.
Check the condition of the brakes and
try to loosen. If this does not work,
please contact the after-sales service.
It has overloaded
Check that the user weighs less than
the previously recommended weight.
Check that there are no objects
obstructing the proper operation of the
product.
Bad driving condition.
Make sure you are on flat, dry, and
constant ground.
The tires / wheels are damaged.
Check the condition of the wheels of
the product.

17
For any information, contact our after-sales service at
the following address:
Support@urbanglide.com
You will also find many tutorial videos concerning the
maintenance and maintenance of your product on our
YouTube channel:
UrbanGlide Channel
Finally, do not hesitate to follow us on our social
networks Instagram and Facebook to follow our news.
You can find the latest update of this manual in digital
format by logging on to our website:
www.urbanglide.com
(Model section concerned).
The paper version will be given to you on request from
our customer service department.
All product names, logos and trademarks are the property of their respective owners. All company,
product and service names mentioned in this manual are for identification purposes only. Mention of
these names, logos and trademarks is not a recommendation for use.

18
DECLARATION OF CONFORMITY ORIGINAL
We undersigned PACT GROUP hereby declare that the product.
Model: URBANGLIDE EBIKE M7
Type: Electric bike
Function: Electric bike
Product description: Electrically assisted bicycle, with assisted pedaling, equipped with a 250W motor whose
power supply is gradually reduced and finally interrupted when the vehicle reaches a speed of 25 Km/h, or earlier,
if the cyclist stops pedaling.
Manufacturing batch: 062021URBBKM7BLMX0001 - 062021URBBKM7BLMX0430
Year of manufacture: 2021
Meets all standards and technical directives below:
. DIRECTIVES
2014/35/EU
TESTS STANDARD
EN 15194 :2017
All tests were carried out by the laboratories mentioned below:
TÜV Rheinland (Shanghai) Co., Ltd.
No 177,178, Lane 777 West Guangzhong Road,
Jing’an District, Shanghai, China
Mail: service-gc@tuv.com Web: www.tuv.com
Shenzhen Anbotek Compliance Laboratory Limited
East of 4/F., Building A, Hourui No.3 Industrial Zone, Xixiang street Bao’an district.
Shenzhen, Guangdong, China
Contact details of the importer:
PACT GROUP
33 rue du ballon
93160 Noisy le Grand – France
Contact details of the person authorized to edit the technical document:
Fung NIM
33 rue du ballon
93160 Noisy le Grand - France
This declaration shall be issued under the responsibility of his representative.
26/07/2021
Representative of the company:
PACT GROUP
33 rue du ballon –
Noisy le Grand - France
Maurice Bodokh
CEO


1
BIKE M7
MANUEL D’UTILISATION
URBANGLIDE est une marque importée par la société PACT GROUP, localisée au
33 rue du Ballon - 93160 Noisy Le Grand - France
PO3068
1/134