Hologic ATEC Breast Biopsy and Excision System Introducer Localization System Instruções de operação
- Categoria
- Acessórios para fazer café
- Tipo
- Instruções de operação

Instructions For Use
Gebruiksaanwijzing
Mode d’emploi
Bedienungsanleitung
Istruzioni per l’uso
Instruções de Utilização
Instrucciones de uso
Breast Biopsy and Excision System
Introducer Localization System


1 English
ATEC® Introducer Localization System
Instructions for Use
Please read all information carefully. Failure to properly follow the instructions may lead to
serious surgical consequences.
Important: This package insert is designed to provide Instructions for Use of the ATEC
Introducer Localization System. It is not a reference to surgical techniques.
Indications
The ATEC Introducer Localization System (ILS) is intended to be used as an aspiration
needle and/or as an introducer with another biopsy needle in percutaneous biopsies of the
breast for diagnostic purposes only.
Contraindications
When performing biopsies in conjunction with the ATEC Introducer Localization System
(ILS) sound professional judgement should be used on patients who are using anticoagulant
therapy and/or patients with known hemophilia problems.
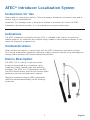
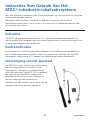
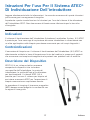
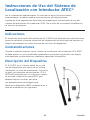
Device Description
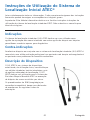
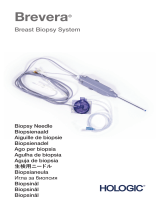
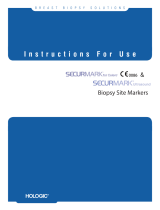
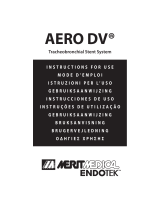
The ATEC ILS is a sterile, single use system
of devices comprised of an introducer stylet,
introducer sheath, needle guide and localizing
obturator. The ATEC ILS is intended for use with
the ATEC Breast Biopsy and Excision System when
performing vacuum assisted breast biopsies.
Magnetic resonance imaging (MRI) procedures
should be performed according to the following
guidelines.

2English
Instructions for Use
1. Standard aseptic patient preparation should be employed prior to use of the ATEC
ILS.
2. Prior to use of the ILS, inspect the protective packaging and device to verify that
neither has been damaged during shipment. If it appears the packaging has been
compromised, do not use the device.
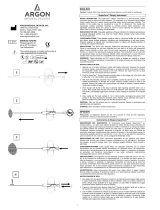
3. Insert the introducer stylet into the introducer sheath. Position the depth stop on the
introducer sheath at the appropriate location according to the pre-determined “Z” value.
4. A standard protocol should be employed to anesthetize the patient and the biopsy
site.
5. Insert the sterile needle guide into the compression grid at the identified target area.
6. Insert the introducer sheath/introducer stylet assembly into and through the needle
guide to the depth stop. Rotate the sheath/stylet assembly while advancing. This will
create access to the target area.
7. Remove the introducer stylet from the introducer sheath while leaving the introducer
sheath in place. Insert the localizing obturator into the introducer sheath. Move the
patient into the imaging field and image to confirm target accuracy.
Note 1: The usable length of the localizing obturator is equal to the distance from the
hub of the ATEC handpiece to the middle of the sampling aperture.
Note 2: The localizing obturator shows up as a “black dot” on the image screen in
the sagittal view and as a “black line” in the axial view and provides identification,
localization and confirmation of the target area.
8. Move the patient out of the imaging field and remove the localizing obturator. Insert
the ATEC handpiece through the introducer sheath to the biopsy site in preparation for
the biopsy to be performed.
9. Ensure the ATEC handpiece is advanced until handpiece hub is contacting the hub
of the introducer sheath. Then, follow the instructions for handpiece use in the ATEC
console Operator’s Manual to perform the biopsy.
10. Once the biopsy is completed, remove the ATEC handpiece while leaving the
introducer sheath in place. Re-image the patient to confirm acquisition of the suspect
target area.
11. If desired, place a biopsy site marker. Follow the instructions for use.
12. Take a final image of the target area to confirm marker location. Remove Introducer
Sheath and Needle Guide and dispose per standard procedures.

3 English
Warnings and Precautions
• Care should be taken when removing sharp objects from the patient, in order to
prevent needle stick injury.
• The ATEC introducer stylet is not recommended for use within the bore of an MRI
magnet.
• Breast biopsies using the ATEC ILS should be performed only by persons having
adequate training and familiarity with this procedure. Consult medical literature
relative to techniques, complications and hazards prior to performance of any
minimally invasive procedure.
• This device should be used only by physicians trained in open or percutaneous
biopsy procedures.
• Caution: Federal (USA) law restricts this device to sale by or on the
order of a physician.
• Minimally invasive instruments and accessories manufactured or distributed by
companies not authorized by Hologic, Inc. may not be compatible with the ATEC
ILS. Use of such products may lead to unanticipated results and possible injury to
the user or patient.
• Instruments or devices which come into contact with bodily fluids may require
special disposal handling to prevent biological contamination.
• Dispose of all opened instruments whether used or unused.
• Do not resterilize and/or reuse the ATEC ILS. Resterilization and/or reuse may
compromise the integrity of the instruments. This may lead to potential risks of
failure of the device to perform as intended and/or cross-contamination associated
with using inadequately cleaned and sterilized devices.
• The introducer sheath and connecting tubing of this device contain di-(2-
ethylhexyl) phthalate; DEHP. In accordance with European Commision Directive
67/548/EEC, it is noted here that DEHP may impair fertility; it also may cause
harm to the unborn child. This device is not contraindicated for use in nursing or
pregnant women or children, however residual risks may exist from use of DEHP in
these populations. Sound medical judgment should be used.
• Sound professional judgement should be used when performing biopsies on
patients with implants.
• The ATEC ILS has been tested up to 3 Tesla for acceptability of artifact and
magnetic draw safety. Use of the ATEC ILS in magnets beyond this strength is not
recommended.

4English
How Supplied
The ATEC ILS is sterilized by gamma radiation and supplied packaged for single use.
Discard into an appropriate container after use.
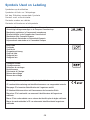
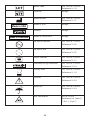
As Identified on Labels:
Number of Devices Enclosed.
YYYY-MM-DD Expiration date is represented by the following:
YYYY represents the year
MM represents the month
DD represents the day
For More Information
For technical support or reorder information in the United States, please contact:
Hologic, Inc.
250 Campus Drive
Marlborough, MA 01752 USA
Phone: 877-371-4372
International customers, contact your distributor or local Hologic Sales Representative:
European Representative
Hologic BV
Da Vincilaan 5
1930 Zaventem
Belgium
Tel: +32 2 711 46 80

5 Nederlands5
Instructies Voor Gebruik Van Het
ATEC®-introductie-lokalisatiesysteem
Lees alle informatie zorgvuldig door. Het niet opvolgen van de instructies kan ernstige
chirurgische gevolgen hebben.
Belangrijk: Deze bijsluiter is bedoeld als gebruiksaanwijzing voor het ATEC
inbrenglokalisatiesysteem. De bijsluiter is niet geschikt als referentiemateriaal voor
chirurgische technieken.
Indicaties
Het ATEC inbrenglokalisatiesysteem (ILS) is uitsluitend bestemd voor gebruik als
aspiratienaald en/of inbrenger met een andere biopsienaald in percutane biopsies van
de borst voor diagnostische doeleinden.
Contra-indicaties
Bij patiënten die antistollingstherapie ondergaan en/of patiënten van wie bekend is
dat ze hemofilieproblemen hebben, moet het uitvoeren van biopsies met het ATEC
inbrenglokalisatiesysteem (ILS) gedegen en professioneel worden beoordeeld.
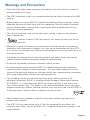
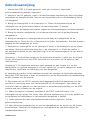
Omschrijving van het apparaat
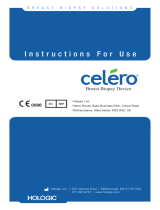
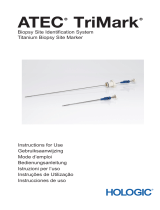
Het ATEC ILS is een steriel hulpmiddelsysteem
voor eenmalig gebruik en bestaat uit een
inbrengstilet, inbrenghuls, naaldgeleider en
lokalisatie-obturator. Het ATEC ILS is bestemd
voor gebruik met het ATEC systeem voor
borstbiopsie en excisie bij het uitvoeren van
vacuüm-ondersteunde borstbiopsies.
Ingrepen met MRI moeten aan de hand van de
volgende richtlijnen worden uitgevoerd.

6Nederlands
Gebruiksaanwijzing
1. Voordat het ATEC ILS wordt gebruikt, moet een standaard, aseptische
patiëntvoorbereiding worden uitgevoerd.
2. Voordat u het ILS gebruikt, moet u de beschermende verpakking en het hulpmiddel
controleren op transportschade. Gebruik het hulpmiddel niet als de verpakking lijkt te
zijn aangetast.
3. Breng het inbrengstilet in de inbrenghuls in. Plaats de diepteaanslag op de
inbrenghuls op de juiste locatie volgens de vooraf bepaalde ‘Z’-waarde.
4. De patiënt en de biopsieplaats dienen volgens een standaardprotocol te worden verdoofd.
5. Breng de steriele naaldgeleider in het compressieraster op het geïdentificeerde
doelgebied in.
6. Breng de inbrenghuls-/inbrengstiletconstructie door de naaldgeleider tot de
diepteaanslag in. Draai de huls-/stiletconstructie tijdens het opvoeren. Hierdoor brengt u
toegang tot het doelgebied tot stand.
7. Verwijder het inbrengstilet uit de inbrenghuls terwijl u de inbrenghuls op zijn plaats
laat zitten. Breng de lokalisatie-obturator in de inbrenghuls in. Plaats de patiënt in
het beeldvormingsveld en voer beeldvorming uit om de nauwkeurigheid van het doel te
controleren.
Opmerking 1: De bruikbare lengte van de lokalisatie-obturator is gelijk aan de afstand
tussen het aanzetstuk van het ATEC handstuk en het midden van de apertuur voor
monstername.
Opmerking 2: De lokalisatie-obturator wordt getoond als een ‘zwarte stip’ op het
beeldscherm in sagittale weergave en als een ‘zwarte lijn’ in axiale weergave en biedt
identificatie, lokalisatie en bevestiging van het doelgebied.
8. Verwijder de patiënt uit het beeldvormingsveld en verwijder de lokalisatie-obturator.
Breng het ATEC handstuk in door de inbrenghuls naar de biopsieplaats ter voorbereiding
op het uitvoeren van de biopsie.
9. Zorg ervoor dat het ATEC handstuk wordt opgevoerd totdat het aanzetstuk van het
handstuk in aanraking komt met het aanzetstuk van de inbrenghuls. Volg daarna de
instructies voor het gebruik van het handstuk in de bedienershandleiding van de ATEC
console voor het uitvoeren van de biopsie.
10. Zodra de biopsie is voltooid, verwijdert u het ATEC handstuk terwijl u de
inbrenghuls op zijn plaats laat zitten. Voer opnieuw beeldvorming uit van de patiënt om
te controleren of bioptafname in het vermoede doelgebied is bereikt.
11. Indien gewenst kan een biopsieplaatsmarker worden geplaatst. Volg de
gebruiksaanwijzing.
12. Voer definitieve beeldvorming uit van het doelgebied om de locatie van de marker
te controleren. Verwijder de inbrenghuls en naaldgeleider en voer deze volgens de
standaardprocedures af.

7 Nederlands
Waarschuwingen en Voorzorgsmaatregelen
• Wees voorzichtig bij het verwijderen van scherpe voorwerpen uit de patiënt om
prikincidenten met de naald te voorkomen.
• Het gebruik van het ATEC inbrengstilet in een MRI-magneet wordt niet aanbevolen.
• Borstbiopsies met gebruik van het ATEC ILS mogen alleen worden uitgevoerd door
personen met de juiste opleiding die voldoende vertrouwd zijn met deze ingreep.
Voordat u een minimaal invasieve ingreep uitvoert, dient u de medische literatuur over
de betreffende technieken, complicaties en gevaren te raadplegen.
• Dit hulpmiddel mag alleen worden gebruikt door artsen die zijn opgeleid in het
uitvoeren van een open of percutane biopsie.
• Let op: Volgens de federale wetgeving van de Verenigde Staten mag dit
hulpmiddel alleen door of op voorschrift van een arts worden verkocht.
• Minimaal invasieve instrumenten en accessoires die worden vervaardigd of geleverd
door bedrijven die niet zijn geautoriseerd door Hologic, Inc. zijn mogelijk niet
compatibel met het ATEC ILS. Het gebruik van dergelijke producten kan leiden tot
onvoorziene resultaten en mogelijk letsel bij de gebruiker of patiënt.
• Instrumenten of hulpmiddelen die in aanraking komen met lichaamsvloeistoffen
dienen mogelijk op speciale wijze te worden afgevoerd om biologische besmetting te
voorkomen.
• Alle instrumenten, gebruikt of ongebruikt, waarvan de verpakking is geopend, moeten
worden afgevoerd.
• Het ATEC ILS mag niet opnieuw worden gesteriliseerd en/of gebruikt. Door opnieuw
steriliseren en/of gebruiken kan de integriteit van de instrumenten worden aangetast.
Dit kan het mogelijke risico met zich meebrengen dat het hulpmiddel niet meer werkt
zoals bedoeld en/of dat er kruisbesmetting optreedt vanwege onvoldoende gereinigde
en gesteriliseerde hulpmiddelen.
• De inbrenghuls en verbindingsslangen van dit hulpmiddel bevatten di-(2-ethylhexyl)-
ftalaat; DEHP. In overeenstemming met richtlijn 67/548/EEG van de Europese
Commissie dient te worden vermeld dat DEHP de vruchtbaarheid kan aantasten en
schadelijk kan zijn voor het ongeboren kind. Dit hulpmiddel is niet gecontra-indiceerd
voor gebruik bij vrouwen die zwanger zijn of borstvoeding geven en bij kinderen. Bij
deze populaties kunnen echter residuele risico’s van het gebruik van DEHP bestaan.
Er moet een degelijke medische beoordeling worden toegepast.

8Nederlands
• Wanneer biopsies worden uitgevoerd bij patiënten met implantaten, moet dit gedegen
en professioneel worden beoordeeld.
• Het ATEC ILS is getest tot 3 Tesla op aanvaardbare artefacten en veiligheid met
betrekking tot magnetische aantrekkingskracht. Het gebruik van het ATEC ILS in
magneten boven deze sterkte wordt niet aanbevolen.
Hoe Aangeboden
Het ATEC ILS is gesteriliseerd met gammastraling en wordt verpakt geleverd voor
eenmalig gebruik. Gooi het hulpmiddel na gebruik weg in een daarvoor bestemde bak.
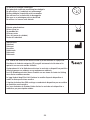
Zoals aangegeven op labels:
Aantal geleverde hulpmiddelen.
YYYY-MM-DD Uiterste gebruiksdatum wordt als volgt aangeduid:
YYYY duidt het jaar aan
MM duidt de maand aan
DD duidt de dag aan
Voor meer informatie
Neem voor technische ondersteuning of bestelinformatie in de Verenigde Staten contact
op met:
Hologic, Inc.
250 Campus Drive
Marlborough, MA 01752 USA
Telefoon: 877-371-4372
International customers, contact your distributor or local Hologic Sales Representative:
European Representative
Hologic BV
Da Vincilaan 5
1930 Zaventem
Belgium
Telefoon: +32 2 711 46 80

9 Français
Instructions d’utilisation du système de
localisation de l’introducteur ATEC®
Veuillez lire attentivement l’ensemble des informations. Le non-respect des instructions
peut entraîner des conséquences chirurgicales sévères.
Important : cette notice d’utilisation est destinée à fournir des instructions d’utilisation
pour le système de localisation de l’introducteur ATEC. Elle ne doit pas être utilisée
comme document de référence pour les techniques chirurgicales.
Indications
Le système de localisation de l’introducteur (SLI) ATEC est destiné à servir d’aiguille
d’aspiration et/ou d’introducteur avec une autre aiguille de biopsie lors de biopsies
percutanées du sein à des fins exclusives de diagnostic.
Contre-indications
Lors de biopsies réalisées avec le système de localisation de l’introducteur (SLI) ATEC,
une attention professionnelle particulière doit être observée chez les patientes sous
anticoagulothérapie et/ou présentant des problèmes de saignement connus.
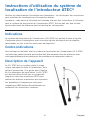
Description de l’appareil
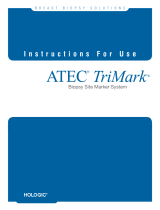
Le SLI ATEC est un système stérile à usage
unique composé du stylet d’introduction, de la
gaine d’introduction, d’un guide pour l’aiguille
et d’un obturateur de localisation. Le SLI ATEC
est destiné à être utilisé avec le système de
biopsie et d’excision mammaire ATEC pour
réaliser des biopsies mammaires par aspiration.
Les procédures d’imagerie par résonance
magnétique (IRM) doivent être effectuées en
respectant les instructions suivantes.

10Français
Instructions d’utilisation
1. Une préparation aseptique standard de la patiente doit être effectuée avant d’utiliser
le SLI ATEC.
2. Avant d’utiliser le SLI, inspectez l’emballage de protection et le dispositif afin
de vérifier qu’ils n’ont pas été endommagés pendant le transport. Si l’emballage est
détérioré, n’utilisez pas le dispositif.
3. Insérez le stylet d’introduction dans la gaine d’introduction. Positionnez correctement
la butée de profondeur de la gaine d’introduction selon la valeur « Z » prédéterminée.
4. Un protocole standard doit être suivi pour anesthésier la patiente et le site de la biopsie.
5. Insérez l’aiguille stérile dans la grille de compression au niveau de la région cible
identifiée.
6. Insérez l’ensemble gaine/stylet d’introduction dans et à travers le guide de l’aiguille
jusqu’à la butée de profondeur. Faites pivoter l’ensemble gaine/stylet pendant la
progression. L’accès à la région cible est ainsi créé.
7. Retirez le stylet d’introduction de la gaine d’introduction en laissant la gaine
d’introduction en place. Insérez l’obturateur de localisation dans la gaine d’introduction.
Déplacez le patient dans le champ d’imagerie et prenez une image pour confirmer que
la cible est bonne.
Remarque 1 : la longueur utile de l’obturateur de localisation est égale à la distance
entre la partie évasée de la pièce à main ATEC et le milieu de l’ouverture de
prélèvement.
Remarque 2 : l’obturateur de localisation apparaît sur l’écran sous la forme d’un « point
noir » en vue sagittale et d’une « ligne noire » en vue axiale. Il permet l’identification, la
localisation et la confirmation de la région cible.
8. Déplacez le patient hors du champ d’imagerie et retirez l’obturateur de localisation.
Insérez la pièce à main ATEC à travers la gaine d’introduction dans le site de la biopsie
afin de préparer la biopsie à réaliser.
9. Assurez-vous de faire progresser la pièce à main ATEC jusqu’à ce que sa partie
évasée entre en contact avec la partie évasée de la gaine d’introduction. Suivez ensuite
les instructions d’utilisation de la pièce à main fournies dans le Manuel d’utilisation de
la console ATEC pour effectuer la biopsie.
10. Une fois la biopsie terminée, retirez la pièce à main ATEC en laissant la gaine
d’introduction en place. Reprenez une image du patient afin de confirmer que la région
cible suspectée est bien acquise.
11. Vous pouvez si vous le souhaitez placer un marqueur de site de biopsie. Suivez les
instructions d’utilisation.
12. Prenez une image finale de la région cible afin de confirmer l’emplacement
du marqueur. Retirez la gaine d’introduction et le guide de l’aiguille et jetez-les
conformément aux procédures standard.

11 Français
Avertissements et Précautions
• Pour éviter toute blessure par l’aiguille, les objets contondants doivent être retirés du
patient avec précaution.
• Le stylet d’introduction ATEC n’est pas recommandé pour une utilisation avec
l’entrefer d’un aimant IRM.
• Une biopsie mammaire utilisant le SLI ATEC doit être exclusivement effectuée par
des personnes parfaitement formées et familiarisées à cette procédure. Consultez la
littérature médicale relative aux techniques, complications et risques avant d’effectuer
une procédure très peu invasive.
• Ce dispositif doit être utilisé par des médecins formés aux techniques de biopsie
percutanée ou ouverte.
• OnlyMise en garde : les lois fédérales (des États-Unis) limitent la vente
de ce dispositif par un médecin ou sous prescription médicale.
• Les instruments et les accessoires très peu invasifs fabriqués ou distribués par des
sociétés non agréées par Hologic, Inc. peuvent s’avérer incompatibles avec le SLI
ATEC. L’utilisation de ces produits peut générer des résultats imprévus et provoquer
des lésions chez l’utilisateur ou le patient.
• Les instruments ou les dispositifs en contact avec des fluides corporels peuvent
nécessiter une procédure particulière d’élimination des déchets pour éviter toute
contamination biologique.
• Jetez les instruments ouverts, qu’ils aient été utilisés ou non.
• Ne restérilisez pas/ne réutilisez pas le SLI ATEC. La restérilisation et/ou la
réutilisation risquent de compromettre l’intégrité des instruments. Cela peut
entraîner un fonctionnement du dispositif non conforme aux attentes et/ou entraîner
la contamination croisée due à l’utilisation de dispositifs nettoyés et stérilisés de
manière incorrecte.
• La gaine d’introduction et la tubulure de raccordement du dispositif contiennent du
phtalate di-2-éthylhexyle ; DEHP. Conformément à la Directive de la Commission
Européenne 67/548/CEE, il est noté que le DEHP peut diminuer la fécondité ; il peut
également nuire à l’enfant à naître. L’utilisation de ce dispositif n’est pas contre-
indiquée chez l’enfant, ni chez la femme enceinte ou allaitante. Il existe toutefois un
risque résiduel lié à l’utilisation de DEHP chez ces populations. Faire preuve de bon
sens médical.

12Français
• Une attention professionnelle particulière doit être observée lors de biopsies réalisées
chez les patientes possédant des implants.
• Le SLI ATEC a été testé jusqu’à 3 Tesla pour l’acceptabilité des artéfacts et la sécurité
relative au champ magnétique. L’utilisation du SLI ATEC avec des aimants de force
inférieure n’est pas recommandée.
Mode de Livraison
Le SLI ATEC est stérilisé par rayonnement gamma et est fourni dans un emballage pour
un usage unique. Jetez-le dans un récipient approprié après utilisation.
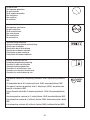
Informations données par les étiquettes :
Nombre de dispositifs inclus.
YYYY-MM-DD La date de péremption est représentée par les éléments suivants :
YYYY représente l’année
MM représente le mois
DD représente le jour
Pour plus d’informations
Pour toute assistance technique ou pour obtenir des informations relatives au
réapprovisionnement aux États-Unis, contacter :
Hologic, Inc.
250 Campus Drive
Marlborough, MA 01752 USA
Tél. : 877-371-4372
Les clients internationaux doivent contacter leur distributeur ou représentant
commercial d’Hologic local :
European Representative
Hologic BV
Da Vincilaan 5
1930 Zaventem
Belgium
Tél. : +32 2 711 46 80

13 Deutsch
ATEC® Einführhilfe-Lokalisierungssystem
Gebrauchsanweisung
Bitte lesen Sie alle Informationen aufmerksam durch. Eine Missachtung der
Gebrauchsanweisung kann unvorhergesehene chirurgische Folgen haben.
Wichtig: Diese Packungsbeilage enthält Hinweise zur Verwendung des ATEC®-
Einführhilfe-Lokalisierungssystems. Sie stellt keine Referenz für chirurgische Verfahren
dar.
Indikationen
Das ATEC Einführhilfe-Lokalisierungssystem (ILS) dient ausschließlich als
Aspirationsnadel und/oder als Einführhilfe zusammen mit einer anderen Biopsienadel
bei zu diagnostischen Zwecken durchgeführten perkutanen Biopsien der Brust.
Kontraindikationen
Bei der Durchführung von Biospien mit dem ATEC Einführhilfe-Lokalisierungssystem
(ILS) ist eine sorgfältige ärztliche Beurteilung von Patienten, die Gerinnungshemmer
erhalten und/oder bekannte hämophiliebezogene Probleme aufweisen, notwendig.
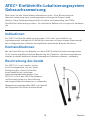
Beschreibung des Geräts
Das ATEC ILS ist ein steriles System
zum Einmalgebrauch, das aus einem
Einführmandrin, einer Einführhilfe,
einer Nadelführung und einem
Lokalisierungsobturator besteht. Das
ATEC ILS ist mit dem ATEC Brustbiopsie-
und Exzisionssystem zur Durchführung
vakuumgestützter Brustbiopsien zu verwenden.
Magnetresonanztomografien (MRI) sind gemäß
den folgenden Richtlinien durchzuführen.

14Deutsch
Gebrauchsanleitung
1. Vor Verwendung des ATEC ILS den Patienten nach den üblichen aseptischen
Verfahren für den Eingriff vorbereiten.
2. Vor Verwendung des ILS-Instruments sollten die Schutzverpackung und das Gerät auf
Transportschäden untersucht werden. Das Gerät darf nicht verwendet werden, wenn die
Verpackung offensichtlich beschädigt ist.
3. Den Mandrin in die Einführhilfe einführen. Den Tiefenanschlag auf der Einführhilfe
an der Stelle anbringen, die auf der Z-Achse vorher festgelegt wurde.
4. Der Patient und die Biopsiestelle sollten nach einem Standardprotokoll anästhesiert
werden.
5. Die sterile Nadelführung in das Kompressionsgitter im Zielgebiet einführen.
6. Die Einführhilfe mit dem Einführmandrin in und durch die Nadelführung einführen,
bis der Tiefenanschlag erreicht wird. Das System beim Einführen drehen. Dies
ermöglicht den Zugriff auf den Zielbereich.
7. Den Mandrin aus der Einführhilfe entfernen und die Einführhilfe belassen. Den
Lokalisierungsobturator in die Einführhilfe einführen. Den Patienten in das Bildfeld
fahren und eine Aufnahme zur Lagekontrolle machen.
Hinweis 1: Die verwendbare Länge des Lokalisierungsobturators entspricht dem Abstand
vom Ansatz des ATEC Handstücks bis zum Mittelpunkt der Apertur (Probenaussparung).
Hinweis 2: Der Lokalisierungsobturator erscheint in der Sagittalansicht als „schwarzer
Punkt“ und in der Axialansicht als „schwarze Linie“. Er ermöglicht somit die
Identifikation, Lokalisation und Bestätigung des Zielgebiets.
8. Den Patienten aus dem Bildfeld fahren und den Lokalisierungsobturator entfernen.
Das ATEC Handstück durch die Einführhilfe bis an die geplante Biopsieentnahmestelle
führen.
9. Sicherstellen, dass das ATEC Handstück soweit vorgeschoben ist, das der Ansatz
des Handstücks den Ansatz der Einführhilfe berührt. Folgen Sie anschließend
den Anweisungen in der Bedienungsanleitung zur ATEC Konsole, um die Biopsie
durchzuführen.
10. Nach Abschluss der Biopsie das ATEC Handstück entfernen und die
Einführschleuse in situ belassen. Eine weitere Aufnahme des Patienten durchführen,
um die Erfassung des Zielbereichs zu bestätigen.
11. Bei Bedarf einen Biopsiemarker positionieren. Dabei die Gebrauchsanleitung
beachten.
12. Nehmen Sie zum Abschluss noch ein Bild des Zielgebiets auf, um die richtige
Lage des Markers zu bestätigen. Einführhilfe und Nadelführung entfernen und nach
Standardverfahren entsorgen.

15 Deutsch
Warnhinweise und Vorsichtsmaßnahmen
• Scharfe Gegenstände müssen mit Bedacht aus dem Patienten entfernt werden, um
Verletzungen durch Nadelstiche zu verhindern.
• Der ATEC-Einführmandrin ist nicht für die Verwendung innerhalb der Bohrung eines
MRT-Magneten empfohlen.
• Brustbiopsien unter Verwendung des ATEC-ILS dürfen nur von Personen durchgeführt
werden, die entsprechend geschult und mit dem Verfahren vertraut sind. Vor der
Durchführung von minimalinvasiven Eingriffen sollte die entsprechende medizinische
Literatur zu Eingriffstechniken, Komplikationen und Risiken zu Rate gezogen werden.
• Diese Geräte sollte nur von Ärzten verwendet werden, die in offenen oder perkutanen
Biopsieverfahren geschult sind.
• ArztVorsicht: Laut Bundesgesetz der USA darf dieses Gerät ausschließlich
an einen Arzt oder auf dessen Anordnung verkauft werden.
• Minimalinvasive Instrumente und Zubehör, die von Unternehmen gefertigt wurden,
die nicht von Hologic, Inc. autorisiert sind, sind u. U. nicht kompatibel mit dem ATEC
ILS. Die Verwendung solcher Produkte kann zu unvorhersehbaren Ergebnissen und
möglichen Verletzungen des Benutzers oder Patienten führen.
• Instrumente oder Geräte, die mit Körperflüssigkeiten in Kontakt kommen, müssen
u. U. auf spezielle Weise entsorgt werden, um eine biologische Kontamination zu
vermeiden.
• Alle gebrauchten oder ungebrauchten Instrumente entsorgen, wenn diese geöffnet
wurden.
• Das ATEC ILS nicht resterilisieren und/oder wieder verwenden. Eine Resterilisierung
und/oder Wiederverwendung kann die Unversehrtheit des Geräts beeinträchtigen. Dies
kann zu Störungen des Geräts und/oder zu Kreuzkontaminationen durch unsachgemäß
gereinigte und sterilisierte Geräte führen.
• Die Einführhülse und das Schlauchset dieses Geräts enthält DEHP (Di-Ethylhexyl)-
Phtalat. In der EG-Richtlinie 67/548/EEC wird darauf hingewiesen, dass DEHP die
Fruchtbarkeit beeinträchtigen kann und möglicherweise das Ungeborene schädigt.
• Bei der Durchführung von Eingriffen an Patienten mit Implantaten
sollte eine sorgfältige ärztliche Beurteilung erfolgen.
• Das ATEC ILS wurde bei bis zu 3 Tesla auf Akzeptanz von Artefakten und Sicherheit
von externen Magnetfeldern getestet. Eine Anwendung des ATEC ILS in Magneten
höherer Stärke wird nicht empfohlen.

16Deutsch
Lieferart
Das ATEC ILS ist mit Gammastrahlung sterilisiert und zur Verwendung an einem
einzigen Patienten vorgesehen. Nach Gebrauch in einem geeigneten Behälter entsorgen.
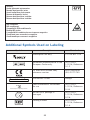
Wie auf Schildern angegeben:
Anzahl enthaltener Instrumente
YYYY-MM-DD Das Verfallsdatum wird wie folgt dargestellt:
YYYY steht für Jahr
MM steht für Monat
DD steht für Tag
Weitere Informationen
Kunden in den USA wenden sich für technische Unterstützung oder Informationen zu
Bestellungen bitte an:
Hologic, Inc.
250 Campus Drive
Marlborough, MA 01752 USA
Telefon: 877-371-4372
Internationale Kunden wenden sich bitte an ihren Händler oder zuständigen
Hologic-Vertreter:
European Representative
Hologic BV
Da Vincilaan 5
1930 Zaventem
Belgium
Telefon: +32 2 711 46 80

17 Italiano
Istruzioni Per l’uso Per Il Sistema ATEC®
Di Individuazione Dell’introduttore
Leggere attentamente tutte le informazioni. La mancata osservanza di queste istruzioni
può causare gravi conseguenze chirurgiche.
Importante: questo inserto fornisce le Istruzioni per l’uso del sistema di localizzazione
dell’introduttore ATEC. Non deve essere utilizzato come riferimento per le tecniche
chirurgiche.
Indicazioni
Il sistema di localizzazione dell’introduttore (Introducer Localization System, ILS) ATEC
è previsto per l’uso come ago di aspirazione e/o come introduttore in associazione con
un altro ago bioptico nelle biopsie percutanee mammarie per soli scopi diagnostici.
Controindicazioni
L’esecuzione di biopsie con il sistema di localizzazione dell’introduttore (ILS) ATEC va
attentamente valutata in base all’esperienza clinica del medico in presenza di pazienti
che assumono una terapia anticoagulante e/o pazienti con problemi noti di emofilia.
Descrizione del Dispositivo
ATEC ILS è un sistema sterile e monouso
composto da dispositivi che includono
uno specillo dell’introduttore, la guaina di
introduzione, la guida dell’ago e un otturatore
per localizzazione. Il sistema ATEC ILS è
previsto per l’uso con il sistema per biopsia ed
escissione mammaria ATEC per l’esecuzione di
biopsie mammarie con aspirazione forzata.
Le procedure di imaging di risonanza magnetica
(MRI) devono essere eseguite in conformità con
le seguenti linee guida.

18Italiano
Istruzioni per l’uso
1. Prima dell’uso del sistema ATEC ILS devono essere impiegate procedure asettiche
standard per la preparazione del paziente.
2. Prima di dell’uso del sistema ILS, controllare la confezione e il dispositivo stesso per
escludere danni insorti durante la spedizione. Se si sospetta che la confezione sia stata
manomessa, non usare il dispositivo.
3. Inserire lo specillo dell’introduttore nella guaina di introduzione. Posizionare l’arresto
di profondità sulla guaina di introduzione nella posizione appropriata secondo il valore
“Z” prestabilito.
4. Utilizzare un protocollo standard per anestetizzare la paziente e il sito bioptico.
5. Inserire la guida dell’ago sterile nella griglia di compressione nell’area target
identificata.
6. Inserire il gruppo guida/specillo dell’introduttore all’interno e attraverso la guida
dell’ago fino all’arresto di profondità. Ruotare il gruppo guaina/specillo mentre lo si fa
avanzare. In questo modo si creerà l’accesso all’area target.
7. Rimuovere lo specillo dell’introduttore dalla guaina di introduzione lasciandola in
posizione. Inserire l’otturatore per localizzazione nella guaina di introduzione. Spostare
la paziente nel campo di acquisizione dell’immagine e visualizzare l’immagine per
verificare che l’area target sia stata identificata correttamente.
Nota 1: la lunghezza utile dell’otturatore per localizzazione è pari alla distanza dal
raccordo del manipolo ATEC al centro dell’apertura di campionamento.
Nota 2: l’otturatore per localizzazione viene visualizzato come un “puntino nero” sulla
schermata dell’immagine in vista sagittale e come una “linea nera” in vista assiale e
fornisce l’identificazione, la localizzazione e la conferma dell’area target.
8. Spostare la paziente fuori dal campo di acquisizione dell’immagine e rimuovere
l’otturatore per localizzazione. Inserire il manipolo ATEC attraverso la guaina di
introduzione fino al sito bioptico in preparazione per la biopsia da eseguire.
9. Assicurarsi che il manipolo ATEC avanzi fino al punto in cui il raccordo del manipolo
entra in contatto con il raccordo della guaina di introduzione. Quindi, attenersi alle
istruzioni sull’uso del manipolo nel Manuale dell’operatore della console ATEC per
eseguire la biopsia.
10. Una volta completata la biopsia, rimuovere il manipolo ATEC lasciando la guaina
di introduzione in posizione. Visualizzare nuovamente l’immagine della paziente per
confermare l’acquisizione dell’area target sospetta.
11. Se lo si desidera, posizionare un marker del sito bioptico. Seguire le istruzioni per
l’uso.
12. Acquisire un’immagine finale dell’area target per confermare la posizione del
marker. Rimuovere la guaina di introduzione e la guida dell’ago e smaltirli secondo le
procedure standard.
A página está carregando...
A página está carregando...
A página está carregando...
A página está carregando...
A página está carregando...
A página está carregando...
A página está carregando...
A página está carregando...
A página está carregando...
A página está carregando...
A página está carregando...
A página está carregando...
A página está carregando...
A página está carregando...
A página está carregando...
A página está carregando...
A página está carregando...
A página está carregando...
A página está carregando...
A página está carregando...
-
 1
1
-
 2
2
-
 3
3
-
 4
4
-
 5
5
-
 6
6
-
 7
7
-
 8
8
-
 9
9
-
 10
10
-
 11
11
-
 12
12
-
 13
13
-
 14
14
-
 15
15
-
 16
16
-
 17
17
-
 18
18
-
 19
19
-
 20
20
-
 21
21
-
 22
22
-
 23
23
-
 24
24
-
 25
25
-
 26
26
-
 27
27
-
 28
28
-
 29
29
-
 30
30
-
 31
31
-
 32
32
-
 33
33
-
 34
34
-
 35
35
-
 36
36
-
 37
37
-
 38
38
-
 39
39
-
 40
40


Hologic ATEC Breast Biopsy and Excision System Introducer Localization System Instruções de operação
- Categoria
- Acessórios para fazer café
- Tipo
- Instruções de operação
em outras línguas
- español: Hologic ATEC Breast Biopsy and Excision System Introducer Localization System Instrucciones de operación
- français: Hologic ATEC Breast Biopsy and Excision System Introducer Localization System Mode d'emploi
- italiano: Hologic ATEC Breast Biopsy and Excision System Introducer Localization System Istruzioni per l'uso
- Nederlands: Hologic ATEC Breast Biopsy and Excision System Introducer Localization System Handleiding
- Deutsch: Hologic ATEC Breast Biopsy and Excision System Introducer Localization System Bedienungsanleitung
Artigos relacionados
-
 Hologic ATEC Handpiece Instruções de operação
-
 Hologic ATEC Breast Biopsy and Excision System Ultrasound Introducer Instruções de operação
-
 Hologic Brevera Breast Biopsy System Biopsy Needle Instruções de operação
-
 Hologic Celero Instruções de operação
-
 Hologic SecurMark Instruções de operação
-
 Hologic SecurMark Instruções de operação
-
 Hologic ATEC TriMark Biopsy Site Identification System Instruções de operação
-
 Hologic TriMark Instruções de operação
-
 Hologic TriMark Instruções de operação
-
 Hologic SecurMark Instruções de operação


Outros documentos
-
 Merit Medical Scout Surgical Guidance System Instruções de operação
-
 argon audio BioPince Instructions Manual
-
Bard ENCOR ECMRINTLOC Instructions For Use Manual
-
 argon audio SuperCore Instructions For Use Manual
-
-
 Waterous SEC. 2413, C20 Operation and Maintenance Manual
-
 Argon Medical Devices T-Lok Manual do usuário
-
 Merit Medical HeRO ACK Instruções de operação
-
-
 Merit Medical Aero DV Tracheobronchial.Stent System Instruções de operação


