A página está carregando...

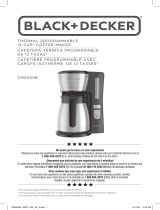
12-CUP* PROGRAMMABLE
COFFEE MAKER
CAFETERA DE
12 TAZAS* PROGRAMABLE
CAFETIÈRE PROGRAMMABLE
DE 12 TASSES*
use and care manual
manual de uso y cuidado
guide d’utilisation et d ’entretien
CM5000B
MILL & BREW™
*One cup equals approximately 5 oz. (varies by brewing technique)
*Una taza equivale a aproximadamente 5 onzas (varía de acuerdo al método de preparación utilizado)
*Une tasse équivaut à environ 115 g (5 oz; varie selon la technique de brassage)
CM5000B_29672_ESF_IB_A.indd 1CM5000B_29672_ESF_IB_A.indd 1 8/16/23 4:31 PM8/16/23 4:31 PM

2
CONTENTS
Important Safeguards
Getting to know your Mill & Brew™ Coffee Maker
Mill & Brew™ Coffee Maker Product Benefits
Getting to know your Control Panel
Before Brewing
Programming your Mill & Brew™ Coffee Maker
4 Elements to Brew the Perfect Cup
Tips for a Perfect Cup of Coffee
Brewing Coffee
Care and Cleaning
Troubleshooting
3
5
7
8
9
9
11
12
13
15
17
WARNING
RISK OF FIRE OR ELECTRIC SHOCK. DO NOT OPEN.
The lightning symbol refers to “dangerous voltage”; the exclamation symbol refers
to maintenance instructions. See below.
Warning: To reduce the risk of fire or electric shock, do not remove the cover of the
c oeemaker. There are no user-serviceable parts inside. Repair should be done by
a uthorized service personnel only.
CM5000B_29672_ESF_IB_A.indd 2CM5000B_29672_ESF_IB_A.indd 2 8/16/23 4:31 PM8/16/23 4:31 PM

3
Please Read and Save this Use and Care Book.
IMPORTANT SAFEGUARDS.
When using electrical appliances, basic safety precautions should always be followed to
reduce the risk of fire, electric shock, and/or injury, including the following:
• Read all instructions.
• Do not touch hot surfaces. Use
handles or knobs.
• To protect against re, electric
shock and injury to persons
do not immerse cord, plugs
or appliance in water or other
liquid.
• Close supervision is necessary
when any appliance is used by
or near children.
• Unplug from outlet when either
the appliance or display clock is
not in use, and before cleaning.
Allow to cool before putting on
or taking off parts, and before
cleaning the appliance.
• Do not operate any appliance
with a damaged cord or
plug, or after the appliance
malfunctions or has been
damaged in any manner.
Contact Consumer Support
at the number listed in this
manual.
• The use of accessory
attachments not recommended
by the appliance manufacturer
may result in re, electric shock
or injury to persons.
• Do not use outdoors.
• Do not let cord hang over edge
of table or counter, or touch hot
surfaces.
• Do not place on or near a hot
gas or electric burner, or in a
heated oven.
• To disconnect, turn any control
to off, then remove plug from
wall outlet.
• Do not use this appliance for
other than
intended use.
• Keep lid on the carafe when in
use.
• Scalding may occur if the lid is
removed during the brewing
cycles.
• The carafe is designed for use
with this appliance. It must
never be used on a range top.
• Do not set a hot carafe on a
wet or cold surface.
• Do not use a cracked carafe
or a carafe having a loose or
weakened handle.
• Do not clean carafe with
cleansers, steel wool pads or
other abrasive material.
• This appliance is not intended
for use by persons (including
children) with reduced physical,
sensory or mental capabilities,
or lack of experience and
knowledge, unless they have
been given supervision or
instruction concerning use
of the appliance by a person
responsible for their safety.
• Children should be supervised
to ensure that they do not play
with the appliance.
• Scalding and/or burns may
occur if the integrated grinder
lid is removed during the
brewing cycle.
• Check the grinder basket for
presence of foreign objects
before using.
• Only coffee beans and coffee
grounds should be placed into
the grinder basket.
• Avoid contact with moving
parts.
CM5000B_29672_ESF_IB_A.indd 3CM5000B_29672_ESF_IB_A.indd 3 8/16/23 4:31 PM8/16/23 4:31 PM

4
POLARIZED PLUG (120V models only)
This appliance has a polarized plug (one blade is wider than the other). To reduce the
risk of electric shock, this plug is intended to t into a polarized outlet only one way. If
the plug does not t fully into the outlet, reverse the plug. If it still does not t, contact
a qualied electrician. Do not attempt to modify the plug in any way.
TAMPER-RESISTANT SCREW
Warning: This appliance is equipped with a tamper-resistant screw to prevent
removal of the outer cover. To reduce the risk of re or electric shock, do not attempt
to remove the outer cover. There are no user-serviceable parts inside. Repair should
be done only by authorized service personnel.
ELECTRICAL CORD
a) A short power-supply cord is provided to reduce the risks resulting from becoming
entangled in or tripping over a longer cord.
b) Extension cords are available and may be used if care is exercised in their use.
c) If an extension cord is used:
1) The marked electrical rating of the extension cord should be at least as great as
the electrical rating of the appliance;
2) If the appliance is of the grounded type, the extension cord should be a
grounding-type 3-wire cord; and
3) The cord should be arranged so that it will not drape over the counter top or
tabletop where it can be pulled on by children or tripped over.
Note: If the power cord is damaged, please contact the warranty department listed
in these instructions.
SAVE THESE INSTRUCTIONS.
This product is for household use only.
CM5000B_29672_ESF_IB_A.indd 4CM5000B_29672_ESF_IB_A.indd 4 8/16/23 4:31 PM8/16/23 4:31 PM

5
GETTING TO KNOW YOUR
MILL & BREW™ COFFEE MAKER
1. Control panel
2. Lift latch
3. Lid
4. Water reservoir cover
5. Easy viewing water window
6. Duralife™ glass carafe
7. “Keep hot” carafe plate
8. Coffee scoop
1
2
3
8
4
5
6
7
Product may vary slightly from what is illustrated.
CM5000B_29672_ESF_IB_A.indd 5CM5000B_29672_ESF_IB_A.indd 5 8/16/23 4:31 PM8/16/23 4:31 PM

6
GETTING TO KNOW YOUR
MILL & BREW™ COFFEE MAKER
1. 2-in-1 grinder and
permanent filter basket
2. Washable brew basket
3. Lift latch
4. Grinder lid
5. Removable showerhead
(press highlighted tabs
to remove)
2
1
3
4
5
CM5000B_29672_ESF_IB_A.indd 6CM5000B_29672_ESF_IB_A.indd 6 8/16/23 4:31 PM8/16/23 4:31 PM

7
MILL & BREW™ COFFEE MAKER
PRODUCT BENEFITS
Fresh Brew Timer
After the brew cycle is complete,
the time since brewed will be
displayed in 1-minute increments.
This information will be in place of
the digital clock during keep warm.
2-in-1 Grinder and
Permanent Filter Basket
Whole coffee beans are ground
and brewed in the same grinder
assembly, allowing for fast brewing
and easy clean-up.
Eco-Friendly Permanent Filter
The high-performance Bronze Tone
permanent lter eliminates the need
for paper lters and minimizes any
coffee staining appearance.
Washable Brew Basket
The washable brew basket can easily
be removed and washed after brewing,
and is top rack dishwasher safe.
Removable Showerhead
The coffeemaker’s showerhead is
removable for easy cleaning.
Auto Brew
The programmable Auto Brew
delay start allows you to set the
24-hour timer to brew coffee at the
selected time, day or night.
Digital Clock with Backlighting
The LCD display features a
programmable digital clock and
backlighting for easy-viewing in low
light conditions.
Adjustable Auto-Shuto
This feature allows you to select
automatic shutoff times from 0-2
hours in 30 minute increments.
The “Keep Hot” carafe plate will
be activated until the automatic
shutoff time is reached.
Brew Strength Selector
Customize the avor of your coffee
by selecting from three brew
strength settings: regular, strong,
or bold.
Sneak-A-Cup™
Can’t wait for the full pot of coffee
to nish brewing? Sneak-A-Cup™
of coffee before brewing using this
great feature, which stops the ow
of coffee into your carafe. Replace
the carafe back in the coffee maker
within 15 seconds to prevent brew
basket overow.
Grind Select
Cycles through optimal grind
settings (4, 6, 8, 10, 12) correlating
with the number of cups to be
brewed, or turns the grinder OFF
for brewing pre-ground coffee.
Duralife™ Glass Carafe
Durable construction provides an
extended carafe life. Water level
markings make for easy lling and
pouring.
Non-stick “Keep Hot” Carafe Plate
This feature allows you to keep
your carafe of coffee hot after
brewing until the selected auto-
shutoff time has been reached.
Easy Viewing Water Window
The water window shows the
amount of water in the reservoir for
easy and accurate lling.
Cord Storage
Keep excess cord out of the way
and your countertop neat with
simple cord storage.
CM5000B_29672_ESF_IB_A.indd 7CM5000B_29672_ESF_IB_A.indd 7 8/16/23 4:31 PM8/16/23 4:31 PM

8
GETTING TO KNOW YOUR CONTROL PANEL
Clock / Backlit LCD Display
Power : Turns the unit ON or OFF.
AUTO: Turns on the Auto
Brew delayed start.
PROG (Program): Auto Brew, press
and release button once.
Keep Warm, press and hold.
HR (Hour): Use to program
the clock (see “Programming”
section).
MIN (Minute): Use to program
the clock (or cycle through
different keep warm settings when
in that program mode to adjust
“Keep Warm” time.)
GRIND: Cycles through optimal
grind settings (4, 6, 8, 10, 12)
correlating with the number of
cups to be brewed. Also, turns the
grinder OFF
( )for brewing pre-ground coffee.
STRONG: Use to select the
Brew Strength setting (3 levels)
No bars = regular (default setting)
1 bar ( ) = strong
2 bars ( ) = bold
Indicates the delay start timer is set
Brew
strength
settings
Optimal grind setting correlating with
the number of cups to be brewed
Indicates if the whole bean grinder function
has been turned OFF ( ) or ON ( )
CM5000B_29672_ESF_IB_A.indd 8CM5000B_29672_ESF_IB_A.indd 8 8/16/23 4:31 PM8/16/23 4:31 PM

9
BEFORE BREWING
PROGRAMMING YOUR
MILL & BREW™ COFFEE MAKER
1. To register your product, go to www.prodprotect.com/blackanddecker
2. Carefully unpack your coffeemaker, removing all packaging materials, labels, and/or
stickers from your coffeemaker.
3. Remove the plastic band around the power plug using scissors.
4. Clean your coffeemaker thoroughly before using for the first time. Wash the Glass
Carafe, Washable Brew Basket, 2-in-1 Grinder and Permanent Filter Basket, and
Removable Showerhead in warm, soapy water. Rinse and dry, then place back into
your coffeemaker.
5. Clean the inside of your coffeemaker by running two full brewing cycles with
water only, no coffee.
a. Pour fresh, cold water into the water reservoir up to the 10-cup mark,
then place carafe on the warming plate.
b. Plug cord into standard electrical outlet.
c. Press the GRIND button until you reach the symbol to turn the
grinder OFF ( ).
d. Push the ON-OFF / Power Button to immediately brew water
through the coffeemaker without adding coffee.
e. Once the cycle is nished, discard water and rinse out the 2-in-1
Grinder and Permanent Filter Basket.
f. Turn off appliance, unplug and allow to cool down for 15 minutes
before repeating.
Setting the Digital Clock
1. Plug the coffeemaker into a standard electrical outlet.
2. The digital clock display flashes “12:00”.
3. To set the time, press the HR button until the correct hour appears on the
display. The “PM” symbol will appear in the upper right corner of the digital
display for PM time settings.
4. Press the MIN button to select minutes.
Note: If the unit is unplugged or power interrupted, the time will need to be
reset, as will the Auto Brew delay start time.
Setting the Auto Brew Delay Start
The programmable Auto Brew delay start allows you to set the 24-hour timer
to brew coffee at the selected time, day or night. To activate the Auto Brew
timer, follow the steps on the next page:
1. After the digital clock is set, press the PROG button. The timer icon ( ) will
begin to flash and display will read 12:00.
Note: The rst button press illuminates the backlit display and any
subsequent presses will perform the programming.
CM5000B_29672_ESF_IB_A.indd 9CM5000B_29672_ESF_IB_A.indd 9 8/16/23 4:31 PM8/16/23 4:31 PM

10
2. Press the HR button and then MIN button to select the time you would
like automatic brewing to begin (for example: 7:30 AM). Make sure the PM light
is not on, if needed.
3. The timer display will flash several times then switch back to the current time of day.
4. Press and release the AUTO button to activate the delay start time that was just
programmed. The timer icon ( ) will remain solid, indicating Auto Brew is
activated.
5. When the time of day matches the programmed Auto Brew set time, your
coffeemaker will activate the brew cycle.
6. To cancel the Auto Brew function, press the AUTO button until the timer
icon ( ) disappears.
Note: To check the preset Auto Brew time, press PROG button and the preset
Auto Brew time is displayed. Press AUTO button to reactivate the timer.
Setting the Adjustable Auto-o, Keep Warm Time
This feature allows you to select automatic shutoff times from 0-2 hours in
30 minute increments. The “Keep Hot” carafe plate will be activated until
the automatic shutoff time is reached.
1. Press and hold PROG button for 3 seconds. This will show the default (120
minutes) keep warm time setting.
2. Press the MIN button to toggle through the keep warm settings (00,
30, 60, 90, 120). The values correlate to length of time (in minutes) the keep
warm will remain on after brewing.
3. Press the PROG button to lock in the keep warm setting.
Note: To check the time Auto Brew is set for without making changes,
press the PROG button to display the Auto Brew time, then press the AUTO
button.”
Setting the Brew Strength Selector
The Brew Strength Selector customizes the avor of your coffee by selecting
from three brew strength settings.
1. Press the STRONG button to cycle through the different Brew Strength settings
(3 levels).
a. No bars = regular (default setting)
b. 1 bar ( ) = strong
c. 2 bars ( ) = bold
CM5000B_29672_ESF_IB_A.indd 10CM5000B_29672_ESF_IB_A.indd 10 8/16/23 4:31 PM8/16/23 4:31 PM

11
4 ELEMENTS TO BREW THE PERFECT CUP
A great cup of coffee starts
with fresh, quality water. Since
water represents more than 98%
of brewed coffee, it is just as
important as the coffee quality
itself. The water you use should
taste like fresh, good-quality
drinking water, have an odorless
aroma, and contain no visible
impurities.
The particle size of the coffee
grind is vital for ensuring proper
avor and extraction. A coffee
grind that is too coarse will allow
water to pass through too quickly
without proper extraction. A coffee
grind that is too ne will lead to
over-extraction and produce a
bitter taste. Your Mill & Brew™
coffee maker comes with a Grind
setting to select the optimal grind,
correlating with the number of cups
to be brewed and ensuring proper
grind size for this type of coffee
maker.
A truly fresh cup of coffee only
comes from freshly ground coffee
beans. In fact, once a coffee bean
is broken or ground, its avor
will begin to degrade over time.
Your Mill & Brew™ coffee maker
maximizes the freshness of your
coffee by grinding the coffee beans
just prior to brewing.
It is important to use the proper
coffee-to-water ratio to produce a
nished brew that isn’t too strong
or weak. When using whole coffee
beans or pre-ground coffee, we
recommend using 1 tablespoon
for every 1 cup of brewed coffee.
This proportion may be adjusted
to suit your individual taste, or
try the Brew Strength Selector to
customize your avor!
Coee
Freshness
Water
Quality
Grind
Selection Proper
Proportion
CM5000B_29672_ESF_IB_A.indd 11CM5000B_29672_ESF_IB_A.indd 11 8/16/23 4:31 PM8/16/23 4:31 PM

12
• To maximize the freshness of your
coffee, use the integrated grinder
to grind your coffee beans just
before brewing.
• When brewing whole bean coffee,
use the Grind setting to select
the optimal grind, correlating with
the number of cups to be brewed
and ensuring proper grind size.
• The coffee grinder is intended for
coffee beans only. Do not grind
other food products or spices in
the coffee grinder.
• Always use fresh, cold, clean
water in your coffee maker. The
water you use should have an
odorless aroma and contain no
visible impurities.
• Use spring water or ltered water,
not distilled water which lacks the
minerals necessary to bind to
elements of the coffee bean.
• A clean coffee maker is always
important. Regular cleaning is
required for the best tasting
coffee.
• Always store your coffee in a
cool, dry place. Once coffee has
been opened, keep it tightly
sealed in an airtight container.
• Do not refrigerate or freeze your
daily supply of coffee, as contact
with moisture will cause the
coffee to deteriorate.
• Never re-use your coffee grounds.
After brewing, the desirable
coffee avors have been
extracted and only the bitter
avors remain.
• Brewed coffee should be enjoyed
immediately! Allowing coffee to
sit too long and reheating coffee
will impact the avor.
• Smell the aroma of your freshly
brewed coffee, and remember
that every sip is meant to be
savored and enjoyed!
TIPS FOR A PERFECT CUP OF COFFEE
CM5000B_29672_ESF_IB_A.indd 12CM5000B_29672_ESF_IB_A.indd 12 8/16/23 4:31 PM8/16/23 4:31 PM

13
BREWING COFFEE
1. Fill the carafe with the
desired amount of fresh, cold
water and pour into the water
reservoir. Do not fill with more
than 12 cups of water.
2. Close the water reservoir
cover and place the carafe on
the Keep Hot carafe plate.
3. (a) Open the grinder lid using the
lift latch and (b) add the desired
amount of coffee into the 2-in-1
Grinder and Permanent Filter.
4. Secure the integrated grinder
lid back into place. Push the lid
cover down until it snaps into place
or until you hear a click. The coffee
maker will not operate without the
lid being closed, all grinder
assembly parts in place, and the
removable showerhead in place.
5. Make sure the coffee maker is
plugged into a standard electrical
outlet.
6. (a) If using whole beans, push the
GRIND button to cycle through
and select the optimal grind
setting (4, 6, 8, 10, 12) correlating
with the number of cups to be
brewed.
1
3a
3b
4
6a
whole beans
CM5000B_29672_ESF_IB_A.indd 13CM5000B_29672_ESF_IB_A.indd 13 8/16/23 4:31 PM8/16/23 4:31 PM

14
BREWING COFFEE
(b) If using ground coffee, push
the GRIND button to cycle through
the grind settings until you reach
the symbol to turn the grinder OFF
for brewing pre-ground coffee.
7. To set the Auto Brew delay
start, adjustable auto-off, and
Brew Strength Selector, follow
the detailed instructions in the
“Programming your Mill & Brew™”
coffee maker section.
8. Press the ON-OFF/Power Button
just once to begin the brew cycle.
If using whole beans, the brew
cycle will automatically start after
grinding.
9. The Sneak-A-Cup™ feature allows
you to pour a cup of coffee before
the brewing cycle is complete. The
carafe must be placed back into
the coffeemaker within 15 seconds
to prevent overflow. Replacing the
carafe will restart the brewing
process.
10. Once the coffee grounds are cool,
empty your brew basket and rinse
after each brewing cycle just like a
regular permanent filter.
(grinder off)
6b
8
9
10
ground coffee
6.
CM5000B_29672_ESF_IB_A.indd 14CM5000B_29672_ESF_IB_A.indd 14 8/16/23 4:31 PM8/16/23 4:31 PM

15
CARE AND CLEANING
Cleaning your coffee maker, following the directions below is recommended
after every use. This product contains no user serviceable parts.
Cleaning
1. Make sure your coffee maker is turned OFF, unplugged and allow to cool.
2. Wipe the outside of your coffee maker and carafe warming plate with a soft,
damp cloth.
3. Remove the Washable Brew Basket and 2-in-1 Grinder and Permanent Filter
Basket, and discard the coffee grounds.
4. Wash the Removable Showerhead and 2-in-1 Grinder and Permanent Filter
Basket by hand in warm water and dish soap.
5. Wash the glass carafe and Washable Brew Basket either by hand in warm
water with dish soap, or in the dishwasher (top rack only).
6. To clean the inside of the cover and inside of the grinder assembly, open
the cover, leave in the open position, and wipe with a damp cloth.
Note: Do not use abrasive cleansers or scouring pads, and never immerse the
coffee maker housing or power cord in water.
COFFEEMAKER PART CLEANING INSTRUCTIONS
Housing
Carafe Warming Plate
Power Cord
Wipe with a soft, damp cloth.
Removable Showerhead
2-in-1 Grinder and
Permanent Filter Basket
Wash by hand in warm
soapy water.
Carafe and carafe lid
Washable Brew Basket
Wash by hand in warm soapy
water, or in the dishwasher
(top rack only).
CM5000B_29672_ESF_IB_A.indd 15CM5000B_29672_ESF_IB_A.indd 15 8/16/23 4:31 PM8/16/23 4:31 PM

16
Descaling with Vinegar
With regular use, minerals and hard water can clog your coffee maker. A full
cleaning with vinegar is recommended once a month.
1. Pour white vinegar into the water reservoir up to the 6-cup mark on the water
window. Add fresh, cold water up to the 10-cup mark.
2. Put the 2-in-1 Grinder and Permanent Filter and Washable Brew Basket into the
Mill & Brew™ Assembly and close the cover. Set empty carafe on the “Keep Hot”
carafe plate.
3. Push the GRIND button to cycle through the grind settings until you reach the
symbol to turn the grinder OFF ( )
4. Push the ON-OFF / Power Button and let half the cleaning mixture brew into
the carafe (until level is around 5-cup mark). Turn OFF coffee maker and let it
soak for at least 15 minutes.
5. Turn ON coffee maker again and brew remaining cleaning mixture into carafe.
6. Turn OFF coffee maker and empty the carafe.
7. Fill the water reservoir with cold water to the 11-cup line; replace carafe on the
carafe plate and then turn ON coffeemaker for a complete brewing cycle
to flush out remaining cleaning mixture. Repeat this step to completely remove
the vinegar smell/taste.
8. Wash the Removable Showerhead, Washable Brew Basket, 2-in-1 Grinder and
Permanent Filter Basket, and glass Carafe as instructed in the Care and
Cleaning Table.
CARE AND CLEANING
CM5000B_29672_ESF_IB_A.indd 16CM5000B_29672_ESF_IB_A.indd 16 8/16/23 4:31 PM8/16/23 4:31 PM

17
TROUBLESHOOTING
PROBLEM POSSIBLE CAUSE SOLUTION
Coee maker does
not turn on.
Coffee maker is not
plugged in.
Make sure appliance
is plugged into a
working outlet.
Coee maker
is leaking.
Water reservoir may be
overlled.
Make sure water
reservoir has not
been lled beyond
the 12-cup MAX line.
Carafe may not be
correctly placed on the
“Keep Hot” carafe plate
Make sure carafe is
placed correctly on the
“Keep Hot” carafe plate.
The brew basket
overflows.
The carafe has been
removed for longer
than 15 seconds when
using the Sneak-A-Cup™
feature.
Make sure to replace
the carafe within 15
seconds during the
brewing cycle.
Excessive amount of
coffee is used.
Reduce the amount
of coffee used to
eliminate brew
basket overows.
The coffee has been
ground too nely.
Adjust the grind
setting, cup selection,
to a lower cup
setting.
The brew basket Sneak-
A-Cup™ mushroom may
be clogged with coffee
grounds.
Free the brew basket
of coffee grounds by
pushing the mushroom
shaped Sneak-A-Cup™
part up and down
during rinsing.
Coee sediment in
brewed cup of coee.
Coffee grounds are small
enough to pass through
the permanent lter.
While it is normal
to see some coffee
sediment when using
a permanent lter,
a coarser grind can
reduce the amount of
sediment.
The coee maker
brews slowly.
The coffee maker needs
cleaning.
Follow the instructions
in the “Descaling with
Vinegar” section.
Grinder does not
turn on
Grinder overheated Let cool 15 minutes
and unplug unit for at
least 30 seconds to
reset fuse.
If additional assistance is needed, please contact our consumer service team at
1-800-465-6070.
CM5000B_29672_ESF_IB_A.indd 17CM5000B_29672_ESF_IB_A.indd 17 8/16/23 4:31 PM8/16/23 4:31 PM

18
TABLA DE CONTENIDOS
Instrucciones Importantes de Seguridad
Familiarícese su cafetera Mill & Brew™
Cafetera Mill & Brew™ beneficios del producto
Familiarícese con su panel de control
Antes de colar café
Programación de su cafetera Mill & Brew™
4 Elementos principales para
colar la taza perfecta
Consejos para obtener la perfecta
taza de café
Preparación de café
Cuidado y limpieza
Resolución de fallas
19
21
23
24
25
25
27
28
29
31
33
PRECAUCIÓN
RIESGO DE INCENDIO O DE CHOQUE ELÉCTRICO. NO ABRA.
El símbolo de un rayo indica voltaje peligroso. El signo de exclamación
indica importantes instrucciones de mantenimiento. Consulte a
continuación:
Precaución: Para reducir el riesgo de incendio o de choque eléctrico,
no retire la cubierta de la cafetera. No contiene por dentro partes
reparables por el consumidor. Cualquier reparación deberá ser
efectuada únicamente por personal autorizado.
CM5000B_29672_ESF_IB_A.indd 18CM5000B_29672_ESF_IB_A.indd 18 8/16/23 4:31 PM8/16/23 4:31 PM

19
Por favor lea este instructivo antes de usar el producto.
INSTRUCCIONES IMPORTANTES
DE SEGURIDAD
Cuando se utilizan aparatos eléctricos, siempre se debe respetar ciertas medidas
de seguridad a fin de reducir el riesgo de un incendio, un choque eléctrico y (o)
lesiones a las personas, incluyendo las siguientes:
• Lea todas las instrucciones antes de
utilizar.
• No toque las superficies calientes. Use
las asas o las perillas.
• A fin de protegerse contra un incendio,
descarga eléctrica y lesiones a las
personas, no sumerja el cable, los
enchufes ni el aparato en agua ni en
ningún otro líquido.
• Todo aparato eléctrico utilizado cerca
de la presencia de los niños o por ellos
mismos, requiere la supervisión de un
adulto.
• Desenchufe del aparato del
tomacorriente cuando éste o el reloj
de la pantalla no estén en uso y antes
de limpiarlo. Permita que el aparato se
enfríe antes de colocarle o retirar las
piezas y antes de limpiarlo.
• No opere ningún aparato eléctrico
que tenga el cable o el enchufe
averiado, que presente un problema
de funcionamiento o que esté dañado.
Comuníquese con el departamento de
Servicio para el Cliente, llamando gratis
al número que aparece en la sección de
Garantía.
• El uso de accesorios no recomendados
por el fabricante para ser utilizados con
este aparato puede ocasionar incendio,
descarga eléctrica o lesiones a las
personas.
• No utilice este aparato a la intemperie.
• No permita que el cable cuelgue del
borde de la mesa o del mostrador ni que
entre en contacto con las superficies
calientes.
• No coloque el aparato sobre ni cerca de
una hornilla de gas o eléctrica ni adentro
de un horno caliente.
• Para desconectar, ajuste todo control a
la posición de apagado (OFF) y después,
retire el enchufe del tomacorriente.
• Este aparato se debe usar únicamente
con el fin previsto.
• La tapa debe mantenerse sobre la jarra
cuando el aparato está en uso.
• El retirar o abrir la tapa durante el ciclo
de colado puede ocasionar quemaduras.
• La jarra está diseñada para ser utilizada
con este aparato. Jamás se deberá
utilizar sobre una estufa.
• Nunca coloque una jarra caliente sobre
una superficie fría ni mojada.
• No utilice la jarra si el vidrio se ha rajado
o si el asa está floja o débil.
• No limpie la jarra con limpiadores
abrasivos, con almohadillas de fibra de
metal ni demás limpiadores abrasivos.
• Este aparato no está diseñado para ser
usado por personas (incluyendo los
niños) con su capacidad física, psíquica
o sensorial reducida, o con falta de
experiencia o sabiduria, a menos que
sean supervisadas o instruidas acerca
del uso del aparato por una persona
responsable de su seguridad.
• Los niños deben ser supervisados para
asegurar que no jueguen con el aparato.
• El retirar la tapa del molino integrado
durante el ciclo de colado puede
ocasionar quemaduras.
• Revise el cesto del molino para
asegurarse de que no contenga objetos
extraños antes de utilizarlo.
• Solo se debe colocar granos de café y
café molido en el cesto del molino.
• Evite el contacto con piezas móviles.
CM5000B_29672_ESF_IB_A.indd 19CM5000B_29672_ESF_IB_A.indd 19 8/16/23 4:31 PM8/16/23 4:31 PM

20
ENCHUFE POLARIZADO (SOLAMENTE PARA LOS MODELOS DE 120V)
Este aparato cuenta con un enchufe polarizado (un contacto es más ancho
que el otro). A n de reducir el riesgo de un choque eléctrico, este enchufe
encaja en un tomacorriente polarizado en un solo sentido. Si el enchufe no
entra en el tomacorriente,inviértalo y si aun así no encaja, consulte con un
electricista. Por favor no trate de alterar esta medida de seguridad.
TORNILLO DE SEGURIDAD
Advertencia: Este aparato cuenta con un tornillo de seguridad para evitar
la remoción de la cubierta exterior del mismo. A n de reducir el riesgo de
incendio o de choque eléctrico, por favor no trate de remover la cubierta
exterior. Este producto no contiene piezas reparables por el consumidor.
Toda reparación se debe llevar a cabo únicamente por personal de servicio
autorizado
CABLE ELÉCTRICO
a) Un cable de alimentación corto es provisto para reducir los riesgos de
enredarse o tropezar con un cable más largo.
b) Existen cables de extensión disponibles y estos pueden ser utilizados si se
toma el cuidado debido en su uso.
c) Si se utiliza un cable de extensión:
1) La clasicación eléctrica marcada del cable de extensión debe ser, como
mínimo, igual a la clasicación eléctrica del aparato;
2) Si el aparato es del tipo de conexión a tierra, el cable de extensión debe
ser un cable de tres alambres de conexión a tierra; y
3) El cable debe ser acomodado de manera que no cuelgue del mostrador
o de la mesa para evitar que un niño tire del mismo o que alguien se
tropiece sin darse cuenta.
Nota: Si el cordón de alimentación es dañado, por favor, póngase
en contacto con el departamento de garantía enumerado en estas
instrucciones.
CONSERVE ESTAS
INSTRUCCIONES.
Este aparato eléctrico es para uso doméstico solamente.
CM5000B_29672_ESF_IB_A.indd 20CM5000B_29672_ESF_IB_A.indd 20 8/16/23 4:31 PM8/16/23 4:31 PM
1/52