A página está carregando...

Palaos electric vertical radiator
Models:
1000RAD | 1500RAD | 2000RAD
EN
FR
MANUAL DE INSTALACIÓN Y USO
Página 20
MANUAL DE INSTALAÇÃO E DE UTILIZAÇÃO
Página 52
INSTALLATION & INSTRUCTION GUIDE
Page 02
MANUEL D’INSTALLATION ET D’UTILISATION
Page 36
ES PT

2

3
Palaos electric vertical radiator
Models:
1000RAD | 1500RAD | 2000RAD
Thank you for choosing this product. Please read this manual carefully before
operation and retain for further use.
Gracias por elegir este producto. Por favor, lea este manual cuidadosamente
antes de utilizarlo y consérvelo para un uso posterior.
Merci d’avoir choisi ce produit. Veuillez lire attentivement ce manuel avant de
l’utiliser et le conserver pour référence ultérieure.
Obrigado por ter escolhido este produto. Por favor leia atentamente este manual
antes de o utilizar e guarde-o para referência futura.
EN
FR
ES
PT

4
CONTENTS
1. Introduction .............................................................................................................. 4
2. Features & functions ................................................................................................ 6
3. Installation ................................................................................................................ 6
4. Control panel .......................................................................................................... 10
5. Operation & programming ..................................................................................... 10
6. Maintenance and cleaning ......................................................................................14
7. European Directive (WEEE) 2012/19/UE ................................................................ .14
8. Guarantee ...............................................................................................................14
8.1 Terms and conditions .......................................................................................15
8.2 How to register ................................................................................................ .17
9. ERP Directive Commission Regulation (EU) 2015/1188 .........................................18
10. Technical specication & data ..............................................................................19
1. INTRODUCTION
ROINTE Palaos electric vertical radiators are programmable with an exclusive temperature
control panel, manufactured with high quality materials. The careful choice of components
ensures efciency, without affecting comfort.
With a unique design, ROINTE Palaos radiators have passed the highest quality controls, to
meet the requirements of safety and efciency. These digital electric radiators are designed
for xed installation.
This product is designed for domestic or residential use. It is recommended that the radiator
be installed by an approved professional. Make sure that the radiator is correctly connected
to a 230V network. The radiator is class II and has IPX4 electrical protection. Do not make
any electrical connections without observing these safety regulations.
Please read this manual carefully before installation and operation. Please keep this
manual for future reference and your product guarantee conditions. It is important to
retain this manual after installation.

5
PALAOS VERTICAL RADIATOR
EN
IMPORTANT: Please read this manual carefully and retain for further use. When using
electrical appliances, precautions should be taken to reduce the risk of re, electrical
shock and injury to persons.
IMPORTANT: Any repairs that require opening the product must be done by ROINTE
or authorized personnel. Please observe regulations when disposing of this product
and its thermal uid.
IMPORTANT: To disconnect the product from the main power supply, remove the
plug from the socket. Do not pull the cable. If the power cable is damaged, it must be
replaced by ROINTE or its authorized personnel in order to avoid any damage.
IMPORTANT: ROINTE declines all responsibility in case of any accident caused by
incorrect use or not in accordance with this manual.
IMPORTANT: The manufacturing characteristics of the radiators distributed by ROINTE
are patented.
WARNING: Servicing and product repairs should only be undertaken by ROINTE or its
authorized personnel using only exact manufacturer-approved spare parts.
WARNING: The product is IPX4 rated and may be used in bathrooms, however not in
the immediate vicinity of baths, showers, water connections, basins, swimming pools or
other bodies of water. The product must never be installed where itself or the switches/
control panel is within the reach of persons in water. Never use the product with wet
hands. Do not place any water containers (glasses, vases etc.) on or near the product.
WARNING: Some parts of this product may become very hot and cause burns.
Particular attention should be paid when children and vulnerable people are present.
WARNING: To avoid overheating, do not cover the product. This includes furniture, curtains,
clothes and any other items. Do not insert any kind of object in the product or obstruct its air
circulation. Obstructions should not be placed in front, above or directly next to the product.
Do not use insecticides, paints, chemicals or aerosols on or near the product. Do not sit on
the product. Failure to comply with the above will render your guarantee invalid.
WARNING: Children from the age of 3 and under the age of 8 may only
switch the device on/off if it has been placed or installed in its normal
intended operating position and they are supervised or instructed in the
safe use of the device and understand the risks involved. Children from
the age of 3 and under the age of 8 must not plug in, adjust or clean the
appliance or perform maintenance operations.

6
2. FEATURES & FUNCTIONS
Not only are our radiators Lot20 compliant, we also include functions to help manage
efciency more effectively.
• Open Windows
This function can detect when windows are open, preventing energy
waste. It is activated when the temperature drops rapidly in a short
period of time (e.g. when a window in the room is opened).
When the Open Window status is detected, the display shows the
word “Opn” (Open = Open) and the radiator switches to ANTI-FROST
mode (7°C). It ends automatically when the product detects that the
window has closed, or when the MODE button is pressed.
3. INSTALLATION
We recommend using a Rointe Trusted Supplier. Find your nearest one by calling us on
0203 321 5928 or using the locator at www.rointe.co.uk.
IMPORTANT: Before installation, please locate the metal tag situated on the back
of the product and note the product reference and serial number. You will need this
information to register your guarantee.
WARNING: Do not install the product directly below a connection box or xed socket
outlet. Do not install or use outdoors. This product is designed for internal, upright
wall-mounted installation using the installation kit and xing items provided.
Using a unique design, ROINTE Palaos radiators utilise
natural air convection to transfer heat. Cold air is introduced at
the bottom of the radiator and raises its temperature by passing
through the interior of the heating element and expelling at the
top as warm air.
To achieve perfect performance and even heat distribution, the
product should be installed with minimum distances from the
oor and adjacent walls. See “Diagram 1”.
If the product is covered, this will interrupt air-ow and could
cause overheating.

7
PALAOS VERTICAL RADIATOR
EN
Diagram 1:
1. Install the radiator at
least 20 cm from the oor.
2. The minimum distance
from the wall on the right
must be at least 30 cm.
3. The minimum distance
from the wall on the left
must be at least 10 cm.
Inside the product packaging, you will nd an installation kit. This includes brackets, screws
and xing plugs for brick, cement or compacted stone walls.
You will need a drill, rubber mallet, spirit level and a pencil to complete the installation.
IMPORTANT: Please follow these instructions carefully.
1. Drill the wall considering Lf and Hf as xing holes according to the model purchased:
+
+
+
+
Lf
Hf
++
Lf
Hf
+
+
+
+
Lf
Hf
+
+
Lf x Hf = 32 x 1,467 mm
1,800 mm
1,800 mm
1,800 mm
Lf x Hf = 144 x 1,467 mm Lf x Hf = 263 x 1,467 mm
Mod. 1,000 W
Floor
Mod. 1,500 W
Floor
Mod. 2,000 W
Floor

8
2. After inserting the rawl plugs, install the 4 bracket guides (C in Diagram 2) supplied.
B
A
C
D
E
3. Insert the 2 upper wall brackets with the hook facing upwards and the lower wall brackets
with the hook facing downwards.
A
B
C
D
E
Wall xing screws
Wall plugs
Guides for support
Wall support
Fastening screws

9
PALAOS VERTICAL RADIATOR
EN
4. Secure the brackets with the fastening screw.
5. Mount the radiator on the 2 upper wall brackets. Then t the radiator onto the 2 lower
wall brackets and nish tightening the 4 xing screws.
1
2
3
4

10
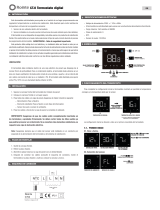
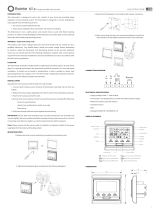
4. CONTROL PANEL
5. OPERATION & PROGRAMMING
5.1 ON / STAND-BY
When in STAND-BY mode the radiator does not heat up, but the
display will show the current time. Pressing the
button for 2
seconds switches the product on or puts it into STAND-BY mode.
Press
for 2 seconds to switch the product on. When it is switched
on for the rst time, the time and day will ash. It’s important to
congure these correctly in the next step.
5.2 Setting hour / day
The time and day must be set when you rst switch the product on, or when the product
is disconnected and reconnected from the power supply.
It’s also possible to congure this by pressing the
MODE button for 5 seconds when
the product is in STAND-BY. The display will show the word “SET” and then suggests
changing the TIME and DAY of the week.
The time is set by holding down the
INCREASE button until the current hour and
minute value is reached.
Click the
MODE button to conrm the clock setting and continue to the day setting.
ON / STAND-BY button
MODE button
INCREASE button
DECREASE button

11
PALAOS VERTICAL RADIATOR
EN
The display will show the word “DAT” and then suggests the day of the
week. D1 corresponds to Monday, D2 to Tuesday and so on.
Use the
INCREASE button to set the current day of the week, e.g.
if it’s Thursday press the
button 4 times until you reach D4.
Press the
MODE button to conrm the day and exit the setting.
Once the time has been set, it will stop ashing.
If you product is in STAND-BY mode and you wish to turn it on, press
the button for 2 seconds.
5.3 MANUAL modes
There are 4 Manual operating modes: Pilot Wire, Comfort, Night and Anti-Frost.
PILOT WIRE mode (only available on request)
The Pilot Wire is a special communication protocol that allows an
external unit or control unit to control the radiator. It’s shown on the
display by an arrow pointing to the house symbol.
To activate Pilot Wire mode, press the
MODE key once. The
message “FP” will appear briey along with an acoustic signal.
IMPORTANT: This function is not available unless requested, even if
it is displayed on the menu.
CONFORT mode
Comfort mode is shown on the display by an arrow pointing to the sun
symbol and the Comfort temperature on the screen.
To activate the Comfort mode, press the
MODE key once. The
message “CON” will appear briey along with an acoustic signal.
You can set the desired temperature with the
INCREASE and
DECREASE buttons. The radiator remains on until the room reaches
the selected temperature.
This selected temperature is used during the WEEKLY
PROGRAMMING mode (section 5.4) as the temperature set for the
periods in Comfort mode.

12
NIGHT mode
Night mode is shown on the display by an arrow pointing to the moon
symbol and the Night temperature on the screen.
To switch from Comfort mode to Night mode, press the
MODE
button again. The word “RID” will appear briey along with an acoustic
signal.
You can set the desired temperature with the
INCREASE and
DECREASE buttons. This temperature does not depend on the
Comfort temperature and is usually used to set a temperature below
19°C, which is ideal for a good nights sleep. This selected temperature
is used during the WEEKLY PROGRAMMING mode (section 5.4.) as
the set temperature for the periods in Night mode.
ANTI-FROST mode
Anti-Frost mode is shown on the display by an arrow pointing to the
snowake symbol and 7ºC temperature on the screen.
To switch from Night mode to Anti-Frost mode, press the
MODE
button again.
In this operating mode, the user cannot regulate the temperature as it
remains xed at 7ºC. This mode prevents the room temperature from
falling below 7ºC.
5.4 AUTOMATIC modes
In Automatic mode, the product regulates the temperature according to the daily programme
created by the user, using the temperatures previously set in the Comfort and Night modes.
To switch from ANTI-FROST mode to PROGRAMMING mode, press
the
MODE button again.
The word “PRO” will appear on the screen with an arrow pointing to
the clock symbol (located at the bottom right of the screen). In the
“clock” section of the screen, the current time of day is displayed,
only if the time and day of the week have been set correctly when the
product is rst switched on (section 5.2).

13
PALAOS VERTICAL RADIATOR
EN
The programming schedule is displayed on the left side of the screen
by a succession of lines that representing 24 hours of the day. An
arrow at the top of the screen indicates the operating mode (Comfort
or Night).
The temperature selected for that mode is shown on the display.
To modify the temperatures of the Comfort or Night modes, access
the corresponding mode and then use the
INCREASE and
DECREASE buttons to modify the temperature parameters.
5.4.1 WEEKLY PROGRAMMING modes
In order to proceed to the weekly programming, you must:
• Have established the correct time and day of the week (section 5.2)
• Be in PROGRAMMING mode (press the
MODE button for 5 seconds until “PRO”
appears on the screen. “FP” will appear rst, then “PRO”.)
In this mode, it is possible to program each day of the week independently.
1. Select the day with the
INCREASE and DECREASE buttons
(D1 = Monday, D2 = Tuesday, etc.). Press the
MODE button to conrm.
All the time bands for the day will then be displayed.
2. The lower screen shows the time interval that must be programmed for each
hour. Press
INCREASE to activate the Comfort mode temperature OR the
DECREASE to activate the Night mode temperature for that hour. Comfort
mode is indicated by a strip on the side bar. After each selection, the time
interval will progressively advance (00h, 01h, 02h, 03h...).
3. The strips will only been seen for the time bands that are active in Comfort
mode.
4. Once you have congured all hours of the day, press the
MODE button once
and then select the remaining days you wish to program e.g. D2 - D7.
5. Press the
MODE button for 5 seconds until the word “END” appears to save.
Example
Set the Comfort mode on Fridays from 7am to 9am, and from 5pm to 9pm keeping the rest
of the day in night mode:
• Press for
5 seconds until “PRO” appears.
• Choose Friday (D5) by pressing the
button 5 times and then press to

14
conrm.
• The display will show the time bands (00h, 01h, 02h, 03h etc.), starting from
midnight onwards, which means that the rst time slot is from midnight to one in
the morning.
• In this case, as you want to activate Night mode until 7am, press
7 times to
program 00h - 07h as Night mode. If Night mode has been set at 15ºC, the radiator
will be activated at 15ºC from midnight to 7am.
• Now you can set the Comfort mode in the time band from 7am to 9am by pressing
the
key twice. You will see this activation in the side strips. If Comfort mode
has been set at 21ºC, the radiator will be activated at 21ºC from 7am until 9am.
• Then set Night mode until 5pm by pressing
button 8 times.
• Then set Comfort mode from 5pm to 9pm by pressing
4 times.
• Then set the remaining hours (9pm - midnight) in Night mode by pressing
3
times. To conrm your programming, press
for 5 seconds until “END” appears.
6. MAINTENANCE & CLEANING
The product does not require regular maintenance. We do, however, recommend that all
parts of the product are kept clean (behind, underneath, along the upper ns etc.). Clean
the aluminium with a soft, damp cloth and pH-neutral soap. Clean the control panel with a
soft, dry cloth.
WARNING: Disconnect the product from the power supply and ensure product is at
room temperature before any cleaning or maintenance. Do not use any abrasive product
on the aluminium, such as (but not limited to) chemicals, rough cloths, hard bristled
brushes or wire/steel wool.
7. EUROPEAN DIRECTIVE (WEEE) 2012/19/UE
Under the European Directive 2012/19/UE on Waste Electrical and Electronic Equipment
(WEEE), this product cannot be treated as household waste. Instead it must be separated
to optimize the recovery and recycling of all of the components and materials to reduce
the impact on human health and the environment. The symbol of the container crossed out
over a horizontal line is marked on all of ROINTE products to remind the consumer of the
obligation to separate them on disposal. The consumer should contact their local authority
or council ofce, or original point of sale to learn about the correct method of disposal for
this product.

15
PALAOS VERTICAL RADIATOR
EN
8. GUARANTEE
There are certain terms and conditions on this ROINTE product. These conditions comply
with all the rights construed within national legislation, as well as any additional rights and
guarantees, which are offered by ROINTE.
Any incident you might detect with your product can be sorted by the product seller or by
ROINTE. Please contact ROINTE by telephoning 0203 321 5929 or send an email to
support@rointe.co.uk, through which we will instruct you on how to solve the incident.
You will need to state the product reference and serial number (located on the metal
tag with the product) and the type of incident when contacting ROINTE. In addition,
please attach a copy of the product invoice and/or proof of purchase that indicates
the date on which the product was sold.
8.1 Terms & conditions
1. ROINTE guarantees there are no material defects of design or manufacture at the time
of original purchase. ROINTE guarantees the aluminium body for 120 months and electric
plus electronic components for 24 months for this product only, provided it has not been
modied in any way. If you register your product online at www.rointe.co.uk with a valid
proof of purchase, such as an invoice, the guarantee period increases to 240 months for the
aluminium body and 36 months for electric plus electronic components.
2. If during the guarantee period, the product does not work correctly under normal use,
and any design, material or manufacturing defect is found, ROINTE will repair or substitute
the product as it sees t, in accordance with the terms and conditions as follows:
2.1. The guarantee is only applicable if the original guarantee is issued by the seller and
when the said guarantee has been registered with ROINTE correctly, including product
reference, series number (marked on the product’s metal tag), purchase date and proof of
purchase. The product guarantee can be registered on our website at www.rointe.co.uk
or can be sent via email to support@rointe.co.uk within 90 days of installation. ROINTE
reserves the right to reject the guarantee when this information has been removed or
modied after the original product purchase.
2.2. The guarantee is only applicable if the product has been installed by a competent
person in accordance with this installation manual and all current regulations at the time
of installation.

16
2.3. The guarantee is only applicable to those cases that concern material, design and
manufacturing defects, and under no circumstances covers damage to the product for
the following reasons:
i) Damage caused by negligence and / or misuse of the product, i.e. used for other
purposes that are not construed as its normal use or for not respecting instructions of
use and maintenance given by ROINTE, as well as incorrect installation or use of the
product that may not comply with the current technical standards of safety.
ii) Corrosion of any part of the product caused by direct exposure to salt-water. When
the product is installed less than 200m from the coast, the guarantee period for
damages caused by corrosion will be reduced by 50%.
iii) Any unauthorised modication of the product or repairs of the product carried out
by third parties or unauthorised persons, or opening of the product by third parties or
unauthorised persons.
iv) Any accidents that are deemed outside the control of ROINTE, such as (but not
limited to): lightning, res, oods, natural disasters, public disorder, atmospheric or
geologic phenomena etc.
v) Faults that result from incorrect installation. Guidance can be found from Rointe and
in this installation manual. If in doubt, please contact ROINTE.
2.4. Any repairs or substitutions completed as part of this guarantee service do not allow
extension periods or new periods of guarantee i.e. your guarantee will not be extended
should a repair or substitution of this product take place.
2.5. Any repairs or substitutions covered under this guarantee must be parts that are
functionally equivalent. The defective parts or parts removed or replaced shall become
the property of ROINTE and should be returned as such.
2.6. The product must be installed in a way that allows access for ROINTE technicians
or authorised persons should they need to gain access to the product for maintenance
or repair. The user/client is responsible for any costs or organisation required to provide
access to the products for repair and/or substitution.
3. The ROINTE Technical Support department will advise you if you need to purchase any
parts not covered under this guarantee or out of guarantee.
4. The ROINTE guarantee will be invalid if the product: has been modied, repaired and/or
manipulated in any way and/or by unauthorised persons. This guarantee will also be invalid
if the product is not correctly installed.
5. This guarantee is not transferable and does not include claims due to damage by
limescale or frost.
6. Proof of purchase will be required by ROINTE for any claim.
7. This guarantee does not affect your statutory rights.

17
PALAOS VERTICAL RADIATOR
EN
8. This guarantee does not affect the buyer’s legal rights stipulated in current national leg-
islation, nor affects those rights against the distributor or installer that could come forth in
compliance with the purchase contract.
9. In the absence of applicable national legislation, this guarantee shall prevail and may
be construed as the buyer’s only protection. ROINTE, its ofces, employees, distributors
and installers will not be held responsible for any accidental damage that emerges due to
infringement of any rules implicitly related to this product.
8.2 How to register your product guarantee
It’s important to register your ROINTE product as part of our guarantee service, in case you
wish to make a claim. You can register your ROINTE product in the following ways:
WEBSITE
1. Go to www.rointe.com/uk/register-your-guarantee/.
2. Login to your existing account or create a new account if you need to.
3. Click on “My products”.
4. Enter your product reference (alphanumeric and in upper case).
5. Enter your serial number (26 digits located on the metal tag on your product and
starts with 843).
6. Upload your proof of purchase, such as invoice in PDF, JPEG or PNG format. This
is not mandatory but by doing so you ensure your guarantee period is accurate.
7. Click “Register”. Congratulations! Your product is now registered.
EMAIL
1. Send an email to support@rointe.co.uk with the following information:
• Customer name
• Address and postcode
• Telephone number and email address
• Product reference (alphanumeric and in upper case)
• Serial number (26 digits located on the metal tag on your product and
starts with 843)
• Product purchase date and proof of purchase (such as invoice)
2. Our Technical Support team will conrm your product registration and request any
additional information needed via email.
POST
1. Post the information listed in the EMAIL section above to:
• INDUSTRIAS ROYAL TERMIC, S.L. t/a Rointe UK, C/E Parcela 43, 30140,
Santomera (SPAIN)
2. Please ensure you obtain proof of posting.

18
9. ERP DIRECTIVE (EU) 2015/1188
ITEM SYMBOL UNIT 1000RAD 1500RAD 2000RAD
HEAT OUTPUT
Nominal heat output
P
nom kW 1 1.5 2.0
Minimal heat output
P
min kW n/a n/a n/a
Maximum continuous heat output
P
max,c kW 1 1.5 2.0
AUXILIARY ELECTRICITY CONSUMPTION
At nominal heat output
el
MAX kW 1,000 1,500 2,000
At minimum heat output
el
MIN kW 1,000 1,500 2,000
In standby mode
el
SB kW 0.0012 0.0012 0.0012
TYPE OF HEAT OUTPUT/ROOM TEMPERATURE CONTROL (SELECT ONE)
Single-level heat output, no internal temperature control — — —
Two or more manual levels, without internal temperature control — — —
Internal temperature control by mechanical thermostat — — —
With electronic interior temperature control — — —
Electronic indoor temperature control and daily timer — — —
Electronic indoor temperature control and weekly timer
OTHER CONTROL OPTIONS (MULTIPLE SELECTIONS POSSIBLE)
Interior temperature control with presence detection — — —
Interior temperature control with detection of open windows
With remote control option — — —
With adaptive start-up control — — —
With operating time limitation — — —
With black lamp sensor — — —
SEASONAL SPACE HEATING ENERGY EFFICIENCY
n
s — 38.0% 38.0% 38.0%

19
PALAOS VERTICAL RADIATOR
EN
10. TECHNICAL SPEC
MODEL 1000RAD 1500RAD 2000RAD
No. Heating Elements 2 3 4
MATERIALS
High purity aluminium body
Control panel with mechanical keyboard
DIMENSIONS, WEIGHTS & FINISHES
Width (mm) 236 356 476
Height (mm) 1,800 1,800 1,800
Depth (mm) 72 72 72
Installed Depth (mm) 110 110 110
Weight (kg) 11 15.5 20.5
Finish White RAL 9016 / Black Sandblast S305I
ELECTRICAL CHARACTERISTICS
Nominal Power (W) 1,000 1,500 2,000
Voltage (V) 230 ~V 230 ~V 230 ~V
Current (A) 4.3 6.5 8.7
Power per Element (W) 500 500 500
INSTALLATION & SAFETY
Safety thermostat
Installation kit
Protection Grade IPX4 IPX4 IPX4

20
CONTENIDO
1. Introducción .......................................................................................................... .20
2. Características y funciones ................................................................................... 22
3. Instalación .............................................................................................................. 22
4. Panel de control ..................................................................................................... 26
5. Operación y programación .................................................................................... 26
6. Mantenimiento y limpieza ...................................................................................... 30
7. Normativa Europea 20120/19/UE ........................................................................... 31
8. Garantía ................................................................................................................. 31
8.1 Términos y condiciones ................................................................................... 32
8.2 Registro de la garantía .................................................................................... 33
9. ERP. Reglamento de la Comisión (EU) 2015/1188 ................................................. 34
10. Especicaciones técnicas y datos ...................................................................... 35
1. INTRODUCCIÓN
Los radiadores verticales eléctricos ROINTE Palaos son programables con un exclusivo panel
de control de temperatura, fabricado con materiales de alta calidad. La cuidadosa elección
de los componentes asegura la eciencia, sin afectar al confort.
Con un diseño único, los radiadores de ROINTE Palaos han pasado los más altos controles
de calidad, para cumplir con los requisitos de seguridad y eciencia. Estos radiadores
eléctricos digitales están diseñados para una instalación ja sobre la pared.
Este producto está diseñado para uso doméstico o residencial. Se recomienda que el radiador
sea instalado por un profesional aprobado. Asegúrese de que el radiador esté correctamente
conectado a una red de 230V. El radiador es de clase II y tiene una protección eléctrica IPX4.
No realice ninguna conexión eléctrica sin observar estas normas de seguridad.
Lea atentamente este manual antes de la instalación y el funcionamiento. Conserve
este manual para futuras consultas y las condiciones de garantía del producto. Es muy
importante conservar este manual después de su instalación.
1/72