RCQC3
V. 01 – 11/07/2016 18 ©Velleman nv
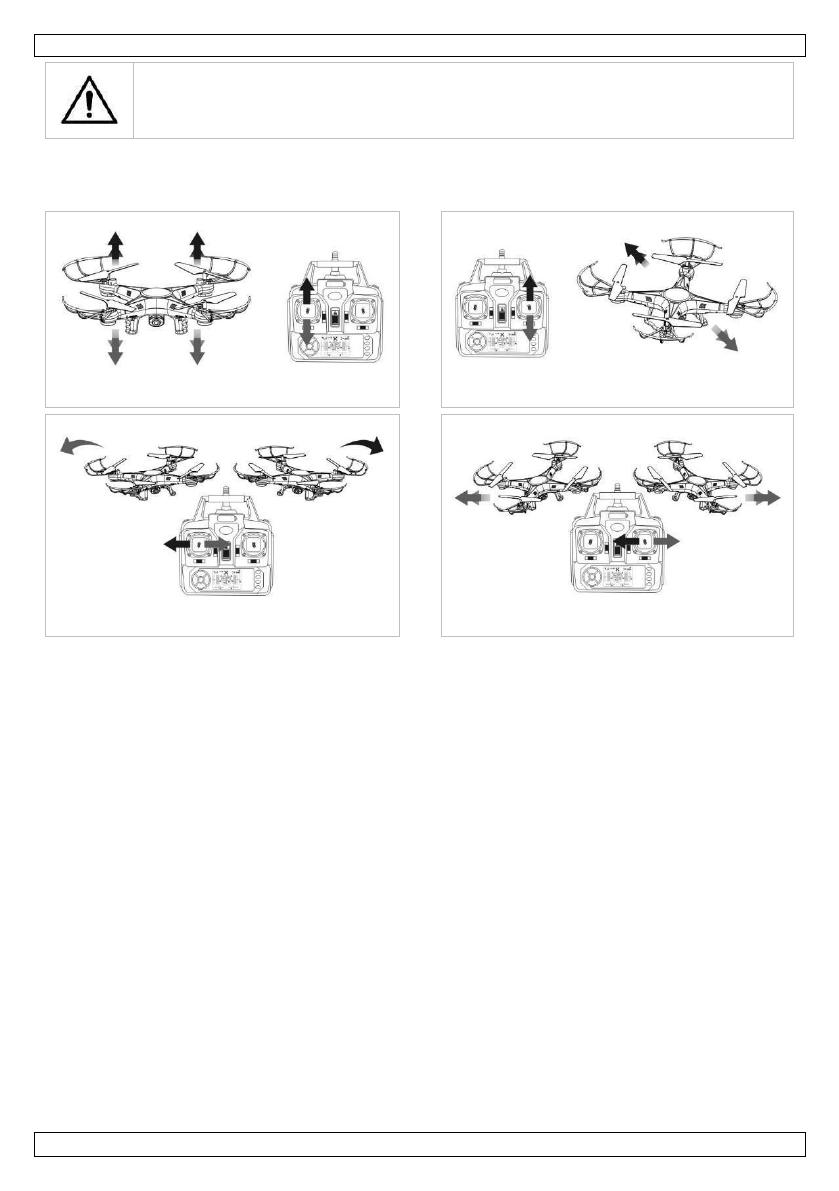
8.3 Leren vliegen
De quadcopter is een vliegtoestel dat snel reageert en slechts kleine stuurbewegingen nodig heeft om het
te besturen. Leer eerst langzaam vliegen en schakel pas over naar een hogere vliegsnelheid wanneer u
voldoende ervaring hebt met vliegen. Het neerstorten van de quadcopter kan ernstige letsels en/of
onherroepelijke schade veroorzaken aan het toestel en de omliggende voorwerpen.
Daarom is het zeer belangrijk om eerst te oefenen en voldoende vlieguren te maken om uw
vliegvaardigheden te verbeteren. Laat de quadcopter langzaam opstijgen en zweven tot 50 - 60 cm
boven de grond. Laat de quadcopter voorzichtig landen.
Probeer vervolgens de quadcopter naar links/rechts en vooruit/achteruit te laten vliegen.
Herhaal deze oefeningen tot u ze goed onder de knie hebt.
8.4 De quadcopter in de lucht gooien
Dankzij de ingebouwde gyroscoop kunt u de quadcopter ongeveer 3 m in de lucht gooien en de
gashendel onmiddellijk naar voren duwen. De quadcopter stabiliseert zich automatisch in de lucht en
zweeft.
8.5 3D-vlucht
Eenmaal u de basisbewegingen onder de knie hebt en voldoende vlieguren hebt opgebouwd, kunt u
enkele spectaculaire stunts uitvoeren!
Zo kan de quadcopter in 3D-modus vliegen of tollen. Ga als volgt te werk:
1. Laat de quadcopter stabiel zweven op min. 3 m hoogte.
2. Druk op de 3D-knop. Beweeg de stuurhendel naar links, naar rechts, voorwaarts of achterwaarts.
3. U hebt nu een perfecte looping van 360° naar links, naar rechts, voorwaarts of achterwaarts
gemaakt.
Gebruik de 3D-vliegmodus enkel met volledig opgeladen batterijen in de quadcopter en de
afstandsbediening, en in een open ruimte zonder obstakels.
9. De camerafunctie
9.1 De camera voorbereiden
1. Sluit de camera aan op de quadcopter.
2. Schakel de quadcopter in. Als de led van de camera rood knippert en groen wordt, dan is de camera
gebruiksklaar. Als de led rood oplicht en daarna uitschakelt, controleer of er een SD-kaart in de
camera is geplaatst of als de gebruikte SD-kaart beschadigd is.
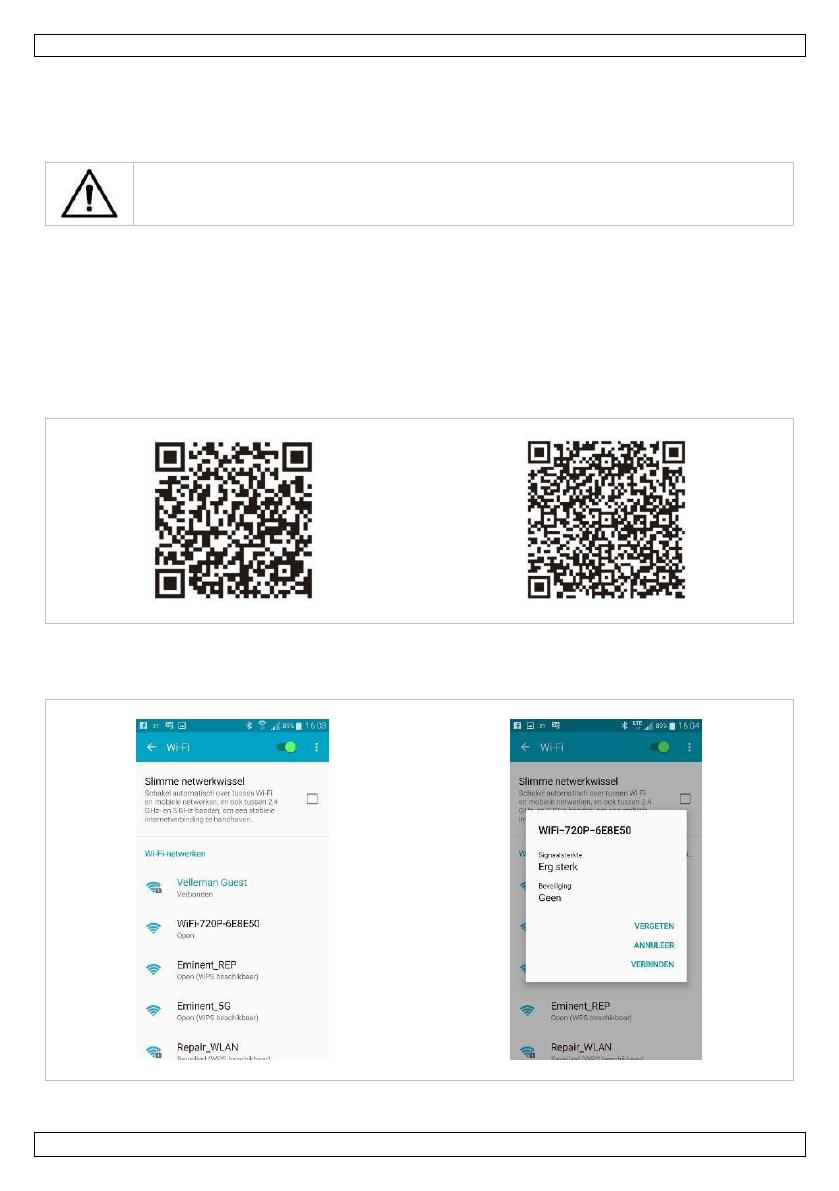
9.2 De smartphone voorbereiden
Scan de onderstaande QR-code om de app te downloaden:
Na de installatie van de app, ga naar het configuratiemenu van uw toestel en selecteer de optie 'wifi'.
Schakel de quadcopter in. De quadcopter verschijnt in de lijst (WiFi-720P-XXXXXX). Selecteer de code
van de quadcopter om verbinding te maken. De verbinding wordt gemaakt van zodra de code wordt
ingegeven.