Weston 01-0006 Guia de usuario
- Categoria
- Fatiadores
- Tipo
- Guia de usuario

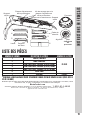
MANDOLINE VEGETABLE
SLICER
01-0006
DUE TO CONSTANT FACTORY IMPROVEMENTS, THE PRODUCT PICTURED MIGHT DIFFER
SLIGHTLY FROM THE PRODUCT IN THIS BOX. 061015

TABLE OF CONTENTS / TABLA DE CONTENIDO / TABLE DES MATIÈRES
2
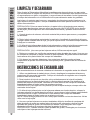
GENERAL SAFETY RULES
COMPONENT LIST
CLEANING & DISASSEMBLY
ASSEMBLY INSTRUCTIONS
DIRECTIONS FOR USE
TYPES OF SLICES
WARRANTY
NORMAS GENERALES DE SEGURIDAD
LISTA DE COMPONENTES
LIMPIEZA Y DESARMADO
INSTRUCCIONES DE ENSAMBLADO
INSTRUCCIONES DE USO
TIPOS DE CORTES
INFORMACIÓN DE GARANTÍA WESTON
RÈGLES GÉNÉRALES DE SÉCURITÉ
LISTE DES PIÈCES
DÉMONTAGE ET NETTOYAGE
DIRECTIVES POUR L’ASSEMBLAGE
MODE D’EMPLOI
TYPES DE TRANCHES
INFORMATION SUR LA GARANTIE
3
4
5
5
6
7
8
10
11
12
12
13
14
16
18
19
20
20
21
22
23

1. NEVER push the product with your hands in line of the Blade when slicing.
ALWAYS use the Food Pusher.
2. NEVER use ngers to scrape food away from the Blade.
3. Close supervision is necessary when used near children. The Mandoline Slicer
is NOT to be used by children.
4. Before using the Slicer, check that all parts are operating properly and
perform the intended functions.
5. The manufacturer declines any responsibility in the case of improper use of
this unit.
6. NEVER use any accessories or parts from other manufacturers. Doing so will
VOID YOUR WARRANTY and may cause injury.
7. Be sure the Mandoline Slicer is stable during use. Both Front and Rear
Stands should be securely on the work surface.
8. DO NOT use this Mandoline Slicer for frozen foods or anything other than
food stuffs.
9. Protective/cut-resistant Kevlar Gloves are recommended whenever
handling the Blades.
10. DO NOT use the Mandoline Slicer while under the inuence of drugs or
alcohol.
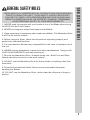
GENERAL SAFETY RULES
READ AND FULLY UNDERSTAND ALL INSTRUCTIONS AND WARNINGS
PRIOR TO USING THIS UNIT. YOUR SAFETY IS MOST IMPORTANT!
FAILURE TO COMPLY WITH PROCEDURES AND SAFE GUARDS MAY
RESULT IN SERIOUS INJURY OR PROPERTY DAMAGE. REMEMBER:
YOUR PERSONAL SAFETY IS YOUR RESPONSIBILITY!
3
ENGLISH INSTRUCTIONS

ENGLISH INSTRUCTIONS
4
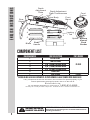
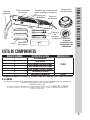
COMPONENT LIST
DIAGRAM NUMBER PART DESCRIPTION PART NUMBER
1 SLICING BLADE*
01-0020
2 WAFFLE BLADE
3 3/16” (5 MM) JULIENNE BLADE
4 5/16” (7 MM) JULIENNE BLADE
5 7/16” (10 MM) JULIENNE BLADE
6 BLADE CASE
7 FOOD PUSHER 01-0021
6
Depth
Adjustment
Plate
Depth Adjustment
Plate Thumbscrews
2
1
5
4
3
Blade
Handle
Locking
Tab
Front
Stand
Rear
Stand
Blade
Bottom
View of
Food
Pusher
Blade
Slicer Body
Food
Pusher
Spikes
WARNING
SHARP BLADES
KEEP FINGERS CLEAR OF BLADE AREA!
Protective/cut-resistant gloves recommended whenever
handling the Blades!
*SLICING BLADE ALSO SOLD SEPARATELY AS PART NUMBER 01-0007 (COMES WITH BLADE CASE)
If any components of this unit are broken, the unit does not operate properly or you
need a replacement instruction manual, visit us on the web at
WestonProducts.com
Or call Weston Brands LLC Toll Free at 1-800-814-4895
Monday thru Friday 8:00am-5:00pm ET. Outside the U.S. call 001-440-638-3131

5
ENGLISH INSTRUCTIONS
Cleaning your Mandoline Slicer should be done immediately after use to prevent
food from drying on the parts. The Slicer Body should be washed by hand in warm
soapy water, rinsed, then dried immediately. Lightly oil the Slicer Body with a food
safe lubricant before storing.
The Blades and the Hand Guard/Food Pusher can be washed in the top rack of a
dishwasher. Carefully position these pieces where they won’t cut or damage other
utensils.
CAUTION: If hand washing the Blades and underside of Hand Guard/Food Pusher,
always wipe AWAY from Blade edges. These surfaces are extremely sharp and can
cause severe injury!
1. When nished slicing, remove any remaining material from the Hand Guard/Food
Pusher.
2. Remove the Slicing Blade by holding on to the Handle and depressing the Locking
Tab. Be careful during Blade removal as the Blade is sharp! Remember to always
hold Blade by the handle.
3. If using a Julienne Blade in addition to the Slicer Blade, remove the Julienne
Blade by holding on to the handle and carefully sliding it out of the Slicer Body.
CAUTION: Once Blades are removed, DO NOT immerse them in water!
4. Completely remove the Depth Adjustment Plate Thumb Screws. Once the Thumb
Screws are removed, the Depth Adjustment Plate should slide out of the bottom of
the Slicer Body.
5. If desired, the Front and Rear Stands can also be removed by simply squeezing
the ends of the Stand together and removing from mounting holes.
CLEANING & DISASSEMBLY
It is recommended that the Vegetable Slicer be thoroughly washed prior to use!
1. Using a at and sturdy work platform, unfold the Front and Rear Stands of the Slicer
Body. Position the Vegetable Slicer with the Rear Stand closest to you.
2. To insert your Blade of choice, carefully remove the Blade from holder, holding it by
the Blade Handle. The arrow should be pointing to the right of the Locking Tab facing
up. Slide it into the right-hand side of the Slicer Body pushing it all the way in until it
latches into place.
3. If using a Julienne Blade in conjunction with the Straight Edge Slicing Blade, install
the Straight Edge Slicing Blade rst, then install the Julienne Blade by holding it by the
Blade Handle. Firmly slide it into right hand side of the Slicer Body pushing it all the way
in until in place.
NOTE: Only use Julienne Blades with the Straight Edge Slicing Blade. Do not use them
with the Wafe Blade.
4. Once Blade(s) are installed, loosen the Depth Adjustment Plate Thumb Screws on
both sides of the Slicer Body and slide the Depth Adjustment Plate to the desired slicing
thickness, then secure into place by tightening the Depth Adjustment Plate Thumb
Screws.
CAUTION: When moving Depth Adjustment Plate, hold Depth Adjustment Plate by the
end farthest away from the Blades to avoid injury.
ASSEMBLY INSTRUCTIONS

6
ENGLISH INSTRUCTIONS
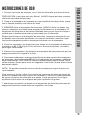
DIRECTIONS FOR USE
1. Install the Blade(s) according to the type of slicing you plan on doing.
2. Position the Vegetable Slicer on a steady, at working surface, with the Rear
Stand is closest to you.
3. ALWAYS use the Food Pusher. NEVER use your ngers, hands or other
objects to push the food on the Slicer! The Food Pusher is designed so that it will
not touch the Blades as you slide it up and down the face of the Slicer.
There are two arrows on the Food Pusher. Always make sure that these arrows
are pointing down the face of the Slicer, toward the Blades. The elongated edges
help keep it aligned on Slicer.
4. Cut vegetable/fruit to t the width of the Food Pusher, 3-7/8” (9.8 cm) wide is
the maximum. Trim tips and stems for uniformity.
5. Press the vegetable/fruit onto the Food Pusher so that the Spikes pierce into
the vegetable/fruit.
6. To make slices, hold the knob on top of the Food Pusher and slide it DOWN
the Vegetable Slicer and over the Slicing Blade(s). REMEMBER to always slice
away from yourself! Use smooth, steady strokes to cut the vegetables/fruits.
Never attempt to cut too quickly.
NOTE: Several test cuts may be needed to achieve the desired cutting
thickness.
To adjust thickness, loosen the Depth Adjustment Plate Thumb Screws on both
sides of the Slicer Body and slide the Depth Adjustment Plate to the desired
slicing thickness, then secure into place by tightening the Depth Adjustment
Plate Thumb Screws.
7. Maintain constant pressure on the Food Pusher so that the Spikes continue to
hold the vegetable/fruit.

DIRECTIONS FOR USE
7
ENGLISH INSTRUCTIONS
JULIENNE BLADES
The three Julienne Blades that come with the Vegetable Slicer have the
following thicknesses – 3/16”, 5/16”, and 7/16”. The more teeth on the Blade, the
THINNER the sticks of vegetable/fruit will be. The less teeth on the Blade, the
THICKER the sticks of vegetable/fruit will be .
Only use the Julienne Blades with the Straight Edge Slicing Blade. Do not use
them with the Wafe Blade.
• Cut the vegetables/fruit in sections corresponding to the desired
length of the julienne strips (approximately 3”-6” (7.6 - 15.2 cm) long).
• Place the vegetable/fruit lengthwise onto the Food Pusher Spikes.
SMOOTH BLADE
This is the Vegetable Slicer’s main Blade and features a straight edge for basic
slicing.
The straight edge of the Smooth Blade is ideal for slicing a variety of foods from
carrots and cabbage to lemons and potatoes.
• For straight cuts, place the vegetable/fruit either endwise or
lengthwise onto the Food Pusher Spikes.
WAFFLE BLADE
The Wafe Blade creates crinkle and wafe cuts, and is easy to use with any fruit/
vegetable. A crinkle cut requires only one pass over the Blade.
WAFFLE CUTS
For a wafe cut, the key is to adjust the height of the Depth Adjustment Plate so
that the slices are only slightly thicker than the serrated edge of the Blade.
• Once you adjust the thickness of the Depth Adjustment Plate, place
the food onto the Food Pusher Spikes and make a pass over the
Blade.
• Next, rotate the vegetable/fruit 90
o
and make a second pass
over the Blade to complete the cut. This rotation will create an
opposing crinkle cut on each side of the vegetable/fruit.
TYPES OF SLICES

Weston Brands LLC warrants to the ORIGINAL RETAIL PURCHASER of this product that if operated in accordance
with the printed instruction accompanying it, then for a period of 2 years from the date of purchase, the product shall be
free from defects in material and workmanship.
The Warranty Card, along with a copy of the original receipt, must be received by Weston Brands LLC within 30 days
from purchase date for the warranty to apply. Failure to send the completely lled out Warranty Card, along with a copy of
the original receipt, will void the warranty.
The product must be delivered to or shipped freight prepaid to Weston Brands LLC for warranty services, in either
its original packaging or similar packaging affording an equal degree of protection. Damage due to shipping is not the
responsibility of the company. Weston Brands LLC charges a $35.00 per hour bench charge. NOTE: No repairs will
be started without the authorization of the customer. The return shipping cost to the customer will be added to the repair
invoice.
Prior to returning the product for Warranty Repair, the product must be thoroughly cleaned and free from any food
particles or other debris. Failure of the purchaser to comply with this standard will result in the unit being returned without
repair. In some cases, a $50 cleaning surcharge may apply.
Weston Brands LLC will repair (or at its discretion, replace) the product free of charge, if in the judgment of the
company, it has been proven to be defective as to seller’s labor and material, within the warranty period.
New or rebuilt replacements for factory defective parts will be supplied for two (2) year from the date of purchase.
Replacement parts are warranted for the remainder of the original warranty period.
For non-warranty repairs, contact Weston Brands LLC’s Customer Service at 1-800-814-4895 M-F 8am-5pm ET
(outside of the United States 001-440-638-3131) to obtain a Return Merchandise Authorization Number (RMA Number).
Weston Brands LLC will refuse all returns that do not contain this number. DO NOT RETURN THE UNIT WITHOUT
PROPER AUTHORIZATION FROM WESTON BRANDS LLC.
LIMITATIONS: The warranty is void if the product is used for any purpose other than that for which it is designed.
The product must not have been previously altered, repaired, or serviced by anyone else other than Weston Brands
LLC. If applicable, the serial number must not have been altered or removed. The product must not have been subjected
to accident in transit or while in the customer’s possession, misused, abused, or operated contrary to the instructions
contained in the instruction manual. This includes failure caused by neglect of reasonable and necessary maintenance,
improper line voltage and acts of nature. This warranty is not transferable and applies only to U.S. and Canadian sales.
Except to the extent prohibited by applicable law, no other warranties whether expressed or implied, including
warranty merchantability and tness for a particular purpose, shall apply to this product. Under no circumstances shall
Weston Brands LLC be liable for consequential damages sustained in connection with said product and Weston Brands
LLC neither assumes nor authorizes any representative or other person to assume for it any obligation or liability other than
such as is expressly set forth herein. Any applicable implied warranties are also limited to the two (2) year period of the
limited warranty.
This warranty covers only the product and its specic parts, not the food or other products processed in it. Weston is
not responsible for missing or damaged parts on discounted/clearance, resale or nal sale items where the seller may not
be able to guarantee full functionality or completeness of the unit.
CUT ALONG THE DOTTED LINE AND SEND THE WARRANTY CARD ALONG WITH A COPY OF YOUR
ORIGINAL PURCHASE RECEIPT TO:
Weston Brands LLC / WARRANTY
20365 Progress Drive, Strongsville, OH 44149 USA
Customer Name:
Address:
City/State/Zip/Country:
Telephone Number:
E-Mail Address:
Original Date of Purchase:
Product Model #:
Serial # (if applicable):
I have read the warranty information. Initial here:
WESTON WARRANTY INFORMATION
SAVE THIS WARRANTY INFORMATION FOR YOUR RECORDS!
WESTON WARRANTY CARD
SEND THIS CARD ALONG WITH A COPY OF YOUR ORIGINAL PURCHASE RECEIPT TO:
WESTON BRANDS LLC / WARRANTY, 20365 PROGRESS DRIVE, STRONGSVILLE, OH 44149 USA
Copy of Receipt
Included

REBANADORA MANDOLINA
DE VEGTALES
01-0006-W
DEBIDO A CONSTANTES MEJORAS EN LA FÁBRICA, EL PRODUCTO QUE SE MUESTRA
PUEDE SER LIGERAMENTE DIFERENTE DEL PRODUCTO EN ESTA CAJA. 061015

10
INSTRUCCIONES EN ESPAÑOL
1. NUNCA empuje el producto con las manos en la línea de la hoja cuando se
encuentre rebanando. SIEMPRE utilice el empujador de alimentos.
2. NUNCA utilice sus dedos para quitar los alimentos de la hoja.
3. Se necesita una supervisión estricta cuando se utiliza cerca de los niños. La
Rebanadora Mandolina NO es para uso de los niños.
4. REVISE SI HAY PARTES DAÑADAS. Antes de utilizar la rebanadora, verique
que todas las piezas funcionen correctamente y cumplan sus funciones.
5. El fabricante no se hace responsable por el uso inadecuado de esta unidad.
6. NUNCA utilice ningún accesorio o pieza de otro fabricante. Utilizar una pieza
de otro fabricante ANULARÁ LA GARANTÍA y podría provocar lesiones.
7. Asegúrese de que la Rebanadora Mandolina esté estable durante el
uso. Tanto los soportes delanteros como los posteriores deben encontrarse
rmemente apoyados sobre la supercie de trabajo.
8. NO utilice la Rebanadora Mandolina para alimentos congelados ni para otra
cosa que no sea alimentos.
9. Se recomienda el uso de guantes Kevlar protectores o resistentes a los cortes
cuando maneje las hojas.
10. NO utilice la Rebanadora Mandolina bajo los efectos de drogas o alcohol.
NORMAS GENERALES DE SEGURIDAD
LEA Y COMPRENDA TODAS LAS INSTRUCCIONES Y ADVERTENCIAS
ANTES DE USAR ESTA UNIDAD. ¡SU SEGURIDAD ES PRIMORDIAL! NO
CUMPLIR CON LOS PROCEDIMIENTOS Y LAS MEDIDAS DE SEGURIDAD
PUEDE OCASIONAR LESIONES GRAVES O DAÑOS MATERIALES.
RECUERDE: ¡USTED TIENE LA RESPONSABILIDAD SOBRE SU
SEGURIDAD PERSONAL!
¡GUARDE ESTAS INSTRUCCIONES!

11
INSTRUCCIONES EN ESPAÑOL
LISTA DE COMPONENTES
NÚMERO DE DIAGRAMA DESCRIPCIÓN DE LA PIEZA NÚMERO DE PIEZA
1 HOJA REBANADORA
01-0020
2 HOJA REJILLA
3 HOJA JULIANA 3/16 PULG. (5 MM)
4 HOJA JULIANA 5/16 PULG. (7 MM)
5 HOJA JULIANA 7/16 PULG. (10 MM)
6 RECIPIENTE DE LA HOJA
7 EMPUJADOR DE ALIMENTOS 01-0021
6
2
1
5
4
3
Manivela
de la hoja
Pestaña
de
bloqueo
Soporte
delantero
Hoja
Vista de
la parte
posterior del
empujador de
alimentos
Hoja
Empujador
de alimentos
Espigones
Plato ajustador
de grosor
Tornillos de mariposa del
plato ajustador de grosor
Soporte
posterior
Cuerpo del
rebanador
*REBANAR HOJA TAMBIÉN SE VENDEN POR SEPARADO COMO PARTE NÚMERO 01-0007 (VIENE CON LA CAJA
DE LA LÁMINA)
Si cualquier componente de esta unidad está roto, si no funciona debidamente, o si necesita un
instructivo de repuesto, visítenos en la Web en
WestonProducts.com
O llame a Weston Brands LLC larga distancia sin costo 1-800-814-4895
De lunes a viernes, de 8:00 am a 5:00 pm tiempo del ET. Fuera de Estados Unidos llame
al 001-440-638-3131

12
INSTRUCCIONES EN ESPAÑOL
Debe limpiar la Rebanadora Mandolina inmediatamente después de su uso para evitar
que los alimentos se sequen en las piezas. El cuerpo del rebanador debe lavarse a mano
en agua caliente con jabón, enjuagarse y luego secarse de inmediato. Aceite ligeramente
el cuerpo del rebanador con un lubricante inocuo para alimentos antes de guardarlo.
Las hojas y el protector para la mano y empujador de alimentos pueden limpiarse en la
rejilla superior del lavavajillas. Coloque cuidadosamente estas piezas donde no corten ni
dañen otros utensilios.
PRECAUCIÓN: Si lava a mano las hojas y la parte inferior del protector para manos y
el empujador de alimentos, siempre seque en dirección HACIA AFUERA de los bordes
de las hojas. ¡Estas supercies son extremadamente losas y pueden causar lesiones
graves!
1. Cuando termine de rebanar, retire todo material del protector para manos y empujador
de alimentos.
2. Retire la hoja rebanadora sosteniendo la manivela y hundiendo la pestaña de bloqueo.
¡Tenga cuidado cuando retire la hoja, ya que la hoja es losa! Recuerde siempre sostener
la hoja por la manivela.
3. Si utiliza la hoja juliana además de la hoja rebanadora, retire la hoja juliana sosteniendo
la manivela y deslizándola de manera cuidadosa fuera del cuerpo del rebanador.
PRECAUCIÓN: ¡Una vez que las hojas se retiran, NO las sumerja en agua!
4. Retire por completo los tornillos de mariposa del plato ajustador de grosor. Una vez que
los tornillos de mariposa se hayan retirado, el plato ajustador de grosor debería deslizarse
hacia afuera de la parte inferior del cuerpo del rebanador.
5. Si lo desea, los soportes delanteros y los posteriores también pueden quitarse,
simplemente al apretar los extremos de los soportes juntos y quitarlos de los oricios de
montaje.
LIMPIEZA Y DESARMADO
¡Se recomienda lavar de manera cuidadosa el rebanador de vegetales antes de utilizarlo!
1. Utilice una plataforma de trabajo plana y fuerte, despliegue los soportes delanteros y
posteriores del cuerpo del rebanador. Coloque el rebanador de vegetales con el soporte
posterior más cerca de usted.
2. Para introducir la hoja de su elección, retire cuidadosamente la hoja del sujetador,
sosteniéndola por la manivela de la hoja. La echa debería apuntar a la derecha de la
pestaña de bloqueo boca arriba. Deslícela en el lado derecho del cuerpo del rebanador
empujándola hasta el fondo hasta que encaje en su lugar.
PRECAUCIÓN: ¡Las hojas son muy losas! ¡NUNCA toque las hojas, siempre utilice las
manivelas de las hojas!
3. Si utiliza la hoja juliana junto con la hoja para rebanar con borde derecho, coloque la
hoja para rebanar con borde derecho primero, luego coloque la hoja juliana sosteniéndola
por la manivela de la hoja. Deslícela en el lado derecho del cuerpo del rebanador
empujándola hasta el fondo hasta que se ajuste en el lugar.
NOTA: Utilice las hojas juliana solo con la hoja para rebanar con bordes derechos. No las
utilice con la hoja rejilla.
4. Una vez que las hojas se encuentren instaladas, aoje los tornillos de mariposa del
plato ajustador de grosor en ambos lados del cuerpo del rebanador y deslice el plato
ajustador de grosor al grosor de rebanado que desee, luego asegúrelo en el lugar
ajustando los tornillos de mariposa del plato ajustador de grosor.
PRECAUCIÓN: Cuando mueva el plato ajustador de grosor, sosténgalo por el extremo
más lejano a las hojas para evitar lesiones.
INSTRUCCIONES DE ENSAMBLADO

13
INSTRUCCIONES EN ESPAÑOL
LIMPIEZA Y DESARMADO
INSTRUCCIONES DE ENSAMBLADO
INSTRUCCIONES DE USO
1. Coloque las hojas de acuerdo con el tipo de rebanado que planea hacer.
PRECAUCIÓN: ¡Las hojas son muy losas! ¡NUNCA toque las hojas, siempre
utilice las manivelas de las hojas!
2. Coloque el rebanador de vegetales en una supercie de trabajo rme, plana,
con el soporte posterior más cerca de usted.
3. SIEMPRE utilice el empujador de alimentos. ¡NUNCA utilice los dedos, las
manos o cualquier otro objeto para empujar los alimentos en el rebanador! El
empujador de alimentos se encuentra diseñado para que no toque las hojas a
medida que lo desliza hacia arriba y hacia abajo por el rebanador.
Existen dos echas en el empujador de alimentos. Asegúrese siempre de que
las echas se encuentren apuntando a la cara del rebanador, hacia las hojas.
Los bordes alargados ayudan a mantenerlo alineado con el rebanador.
4. Corte los vegetales o las frutas para que entren en el empujador de alimentos;
el máximo es de 3-7/8 pulg (9,8 cm) de ancho. Recorte las puntas y los tallos
para lograr uniformidad.
5. Presione los vegetales o las frutas en el empujador de alimentos para que los
espigones perforen el vegetal o la fruta.
6. Para hacer rebanadas, sostenga la perilla en la parte superior del empujador
de alimentos y deslícela hacia ABAJO en el rebanador de vegetales y sobre las
hojas rebanadoras. ¡RECUERDE siempre rebanar alejándose de usted! Utilice
cortes suaves y rmes para cortar los vegetales o las frutas. Nunca intente cortar
demasiado rápido.
NOTA: Se pueden necesitar varios cortes de prueba para lograr el grosor de
corte deseado.
Para ajustar el grosor, aoje los tornillos de mariposa del plato ajustador de
grosor en ambos lados del cuerpo del rebanador y deslice el plato ajustador
de grosor al grosor de rebanado que desee, luego asegúrelo en el lugar
ajustando los tornillos de mariposa del plato ajustador de grosor.
7. Mantenga una presión constante en el empujador de alimentos para que los
espigones continúen sosteniendo los vegetales o las frutas.

14
INSTRUCCIONES EN ESPAÑOL
HOJAS JULIANA
Las tres hojas juliana que vienen con el rebanador de vegetales cuentan con el
grosor siguiente: 3/16 pulg, 5/16 pulg y 7/16 pulg. Cuantos más dientes haya en
la hoja, MÁS FINO será el corte del vegetal o de la fruta. Cuantos menos dientes
haya en la hoja, MÁS GRUESO será el corte del vegetal o de la fruta.
Utilice la hoja juliana solo con la hoja para rebanar con bordes derechos. No las
utilice con la hoja rejilla.
• Corte los vegetales o las frutas en secciones correspondientes al largo
deseado de las tiras juliana (aproximadamente de 3 a 6 pulg [de 7,6 a
15,2 cm] de longitud).
• Coloque el vegetal o la fruta de manera longitudinal en los espigones
del empujador de alimentos.
HOJA LISA
Esta es la hoja principal del rebanador de vegetales y presenta un borde derecho
para un rebanado básico.
El borde derecho de la hoja lisa es perfecto para rebanar una gran variedad de
alimentos, desde zanahorias y repollo hasta limones y papas.
• Para cortes derechos, coloque el vegetal o la fruta, ya sea en el
extremo o de manera longitudinal en los espigones del empujador de
alimentos.
HOJA REJILLA
La hoja rejilla crea cortes rejilla y corrugados y es fácil de usar con cualquier fruta
o vegetal. Un corte corrugado requiere solo de un pase por sobre la hoja.
CORTES REJILLA
Para un corte rejilla, la clave es ajustar la altura del plato ajustador de grosor para
que las rebanadas sean solo un poco más gruesas que los bordes dentados de
la hoja.
• Una vez que haya ajustado el grosor del plato ajustador de grosor,
coloque el alimento en los espigones del empujador de alimentos y
haga un pase por sobre la hoja.
• Luego, gire el vegetal o la fruta 90° y haga un segundo pase por sobre
la hoja para completar el corte. Este giro creará un corte corrugado
opuesto en cada lado del vegetal o de la fruta.
TIPOS DE CORTES

TIPOS DE CORTES

Weston Brands LLC garantit à l’ACHETEUR AU DÉTAIL D’ORIGINE de ce produit contre tout défaut en matériau
et en main-d’œuvre pendant un (1) an a partir de la date d’achat à condition qu’il soit utilisé conformément aux
directives imprimées qui y sont jointes.
La Carte de Garantie, avec une copie du reçu original, doivent être reçus par Weston Brands LLC dans les trente
(30) jours à partir de la date d’achat pour que la garantie puisse s’appliquer. Le manque d’envoyer la Carte de
Garantie complètement remplie avec une copie du reçu original annulera la garantie.
Le produit doit être livré à ou expédié franco de port à Weston Brands LLC pour les services de garantie, soit dans
son emballage d’origine ou un emballage similaire offrant un degré de protection équivalent. Les dommages causés
par l’expédition ne sont pas la responsabilité de la société. Weston Brands LLC charge 35,00 $ par heure pour frais
de service. REMARQUE : Aucune réparation ne sera commencée sans l’autorisation du client. Les frais d’expédition
de retour seront ajoutés à la facture de réparation.
Avant de renvoyer le produit pour une réparation sous garantie, bien nettoyer le produit pour qu’il soit exempt de
toute particule alimentaire ou autres débris. Si l’acheteur ne respecte pas cette consigne, le produit lui sera renvoyé
sans avoir été réparé. Dans certains, la somme de 50 dollars sera facturée pour le nettoyage.
Weston Brands LLC réparera (ou à sa discrétion, remplacera) le produit sans frais, si à l’opinion de la société, il a
été prouvé être défectueux en matériau et en main d’œuvre dans la période de garantie.
Des remplacements neufs ou remis en état pour les pièces d’usine défectueuses seront fournis pendant un (1)
an à partir de la date d’achat. Les pièces de remplacement sont garanties pour le reste de la période de garantie
originale.
Pour les réparations non garanties, veuillez contacter le Service à la clientèle de Weston Brands LLC au numéro
sans frais 1-800-814-4895, du lundi au vendredi, de 8h00 à 17h00 ET (en dehors des États-Unis : 001-440-638-
3131) pour obtenir une Autorisation de retour d’article (Numéro RMA). Weston Brands LLC refusera tous les retours
qui ne contiennent pas ce numéro. NE PAS RENVOYER CET APPAREIL SANS L’AUTORISATION CORRECTE
DE Weston Brands LLC.
LIMITATIONS : La garantie est annulée si le produit est utilisé pour toute raison autre que pour laquelle il est
conçu. Le produit ne doit pas avoir été antérieurement modié, réparé, ou entretenu par quelqu’un autre que
Weston Brands LLC. Le cas échéant, le numéro de série ne doit pas être modié ou enlevé. Le produit ne doit pas
avoir été soumis à un accident en transit ou pendant qu’il est en la possession du client, mal utilisé, mal traité, ou
utilisé contrairement aux directives contenues dans le manuel d’utilisation. Ceci comprend la défaillance causée
par la négligence d’un entretien raisonnable et nécessaire, une tension de secteur incorrecte et des catastrophes
naturelles. Cette garantie n’est pas transférable et s’applique seulement aux ventes américaines et canadiennes.
À l’exception des cas où la loi en vigueur l’interdit, aucune autre garantie, expresse ou implicite, y compris les
garanties relatives au caractère adéquat pour la commercialisation ou un usage particulier, ne s’appliquera à ce
produit. Weston Brands LLC ne sera en aucun cas responsable des dommages indirects liés au dit produit et
Weston Brands LLC n’a aucune obligation ni responsabilité autre que celles expressément établies dans la présente,
et n’autorise aucun représentant ou autre personne à les assumer pour lui. Toutes garanties implicites applicables
sont aussi limitées à la période d’un (1) an de la garantie limitée.
Cette garantie couvre seulement le produit et ses pièces spéciques, pas les aliments ou autres produits traités
dans celui-ci. Weston n’est pas responsable des pièces manquantes ou endommagées pour les articles réduits/
en solde ou les articles naux de vente où le vendeur peut ne pas être en mesure de garantir l’ensemble de la
fonctionnalité ou l’intégralité de l’unité.
DÉCOUPEZ LE LONG DE LA LIGNE POINTILLÉE ET ENVOYEZ CETTE CARTE DE GARANTIE AVEC UNE
COPIE DE VOTRE REÇU D’ACHAT ORIGINAL À :
Weston Brands LLC / WARRANTY
20365 Progress Drive, Strongsville, OH 44149 USA
INFORMATION SUR LA GARANTIE
CONSERVEZ CETTE INFORMATION SUR LA GARANTIE POUR VOS DOSSIERS!
Nom du Client:
Adresse:
Province/Code postal/Région:
Numéro de téléphone:
Adresse de courrier électronique:
Date d’achat d’origine:
No de modèle du produit:
No de série (s’il y a lieu):
J’ai lu les informations relatives à la garantie. Initiales ici:
CARTE DE GARANTIE
ENVOYEZ CETTE CARTE DE GARANTIE AVEC UNE COPIE DE VOTRE REÇU D’ACHAT ORIGINAL À:
WESTON BRANDS LLC / WARRANTY, 20365 PROGRESS DRIVE, STRONGSVILLE, OH 44149 USA
Copie du reçu incluse

MANDOLINE ET TRANCHEUS
À LÉGUMES
01-0006-W
DEBIDO A CONSTANTES MEJORAS EN LA FÁBRICA, EL PRODUCTO QUE SE MUESTRA
PUEDE SER LIGERAMENTE DIFERENTE DEL PRODUCTO EN ESTA CAJA. 061015

1. NE JAMAIS pousser le produit en plaçant les mains dans la ligne de la
lame au moment de trancher. Il faut TOUJOURS utiliser le poussoir.
2. NE JAMAIS enlever les aliments de la lame avec les doigts.
3. Une surveillance étroite est nécessaire lorsque l’ensemble est utilisé à
proximité des enfants. La mandoline NE doit PAS être utilisée par les enfants.
4. VÉRIFIER SI DES PIÈCES SONT ENDOMMAGÉES. Avant d’utiliser
la trancheuse, vérier si toutes les pièces fonctionnent correctement et
remplissent les fonctions prévues.
5. Le fabricant décline toute responsabilité en cas d’une utilisation
inappropriée de cet appareil.
6. NE JAMAIS utiliser d’accessoires ou de pièces provenant d’un autre
fabricant. Ceci ANNULERA LA GARANTIE de l’appareil et pourrait entraîner des
blessures.
7. Assurer la stabilité de la mandoline pendant l’utilisation. Les supports avant
et arrière doivent être bien xés sur la surface de travail.
8. NE PAS utiliser la mandoline pour les aliments congelés ou autres choses
que des produits alimentaires.
9. Il est conseillé de porter des gants de protection anti-coupures en Kevlar
lors de la manipulation des lames.
10. NE PAS utiliser la mandoline sous l’inuence de drogues ou d’alcool.
CONSERVER CES INSTRUCTIONS!
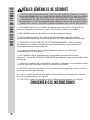
RÈGLES GÉNÉRALES DE SÉCURITÉ
LIRE ET BIEN COMPRENDRE TOUTES LES INSTRUCTIONS ET TOUS
LES AVERTISSEMENTS AVANT DE SE SERVIR DE CETTE UNITÉ. VOTRE
SÉCURITÉ EST CE QUI COMPTE LE PLUS! SI CES PROCÉDURES ET
CONSIGNES DE SÉCURITÉ NE SONT PAS RESPECTÉES, DE GRAVES
BLESSURES ET DES DOMMAGES MATÉRIELS PEUVENT EN RÉSULTER.
RAPPELEZ-VOUS: VOUS ÊTES RESPONSABLE DE VOTRE SÉCURITÉ!
INSTRUCTIONS EN FRANÇAIS
18

INSTRUCTIONS EN FRANÇAIS
19
LISTE DES PIÈCES
NUMÉRO DE SCHÉMA DESCRIPTION DE LA PIÉCE NUMÉRO DE LA PIÉCE
1 LAME À TRANCHER
01-0020
2 LAME À GAUFRER
3 LAME POUR COUPE JULIENNE 3/16 PO (5 MM)
4 LAME POUR COUPE JULIENNE 5/16 PO (7 MM)
5 LAME POUR COUPE JULIENNE 7/16 PO (10 MM)
6 ÉTUI À LAME
7 POUSSOIR 01-0021
6
Plaque d’ajustement
de la profondeur
Vis de serrage pour la
plaque d’ajustement
de la profondeur
2
1
5
4
3
Poignée
de lame
Patte de
sécurité
Support
avant
Support
arrière
Lame
Vue
inférieure
du
poussoir
Lame
Corps de la trancheuse
Poussoir
Aiguilles
N’hésitez pas à visiter notre site Web WestonProduct.com/support si un composant est cassé, l’outil
fonctionne mal, ou pour commander un nouveau mode d’emploi.
WestonProducts.com
Veuillez appeler Weston Brands, LLC au numéro sans frais : 1-800-814-4895
Du lundi au vendredi: de 8h00 à 17h00 ET. En dehors des États-Unis, veuillez
appeler le 001-440-638-3131
*TRANCHAGE LAME ÉGALEMENT VENDU SÉPARÉMENT COMME ÉLÉMENT NUMÉRO 01-0007 (VIENT AVEC LE
CAS DE LA LAME)

INSTRUCTIONS EN FRANÇAIS
20
La mandoline doit être nettoyée immédiatement après usage pour empêcher les
aliments de sécher à la surface des pièces. Le corps de la trancheuse doit être lavé à la
main dans de l’eau chaude savonneuse, puis rincé et séché immédiatement. Lubrier
légèrement le corps de la trancheuse avec un lubriant alimentaire avant de la ranger.
Les lames et le protège-main/poussoir peuvent être lavés sur le râtelier supérieur du
lave-vaisselle. Placer soigneusement ces pièces de sorte qu’elles ne coupent pas, ni
n’endommagent les autres ustensiles.
MISE EN GARDE : Si les lames ainsi que le protège-main/poussoir sont lavés à la
main, essuyer en vous ÉLOIGNANT du tranchant des lames. Ces surfaces sont très
tranchantes et peuvent causer des blessures graves!
1. Une fois que vous avez terminé, retirer tout matériel restant sur le protège-main/
poussoir.
2. Retirer la lame en tenant la poignée et en appuyant sur la patte de sécurité. Faire
attention pendant que la lame est retirée, car elle est très tranchante! Ne pas oublier de
tenir la lame par la poignée.
3. Si une lame pour coupe julienne est utilisée en plus de la lame de la trancheuse,
retirer la lame pour coupe julienne en tenant la poignée et la glisser délicatement hors du
corps de la trancheuse.
MISE EN GARDE : Une fois que les lames sont retirées, NE PAS les plonger dans
l’eau!
4. Retirer complètement les vis de serrage de la plaque d’ajustement de la profondeur.
Une fois que les vis de serrage sont retirées, la plaque d’ajustement de profondeur
devrait sortir en glissant hors du corps de la trancheuse.
5. Si nécessaire, les supports avant et arrière peuvent aussi être retirés en serrant les
extrémités du support ensemble et en les sortant des trous de montage.
DÉMONTAGE ET NETTOYAGE
Il est conseillé de bien nettoyer la trancheuse à légumes avant de l’utiliser!
1. Utiliser une plateforme de travail plane et solide, déplier les supports avant et
arrière du corps de la trancheuse. Positionner la trancheuse à légumes avec le
support arrière plus près de vous.
2. Pour insérer la lame de votre choix, retirer délicatement la lame du support, en
la tenant par la poignée de la lame. La èche doit pointer à droite de la patte de
sécurité tournée vers le haut. Glisser dans le côté droit du corps de la trancheuse en
poussant jusqu’au fond jusqu’à ce qu’il s’enclenche en place.
MISE EN GARDE : Les lames sont très tranchantes! NE JAMAIS toucher la lame,
utiliser toujours les poignées de lame!
3. Si une lame pour coupe julienne est utilisée en conjonction avec une lame à
bord droit, installer d’abord la lame à bord droit, puis installer la lame pour coupe
julienne en les tenant par la poignée de la lame. Glisser dans le côté droit du corps
de la trancheuse en poussant jusqu’au fond jusqu’à ce qu’elle s’enclenche en place.
REMARQUE : Utiliser uniquement les lames pour coupe julienne avec la lame à
bord droit. Ne pas les utiliser avec la lame à gaufrer.
4. Une fois que la ou les lames sont installées, desserrer les vis de serrage de la
plaque d’ajustement de la profondeur sur les deux côtés du corps de la trancheuse
et glisser la plaque d’ajustement de profondeur à l’épaisseur de coupe désirée,
ensuite xer en place en serrant les vis de serrage de la plaque d’ajustement de la
profondeur.
MISE EN GARDE : Tenir la plaque d’ajustement de la profondeur par son extrémité
la plus éloignée des lames pour la déplacer et ainsi éviter les blessures.
DIRECTIVES POUR L’ASSEMBLAGE
A página está carregando...
A página está carregando...
A página está carregando...
A página está carregando...
-
 1
1
-
 2
2
-
 3
3
-
 4
4
-
 5
5
-
 6
6
-
 7
7
-
 8
8
-
 9
9
-
 10
10
-
 11
11
-
 12
12
-
 13
13
-
 14
14
-
 15
15
-
 16
16
-
 17
17
-
 18
18
-
 19
19
-
 20
20
-
 21
21
-
 22
22
-
 23
23
-
 24
24


Weston 01-0006 Guia de usuario
- Categoria
- Fatiadores
- Tipo
- Guia de usuario
em outras línguas
- español: Weston 01-0006 Guía del usuario
- français: Weston 01-0006 Mode d'emploi
- English: Weston 01-0006 User guide