
Bedienungsanleitung/Garantie
Gebruiksaanwijzing/Garantie • Mode d’emploi/Garantie
Instrucciones de servicio/Garantía • Manual de instruções/Garantia
Istruzioni per l’uso/Garanzia • Bruksanvisning/Garanti
Instruction Manual/Guarantee • Instrukcja obsługi/Gwarancja
Návod k použití/Záruka • A használati utasítás/Garancia
Руководство по эксплуатации/Гарантия
AKS 826
Akkusauger
Accu-stofzuiger • Aspirateur à accus
Aspirador de baterías • Aspirador de acumuladores
Aspirator ricaricabile • Batteridrevet støvsuger
Battery Vacuum • Odkurzacz z akumulatorem
Akumulátorový vysavač • Akkumulátoros porszívó
Аккумуляторный пылесос
5....-05-AKS 826 18.06.2004 9:34 Uhr Seite 1

Inhalt
Inhoud • Sommaire • Indice • Índice • Indice • Innhold
Contents • Spis treści • Obsah • Tartalom • Содержание
D
Übersicht Bedienelemente . . . . . . . . . . . . . . . . . . . . . . . . . . . .Seite 3
Bedienungsanleitung . . . . . . . . . . . . . . . . . . . . . . . . . . . . . . . .Seite 4
Garantie . . . . . . . . . . . . . . . . . . . . . . . . . . . . . . . . . . . . . . . . . .Seite 6
NL
Overzicht bedieningselementen . . . . . . . . . . . . . . . . . . . . . . . .Pagina 3
Gebruiksaanwijzing . . . . . . . . . . . . . . . . . . . . . . . . . . . . . . . . .Pagina 8
Garantie . . . . . . . . . . . . . . . . . . . . . . . . . . . . . . . . . . . . . . . . . .Pagina 10
F
Aperçu des éléments de commande . . . . . . . . . . . . . . . . . . . .Page 3
Mode d’emploi . . . . . . . . . . . . . . . . . . . . . . . . . . . . . . . . . . . . .Page 12
Garantie . . . . . . . . . . . . . . . . . . . . . . . . . . . . . . . . . . . . . . . . . .Page 14
E
Vista de conjunto Elementos de mando . . . . . . . . . . . . . . . . .Página 3
Instrucciones de servicio . . . . . . . . . . . . . . . . . . . . . . . . . . . . .Página 16
Garantia . . . . . . . . . . . . . . . . . . . . . . . . . . . . . . . . . . . . . . . . . .Página 19
P
Vista geral dos elemntos de comando . . . . . . . . . . . . . . . . . .Página 3
Manual de instruções . . . . . . . . . . . . . . . . . . . . . . . . . . . . . . . .Página 20
Garantía . . . . . . . . . . . . . . . . . . . . . . . . . . . . . . . . . . . . . . . . . .Página 22
I Descrizione dei singoli pezzi . . . . . . . . . . . . . . . . . . . . . . . . .Pagina 3
Istruzioni per l’uso . . . . . . . . . . . . . . . . . . . . . . . . . . . . . . . . . .Pagina 24
Garanzia . . . . . . . . . . . . . . . . . . . . . . . . . . . . . . . . . . . . . .Pagina 27
N
Oversikt over betjeningselementer . . . . . . . . . . . . . . . . . . . . . .Side 3
Bruksanvisning . . . . . . . . . . . . . . . . . . . . . . . . . . . . . . . . . . . . .Side 28
Garanti . . . . . . . . . . . . . . . . . . . . . . . . . . . . . . . . . . . . . . . . . . .Side 30
GB
Control element overview . . . . . . . . . . . . . . . . . . . . . . . . . . . . .Page 3
Instruction Manual . . . . . . . . . . . . . . . . . . . . . . . . . . . . . . . . . .Page 32
Guarantee . . . . . . . . . . . . . . . . . . . . . . . . . . . . . . . . . . . . . . . .Page 34
PL
Przegląd elemetów obsługi . . . . . . . . . . . . . . . . . . . . . . . . . .Strona 3
Instrukcja obsługi . . . . . . . . . . . . . . . . . . . . . . . . . . . . . . . . . .Strona 36
Gwarancja . . . . . . . . . . . . . . . . . . . . . . . . . . . . . . . . . . . . .Strona 39
CZ
Přehled obsluhovací prvky . . . . . . . . . . . . . . . . . . . . . . . . . . .Strana 3
Návod k použití . . . . . . . . . . . . . . . . . . . . . . . . . . . . . . . . . . . .Strana 41
Záruka . . . . . . . . . . . . . . . . . . . . . . . . . . . . . . . . . . . . . . .Strana 43
H
A hasznalt elemek megtekintése . . . . . . . . . . . . . . . . . . . . . .Oldal 3
A hasznalati utasítás . . . . . . . . . . . . . . . . . . . . . . . . . . . . . . . .Oldal 45
Garancia . . . . . . . . . . . . . . . . . . . . . . . . . . . . . . . . . . . . . . . . . .Oldal 47
RUS
Обзор управляющих элементов . . . . . . . . . . . . . . . . . . . . .стр. 3
Руководство по эксплуатации . . . . . . . . . . . . . . . . . . . . . . .стр. 49
Гарантия . . . . . . . . . . . . . . . . . . . . . . . . . . . . . . . . . . . . . . . . . . .стр. 52
58908-05-AKS 826 22.02.2005 10:32 Uhr Seite 2

3
3
1
2
5
6
4
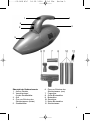
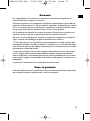
Übersicht der Bedienelemente
1. An/Aus Schalter
2. Verschlussknopf
für den Staubbehälter
3. Griff
4. Öse zum Einhaken des
Schulterriemens (hinten)
5. Staubbehälter
6. Öse zum Einhaken des
Schulterriemens (vorn)
7. Fugendüse
8. Große Bürstendüse
9. Bodendüse
10. Standrohre
11. Kleine Bürstendüse
12. Schulterriemen
5....-05-AKS 826 18.06.2004 9:34 Uhr Seite 3
A página está carregando...
A página está carregando...
A página está carregando...

Nach der Garantie
Nach Ablauf der Garantiezeit können Reparaturen kostenpflichtig vom entsprechen-
den Fachhandel oder Reparaturservice ausgeführt werden.
Service für unsere Haushaltsartikel
und Unterhaltungselektronik
Zu technischen Fragen oder zur Bestellung von Verschleißteilen (soweit diese nicht
vom Fachmann ausgewechselt werden müssen), wie z.B. Ersatzkannen,
Staubsaugerfilterbeutel, Fernbedienung usw. können Sie sich, mit Angabe des
Gerätetyps, an unsere Hotline-Adresse wenden:
hotline@clatronic.de
Interessieren Sie sich für weitere Clatronic-Produkte?
Besuchen Sie doch einmal unsere Homepage unter
www.clatronic.de oder www.clatronic.com
7
D
5....-05-AKS 826 18.06.2004 9:34 Uhr Seite 7
A página está carregando...

Ingebruikname van het apparaat
Wandmontage
Met behulp van schroeven en pluggen (niet bij de levering inbegrepen) kan de hou-
der ook aan de wand worden gemonteerd.
Meet daarvoor de afstand tussen de inkervingen aan de achterzijde. Waarborg van
tevoren dat u geen leidingen in de muur beschadigt! Boor de gaten op deze
afstand.
Accu’s laden
De laadkabel aan de wandhouder aanbrengen
Na montage van de wandhouder:
1. Trek de kabel door de onderste opening van de wandhouder naar boven.
2. Houd de laadsteker zodanig dat het rechthoekige gedeelte van de steker zich
recht voor de groef bevindt.
3. Druk nu de steker recht in de groef en draai hem vervolgens 90°.
De steker moet vast in de opening zitten. Allen zo blijft hij in positie en glijdt hij
er bij het plaatsen of verwijderen van de stofzuiger niet uit.
Sluit het nettoestel aan op een correct geïnstalleerde en geaarde contactdoos,
230 V - 50 Hz. Het laadlampje brandt. De laadtijd bedraagt ca. 16 uur. Trek daarna
het nettoestel uit de contactdoos.
Bediening van het apparaat
Neem het apparaat uit de houder en breng de gewenste hulpstukken aan. Druk op
de Aan/Uit-knop (I/O) om met het zuigen te beginnen. Na het zuigen of bij lege
accu sluit u de stofzuiger weer aan zoals beschreven onder “Laden van de accu’s“.
Let erop dat ook de netsteker moet zijn aangesloten.
Hulpstukken
Klein borstelmondstuk: Voor het zuigen van smalle, nauwe plekken en hoeken.
Groot borstelmondstuk: Voor het zuigen van grotere oppervlakken.
Voegenmondstuk: Ideaal voor het zuigen van uw auto.
Vloermondstuk: Voor de reiniging van vloerbedekking of gladde
oppervlakken.
Schouderriem:
Haak het uiteinde van de schouderriem met de karabijnhaak in de ogen (4 en 6).
Let op dat u de schouderriem niet verdraaid aanbrengt.
U kunt de lengte van de schouderriem regelen met de gesp aan de riem. Daartoe
trekt u gewoon aan één zijde van de riem. Dankzij het geringe gewicht kunt u de
stofzuiger nu moeiteloos omhangen en bent u flexibel bij het zuigen.
9
NL
5....-05-AKS 826 18.06.2004 9:34 Uhr Seite 9
A página está carregando...

Niet defecten aan de hulpstukken of aan de slijtende onderdelen (bijv. koolborstels,
deeghaken, drijfriemen, reserveafstandsbediening, reservetandenborstels, zaag-
bladen enz.), maar ook reiniging, onderhoud of de vervanging van slijtende delen
vallen niet onder de garantie en geschieden altijd tegen berekening!
Bij ingrepen door derden komt de garantieverlening te vervallen.
Na de garantieperiode
Na afloop van de garantieperiode kunnen reparaties tegen berekening worden uit-
gevoerd door de betreffende vakhandelaar of de technische dienst.
11
NL
5....-05-AKS 826 18.06.2004 9:34 Uhr Seite 11
A página está carregando...
A página está carregando...

Nettoyage
• Débranchez toujours l’appareil avant de le nettoyer!
• Nettoyez les parois de l’appareil avec un torchon sec.
• Votre appareil est équipé d’un filtre amovible lavable. Cela supprime les désa-
vantages de l’achat de sacs à poussière de remplacement.
• Vous pouvez sortir le bac à poussière à l’aide du bouton de déverrouillage (2).
Videz le bac.
• Retirez le filtre à poussière et secouez-le. Après avoir vidé plusieurs fois le sac
à poussière, vous pouvez le laver à l’eau. N’oubliez pas de le laisser ensuite
sécher.
• Replacez le bac à poussière et enfoncez-le.
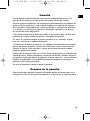
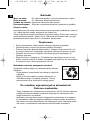
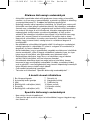
Conseil de recyclage des piles
Cet appareil est équipé de piles au nickel-cadmium rechar-
gables.
• Les piles et accus usagées ne doivent en aucun cas
être jetés avec les ordures ménagères.
• Vous pouvez les déposer à une station de recyclage
pour piles usagées.
Cet appareil a été contrôlé d’après toutes les directives européennes actuelles
applicables, comme par exemple concernant la compatibilité électromagnétique et
la basse tension. Cet appareil a été fabriqué en respect des réglementations tech-
niques de sécurité les plus récentes.
Sous réserve de modifications techniques.
Garantie
Nous accordons une garantie de 24 mois à dater de la date d’achat (ticket de
caisse) pour l’appareil que nous vendons.
Pendant la durée de la garantie, nous éliminons gratuitement les défauts de l’appa-
reil ou des accessoires *) découlant d’un vice de matériau ou de fabrication au
moyen d’une réparation ou, selon notre estimation, au moyen d’un remplacement.
Les prestations dans le cadre de la garantie n’entraînent aucune prorogation de la
durée de garantie et ne donnent pas droit à une nouvelle garantie !
Le justificatif de garantie est le reçu. Sans ce justificatif, aucun remplacement
gratuit ni aucune réparation gratuite ne peuvent être effectués.
En cas de recours à la garantie, ramenez votre appareil complet, dans son
emballage d'origine, accompagné de votre preuve d'achat, à votre revendeur.
14
F
NiCd:
5....-05-AKS 826 18.06.2004 9:34 Uhr Seite 14
A página está carregando...
A página está carregando...
A página está carregando...
A página está carregando...
A página está carregando...

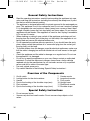
Instruções gerais de segurança
•
Antes de pôr este aparelho a funcionar, leia muito atentamente as instruções de
emprego e guarde-as muito bem, juntamente com o talão de garantia, o talão de
compra e, tanto quanto possível, a embalagem com os elementos interiores.
• Utilize o aparelho exclusivamente para fins privados e para a finalidade para a
qual o mesmo foi concebido. Este aparelho não se destina a fins comerciais.
Não o utilize ao ar livre (a não ser que o mesmo possa ser usado ao ar livre
sob determinadas condições). Mantenha-o protegido do calor, de irradiação
solar directa, da humidade (não o imergir de forma alguma em quaisquer líqui-
dos) e de arestas aguçadas. Não utilize o aparelho com as mãos molhadas. No
caso de o aparelho ficar húmido ou molhado, retire imediatamente a ficha da
tomada. Não tocar na água.
• Sempre que não utilizar o aparelho, ou desejar montar acessórios, ou queira
limpá-lo, ou ainda em caso de avarias, deverá desligá-lo e retirar a ficha da
tomada (puxe pela ficha e não pelo fio).
• O aparelho não deverá funcionar sem vigilância. No caso de ter de se ausentar
do local onde o aparelho estiver a funcionar, desligue-o sempre ou retire a ficha
da tomada (puxe pela ficha e não pelo fio).
• Para proteger as crianças dos perigos relacionados com aparelhos eléctricos,
nunca deixe os fios pendurados e atente em que as crianças não possam che-
gar a tais aparelhos.
• Verifique regularmente se o aparelho ou o fio têm alguns danos. Nunca ponha
a funcionar um aparelho com quaisquer danos.
• Não tente reparar o aparelho, dirija-se a um técnico da especialidade, devida-
mente autorizado. Para evitar quaisquer perigos, é favor substituir um fio danifi-
cado por um fio da mesma qualidade. Tal deverá ser efectuado pelo fabricante,
pelos nossos serviços de assistência ou por outra pessoa com as mesmas
qualificações.
• Utilize apenas acessórios de origem.
• É favor observar as seguintes „Instruções especiais de segurança...“.
Descrição dos elementos
1 Interruptor 7 Bocal para frestas
2 Fecho para o saco 8 Bocal grande com escova
3 Pega 9 Bocal para aspirar o chão
4 Aselha para enganchar o cinto (parte traseira) 10 Tubos verticais
5 Saco 11 Bocal pequeno com escova
6 Aselha para enganchar o cinto (parte dianteira) 12 Cinto
Instruções especiais de segurança
• Não aspire líquidos.
• Aspire apenas pó e sujidades menores, não aspire objectos aguçados nem cin-
zas quentes.
20
P
5....-05-AKS 826 18.06.2004 9:34 Uhr Seite 20

Primeira utilização do aparelho
Montagem na parede
O suporte poderá ser igualmente montado na parede com parafusos e buchas
(não incluídos).
Meça a distância entre os orifícios que se encontram na parte anterior. Certifique-
se de que não serão danificadas ligações que se encontrem dentro da parede e
faça as perfurações de acordo com a distância que mediu.
Recarga dos acumuladores
Instalação do cabo de recarga no suporte de parede
Após a montagem do suporte de parede:
1. Introduza em primeiro lugar o cabo no orifício inferior do suporte e puxe-o para
cima.
2. Segure a ficha do aparelho de recarga de forma a que a parte rectangular da
mesma fique direita em frente da ranhura.
3. Introduza então a ficha a direito dentro da ranhura e gire-a em seguida num
ângulo de 90º. A ficha terá de ficar bem fixa. Só assim se manterá na sua
posição e não sairá quando o aspirador for ligado ao recarregador, nem quan-
do for desligado do mesmo.
Introduzir a o adaptador de corrente numa tomada com protecção de contactos de
230 V/50 Hz, convenientemente instalada. A lâmpada de controle de recarga ilumi-
nar-se-á. A recarga durará aprox. 16 horas. Retirar em seguida o adaptador da
tomada.
Utilização do aparelho
Desligue o aparelho da corrente e coloque os bocais pretendidos. Para começar a
aspirar, bastará pressionar o respectivo interruptor (I/O). Quando acabar de aspirar
ou quando o acumulador ficar descarregado, ligue o aspirador à ficha do aparelho
de recarga, da forma descrita na rubrica "Recarga dos acumuladores”. Certifique-
se de que a ficha do aparelho de recarga está ligada à corrente.
Bocais
Bocal pequeno com escova: Para aspirar superfícies estreitas e apertadas,
assim como cantos.
Bocal grande com escova: Para aspirar superfícies mais amplas.
Bocal para frestas: Ideal para aspirar automóveis.
Bocal para aspirar
o chão: Para aspirar tapetes, alcatifas ou superfícies lisas.
21
P
5....-05-AKS 826 18.06.2004 9:34 Uhr Seite 21

Cinto:
Enganche as extremidades do cinto nas aselhas (4 e 6). Montar o cinto de forma a
não ficar torcido. O comprimento do cinto pode ser regulado através da fivela,
bastando para tal puxar simplesmente por um dos lados do cinto. Como o aspira-
dor tem muito pouco peso, poderá agora ser posto à volta dos ombros, sem quais-
quer problemas, e a sua utilização será extremamente cómoda.
Limpeza
• Antes de proceder à limpeza do aparelho, retire sempre a ficha da tomada.
• Limpe a caixa do aspirador com um pano seco.
• Dado que o seu aspirador dispõe de um filtro destacável que pode ser lavado,
deixa de ser necessária a compra maçadora de sacos novos.
• Para soltar o recipiente do lixo, pressione o botão (2). Despeje o recipiente.
• Retire o filtro do pó e sacuda-o. Depois de ter despejado várias vezes o lixo,
poderá lavar o filtro com água.
• Em seguida, deixe-o secar bem.
• Torne a colocar o recipiente do lixo e fixe-o bem.
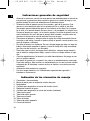
Notas referentes à remoção de pilhas
O aparelho contém acumuladores recarregáveis de níquel
e cádmio.
• As pilhas e os acumuladores gastos não deverão ser
deitados para o lixo normal.
• Poderá entregá-los no local apropriado para a recolha
de pilhas usadas, nomeadamente de lixo perigoso.
Informe-se na sua Junta de Freguesia.
Este aparelho foi controlado nos termos das actuais directivas da CEE
aplicáveis, tais como inocuidade electromagnética e directiva sobre baixa
tensão, e fabricado de acordo com as mais novas prescrições da segurança
técnica.
Reserva-se o direito de alterações!
Garantia
O aparelho vendido pela nossa empresa tem uma garantia de 24 meses a partir
da data da compra (talão).
Durante o período de garantia, procederemos à remoção grátis - por reparação,
ou, segundo a nossa decisão, por substituição - das deficiências do aparelho ou
dos acessórios*) que provenham de erros de material ou de fabricação. A pre-
stação de serviços relacionados com a garantia não prolongarão a mesma, nem
iniciarão um novo prazo de garantia!
22
P
NiCd:
5....-05-AKS 826 18.06.2004 9:34 Uhr Seite 22

O talão de compra consistirá prova desta garantia. Sem o mesmo, não será pos-
sível proceder-se a qualquer troca ou reparação grátis.
Em caso de garantia, entregue o aparelho completo, juntamente com o talão de
compra, na loja onde o mesmo foi comprado.
*) No caso de danos em quaisquer acessórios, não será efectuada automática-
mente uma substituição completa do aparelho. Contacte neste caso a nossa hotli-
ne! Danos causados por quebras de peças de vidro ou de plástico terão de ser
pagos pelo cliente!
Não estão incluídos na garantia quaisquer defeitos de acessórios ou de peças que
se desgastem (como, por exemplo, carvões do motor, varinhas, correias do motor,
telecomandos, escovas de dentes, folhas de serra, etc.), nem a limpeza, a manu-
tenção ou a substituição de peças que se desgastem, devendo tais despesas ser
reembolsadas!
A garantia terminará sempre que tenha havido intervenção alheia nos aparelhos.
Após a garantia
Após a expiração do prazo de garantia, poderão ser efectuados arranjos por pes-
soal especializado, ou pelos nossos serviços de reparações, contra reembolso.
23
P
5....-05-AKS 826 18.06.2004 9:34 Uhr Seite 23
A página está carregando...
A página está carregando...
A página está carregando...
A página está carregando...
A página está carregando...
A página está carregando...
A página está carregando...

Verken defekter på forbrukstilbehør og slitasjedeler (for eksempel motorkull, eltekro-
ker, drivremmer, ekstra fjernbetjening, ekstra tannbørster, sagblader osv.) eller
rengjøring, vedlikehold og utskifting av slitasjedeler går inn under garantien. Slike
ting er derfor kostnadspliktige!
Garantien utgår ved inngrep utenfra.
Etter garantien
Etter at garantitiden har gått ut, kan reparasjoner utføres av den aktuelle faghande-
len eller reparasjonsservice mot betaling.
31
N
5....-05-AKS 826 18.06.2004 9:35 Uhr Seite 31
A página está carregando...

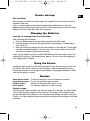
Device start-up
Wall Installation
With the help of screws and dowel plugs (not supplied) the mounting can also be
attached to the wall.
To do so, please measure the distance between the indentations on the rear.
Beforehand you should ensure that you will not damage any pipe or electric wiring
hidden in the wall! Then drill holes at this distance.
Charging the Batteries
Inserting the charging cable in the wall holder
After mounting the wall holder:
1. Pass the cable upwards through lower opening of the wall holder.
2. Hold the charger so that the rectangular part of the charger is located right in
front of the slot.
3. Now press the plug straight into the groove and turn it through 90°. The charger
must be connected securely. It must remain in this position and it must not fall
out when inserting or pulling off the vacuum.
Insert the AC adapter in a duly installed 230V/50Hz protective contact socket. The
charging LED lights up. The charging lasts approx. 16 hours. Once the charging is
over, unplug the AC adapter.
Using the Device
Unplug the device and fit on the desired nozzle. To start the vacuuming, press only
the On/Off (I/O) switch. Once you have finished or when the batteries are down,
connect the vacuum to the charger as described in „Charging the Batteries“. Make
sure that the plug is inserted.
Nozzles
Small brush nozzle: For the vacuuming of narrow surfaces and corners.
Large brush nozzle: For the vacuuming of large surfaces.
Crevice nozzle: Perfect for vacuuming the interior of cars.
Floor nozzle: For cleaning carpets or smooth surfaces.
Shoulder straps:
Hook the ends of the shoulder strap with the snap-link in the eyes (4 and 6). Make
sure that the shoulder straps are not wound up. The length of the shoulder strap
can be adjusted with the buckle on the strap by simply pulling one side of the strap.
Thanks to its light weight the hand vacuum can be hung without problems and used
anywhere.
33
GB
5....-05-AKS 826 18.06.2004 9:35 Uhr Seite 33
A página está carregando...

Defects to consumables or parts subject to wearing (e.g. motor pistons, kneading
blades, drive shafts, spare remote control, spare toothbrushes, saw blades, etc.) as
well as cleaning, maintenance or the replacement of said parts are not covered by
the guarantee and hence are to be paid!
The guarantee lapses in case of unauthorized tampering.
After the expiry of the guarantee
After the expiry of the guarantee repairs can be carried by the competent dealer or
repair service against the payment of the ensuing costs.
35
GB
5....-05-AKS 826 18.06.2004 9:35 Uhr Seite 35
A página está carregando...
A página está carregando...
A página está carregando...
A página está carregando...

• prawidłowego zużycia i uszkodzeń, które mają nieistotny wpływ na wartość
lub działanie tego urządzenia.
Karta gwarancyjna bez pieczątki sklepu, daty sprzedaży, nie wypełniona, źle
wypełniona, ze śladami poprawek, nieczytelna wskutek zniszczenia, bez możliwoś-
ci ustalenia miejsca sprzedaży oraz dołączonego dowodu zakupu jest nieważna.
Korzystanie z usług gwarancyjnych nie jest możliwe po upływie daty ważności
gwarancji. Gwarancja na części lub całe urządzenie, które są wymieniane kończy
się, wraz z końcem gwarancji na to urządzenie.
Wszystkie inne roszczenia, wliczając w to odszkodowania są wykluczone chyba, że
prawo przewiduje inaczej. Roszczenia wykraczające poza tą umowę nie są
uwzględniane przez tą gwarancję.
Gwarancja na sprzedany towar konsumpcyjny nie wyłącza, nie ogranicza ani
nie zawiesza uprawnień kupującego wynikających z niezgodności towaru z umową.
Gwarancja oraz zawarte w niej warunki obowiązują na terenie Rzeczpospolitej
Polskiej.
40
PL
5....-05-AKS 826 18.06.2004 9:35 Uhr Seite 40
A página está carregando...
A página está carregando...

Čištění
• Před čištěním vždy vytáhněte zástrčku ze sítě!
• Kryt čistěte suchým hadříkem.
• Protože Váš přístroj je vybaven vyjímatelným a pracím filtrem, odpadá nák-
ladná koupě náhradních pytlíků na prach.
• Jímku na prach můžete uvolnit pomocí tlačítka (2). Vyprázdněte jímku.
• Vyjměte filtr na prach a vyklepejte jej. Po několikerém vyprázdnění můžete
sáček na prach rovněž vyčistit vodou. Poté, prosím, nechejte vyschnout.
• Jímku na prach opět nasad’te a přitlačte.
Pokyny pro likvidaci baterií
Přístroj obsahuje nikl-kadmiové akumulátory, které lze
dobíjet.
• Vybité baterie a nefunkční akumulátory nepatří do
domovního odpadu.
• Můžete je odevzdat ve sběrně starých baterií, resp.
na místě pro sběr zvláštního odpadu. Informujte se u
Vašeho obecního úřadu.
Tento přístroj byl testován podle všech příslušných, v současné době platných
směrnic CE, jako je např. elektromagnetická kompatibilita a direktiva o nízko-
napěťové bezpečnosti, a byl zkonstruován podle nejnovějších bezpečnostně-
technických předpisů.
Vyhrazujeme si technické změny!
Záruka
Na námi prodaný přístroj poskytujeme záruku v trvání 24 měsíců od data prode-
je (pokladní doklad).
Během záruční lhůty odstraníme bezplatně všechny vady přístroje nebo
příslušenství*), které vzniknou v důsledku vad materiálu nebo výrobních vad, a to
opravou nebo, podle našeho uvážení, formou výměny. Záruční plnění nemají za
následek ani prodloužení záruční doby ani tím nevzniká nárok na novou záruku!
Jako záruční doklad slouží doklad o koupi. Bez tohoto dokladu nelze uskutečnit
bezplatnou výměnu nebo bezplatnou opravu.
V případě uplatnění záruky předejte, prosím, kompletní přístroj v originálním
obalu spolu s pokladním dokladem Vašemu obchodníkovi.
*) Poškození příslušenství není automaticky důvodem pro bezplatnou výměnu
kompletního přístroje. V takovém případě se obraťte na naši Hotline! Prasklé
skleněné resp. plastové díly zásadně podléhají povinnosti úhrady!
43
CZ
NiCd:
5....-05-AKS 826 18.06.2004 9:35 Uhr Seite 43

Jak na vady na spotřebním příslušenství, resp. dílech podléhajících rychlému
opotřebení (např. uhlíky motoru, hnětací háky, hnací řemeny, náhradní dálkové
ovládání, náhradní zubní kartáčky, pilové listy atd.), tak i na čištění, údržbu nebo
výměnu dílů podléhajících rychlému opotřebení se záruka nevztahuje a je proto
nutno je uhradit!
Záruka zaniká v případě, že dojde k zásahu neautorizovanou osobou.
Po uplynutí záruky
Po uplynutí záruční doby je možno za úplatu provést opravy v příslušném
odborném obchodě nebo opravně.
44
CZ
5....-05-AKS 826 18.06.2004 9:35 Uhr Seite 44
A página está carregando...
A página está carregando...
A página está carregando...

vevőszolgálatunkkal egyeztetve csak a hibás tartozékot! Az üvegtörés okozta
hibák mindig térítéskötelesek!
Sem az elhasználódó tartozékokban, ill. kopó alkatrészekben (pl. szénkefe,
dagasztóhorog, hajtószíj, póttávvezérlő, pótfogkefe, fűrészlap stb.) bekövetkező
hibák, sem a tisztítás, karbantartás vagy a kopó alkatrészek cseréje nem esik a
garancia hatálya alá, következésképp térítésköteles.
Illetéktelen beavatkozás a garancia megszűnését eredményezi.
A garanciális idő után
A garanciális idő eltelte után a megfelelő szakkereskedésben vagy javítószol-
gálatnál végeztethet térítésköteles javításokat.
48
H
5....-05-AKS 826 18.06.2004 9:35 Uhr Seite 48
A página está carregando...
A página está carregando...
A página está carregando...
A página está carregando...

Stünings Medien, Krefeld • 05/04
D-47906 Kempen/Germany · Industriering Ost 40
Internet: http://www.clatronic.de · email: [email protected]
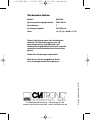
Technische Daten
Modell: AKS 826
Spannungsversorgung Netzteil: 230 V, 50 Hz
Schutzklasse: ΙΙ
Leistungsaufnahme: 24 V/250 mA
Akku: 14,4 V (12 x NiCd à 1,2 V)
Dieses Gerät wurde nach allen zutreffenden,
aktuellen CE-Richtlinien geprüft, wie z.B.
elektromagnetische Verträglichkeit und
Niederspannungsdirektive und wurde nach den
neuesten sicherheitstechnischen Vorschriften
gebaut.
Technische Änderungen vorbehalten!
Bitte führen Sie das ausgediente Gerät
einer umweltgerechten Entsorgung zu.
5....-05-AKS 826 18.06.2004 9:35 Uhr Seite 53
-
 1
1
-
 2
2
-
 3
3
-
 4
4
-
 5
5
-
 6
6
-
 7
7
-
 8
8
-
 9
9
-
 10
10
-
 11
11
-
 12
12
-
 13
13
-
 14
14
-
 15
15
-
 16
16
-
 17
17
-
 18
18
-
 19
19
-
 20
20
-
 21
21
-
 22
22
-
 23
23
-
 24
24
-
 25
25
-
 26
26
-
 27
27
-
 28
28
-
 29
29
-
 30
30
-
 31
31
-
 32
32
-
 33
33
-
 34
34
-
 35
35
-
 36
36
-
 37
37
-
 38
38
-
 39
39
-
 40
40
-
 41
41
-
 42
42
-
 43
43
-
 44
44
-
 45
45
-
 46
46
-
 47
47
-
 48
48
-
 49
49
-
 50
50
-
 51
51
-
 52
52
-
 53
53


em outras línguas
- español: Clatronic aks 826 El manual del propietario
- français: Clatronic aks 826 Le manuel du propriétaire
- italiano: Clatronic aks 826 Manuale del proprietario
- English: Clatronic aks 826 Owner's manual
- русский: Clatronic aks 826 Инструкция по применению
- Nederlands: Clatronic aks 826 de handleiding
- Deutsch: Clatronic aks 826 Bedienungsanleitung
- čeština: Clatronic aks 826 Návod k obsluze
- polski: Clatronic aks 826 Instrukcja obsługi
Artigos relacionados
-
Clatronic HS 2631 Manual do proprietário
-
Clatronic AKS 827 Manual do proprietário
-
-
Clatronic HS 2767 Manual do proprietário
-
-
-
CTC Union aks 828 wet dry Manual do proprietário
-
-
BOMANN BS 1236 Manual do proprietário
-
