
1
Dansk ................ 19
Català ................ 16
Español ............. 13
Italiano .............. 10
Deutsch ............... 7
Français ............... 4
English................. 1
Norsk ................. 37
Lietuvių ............. 34
Latviešu ............. 31
Suomi ................ 28
Eesti................... 25
Nederlands ........ 22
Svenska ............. 43
Português ......... 40
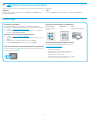
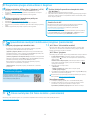
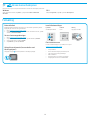
USB connection directly between the
printer and the computer
Use an A-to-B type USB cable.
Windows
1. Do not connect the USB cable before installing the software. The
installation process prompts to connect the cable at the appropriate
time. If the cable is already connected, restart the printer when
installation prompts to connect the cable.
2. Continue to “6. Download and install the software.”
OS X
1. Connect the USB cable between the computer and the printer before
installing the software.
2. Continue to “6. Download and install the software.”
Wireless network connection
(wireless models only)
Touchscreen control panels
1. To connect the printer to a wireless (Wi-Fi) network, on the printer control
panel, touch the Wireless button.
2. Touch Wireless Menu, and then touch Wireless Setup Wizard. Select
the network name from the SSID list, or enter the network name if it is
notlisted.
3. Use the keyboard to enter the passphrase, and then touch the OK button.
4. Wait while the printer establishes a network connection.
5. On the printer control panel, touch the Network button. If an IP address
is listed, the network connection has been established. If not, wait a few
more minutes and try again. Note the IP address for use during software
installation. Example IP address: 192.168.0.1
2-line/LED control panels
1. To connect the printer to a wireless (Wi-Fi) network, make sure that the
printer, access point, and computer are turned on and that the computer is
connected to the wireless network.
2. A USB cable might be required during software installation.
3. To print from a computer, continue with “6. Download and install the
software.” To print from a phone or tablet only, continue with “7.
Mobile
printing (optional).”
Wired (Ethernet) network connection
(optional)
Use a standard network cable.
1. Connect the network cable to the printer and to the network. Wait a few
minutes for the printer to acquire a network address.
2. Continue to “6. Download and install the software.”
5.
Select a connection method
Manually congure the IP address
See the printer user guide for information on how to manually congure the
IPaddress www.hp.com/support/ljM129MFP.
www.hp.com/support/ljM129MFP www.register.hp.com
IMPORTANT:
Follow
Steps 1 - 3 on
the printer hardware setup
poster, then continue
with Step 4.
4.
Set up the control panel
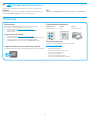
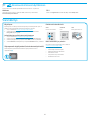
At the printer control panel, check the display status before beginning software installation.
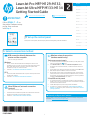
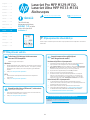
LaserJet Pro MFP M129-M132,
LaserJet Ultra MFP M133-M134
Getting Started Guide

2
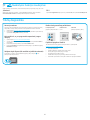
Readiris Pro for HP
Download this free software to enable extra scanning features, including Optical
Character Recognition (OCR).
To download the software from the web, go to:
www.hp.com/support/ljM129MFP
Select Drivers, select the appropriate operating system, and then click Next. Click
Application - 3rd Party, and then click the Download button.
7.1
Connect the device to the wireless network
To print from a phone or tablet, connect the device to the same wireless
network as the printer.
Apple iOS devices (AirPrint): Open the item to print, and select the Action icon.
Select Print, select the printer, and then select Print.
Android devices (4.4 or newer): Open the item to print, and select the
Menubutton. Select Print, select the printer, and select Print.
Some devices require downloading the HP Print Service plugin app from the
Google Play store.
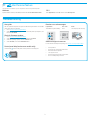
Windows Phone: Download the HP AiO Remote app from the Windows Store.
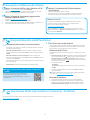
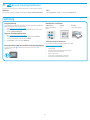
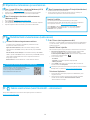
Learn more about mobile printing
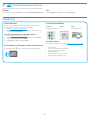
For further information on these and other operating
systems (Chrome/Google Cloud Print) go to
“www.hp.com/go/LaserJetMobilePrinting”
or scan the QR code below.
6.
Download and install the software
7.
Mobile printing (optional)
Method 1: Download HP Easy Start (Windows and OS X)
1. Go to 123.hp.com/laserjet, and click Download.
2. Follow the on-screen instructions and prompts to save the le to the computer.
3. Launch the software le from the folder where the le was saved.
Method 2: Download from the printer support website
(Windows and OS X)
1. Go to www.hp.com/support/ljM129MFP.
2. Select Software and drivers.
3. Download the software for your printer model and operating system.
4. Launch the software le from the folder where the le was saved.
Method 3: Install from the printer CD
(Windows only)
1. Insert the printer CD into the computer.
2. Follow the on-screen instructions to install the software. For more information
see the Install Notes on the printer CD.
8.
Set up fax (fax models only - optional)
7.2
Wi-Fi Direct (wireless models only)
Wi-Fi Direct enables close-proximity printing from a wireless mobile device
directly to an Wi-Fi Direct-enabled printer without requiring a connection to a
network or the Internet.
Enable Wi-Fi Direct
To enable Wi-Fi Direct from the control panel, complete the following steps.
1. 2-line control panels: On the printer control panel, press the Setup
button, and then open the Network Setup menu.
Touchscreen control panels: From the Home screen on the printer
control panel, select the Connection Information button.
2. Open the following menus:
- Wi-Fi Direct
- Settings (touchscreen control panels only)
- On/O
3. Touch the On menu item. Touching the O button disables Wi-Fi Direct
printing.
For more information on wireless printing and wireless setup, go to
www.hp.com/go/wirelessprinting.
Discover the printer
1. From the mobile device, turn on the Wi-Fi, and search for wireless
networks.
2. Select the printer, which will show up as ‘Direct-model-name’
asshownon the printer control panel.
Example printer name: “Direct-bb-HP M277 Laserjet”.
For information about sending fax, please see the user guide on the printer CD, or go to:
www.hp.com/support/ljM129MFP.

3
Use the HP Scan software on your computer to start a scan job at the printer.
Windows
Open HP Printer Assistant, select Scan, and then select Scan a Document or Photo.
OS X
Click Applications, select HP, and then select HP Easy Scan.
9.
Use the scan feature
Troubleshooting
User guide
The user guide includes printer usage and troubleshooting information. It is available
on the printer CD and on the web:
1. Go to: www.hp.com/support/ljM129MFP
2. Select the appropriate language, and then select the printer if prompted to, and
then click User Guides.
Check for rmware updates
1. Go to: www.hp.com/support/ljM129MFP
2. Select a printer or category from the list, and then click Drivers.
3. Select the operating system, and click the Next button.
4. Select Firmware, and click the Download button.
Control panel help (touchscreen models only)
Touch the Help button on the printer control panel to access help topics.
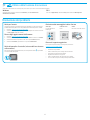
Resolve error code messages
Lights Status Error code Action
The Attention Light is blinking Er/01 Load the paper into the tray
Additional support resources
For HP’s all-inclusive help for the printer, go to: www.hp.com/support/ljM129MFP
• Solve problems
• Find advanced conguration instructions
• Download software updates
• Join support forums
• Find warranty and regulatory information
• Access mobile printing resources

Dansk ............ 19
Català ............ 16
Español ......... 13
Italiano .......... 10
Deutsch ........... 7
Français ........... 4
English............. 1
Norsk ............. 37
Lietuvių ......... 34
Latviešu ......... 31
Suomi ............ 28
Eesti............... 25
Nederlands .... 22
Svenska ......... 43
Português ..... 40
4
www.hp.com/support/ljM129MFP www.register.hp.com
IMPORTANT:
Suivez les
étapes1 à 3 sur
l’aiche de conguration
matérielle de l’imprimante
puis passez à l’étape4
.
4.
Congurer le panneau de commande
Sur le panneau de commande de l’imprimante, vériez l’état de l’écran avant de commencer
l’installation du logiciel.
Guide de démarrage
LaserJet Pro MFP M129-M132,
LaserJet Ultra MFP M133-M134
Connexion USB directement entre
l'imprimante et l'ordinateur
Utilisez un câble USB de type A-à-B.
Windows
1. Ne connectez pas le câble USB avant d'installer le logiciel. Le processus
d'installation vous invite à connecter le câble au moment opportun. Si le
câble est déjà connecté, redémarrez l'imprimante lorsque le processus
d'installation vous invite à connecter le câble.
2. Passez à la section «6. Télécharger et installer le logiciel.»
OS X
1. Pour Mac, branchez le câbleUSB entre l'ordinateur et l'imprimante avant
d'installer le logiciel.
2. Passez à la section «6. Télécharger et installer le logiciel.»
Connexion du réseau sans l
(modèles sans l uniquement)
Panneaux de commande à écran tactile
1. Pour connecter l'imprimante à un réseau sans l (Wi-Fi), sur le panneau
de commande de l'imprimante, appuyez sur le bouton Sans l .
2. Appuyez sur Menu Sans l, puis sur Assistant d'installation sans l.
Sélectionnez le nom du réseau dans la liste SSID, ou entrez le nom du
réseau s'il n'y gure pas.
3. Entrez la phrase secrète à l'aide du clavier, puis appuyez sur OK.
4. Patientez pendant que l'imprimante établit une connexion réseau.
5. Sur le panneau de commande de l'imprimante, appuyez sur le bouton
Réseau. Si une adresse IP est indiquée, la connexion au réseau a été
établie. Si ce n'est pas le cas, patientez quelques minutes et réessayez.
Notez l'adresse IP à utiliser lors de l'installation du logiciel.
Exemple d'adresse IP: 192.168.0.1
Panneaux de commande à 2lignes/voyants
1. Pour connecter l'imprimante à un réseau sans l (Wi-Fi), assurez-vous
que le point d'accès de l'imprimante et l'ordinateur sont activés et que
l'ordinateur est connecté au réseau sans l.
2. Vous pourriez avoir besoin d'une câbleUSB lors de l'installation du
logiciel.
3. Pour imprimer à partir d'un ordinateur, passez à la section
«6. Télécharger et installer le logiciel.» Pour imprimer à partir
d'untéléphone ou d'une tablette uniquement, continuez avec
«7. Impression mobile (facultatif).»
Connexion à un réseau laire (Ethernet)
(facultatif)
Utilisez un câble réseau standard.
1. Branchez le câble réseau à l'imprimante et au réseau. Attendez quelques
minutes que l'imprimante acquière une adresse réseau.
2. Passez à la section «6. Télécharger et installer le logiciel.»
5.
Sélectionner une méthode de connexion
Congurer manuellement l'adresse IP
Consultez le manuel de l'utilisateur de l'imprimante pour obtenir des informations
sur la conguration manuelle de l'adresseIP www.hp.com/support/ljM129MFP.

5
Readiris Pro pour HP
Téléchargez gratuitement ce logiciel pour activer des fonctions de
numérisation supplémentaires, notamment la reconnaissance optique
decaractères (OCR).
Pour télécharger le logiciel sur Internet, rendez-vous sur:
www.hp.com/support/ljM129MFP
Sélectionnez Pilotes, puis le système d'exploitation approprié et cliquez sur
Suivant. Cliquez sur Application - Tierce, puis sur le bouton Télécharger.
7.1
Connexion du produit à un réseau sans l
Pour imprimer depuis un téléphone ou une tablette, connectez le périphérique
au même réseau sans l que l'imprimante.
Périphériques Apple iOS (AirPrint): ouvrez l'élément à imprimer et
sélectionnez l'icône Action. Sélectionnez Imprimer, puis l'imprimante
etappuyez sur Imprimer.
Périphériques Android (4.4 ou ultérieurs): ouvrez l'élément à imprimer, puis
sélectionnez le bouton Menu. Sélectionnez Imprimer, puis l'imprimante et
appuyez sur Imprimer.
Pour certains périphériques, il est nécessaire de télécharger l'application du
module d'extension du service d'impressionHP sur Google Play.
WindowsPhone: téléchargez l'application HPAiO Remote dans le
WindowsStore.
En savoir plus sur l'impression mobile
Pour plus d'informations sur ces systèmes
d'exploitation et d'autres (Chrome/Google Cloud Print),
accédez à «www.hp.com/go/LaserJetMobilePrinting»
ou scannez le code QR ci-dessous.
6.
Télécharger et installer le logiciel
7.
Impression mobile (facultatif)
Méthode 1: Téléchargement de HP Easy Start
(Windows et OS X)
1. Visitez la page 123.hp.com/laserjet et cliquez sur Télécharger.
2. Suivez les instructions et les invites à l'écran pour enregistrer le chier sur
l'ordinateur.
3. Lancez le chier du logiciel à partir du dossier dans lequel il a été enregistré.
Méthode 2: Téléchargement depuis le site Web
d'assistance de l'imprimante (Windows et OS X)
1. Accédez à www.hp.com/support/ljM129MFP.
2. Sélectionnez Pilotes et logiciels.
3. Téléchargez le logiciel adapté à votre modèle d'imprimante et à votre système
d'exploitation.
4. Lancez le chier du logiciel à partir du dossier dans lequel il a été enregistré.
Méthode 3: Installation avec le CD de l'imprimante
(Windows uniquement)
1. Insérez le CD de l'imprimante dans votre ordinateur.
2. Suivez les instructions à l'écran pour installer le logiciel. Pour plus d'informations,
consultez les notes d'installation sur le CD de l'imprimante.
8.
Conguration du télécopieur (modèles avec télécopieur uniquement -
facultatif)
Pour obtenir des informations sur la télécopie, veuillez consulter le manuel de l’utilisateur sur le CD de l’imprimante ou aller à la page:
www.hp.com/support/ljM129MFP.
7.2
Wi-Fi Direct (modèles sans l uniquement)
La fonctionnalité Wi-Fi Direct permet d'imprimer en proximité immédiate depuis
un périphérique mobile sans l directement sur une imprimante disposant de
cette même fonctionnalité sans vous connecter à un réseau ou Internet.
Activer Wi-Fi Direct
Pour activer Wi-Fi Direct depuis le panneau de commande, eectuez la
procédure suivante.
1. Panneau de commande à 2lignes: sur le panneau de commande de
l'imprimante, appuyez sur le bouton Conguration , puis ouvrez le
menu Conguration réseau.
Panneaux de commande à écran tactile: sur l'écran d'accueil du panneau
de commande de l'imprimante, sélectionnez le bouton Informations de
connexion .
2. Ouvrez les menus suivants:
- Wi-Fi Direct
- Paramètres (panneaux de commande à écran tactile uniquement)
- Actif/ Inactif
3. Appuyez sur l'élément de menu Activé. Appuyez sur le bouton Désactivé
pour désactiver l'impression Wi-Fi Direct.
Pour obtenir plus d'informations sur l'impression sans l et la conguration
sans l, accédez à www.hp.com/go/wirelessprinting.
Détecter l'imprimante
1. A partir du périphérique portable, activez la Wi-Fi puis recherchez des
réseaux sans l.
2. Sélectionnez l'imprimante, qui apparaîtra comme «Direct-nom-modèle»
commeindiqué sur le panneau de commande de l'imprimante.
Exemple de nom d'imprimante: «Direct-bb-HP M277 Laserjet».

6
Dépannage
Manuel de l'utilisateur
Le manuel de l'utilisateur comprend des informations relatives à l'utilisation de
l'imprimante et au dépannage. Il est disponible sur le CD de l'imprimante et sur le Web:
1. Accédez à: www.hp.com/support/ljM129MFP
2. Sélectionnez la langue appropriée, puis l'imprimante si vous y êtes invité,
etcliquez sur Manuels de l'utilisateur.
Recherche des mises à jour de micrologiciels
1. Accédez à: www.hp.com/support/ljM129MFP
2. Sélectionnez une imprimante ou une catégorie dans la liste, puis cliquez sur
Pilotes.
3. Sélectionnez le système d'exploitation et cliquez sur Suivant.
4. Sélectionnez Micrologiciel et cliquez sur le bouton Télécharger.
Aide du panneau de commande (modèles dw uniquement)
Appuyez sur le bouton Aide sur le panneau de commande de l'imprimante pour
accéder aux rubriques d'aide.
Résolution des messages à code d'erreur
Etat des voyants Code d'erreur Action
Le voyant Attention Er/01 Chargez le papier dans le bac
clignote
Ressources d'assistance supplémentaires
Pour l'aide globale de HP relative à l'imprimante, allez sur:
www.hp.com/support/ljM129MFP
• Résolution des problèmes
• Recherche d'instructions de conguration avancées
• Téléchargement des mises à jour du logiciel
• Inscription au forum d'assistance
• Recherche d'informations réglementaires et de garantie
• Accès aux ressources d'impression mobile
Utilisez le logiciel HP Scan sur votre ordinateur pour lancer un travail de numérisation sur l'imprimante.
Windows
Ouvrez l'Assistant d'imprimante HP, sélectionnez Numériser, puis Numériser un
document ou une photo.
OS X
Cliquez sur Applications, sélectionnez HP, puis sélectionnez HP Easy Scan.
9.
Utiliser la fonction de numérisation

Dansk ................ 19
Català ................ 16
Español ............. 13
Italiano .............. 10
Deutsch ............... 7
Français ............... 4
English................. 1
Norsk ................. 37
Lietuvių ............. 34
Latviešu ............. 31
Suomi ................ 28
Eesti................... 25
Nederlands ........ 22
Svenska ............. 43
Português ......... 40
7
www.hp.com/support/ljM129MFP www.register.hp.com
WICHTIG:
Führen Sie die
Schritte1 bis 3 auf
demPlakat zur Einrichtung
der Druckerhardware aus,
undfahren Sie dann mit
Schritt 4 fort.
4.
Bedienfeld einrichten
Überprüfen Sie den LED-Status auf dem Druckerbedienfeld, bevor Sie die Softwareinstallation
starten.
LaserJet Pro MFP M129-M132,
LaserJet Ultra MFP M133-M134
Handbuch für die Inbetriebnahme
Direkte USB-Verbindung zwischen dem
Drucker und dem Computer
Verwenden Sie ein USB-Kabel des Typs A-auf-B.
Windows
1. Schließen Sie das USB-Kabel erst nach Installation der Software an.
Beim Installationsvorgang werden Sie zum passenden Zeitpunkt
zum Anschließen des Kabels aufgefordert. Wenn das Kabel bereits
angeschlossen ist, starten Sie den Drucker neu, wenn Sie die Installation
zum Anschließen des Kabels auordert.
2. Fahren Sie mit „6. Software herunterladen und installieren“ fort.
OSX
1. Schließen Sie das USB-Kabel zwischen dem Computer und dem Drucker
vor der Installation der Software an.
2. Fahren Sie mit „6. Software herunterladen und installieren“ fort.
WLAN-Verbindung (nur Wireless-Modelle)
Bedienfelder mit Touchscreen
1. Um den Drucker mit einem Drahtlosnetzwerk (Wi-Fi) zu verbinden,
berühren Sie auf dem Bedienfeld des Druckers die Taste „Wireless“ .
2. Berühren Sie Drahtlosmenü, und berühren Sie dann Assistent
für die drahtlose Installation. Wählen Sie in der Liste „SSID“ den
Netzwerknamen aus, oder geben Sie den Netzwerknamen ein, wenn er
in der Liste nicht aufgeführt ist.
3. Geben Sie die Passphrase über die Tastatur ein, und berühren Sie dann
die Taste OK.
4. Warten Sie, bis der Drucker eine Netzwerkverbindung hergestellt hat.
5. Berühren Sie auf dem Bedienfeld des Druckers die Taste „Netzwerk“.
Wenn eine IP-Adresse aufgeführt wird, wurde die Netzwerkverbindung
hergestellt. Falls nicht, warten Sie einige Minuten und versuchen Sie es
erneut. Notieren Sie die IP-Adresse zur Software-Installation.
Beispiel-IP-Adresse: 192.168.0.1
Zweizeilige LED-Bedienfelder
1. Stellen Sie sicher, dass Drucker, Zugrispunkt und Computer
eingeschaltet sind und dass der Computer mit dem Drahtlosnetzwerk
verbunden ist, um den Drucker mit einem Drahtlosnetzwerk (Wi-Fi) zu
verbinden.
2. Während der Softwareinstallation wird möglicherweise ein USB-Kabel
benötigt.
3. Um von einem Computer aus zu drucken, fahren Sie mit „6. Software
herunterladen und installieren“ fort. Um nur von einem Mobiltelefon
oder einem Tablet aus zu drucken, fahren Sie mit „7. Mobiles Drucken
einrichten (optional)“ fort.
Kabelgebundene Netzwerkverbindung
(Ethernet)
(optional)
Verwenden Sie ein Standardnetzwerkkabel.
1. Schließen Sie das Netzwerkkabel an den Drucker und das Netzwerk an.
Warten Sie einige Minuten, während der Drucker eine Netzwerkadresse
bezieht.
2. Fahren Sie mit „6. Software herunterladen und installieren“ fort.
5.
Verbindungsmethode auswählen
Manuelle Konguration der IP-Adresse
Informationen zur manuellen Konguration der IP-Adresse nden Sie im
Benutzerhandbuch zum Drucker unter www.hp.com/support/ljM129MFP.

8
Readiris Pro für HP
Laden Sie diese kostenlose Software herunter, um zusätzliche Scanfunktionen
wie die optische Zeichenerkennung (OCR, Optical Character Recognition) zu
aktivieren.
Über die folgenden URLs können Sie die Software aus dem Internet
herunterladen: www.hp.com/support/ljM129MFP
Wählen Sie Treiber sowie anschließend das entsprechende Betriebssystem
aus, und klicken Sie auf Weiter. Klicken Sie auf Anwendung-Drittanbieter und
dann auf die Schaltäche Herunterladen.
7.1
Verbinden des Geräts mit einem Wireless-Netzwerk
Wenn Sie von einem Mobiltelefon oder Tablet aus drucken möchten, müssen
Sie das Gerät mit dem Wireless-Netzwerk verbinden, mit dem auch der
Drucker verbunden ist.
Apple iOS-Geräte (AirPrint): Önen Sie das zu druckende Dokument, und
wählen Sie das Symbol „Aktion“ aus. Wählen Sie die Option Drucken, dann den
Drucker und anschließend Drucken.
Android-Geräte (4.4 oder höher): Önen Sie das zu druckende Dokument, und
wählen Sie die Schaltäche Menü. Wählen Sie die Option Drucken, dann den
Drucker und anschließend Drucken.
Bei einigen Geräten muss die HP Print Service Plugin-App aus dem Google
Play Store heruntergeladen werden.
Windows Phone: Laden Sie die HP AiO Remote App aus dem Windows Store
herunter.
Weitere Informationen zum mobilen Druck
Weitere Informationen zu diesen und anderen
Betriebssystemen (Chrome/Google Cloud Print) nden
Sie unter „www.hp.com/go/LaserJetMobilePrinting“
oder scannen Sie den QR-Code unten.
6.
Software herunterladen und installieren
7.
Mobiles Drucken einrichten (optional)
Methode 1: Download von HP Easy Start
(Windows und OS X)
1. Gehen Sie zu 123.hp.com/laserjet, und klicken Sie auf Download.
2. Befolgen Sie die Anweisungen auf dem Bildschirm, um die Datei auf dem
Computer zu speichern.
3. Starten Sie die Softwaredatei in dem Ordner, in dem die Datei gespeichert wurde.
Methode 2: Download von der Druckersupport-Website
(Windows und OS X)
1. Besuchen Sie die Website www.hp.com/support/ljM129MFP.
2. Wählen Sie Software und Treiber aus.
3. Laden Sie die Software für Ihr Druckermodell und Ihr Betriebssystem herunter.
4. Starten Sie die Softwaredatei in dem Ordner, in dem die Datei gespeichert wurde.
Methode 3: Installieren über die Drucker-CD
(nur Windows)
1. Legen Sie die Drucker-CD in den Computer ein.
2. Befolgen Sie die Anleitungen auf dem Bildschirm, um die Software zu
installieren. Weitere Informationen nden Sie in den Installationshinweisen auf
der Drucker-CD.
8.
Fax einrichten (nur Faxmodelle; optional)
Informationen zum Versenden eines Fax nden Sie im Benutzerhandbuch, auf der Drucker-CD oder unter:
www.hp.com/support/ljM129MFP.
7.2
Wi-Fi Direct (nur Wireless-Modelle)
Mit Wi-Fi Direct können Sie von einem drahtlosen mobilen Gerät direkt
Druckaufträge an einen Drucker in der Nähe mit Wi-Fi Direct senden, ohne
dass eine Verbindung zu einem Netzwerk oder dem Internet notwendig wäre.
Wi-Fi Direct aktivieren
Um Wi-Fi Direct über das Bedienfeld zu aktivieren, führen Sie die folgenden
Schritte aus.
1. Zweizeilige Bedienfelder: Drücken Sie auf dem Bedienfeld des Druckers die
Taste „Einrichten“ , und önen Sie dann das Menü „Netzwerk-Setup“.
Bedienfelder mit Touchscreen: Wählen Sie im Bedienfeld des Druckers auf
dem Startbildschirm die Schaltäche „Verbindungsinformationen“ .
2. Önen Sie die folgenden Menüs:
- Drahtlos direkt
- Einstellungen (nur Touchscreen-Bedienfelder)
- Ein/Aus
3. Berühren Sie den Menübefehl Ein. Berühren Sie die Schaltäche Aus,
umden Druck über Wi-Fi Direct zu deaktivieren.
Weitere Informationen zum Drahtlosdruck sowie zur drahtlosen
Installation nden Sie unter www.hp.com/go/wirelessprinting.
Erkennen des Druckers
1. Aktivieren Sie auf dem Mobilgerät den WLAN-Empfänger, und suchen Sie
nach Drahtlosnetzwerken.
2. Wählen Sie den Drucker aus. Er wird mit dem Namen „Direct-Modellname“
angezeigt (vgl. Bedienfeld). Beispiel für den Druckernamen:
„Direct-bb-HP M277 Laserjet“.

9
Über die HPScan-Software auf dem Computer können Sie einen Scanauftrag auf dem Drucker starten.
Windows
Önen Sie den HPDruckerassistenten, und wählen Sie die Option Scannen und
anschließend Dokument oder Foto scannen aus.
OSX
Klicken Sie auf Anwendungen, und wählen Sie HP und dann HPEasy Scan aus.
9.
Verwenden der Scanfunktion
Fehlerbehebung
Benutzerhandbuch
Das Benutzerhandbuch enthält Informationen zur Nutzung des Druckers sowie
zur Fehlerbehebung. Es ist über die Drucker-CD und über das Internet verfügbar:
1. Gehen Sie zu: www.hp.com/support/ljM129MFP
2. Wählen Sie die entsprechende Sprache sowie den Drucker aus, falls Sie dazu
aufgefordert werden, und klicken Sie auf Benutzerhandbücher.
Prüfung der Verfügbarkeit von Firmware-Updates
1. Gehen Sie zu: www.hp.com/support/ljM129MFP
2. Wählen Sie in der Liste einen Drucker oder eine Kategorie aus, und klicken Sie
dann auf Treiber.
3. Wählen Sie das Betriebssystem aus, und klicken Sie dann auf die Schaltäche
Weiter.
4. Wählen Sie Firmware aus, und klicken Sie auf die Schaltäche Herunterladen.
Hilfesystem für Bedienfeld (nur Modelle mit Touchscreen)
Berühren Sie die Taste „Hilfe“ auf dem Bedienfeld des Druckers, um auf die
Hilfethemen zuzugreifen.
Beheben von Fehlercodemeldungen
LED-Status Fehlercode Maßnahme
Die Achtung-LED blinkt. Er/01 Legen Sie das Papier in das
Fach ein.
Weitere Support-Ressourcen
Die umfassende Hilfe zum Drucker von HP nden Sie unter:
www.hp.com/support/ljM129MFP
• Lösen von Problemen
• Suchen nach weiteren Kongurationsanweisungen
• Herunterladen von Softwareaktualisierungen
• Beitritt zu Support-Foren
• Suchen nach Garantie- und Zulassungsinformationen
• Zugri auf Druckressourcen für mobile Geräte

Dansk ............ 19
Català ............ 16
Español ......... 13
Italiano .......... 10
Deutsch ........... 7
Français ........... 4
English............. 1
Norsk ............. 37
Lietuvių ......... 34
Latviešu ......... 31
Suomi ............ 28
Eesti............... 25
Nederlands .... 22
Svenska ......... 43
Português ..... 40
10
www.hp.com/support/ljM129MFP www.register.hp.com
IMPORTANTE:
Seguire i
passaggi 1 - 3
del poster di installazione
dell’hardware della
stampante, quindi continuare
con il passaggio 4.
4.
Congurazione del pannello di controllo
Prima di iniziare l’installazione del software, controllare lo stato del display dal pannello di
controllo della stampante.
Guida introduttiva per
LaserJet Pro MFP M129-M132,
LaserJet Ultra MFP M133-M134
Collegamento USB diretto tra stampante
ecomputer
Utilizzare un cavo USB di tipo A/B.
Windows
1. Non collegare il cavo USB prima di installare il software. Il processo
di installazione richiede di collegare il cavo al momento appropriato.
Seilcavo è già connesso, riavviare la stampante quando il programma
diinstallazione di collegare il cavo.
2. Continuare con “6. Download e installazione del software”.
OS X
1. Collegare il cavo USB tra il computer e la stampante prima di installare
ilsoftware.
2. Continuare con “6. Download e installazione del software”.
Connessione della rete wireless
(solo modelli wireless)
Pannelli di controllo con schermo a soramento
1. Per collegare la stampante a un rete wireless (Wi-Fi), toccare il pulsante
Wireless sul pannello di controllo della stampante.
2. Toccare Menu Wireless, quindi Congurazione wireless guidata.
Selezionare il nome di rete dall'elenco SSID o immettere il nome della
rete se non è presente nell'elenco.
3. Utilizzare la tastiera per immettere la frase di accesso, quindi toccare il
pulsante OK.
4. Attendere che la stampante stabilisca la connessione di rete.
5. Sul pannello di controllo della stampante, toccare il pulsante Rete.
Seviene elencato un indirizzo IP, la connessione di rete è stata
stabilita. In caso contrario, attendere qualche altro minuto e riprovare.
Annotarel'indirizzo IP per l'uso durante l'installazione del software.
Esempio di indirizzo IP: 192.168.0.1
Pannello di controllo a 2 righe/LED
1. Per connettere la stampante a una rete wireless (Wi-Fi), assicurarsi
che la stampante, il punto di accesso e il computer siano accesi e che
ilcomputer sia connesso alla rete wireless.
2. Durante l'installazione del software potrebbe essere necessario un cavo USB.
3. Per stampare da un computer, continuare con “6. Download e installazione
del software”. Per stampare solo da telefono o tablet, continuare con
“7.Stampa da dispositivi mobili (facoltativo)”.
Connessione di rete cablata (Ethernet)
(facoltativo)
Utilizzare un cavo di rete standard.
1. Collegare il cavo di rete alla stampante e alla rete. Attendere alcuni minuti
in modo che la stampante acquisisca un indirizzo di rete.
2. Continuare con “6. Download e installazione del software”.
5.
Scelta del metodo di connessione
Congurazione manuale dell'indirizzo IP
Per informazioni su come congurare manualmente l'indirizzo IP, vedere la Guida
per l'utente all'indirizzo www.hp.com/support/ljM129MFP.

11
Readiris Pro for HP
Scaricare questo software gratuito per abilitare funzioni di scansione
aggiuntive, compreso il riconoscimento ottico dei caratteri (OCR).
Per scaricare il software dal Web, accedere a:
www.hp.com/support/ljM129MFP
Selezionare Drivers, quindi il sistema operativo appropriato e fare clic su
Next(Avanti). Fare clic su Application - 3rd Party (Applicazione - Terze parti),
quindi sul pulsante Download.
7.1
Collegamento della periferica a una rete wireless
Per stampare da un telefono o un tablet, connettere il dispositivo alla stessa
rete wireless della stampante.
Dispositivi Apple iOS (AirPrint): Aprire il documento da stampare, quindi
selezionare l'icona Azione. Selezionare Stampa, quindi la stampante e inne
Stampa.
Dispositivi Android (4.4 o versioni successive): Aprire il documento da
stampare, quindi selezionare il pulsante Menu. Selezionare Stampa, quindi la
stampante e inne Stampa.
Alcuni dispositivi richiedono il download del plugin Servizio di stampa HP dallo
store di Google Play.
Windows Phone: Scaricare l'app HP AiO Remote da Windows Store.
Maggiori informazioni sulla stampa da dispositivi
mobili
Per ulteriori informazioni su questi e altri sistemi
operativi (Chrome/Google Cloud Print), accedere a
“www.hp.com/go/LaserJetMobilePrinting” o acquisire il
codice QR sotto.
6.
Download e installazione del software
7.
Stampa da dispositivi mobili (facoltativo)
Metodo 1: Download di HP Easy Start (Windows e OS X)
1. Accedere a 123.hp.com/laserjet e fare clic su Download.
2. Seguire le istruzioni e le richieste visualizzate per salvare il le nel computer.
3. Avviare il le del software dalla cartella in cui è stato salvato.
Metodo 2: Download dal sito Web di supporto della
stampante (Windows e OS X)
1. Accedere a www.hp.com/support/ljM129MFP.
2. Selezionare Software and drivers (Software e driver).
3. Scaricare il software per il modello della stampante e il sistema operativo in uso.
4. Avviare il le del software dalla cartella in cui è stato salvato.
Metodo 3: Installazione dal CD della stampante
(soloWindows)
1. Inserire il CD della stampante nel computer.
2. Seguire le istruzioni visualizzate per installare il software. Per maggiori
informazioni, vedere le note di installazione nel CD della stampante.
8.
Impostazione del fax (solo modelli con funzione fax - facoltativo)
Per ulteriori informazioni sull’invio di fax, vedere la guida per l’utente nel CD della stampante o accedere a:
www.hp.com/support/ljM129MFP.
7.2
Wi-Fi Direct (solo modelli wireless)
La stampa Wi-Fi Direct consente la stampa di prossimità da un dispositivo
mobile wireless direttamente su una stampante abilitata per Wi-Fi Direct
senza richiedere una connessione a una rete o a Internet.
Abilitazione di Wi-Fi Direct
Per abilitare Wi-Fi Direct dal pannello di controllo, completare la procedura
descritta.
1. Pannelli di controllo a 2 righe: Sul pannello di controllo della stampante,
premere il pulsante Imposta e aprire il menu Congurazione di rete.
Pannelli di controllo con schermo a soramento: Nella schermata
iniziale del pannello di controllo della stampante, selezionare il pulsante
Informazioni di connessione .
2. Aprire i seguenti menu:
- Wi-Fi Direct
- Impostazioni (solo pannelli di controllo con schermo a soramento)
- On/O
3. Toccare la voce di menu On. Toccando il pulsante O si disabilita la
stampa Wi-Fi Direct.
Per ulteriori informazioni sulla stampa e sulla congurazione wireless,
accedere a www.hp.com/go/wirelessprinting.
Rilevamento stampante
1. Dal dispositivo mobile, attivare il Wi-Fi e cercare le reti wireless.
2. Selezionare la stampante, che verrà mostrata come "Direct-nome-
modello" come mostrato sul pannello di controllo della stampante.
Nome della stampante di esempio: “Direct-bb-HP M277 LaserJet”.

12
Utilizzare il software HP Scan nel computer per avviare un processo di scansione dalla stampante.
Windows
Aprire HP Printer Assistant, selezionare Scansione, quindi Scansione di un
documento o di una foto.
OS X
Fare clic su Applicazioni, selezionare HP, quindi selezionare HP Easy Scan.
9.
Utilizzo della funzione di scansione
Risoluzione dei problemi
Guida per l'utente
La Guida per l'utente comprende informazioni sull'utilizzo e sulla risoluzione dei
problemi della stampante. Essa è disponibile nel CD della stampante e sul Web:
1. Andare a: www.hp.com/support/ljM129MFP
2. Selezionare la lingua appropriata, quindi la stampante se richiesto e fare clic
su User guides (Guide per l'utente).
Ricerca degli aggiornamenti del rmware
1. Andare a: www.hp.com/support/ljM129MFP
2. Selezionare una stampante o una categoria dall'elenco e fare clic su Drivers.
3. Selezionare il sistema operativo e fare clic sul pulsante Next (Avanti).
4. Selezionare Firmware, quindi fare clic sul pulsante Download.
Guida del pannello di controllo (solo modelli con schermo
a soramento)
Per accedere agli argomenti della Guida, toccare il pulsante Guida sul pannello
di controllo della stampante.
Risoluzione dei messaggi dei codice di errore
Stato spia Codice di errore Azione
La spia Attenzione Er/01 Caricare la carta nel vassoio
lampeggia
Risorse di supporto aggiuntive
Per la guida completa di HP per la stampante, accedere a:
www.hp.com/support/ljM129MFP
• Risoluzione dei problemi
• Ricerca di istruzioni per la congurazione avanzata
• Download di aggiornamenti software
• Registrazione al forum di supporto
• Ricerca di informazioni sulla garanzia e le normative
• Accesso alle risorse per la stampa da dispositivi mobili

Dansk ................ 19
Català ................ 16
Español ............. 13
Italiano .............. 10
Deutsch ............... 7
Français ............... 4
English................. 1
Norsk ................. 37
Lietuvių ............. 34
Latviešu ............. 31
Suomi ................ 28
Eesti................... 25
Nederlands ........ 22
Svenska ............. 43
Português ......... 40
13
www.hp.com/support/ljM129MFP www.register.hp.com
IMPORTANTE:
Siga los
pasos 1 - 3 del
folleto de conguración del
hardware de la impresora
y, después, continúe con el
paso 4.
4.
Conguración del panel de control
En el panel de control de la impresora, compruebe el estado de la pantalla antes de comenzar
ainstalar el software.
LaserJet Pro MFP M129-M132,
LaserJet Ultra MFP M133-M134
Guía de introducción
Conexión USB directamente entre la
impresora y el equipo
Utilice un cableUSB de tipoA aB.
Windows
1. No conecte el cable USB antes de instalar el software. El proceso de
instalación del software muestra un aviso para conectar el cable en el
momento adecuado. Si el cable ya está conectado, reinicie la impresora
cuando el proceso de instalación muestre el aviso para conectar el cable.
2. Continúe con “6. Descarga e instalación del software”.
OS X
1. Conecte el cable USB entre el equipo y la impresora antes de instalar el
software.
2. Continúe con “6. Descarga e instalación del software”.
Conexión de la red inalámbrica
(solo modelos inalámbricos)
Paneles de control con pantalla táctil
1. Para conectar la impresora a una red inalámbrica (Wi-Fi), toque el botón
Conguración inalámbrica en el panel de control de la impresora.
2. Toque Menú inalámb. y, a continuación, toque Asist. cong. inalám.
Seleccione el nombre de la red en la lista SSID o introduzca el nombre de
la red si no lo encuentra en la lista.
3. Utilice el teclado para introducir la dirección y, a continuación, toque el
botón Aceptar.
4. Espere mientras la impresora establece una conexión de red.
5. En el panel de control de la impresora, toque el botón Red. Si aparece
una dirección IP, se habrá establecido la conexión de red. Si no, espere
unos minutos más e inténtelo de nuevo. Anote la dirección IP que se
usará durante la instalación del software. Dirección IP de ejemplo:
192.168.0.1
Paneles de control de 2líneas/LED
1. Antes de conectar la impresora a una red inalámbrica (Wi-Fi), asegúrese
de que la impresora, el punto de acceso y el equipo estén encendidos
yde que el equipo esté conectado a la red inalámbrica.
2. Es posible que se necesite un cable USB durante la instalación del
software.
3. Para imprimir desde un ordenador, continúe con “6. Descarga e instalación
del software”. Para imprimir solamente desde un teléfono o una tableta,
continúe con el paso “7. Impresión móvil (opcional)”.
Conexión a una red por cable (Ethernet)
(opcional)
Utilice un cable de red estándar.
1. Conecte el cable de red a la impresora y a la red. Espere unos minutos a
que la impresora obtenga la dirección de red.
2. Continúe con “6. Descarga e instalación del software”.
5.
Selección del método de conexión
Conguración manual de la direcciónIP
Consulte la Guía del usuario de la impresora para obtener información sobre cómo
congurar manualmente la dirección IP www.hp.com/support/ljM129MFP.

14
Readiris Pro para HP
Descargue este software gratuito para habilitar funciones de escaneado
adicionales, incluido el Reconocimiento óptico de caracteres (OCR).
Para descargar el software de la web, vaya a:
www.hp.com/support/ljM129MFP
Seleccione Controladores y el sistema operativo correspondiente; después,
haga clic en Siguiente. Haga clic en Aplicación de terceros y, a continuación,
en el botón Descargar.
7.1
Conexión del dispositivo a la red inalámbrica
Para imprimir desde un teléfono o una tableta, conecte el dispositivo a la
misma red inalámbrica que la impresora.
Dispositivos iOS de Apple (AirPrint): Abra el elemento que desee imprimir y
seleccione el icono Acción. Seleccione primero Imprimir, después la impresora
y por último, de nuevo, Imprimir.
Dispositivos Android (4.4 o más recientes): Abra el elemento que desee
imprimir y seleccione el botón Menú. Seleccione primero Imprimir, después la
impresora y por último, de nuevo, Imprimir.
Algunos dispositivos requieren que se descargue el complemento HP Print
Service de Play Store de Google.
Windows Phone: Descargue la aplicación HP AiO Remote de Windows Store.
Obtener más información sobre la impresión móvil
Para obtener más información acerca de este y otros
sistemas operativos (Chrome/Google Cloud Print) vaya
a “www.hp.com/go/LaserJetMobilePrinting” o escanee
el código QR a continuación.
6.
Descarga e instalación del software
7.
Impresión móvil (opcional)
Método 1: Descarga desde HP Easy Start (Windows y OS X)
1. Vaya a 123.hp.com/laserjet y haga clic en Descargar.
2. Siga las instrucciones e indicaciones en pantalla para guardar el archivo en
el equipo.
3. Inicie el archivo de software de la carpeta en la que se guardó el archivo.
Método 2: Descarga desde el sitio web de asistencia de la
impresora (Windows y OS X)
1. Vaya a www.hp.com/support/ljM129MFP.
2. Seleccione Software y controladores.
3. Descargue el software para su modelo de impresora y sistema operativo.
4. Inicie el archivo de software de la carpeta en la que se guardó el archivo.
Método 3: Instalación desde el CD de la impresora
(solo Windows)
1. Inserte el CD de la impresora en el equipo.
2. Siga las instrucciones en pantalla para instalar el software. Para obtener más
información, consulte las Notas sobre la instalación del CD de la impresora.
8.
Conguración de fax (solo para modelos con fax, opcional)
Para obtener información acerca del envío de faxes, consulte la guía de usuario en el CD de la impresora o vaya a:
www.hp.com/support/ljM129MFP.
7.2
Wi-Fi Direct (solo modelos inalámbricos)
Wi-Fi Direct permite imprimir directamente desde un dispositivo móvil
inalámbrico en una impresora compatible con Wi-Fi Direct sin necesidad de
conectarse a la red ni a Internet.
Habilitar Wi-Fi Direct
Para habilitar Wi-Fi Direct desde el panel de control, realice los siguientes pasos.
1. Paneles de control de 2líneas: En el panel de control de la impresora,
pulse el botón Conguración y, a continuación, abra el menú
Conguración de red.
Paneles de control con pantalla táctil: En la pantalla de inicio del panel
de control de la impresora, seleccione el botón de información de
conexión .
2. Abra los siguientes menús:
- Wi-Fi directo
- Conguración (solo para paneles de control con pantalla táctil)
- Activada/desactivada
3. Toque el elemento del menú Activada. Toque el botón de desactivación
para desactivar la impresión con Wi-Fi directo.
Para obtener más información sobre la impresión inalámbrica y la
conguración inalámbrica, visite www.hp.com/go/wirelessprinting.
Detección de la impresora
1. En el dispositivo móvil, active la conectividad Wi-Fi y busque redes
inalámbricas.
2. Seleccione la impresora, que en el panel de control de la impresora
se muestra como "Direct-modelo-nombre". Nombre de impresora
deejemplo: “Direct-bb-HP M277 Laserjet”.

15
Utilice el software HP Scan en el equipo para iniciar un trabajo de escaneado en la impresora.
Windows
Abra HP Printer Assistant, seleccione Escanear y a continuación, seleccione Escanear
un documento o una fotografía.
OS X
Haga clic en Aplicaciones y seleccione HP y, a continuación, HP Easy Scan.
9.
Uso de la función de escaneado
Solución de problemas
Guía del usuario
En la Guía del usuario se incluye información sobre el uso de la impresora y
solución de problemas. Está disponible en el CD de la impresora y en la Web:
1. Vaya a: www.hp.com/support/ljM129MFP
2. Seleccione el idioma correspondiente, la impresora si así se le indica y, luego,
haga clic en Guías del usuario.
Comprobar las actualizaciones del rmware
1. Vaya a: www.hp.com/support/ljM129MFP
2. Seleccione una impresora o una categoría en la lista y, a continuación,
hagaclic en Controladores.
3. Seleccione el sistema operativo y haga clic en el botón Siguiente.
4. Seleccione Firmware y haga clic en el botón Descargar.
Ayuda del panel de control (solo modelos con pantalla táctil)
Toque el botón Ayuda en el panel de control de la impresora para acceder a los
temas de ayuda.
Resolver mensajes de código de error
Estado de las luces Código de error Acción
La luz Atención parpadea Er/01 Cargue el papel en la bandeja
Recursos de asistencia adicional
En caso de que desee obtener ayuda integral de HP para la impresora, vaya a:
www.hp.com/support/ljM129MFP
• Solucionar problemas
• Buscar instrucciones de conguración avanzada
• Descargar las actualizaciones de software
• Participar en foros de asistencia
• Buscar información legal y sobre la garantía
• Acceder a recursos de impresión móvil

Dansk ............ 19
Català ............ 16
Español ......... 13
Italiano .......... 10
Deutsch ........... 7
Français ........... 4
English............. 1
Norsk ............. 37
Lietuvių ......... 34
Latviešu ......... 31
Suomi ............ 28
Eesti............... 25
Nederlands .... 22
Svenska ......... 43
Português ..... 40
16
www.hp.com/support/ljM129MFP www.register.hp.com
IMPORTANT:
Seguiu els
passos1a 3
del pòster de conguració
del maquinari de la
impressora i després
passeual pas 4
.
4.
Conguració inicial del tauler de control
Al tauler de control de la impressora, comproveu l’estat de la pantalla abans de començar la
instal·lació del programari.
Guia d'introducció de la
LaserJet Pro MFP M129-M132,
LaserJet Ultra MFP M133-M134
Connexió USB directa entre la impressora
il’ordinador
Utilitzeu un cable USB de tipus A-B.
Windows
1. No connecteu el cable USB abans d'instal·lar el programari. El procés
d'instal·lació us sol·licita que connecteu el cable en el moment adequat.
Si el cable ja està connectat, reinicieu la impressora quan la instal·lació us
demani de connectar el cable.
2. Continueu ns a “6. Descàrrega i instal·lació del programari.”
OS X
1. Connecteu el cable USB entre l'equip i la impressora abans d'instal·lar el
programari.
2. Continueu ns a “6. Descàrrega i instal·lació del programari.”
Connexió de xarxa sense l (només models
sense l)
Taulers de control de la pantalla tàctil
1. Per connectar la impressora a una xarxa sense l (Wi-Fi), al tauler de
control de la impressora, toqueu el botó Wireless (sense l) .
2. Toqueu Menú sense cables i després toqueu Wireless Setup Wizard
(Assistent per a la conguració sense l). Seleccioneu el nom de la xarxa
a la llista SSID o introduïu el nom de la xarxa si no hi és.
3. Utilitzeu el teclat per introduir la frase de pas i després toqueu el botó
D'acord.
4. Espereu mentre la impressora estableix una connexió de xarxa.
5. Al tauler de control de la impressora, toqueu el botó Xarxa. Si apareix
una adreça IP, s’ha establert la connexió de xarxa. Si no apareix, espereu
una estona i torneu-ho a provar. Apunteu l’adreça IP per utilitzar-la
durant la instal·lació del programari. Adreça IP d’exemple: 192.168.0.1
Taulers de control LED/de 2línies
1. Per connectar la impressora a una xarxa sense l (Wi-Fi), assegureu-vos
que la impressora, el punt d'accés i l'ordinador estiguin engegats i que
l'ordinador estigui connectat a la xarxa sense l.
2. Pot ser necessari un cable USB durant la instal·lació del programari.
3. Per imprimir des d'un ordinador, continueu amb “6. Descàrrega i instal·lació
del programari.” Per imprimir només des d'un telèfon od'una tauleta
continueu a “7. Impressió per a dispositius mòbils (opcional).”
Connexió de xarxa (Ethernet) amb l
(opcional)
Utilitzeu un cable de xarxa estàndard.
1. Connecteu el cable de xarxa a la impressora i a la xarxa. Espereu uns
minuts perquè la impressora obtingui una adreça de xarxa.
2. Continueu ns a “6. Descàrrega i instal·lació del programari.”
5.
Seleccioneu un mètode de connexió
Conguració manual de l’adreça IP
Consulteu la guia de l'usuari de la impressora per informar-vos sobre com
congurar manualment l'adreça IP www.hp.com/support/ljM129MFP.

17
Readiris Pro per a HP
Descarregueu aquest programari gratuït per habilitar característiques
d'escaneig gratuïtes, inclòs el reconeixement òptic de caràcters (OCR).
Per descarregar el programari des del web, aneu a:
www.hp.com/support/ljM129MFP
Seleccioneu Drivers (Controladors), seleccioneu el sistema operatiu pertinent
ifeu clic a Next (Següent). Feu clic a Application - 3rd Party (aplicació - tercers)
ial botó Download (Descarrega).
7.1
Connecteu el dispositiu a la xarxa sense l
Per imprimir des d'un telèfon o una tauleta, connecteu el dispositiu a la
mateixa xarxa sense l que la impressora.
Dispositius Apple iOS (AirPrint): Obriu l’element que voleu imprimir i
seleccioneu la icona Acció. Seleccioneu Print (Imprimeix) seleccioneu la
impressora i, després, Print (Imprimeix).
Dispositius Android (4.4 o posteriors): Obriu l'element que voleu imprimir
i premeu el botó Menú. Seleccioneu Print (Imprimeix) seleccioneu la
impressora i, després, Print (Imprimeix).
Per a alguns dispositius cal baixar l'aplicació complement HP Print Service des
de la botiga Google Play.
Windows Phone: Baixeu l'aplicació HP AiO Remote de Windows Store.
Més informació sobre la impressió mòbil
Per obtenir més informació sobre aquests i altres
sistemes operatius (Chrome/Google Cloud Print),
aneu a“www.hp.com/go/LaserJetMobilePrinting”
oescanegeu el codi QR següent.
6.
Descàrrega i instal·lació del programari
7.
Impressió per a dispositius mòbils (opcional)
Mètode 1: Descàrrega de l'HP Easy Start (Windows i OS X)
1. Aneu a 123.hp.com/laserjet i feu clic a Descarrega.
2. Seguiu les indicacions i instruccions de la pantalla per desar el txer a l’ordinador.
3. Inicieu el txer del programari des de la carpeta en què l'hàgiu desat.
Mètode 2: Descàrrega des del lloc web de suport de la
impressora (Windows i OS X)
1. Aneu a www.hp.com/support/ljM129MFP.
2. Seleccioneu Programari i controladors.
3. Descarregueu el programari per als vostres model d'impressora i sistema
operatiu.
4. Inicieu el txer del programari des de la carpeta en què l'hàgiu desat.
Mètode 3: Instal·lació mitjançant el CD de la impressora
(només per al Windows)
1. Introduïu el CD de la impressora a l’ordinador.
2. Seguiu les instruccions que apareguin a la pantalla per instal·lar el programari.
Per obtenir més informació, vegeu les notes d'instal·lació al CD de la impressora.
8.
Conguració del fax (només models de fax - opcional)
Per obtenir informació sobre com enviar un fax, vegeu la guia de l’usuari al CD de la impressora o aneu a:
www.hp.com/support/ljM129MFP.
7.2
Wi-Fi Direct (només per a models sense l)
La funció d'impressió de proximitat Wi-Fi Direct us permet imprimir des d'un
dispositiu mòbil sense l a poca distància, directament a una impressora
habilitada per al Wi-Fi Direct sense necessitat d'establir una connexió amb
una xarxa o amb Internet.
Habilitació del Wi-Fi Direct
Per habilitar el Wi-Fi Direct des del tauler de control, realitzeu els passos
següents.
1. Taulers de control de 2línies: Al tauler de control de la impressora,
premeu el botó Conguració i, a continuació, obriu el menú
Conguració de xarxa.
Taulers de control de la pantalla tàctil: A la pantalla d'inici del tauler
decontrol de la impressora, seleccioneu el botó d'informació de
connexió .
2. Obriu els següents menús:
- Wi-Fi Direct
- Paràmetres (només per als taulers de control de la pantalla tàctil)
- Activat/desactivat
3. Toqueu l'element del menú Activat. Si toqueu el botó d'apagat,
s'inhabilitarà la impressió Wi-Fi Direct.
Per obtenir més informació sobre la impressió i la conguració sense l,
aneu a www.hp.com/go/wirelessprinting.
Descobriu la impressora
1. Des del dispositiu mòbil, activeu la Wi-Fi i cerqueu xarxes sense l.
2. Seleccioneu la impressora, que es mostrarà com a "Direct-nom del
model" tal com es mostra al tauler de control de la impressora.
Nom d'exemple de la impressora: “Direct-bb-HP M277 Laserjet”.

18
Utilitzeu el programari HP Scan a l'ordinador per iniciar una tasca d'escaneig a la impressora.
Windows
Obriu l’HP Printer Assistant, seleccioneu Escàner i, a continuació, seleccioneu
Escaneja un document o una foto.
OS X
Feu clic a Applications (Aplicacions), seleccioneu HP i, per últim, seleccioneu
HP Easy Scan.
9.
Ús de la característica d'escaneig
Solució de problemes
Guia de l'usuari
La guia de l'usuari inclou informació sobre l'ús de la impressora i de resolució de
problemes. Està disponible al CD de la impressora i al web:
1. Aneu a: www.hp.com/support/ljM129MFP
2. Seleccioneu l'idioma pertinent, la impressora (si el sistema us ho sol·licita)
ifeu clic a User Guides (Guies de l'usuari).
Cerca d'actualitzacions de microprogramari
1. Aneu a: www.hp.com/support/ljM129MFP
2. Seleccioneu una impressora o una categoria a la llista i feu clic a Drivers
(Controladors).
3. Seleccioneu el sistema operatiu i feu clic al botó Next (Següent).
4. Seleccioneu Firmware (Microprogramari) i feu clic al botó Download
(Descarrega).
Ajuda del tauler de control (només models amb
pantallatàctil)
Toqueu el botó d'ajuda al tauler de control de la impressora per accedir als
temes de l'ajuda.
Resolució de missatges de codis d'error
Estat del llum Codi d'error Acció
L’indicador lluminós Er/01 Carregueu paper a la safata
Atenció parpelleja
Recursos de suport tècnic addicionals
Per obtenir una ajuda completa d'HP per a la impressora, aneu a:
www.hp.com/support/ljM129MFP
• Resolució de problemes
• Cerca d'instruccions de conguració avançades
• Descàrrega d'actualitzacions de programari
• Informació per unir-se a fòrums de suport tècnic
• Obtenció d'informació normativa i sobre la garantia
• Accés a recursos d'impressió mòbil

Dansk ................ 19
Català ................ 16
Español ............. 13
Italiano .............. 10
Deutsch ............... 7
Français ............... 4
English................. 1
Norsk ................. 37
Lietuvių ............. 34
Latviešu ............. 31
Suomi ................ 28
Eesti................... 25
Nederlands ........ 22
Svenska ............. 43
Português ......... 40
19
www.hp.com/support/ljM129MFP www.register.hp.com
VIGTIGT:
Følg
trin 1-3 på
opsætningsoversigten for
printerhardware, og fortsæt
derefter med trin 4.
4.
Konguration af kontrolpanelet
Kontrollér status på printerens kontrolpanel, før du starter softwareinstallationen.
Startvejledning til
LaserJet Pro MFP M129-M132,
LaserJet Ultra MFP M133-M134
USB-tilslutning direkte mellem printeren og
computeren
Du skal bruge et USB-kabel af typen A-til-B.
Windows
1. Tilslut ikke USB-kablet, før du installerer softwaren. Under
installationsprocessen bliver du bedt om at isætte kablet på det rette
tidspunkt. Hvis kablet allerede er tilsluttet, skal du genstarte printeren,
når installationsprogrammet giver dig besked om at tilslutte kablet.
2. Fortsæt til "6. Download og installation af softwaren."
OS X
1. Tilslut USB-kablet mellem computeren og printeren, før du installerer
softwaren.
2. Fortsæt til "6. Download og installation af softwaren."
Trådløs netværksforbindelse
(kun trådløse modeller)
Kontrolpaneler for berøringsskærm
1. Hvis du vil oprette forbindelse mellem printeren og et trådløst netværk
(Wi-Fi), skal du trykke på knappen Trådløs på printerens kontrolpanel.
2. Tryk på Menu for trådløs forbindelse, og tryk derefter på Guiden
Trådløs konguration. Vælg netværksnavnet på SSID-listen, eller angiv
netværksnavnet, hvis det ikke vises.
3. Brug tastaturet til at indtaste adgangskoden, og tryk derefter på
knappen OK.
4. Vent, mens printeren opretter forbindelse til netværket.
5. Tryk på knappen Netværk på printerens kontrolpanel. Hvis der vises
en IP-adresse, er der oprettet netværksforbindelse. Hvis ikke, skal du
vente et par minutter og prøve igen. Notér IP-adressen til brug under
softwareinstallation. Eksempel på IP-adresse: 192.168.0.1
Kontrolpaneler med 2 linjer/lysdiode
1. Hvis du vil oprette forbindelse mellem printeren og et trådløst netværk
(Wi-Fi), skal du sørge for, at printeren, adgangspunktet og computeren er
tændt, og at computeren har forbindelse til det trådløse netværk.
2. Du skal måske bruge et USB-kabel under softwareinstallationen.
3. Hvis du vil udskrive fra en computer, skal du fortsætte med "6. Download
og installation af softwaren." Hvis du kun vil udskrive fra en telefon eller
en tablet, skal du fortsætte med "7. Mobiludskrivning (valgfri)."
Netværksforbindelse med ledning (Ethernet)
(valgfrit)
Brug et standardnetværkskabel.
1. Tilslut netværkskablet til printeren og til netværket. Vent et par minutter,
så printeren kan nde netværksadressen.
2. Fortsæt til "6. Download og installation af softwaren."
5.
Valg forbindelsesmetode
Kongurer IP-adressen manuelt
I brugervejledningen til printeren kan du se, hvordan du manuelt kongurerer
IP-adressen www.hp.com/support/ljM129MFP.

20
Readiris Pro til HP
Download denne gratis software for at aktivere ekstra scanningsfunktioner,
herunder OCR (Optical Character Recognition).
Download softwaren fra internettet ved at gå til:
www.hp.com/support/ljM129MFP
Vælg Drivere, vælg det relevante operativsystem, og klik på Næste. Klik på
Applikation - tredjepart, og klik derefter på knappen Download.
7.1
Opret forbindelse mellem enheden og det trådløse
netværk
Hvis du vil udskrive fra en telefon eller en tablet, skal du oprette forbindelse
mellem enheden og det samme trådløse netværk som printeren.
Apple iOS-enheder (AirPrint): Åbn det element, der skal udskrives, og vælg
ikonet Handling. Vælg Udskriv, vælg printeren, og vælg derefter Udskriv.
Android-enheder (4.4 eller nyere): Åbn det element, der skal udskrives, og
tryk på knappen Menu. Vælg Udskriv, vælg printeren, og vælg Udskriv.
For visse enheder er det nødvendigt at hente HP Print Service-plugin-
programmet fra Google Play-butikken.
Windows Phone: Hent HP AiO Remote-appen fra Google Play-butikken.
Få mere at vide om mobiludskrivning
Du kan nde yderligere oplysninger om disse og andre
operativsystemer (Chrome/Google Cloud Print) ved at
gå til "www.hp.com/go/LaserJetMobilePrinting" eller
scanne QR-koden nedenfor.
6.
Download og installation af softwaren
7.
Mobiludskrivning (valgfri)
Metode 1: Download HP Easy Start (Windows og OS X)
1. Gå til 123.hp.com/laserjet, og klik på Download.
2. Følg vejledningen og meddelelserne på skærmen for at gemme len på
computeren.
3. Start softwarelen fra den mappe, hvor len blev gemt.
Metode 2: Download fra webstedet med printersupport
(Windows og OS X)
1. Gå til www.hp.com/support/ljM129MFP.
2. Vælg Software og drivere.
3. Download softwaren til din printermodel og dit operativsystem.
4. Start softwarelen fra den mappe, hvor len blev gemt.
Metode 3: Installer fra printer-cd'en
(kun Windows)
1. Isæt printer-cd'en i computeren.
2. Følg anvisningerne på skærmen for at installere softwaren. Du kan nde ere
oplysninger i installationsnoterne på printer-cd'en.
8.
Opsætning af fax (kun faxmodeller – valgfrit)
Du kan nde ere oplysninger om, hvordan du sender en fax, i brugervejledningen på printer-cd’en eller ved at gå til:
www.hp.com/support/ljM129MFP.
7.2
Wi-Fi Direct (kun trådløse modeller)
Med Wi-Fi Direct kan du udskrive fra en trådløs mobilenhed direkte til en
Wi-Fi Direct-aktiveret printer, uden at det kræver forbindelse til et netværk
eller internettet.
Aktivér Wi-Fi Direct
Gennemfør følgende trin for at aktivere Wi-Fi Direct fra kontrolpanelet.
1. Kontrolpaneler med 2 linjer: Tryk på knappen Opsætning på
printerens kontrolpanel, og åbn derefter menuen Netværksopsætning.
Kontrolpaneler for berøringsskærm: Vælg knappen
Forbindelsesoplysninger på startskærmbilledet på printerens
kontrolpanel.
2. Åbn følgende menuer:
- Wi-Fi Direct
- Indstillinger (kun kontrolpaneler for berøringsskærm)
- Tænd/sluk
3. Tryk på menupunktet Til. Når du trykker på knappen Fra, deaktiveres
Wi-Fi Direct-udskrivning.
Du kan nde ere oplysninger om trådløs udskrivning og trådløs
opsætning på www.hp.com/go/wirelessprinting.
Registrer printeren
1. Fra mobilenheden skal du aktivere Wi-Fi og søge efter trådløse netværk.
2. Vælg den printer, der vises som "Direct-modelnavn" som vist i printerens
kontrolpanel. Eksempel på printernavn: "Direct-bb-HP M277 Laserjet".
A página está carregando...
A página está carregando...
A página está carregando...
A página está carregando...
A página está carregando...
A página está carregando...
A página está carregando...
A página está carregando...
A página está carregando...
A página está carregando...
A página está carregando...
A página está carregando...
A página está carregando...
A página está carregando...
A página está carregando...
A página está carregando...
A página está carregando...
A página está carregando...
A página está carregando...
A página está carregando...
A página está carregando...
A página está carregando...
A página está carregando...
A página está carregando...
A página está carregando...
A página está carregando...
A página está carregando...
A página está carregando...
-
 1
1
-
 2
2
-
 3
3
-
 4
4
-
 5
5
-
 6
6
-
 7
7
-
 8
8
-
 9
9
-
 10
10
-
 11
11
-
 12
12
-
 13
13
-
 14
14
-
 15
15
-
 16
16
-
 17
17
-
 18
18
-
 19
19
-
 20
20
-
 21
21
-
 22
22
-
 23
23
-
 24
24
-
 25
25
-
 26
26
-
 27
27
-
 28
28
-
 29
29
-
 30
30
-
 31
31
-
 32
32
-
 33
33
-
 34
34
-
 35
35
-
 36
36
-
 37
37
-
 38
38
-
 39
39
-
 40
40
-
 41
41
-
 42
42
-
 43
43
-
 44
44
-
 45
45
-
 46
46
-
 47
47
-
 48
48


HP LaserJet Ultra MFP M134 Printer series Manual do usuário
- Tipo
- Manual do usuário
- Este manual também é adequado para
em outras línguas
- español: HP LaserJet Ultra MFP M134 Printer series Manual de usuario
- français: HP LaserJet Ultra MFP M134 Printer series Manuel utilisateur
- italiano: HP LaserJet Ultra MFP M134 Printer series Manuale utente
- English: HP LaserJet Ultra MFP M134 Printer series User manual
- Nederlands: HP LaserJet Ultra MFP M134 Printer series Handleiding
- Deutsch: HP LaserJet Ultra MFP M134 Printer series Benutzerhandbuch
- dansk: HP LaserJet Ultra MFP M134 Printer series Brugermanual
- eesti: HP LaserJet Ultra MFP M134 Printer series Kasutusjuhend
- svenska: HP LaserJet Ultra MFP M134 Printer series Användarmanual
- suomi: HP LaserJet Ultra MFP M134 Printer series Ohjekirja
Artigos relacionados
-
HP M130nw Manual do usuário
-
-
HP LaserJet Pro M101 Manual do usuário
-
-
-
HP Color LaserJet Pro M153-M154 Printer series Manual do usuário
-
-
-
-