Blending Function (without
heat)
Refer to illustration 9A - 9D
1 Add the food to the goblet. For
best results always add the frozen
ingredients in last.
O Ensure the fill level is between the
500ml MIN and 1750ml MAX mark
inside the goblet.
2 Fit the lid and filler cap – turn
clockwise to lock.
3 Turn the rotary dial to the required
speed or Pulse. Refer to the cold
blending chart for speed and time
information.
4 Press the Start/Stop button to start
– the display screen will start to
count up.
Note : The blender will switch off
automatically after 3 minutes continuous
operation. To reset the time press 'Start'.
O To pause the blending cycle press
the 'Start/Stop' button. To resume,
press the 'Start/Stop' button again.
5 To end or cancel the blending cycle
press the 'Start/Stop' button and
turn the dial to 'O'.
Pulse Function
O Use the in short bursts to operate
the motor in a Start/Stop action. The
pulse will operate for as long as the
Start/Stop button is pressed.
O Use for crushing ice.
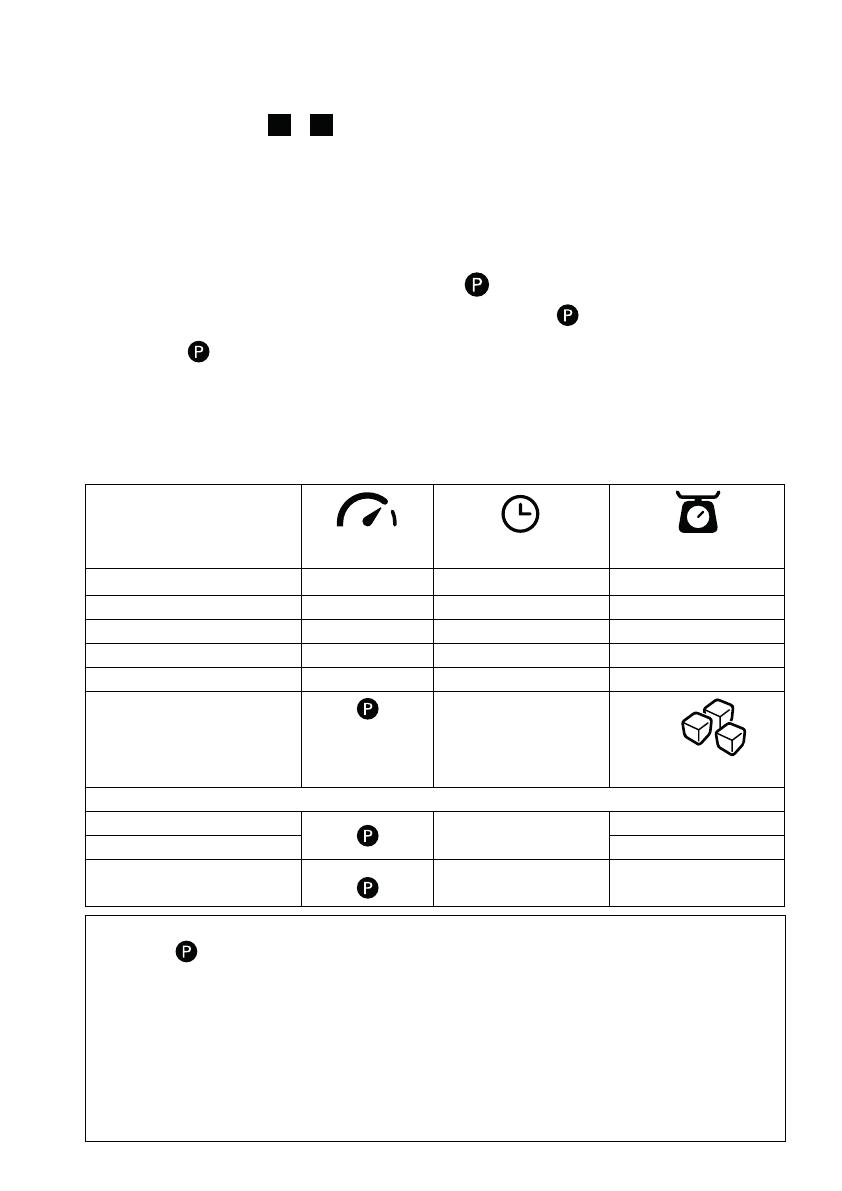
Recipe
(mins : secs) (MAX)
Milkshakes 3 - 4 01:00 – 01:30 500 – 1000ml
Cold Drinks & Smoothies 3 - 4 01:00 – 02:00 500 – 1750ml
Chilled Soups 4 02:00 – 03:00 500 – 1750ml
Batter 1 - 3 01:00 1000ml
Cold purees 3 - 4 00:30 – 01:00 300g
Ice Crushing 00:20 - 00:40
6 X
125g
Honey & Prune Spread
Pitted Prunes 00:05 360g
Honey 320g
Add
Water 00:08 300g
Hints and Tips
O Use the pulse to process ice in a stop/start operation for best results.
O Smoothies – place the fresh fruit and liquid ingredients in first (includes yoghurt, milk
and fruit juices). Then add ice or frozen ingredients (includes frozen fruit, ice or ice
cream)
O To blend dry ingredients - cut into pieces, remove the filler cap, then with the
machine running, drop the pieces down one by one. Keep your hand over the
opening. For best results empty regularly.
O Thick mixtures, e.g. pâtés and dips, may need scraping down. If the mixture is
difficult to process, add more liquid.
9


