
CV1003
Central vacuum cleaner
Installation and Operating Manual. . . . . 6
Zentralstaubsauger
Montage- und Bedienungsanleitung. . 15
Aspirateur central
Instructions de montage
et de service . . . . . . . . . . . . . . . . . . . . . . 24
Aspirador central
Instrucciones de montaje y de uso . . . . 34
Aspirador central
Instruções de montagem e manual de
instruções . . . . . . . . . . . . . . . . . . . . . . . . 43
Aspirapolvere centralizzato
Istruzioni di montaggio e d’uso . . . . . . 52
Centrale stofzuiger
Montagehandleiding en
gebruiksaanwijzing . . . . . . . . . . . . . . . . 61
Centralstøvsuger
Monterings- og betjeningsvejledning . 70
Centraldammsugare
Monterings- och bruksanvisning . . . . . 79
Sentralstøvsuger
Monterings- og bruksanvisning . . . . . . 88
Keskuspölynimuri
Asennus- ja käyttöohje . . . . . . . . . . . . . 97
Центральный пылесос
Инструкция по монтажу и
эксплуатации. . . . . . . . . . . . . . . . . . . . 106
Odkurzacz centralny
Instrukcja montażu i obsługi. . . . . . . . 116
Centrálny vysávač
Návod na montáž a uvedenie
do prevádzky. . . . . . . . . . . . . . . . . . . . 125
Centrální vysavač
Návod k montáži a obsluze. . . . . . . . . 134
Központi porszívó
Szerelési és használati útmutató. . . . . 143
EN
DE
FR
ES
PT
IT
NL
DA
SV
NO
FI
RU
PL
SK
CS
HU
CLEANING
VACUUM & CLEANERS
CV1003-IO-16s.book Seite 1 Mittwoch, 14. Februar 2018 1:56 13

CV1003
2
1
2
3
4
5
6
7
8
1
3
1
2
4
2
CV1003-IO-16s.book Seite 2 Mittwoch, 14. Februar 2018 1:56 13

CV1003
3
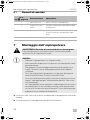
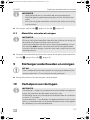
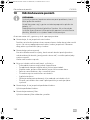
min. 10 mm
max. 25 mm
280 mm
153 mm
3
2.
1.
4
5
6
7
8
CV1003-IO-16s.book Seite 3 Mittwoch, 14. Februar 2018 1:56 13

CV1003
4
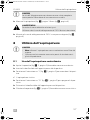
9
0
a
b
c
d
CV1003-IO-16s.book Seite 4 Mittwoch, 14. Februar 2018 1:56 13

CV1003
5
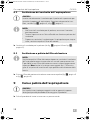
e
f
g
h
CV1003-IO-16s.book Seite 5 Mittwoch, 14. Februar 2018 1:56 13

EN
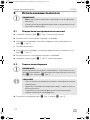
Explanation of symbols CV1003
6
Please read this instruction manual carefully before installation and
first use, and store it in a safe place. If you pass on the product to
another person, hand over this instruction manual along with it.
Table of contents
1 Explanation of symbols . . . . . . . . . . . . . . . . . . . . . . . . . . . . . . . . . . . . . . 6
2 Safety instructions . . . . . . . . . . . . . . . . . . . . . . . . . . . . . . . . . . . . . . . . . . 7
3 Scope of delivery . . . . . . . . . . . . . . . . . . . . . . . . . . . . . . . . . . . . . . . . . . . 9
4 Accessories. . . . . . . . . . . . . . . . . . . . . . . . . . . . . . . . . . . . . . . . . . . . . . . . 9
5 Intended use. . . . . . . . . . . . . . . . . . . . . . . . . . . . . . . . . . . . . . . . . . . . . . . 9
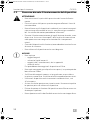
6 Technical description. . . . . . . . . . . . . . . . . . . . . . . . . . . . . . . . . . . . . . . . 9
7 Installing the vacuum cleaner . . . . . . . . . . . . . . . . . . . . . . . . . . . . . . . . .10
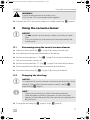
8 Using the vacuum cleaner . . . . . . . . . . . . . . . . . . . . . . . . . . . . . . . . . . . . 11
9 Maintaining and cleaning the vacuum cleaner . . . . . . . . . . . . . . . . . . . .12
10 Troubleshooting. . . . . . . . . . . . . . . . . . . . . . . . . . . . . . . . . . . . . . . . . . . .12
11 Warranty . . . . . . . . . . . . . . . . . . . . . . . . . . . . . . . . . . . . . . . . . . . . . . . . . .13
12 Disposal . . . . . . . . . . . . . . . . . . . . . . . . . . . . . . . . . . . . . . . . . . . . . . . . . .13
13 Technical data . . . . . . . . . . . . . . . . . . . . . . . . . . . . . . . . . . . . . . . . . . . . .14
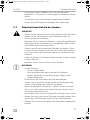
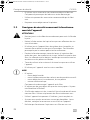
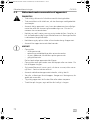
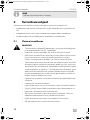
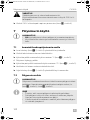
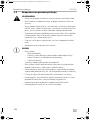
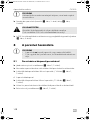
1 Explanation of symbols
!
!
A
WARNING!
Safety instruction: Failure to observe this instruction can cause
fatal or serious injury.
CAUTION!
Safety instruction: Failure to observe this instruction can lead to
injury.
NOTICE!
Failure to observe this instruction can cause material damage and
impair the function of the product.
CV1003-IO-16s.book Seite 6 Mittwoch, 14. Februar 2018 1:56 13

EN
CV1003 Safety instructions
7
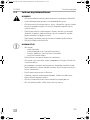
I
2 Safety instructions
The manufacturer accepts no liability for damage in the following cases:
•
Damage to the product resulting from mechanical influences and excess
voltage
•
Alterations to the product without express permission from the manufacturer
•
Use for purposes other than those described in the operating manual
2.1 General safety
!
WARNING!
•
Before you use the device for the first time, check that the operat-
ing voltage matches the mains voltage (see type plate).
•
Do not operate the appliance if it is visibly damaged.
•
This device may only be repaired by qualified personnel. Inade-
quate repairs may cause serious hazards.
Should your appliance need to be repaired, please contact cus-
tomer service.
•
This appliance can be used by children aged 8 years or over, as
well as by persons with diminished physical, sensory or mental
capacities or a lack of experience and knowledge, providing they
are supervised, or have been taught how to use the appliance
safely and are aware of the resulting risks.
•
Cleaning and user maintenance must not carried out by unsuper-
vised children.
•
Children must not play with the device.
•
Children must be supervised to ensure that they do not play with
the device.
•
Always keep and use the device out of the reach of children under
8 years of age.
•
Never expose the device to moisture.
•
Do not use accessories that have not been recommended by the
manufacturer. This can lead to injury and material damage.
•
Only use accessories recommended by the manufacturer.
•
Do not lean any objects against the vacuum cleaner.
NOTE
Supplementary information for operating the product.
CV1003-IO-16s.book Seite 7 Mittwoch, 14. Februar 2018 1:56 13

EN
Safety instructions CV1003
8
2.2 Operating the device safely
!
CAUTION!
•
Never pull the plug out of the socket by the connection cable.
•
Remove the power plug from the socket if you plan to carry out
maintenance work.
•
Never use the device in rooms where flammable materials are
stored or flammable gases have built up. Sparks from the motor
could ignite them.
•
Keep the nozzles away from eyes, ears and face while operating.
Ensure that hair, loose clothing and fingers do not get in the out-
lets or moving parts.
•
Keep children and animals at a safe distance when operating the
device.
•
Do not use the device with wet hands.
A
NOTICE!
•
Do not vacuum any
–wet objects
– solvents or caustic liquids
– hot, glowing, hard or sharp objects
–poisonous materials
These could damage the device or the filter.
•
Do not vacuum any large objects, such as waste paper or cloths.
These could block the hose.
•
If the motor filter is dirty, rinse it in warm water or insert a new filter.
Only insert filters that are completely dry.
•
Only use the device indoors, never outside.
•
Make sure that none of the vents are blocked. If necessary, clean
the vents before you use the device.
•
Do not use the device without a filter or a dust bag.
•
Do not tread on the hose and do not pull too tightly on it.
CV1003-IO-16s.book Seite 8 Mittwoch, 14. Februar 2018 1:56 13

EN
CV1003 Scope of delivery
9
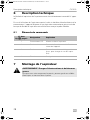
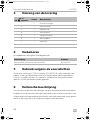
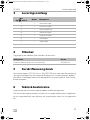
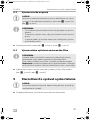
3Scope of delivery
4 Accessories
Available as accessories (not included in the scope of delivery):
5 Intended use
The CV1003 central vacuum cleaner (ref. no. 9103501124) is a vacuum cleaner
for installation in a suitable cavity wall or in existing fixtures in caravans, motor-
homes or boats. This device is not intended for commercial use. It may not be
used outdoors.
6 Technical description
The suction hose of the central vacuum cleaner is connected directly to the
device.
It must be switched on and off using the switch when using the central vacuum
cleaner.The device has automatic suction which is activated when the suction
hose is inserted into the hose socket.
No. in
fig. 1, page 2
Quantity Designation
1 1 Central vacuum cleaner
21Floor nozzle
3 1 Attachment brush
41Dust nozzle
5 1 Crevice nozzle
6 1 Telescopic tube
7 1 Suction hose
8 2 Dust bag
Designation Ref. no.
New dust bag (pack of 5 incl. a motor filter) 9103501125
CV1003-IO-16s.book Seite 9 Mittwoch, 14. Februar 2018 1:56 13

EN
Installing the vacuum cleaner CV1003
10
6.1 Control elements
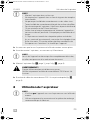
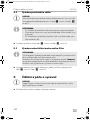
7 Installing the vacuum cleaner
!
A
➤ Ensure that the dust bag and the motor filter are in place.
➤ Check the vacuum cleaner works prior to installation.
A
➤ Mount the vacuum cleaner (fig. 3, page 3 to fig. 9, page 4).
No. in
fig. 2, page 2
Description Explanation
1 I/O switch Switches the vacuum cleaner on and off.
2 Sliding cover Closes up the hose connection on the
device.
3 Slider Opens the front of the device (e.g. for
changing the dust bag).
4 Motor filter Protects the motor from contamination.
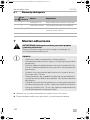
WARNING! Danger of electrocution and serious injury.
Beware of electrical cables in the wall when drilling and sawing.
NOTICE!
•
Mount the vacuum cleaner in a dry place.
•
Do not mount the vacuum cleaner in an area which is subject to
high temperatures.
•
Do not bend the connection cable round sharp edges or cor-
ners. Keep the connection cable away from heated surfaces.
•
To install the vacuum cleaner, the wall thickness must be a mini-
mum of 10 mm and a maximum of 25 mm.
•
Ensure there is a socket nearby which can be used to supply the
vacuum cleaner with power. Do not use extension cables.
•
If the vacuum cleaner is being installed in small spaces with poor
ventilation (e.g. cabinet), then an air outlet and an air outlet grille
with a cross-section of 70 mm must be installed in order to trans-
port warm air generated by the device outside.
NOTICE!
The bolts on the housing must not be screwed out completely
because they are fitted with a spring mechanism.
CV1003-IO-16s.book Seite 10 Mittwoch, 14. Februar 2018 1:56 13

EN
CV1003 Using the vacuum cleaner
11
!
➤ Connect the 230 V connection cable to a suitable socket (fig. 0, page 4).
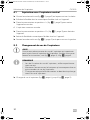
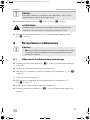
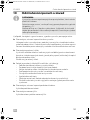
8Using the vacuum cleaner
A
8.1 Vacuuming using the central vacuum cleaner
➤ Open the sliding cover (fig. 2 2, page 2) by sliding it to the right.
➤ Insert the hose into the hose connection on the device.
➤ Set the switch to position “I” (fig. 2 1, page 2) to switch on the device.
✓ The vacuum cleaner switches on.
➤ Set the switch to position “O” (fig. 2 1, page 2) to switch off the device.
➤ Disconnect the hose from the hose connection on the device.
➤ Close the sliding cover (fig. 2 2, page 2) by sliding it to the left.
8.2 Changing the dust bag
A
I
➤ Change the dust bag (fig. a, page 4, to fig. f, page 5).
WARNING!
Danger of electrocution and serious injury.
Only use the 230 V connection cable supplied.
NOTICE!
•
Do not use the vacuum cleaner without a dust bag or motor
filter.
•
Only use spare parts and accessories recommended by the
manufacturer.
NOTICE!
It is important for vacuum cleaner suction that the dust bag is fitted
correctly. Please follow the instructions carefully, see fig. a,
page 4 to fig. f, page 5.
NOTE
•
Make sure the dust bag is fitted in the correct position.
•
Hold the opening upwards to prevent any dust falling out.
•
Replace or clean the motor filter after you have changed the dust
bag five times.
CV1003-IO-16s.book Seite 11 Mittwoch, 14. Februar 2018 1:56 13

EN
Maintaining and cleaning the vacuum cleaner CV1003
12
8.3 Replacing and cleaning the motor filter
I
➤ Remove the motor filter and insert a new one or reinsert the cleaned motor
filter (fig. g, page 5 and fig. h, page 5).
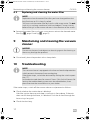
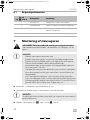
9 Maintaining and cleaning the vacuum
cleaner
A
➤ Occasionally clean the product with a damp cloth.
10 Troubleshooting
I
If the motor stops, switch off the vacuum cleaner and proceed as follows:
➤ Check whether the suction hose is blocked.
Hold the suction hose up and drop a small coin in from above. If the coin
does not fall through the hose, it is blocked. Push the dirt ball through the
hose using a long rod.
➤ Check the dust bag.
NOTE
Replace or clean the motor filter after you have changed the dust
bag five times or if it is heavily soiled.
You can wash the motor filter by hand in mild soapy water. Do not
wash it in a washing machine or with hard objects. Leave it to dry
before fitting it in the vacuum cleaner in the direction of the arrows.
NOTICE!
Do not use sharp or hard objects or cleaning agents for cleaning as
these may damage the product.
NOTE
The vacuum cleaner is equipped with a thermal overload protection
which prevents the motor from overheating.
If the motor stops, switch the device off by setting the switch to posi-
tion “O”.
Let the device cool down for around 1 hour. If this fault still occurs fol-
lowing the troubleshooting measures described below, then
please contact the manufacturer or your dealer.
CV1003-IO-16s.book Seite 12 Mittwoch, 14. Februar 2018 1:56 13

EN
CV1003 Warranty
13
If a large amount of dirt which is not household dust (plasterboard dust, fine
sawdust etc.) is vacuumed up, the pores in the dust bag can get blocked.
Insert a new dust bag.
➤ Clean the suction hose if it is heavily soiled.
– Hold the ends of the suction hose up high.
– Pour liquid detergent into both ends.
– Fill up with water while holding both ends up.
– Shake the suction hose to and fro to loosen the dirt.
– Pull the suction hose apart as far as possible.
– Rinse out the dirt.
– Repeat this procedure until the suction hose is clean.
– Hang the suction hose up from the middle and leave it to dry before using
it again.
➤ Check whether the floor nozzle is blocked.
Clean the floor nozzle.
➤ Check the motor filter.
Clean or replace the motor filter.
11 Warranty
The statutory warranty period applies. If the product is defective, please contact
the manufacturer's branch in your country (see the back of the instruction manual
for the addresses) or your retailer.
For repair and guarantee processing, please include the following documents
when you send in the device:
•
A copy of the receipt with purchasing date
•
A reason for the claim or description of the fault
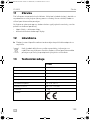
12 Disposal
➤ Place the packaging material in the appropriate recycling waste bins
wherever possible.
M
If you wish to finally dispose of the product, ask your local recycling
centre or specialist dealer for details about how to do this in
accordance with the applicable disposal regulations.
CV1003-IO-16s.book Seite 13 Mittwoch, 14. Februar 2018 1:56 13

EN
Technical data CV1003
14
13 Technical data
CV1003
Ref. no.: 9103501124
Input voltage: 220 – 240 Vw
Power consumption: 950 W
Current: 4.5 A
Suction power: 2500 mm water column
Operating temperature: –15 °C to +40 °C
Dimensions W x H x D: 298 x 171 x 175 mm
Weight: 2.7 kg
Certificate:
CV1003-IO-16s.book Seite 14 Mittwoch, 14. Februar 2018 1:56 13

DE
CV1003 Erklärung der Symbole
15
Bitte lesen Sie diese Anleitung vor Einbau und Inbetriebnahme sorg-
fältig durch und bewahren Sie sie auf. Geben Sie sie im Falle einer
Weitergabe des Produktes an den Nutzer weiter.
Inhaltsverzeichnis
1 Erklärung der Symbole. . . . . . . . . . . . . . . . . . . . . . . . . . . . . . . . . . . . . . 15
2 Sicherheitshinweise . . . . . . . . . . . . . . . . . . . . . . . . . . . . . . . . . . . . . . . . 16
3 Lieferumfang . . . . . . . . . . . . . . . . . . . . . . . . . . . . . . . . . . . . . . . . . . . . . . 18
4 Zubehör . . . . . . . . . . . . . . . . . . . . . . . . . . . . . . . . . . . . . . . . . . . . . . . . . 18
5 Bestimmungsgemäßer Gebrauch . . . . . . . . . . . . . . . . . . . . . . . . . . . . . 18
6 Technische Beschreibung . . . . . . . . . . . . . . . . . . . . . . . . . . . . . . . . . . . 18
7 Staubsauger montieren . . . . . . . . . . . . . . . . . . . . . . . . . . . . . . . . . . . . . 19
8 Staubsauger benutzen . . . . . . . . . . . . . . . . . . . . . . . . . . . . . . . . . . . . . . 20
9 Staubsauger pflegen und reinigen . . . . . . . . . . . . . . . . . . . . . . . . . . . . 21
10 Störungsbeseitigung . . . . . . . . . . . . . . . . . . . . . . . . . . . . . . . . . . . . . . . 22
11 Gewährleistung . . . . . . . . . . . . . . . . . . . . . . . . . . . . . . . . . . . . . . . . . . . 23
12 Entsorgung . . . . . . . . . . . . . . . . . . . . . . . . . . . . . . . . . . . . . . . . . . . . . . . 23
13 Technische Daten. . . . . . . . . . . . . . . . . . . . . . . . . . . . . . . . . . . . . . . . . . 23
1 Erklärung der Symbole
!
!
A
WARNUNG!
Sicherheitshinweis: Nichtbeachtung kann zu Tod oder schwerer
Verletzung führen.
VORSICHT!
Sicherheitshinweis: Nichtbeachtung kann zu Verletzungen
führen.
ACHTUNG!
Nichtbeachtung kann zu Materialschäden führen und die Funktion
des Produktes beeinträchtigen.
CV1003-IO-16s.book Seite 15 Mittwoch, 14. Februar 2018 1:56 13

DE
Sicherheitshinweise CV1003
16
I
2 Sicherheitshinweise
Der Hersteller übernimmt in folgenden Fällen keine Haftung für Schäden:
•
Beschädigungen am Produkt durch mechanische Einflüsse und Über-
spannungen
•
Veränderungen am Produkt ohne ausdrückliche Genehmigung vom
Hersteller
•
Verwendung für andere als die in der Anleitung beschriebenen Zwecke
2.1 Allgemeine Sicherheit
!
WARNUNG!
•
Kontrollieren Sie vor Inbetriebnahme des Gerätes, ob Betriebs-
spannung und Netzspannung übereinstimmen (siehe Typen-
schild).
•
Wenn das Gerät sichtbare Beschädigungen aufweist, dürfen Sie
es nicht in Betrieb nehmen.
•
Reparaturen an diesem Gerät dürfen nur von Fachkräften durch-
geführt werden. Durch unsachgemäße Reparaturen können
erhebliche Gefahren entstehen.
Wenden Sie sich im Reparaturfall an den Kundendienst.
•
Dieses Gerät kann von Kindern ab 8 Jahren und darüber sowie von
Personen mit verringerten physischen, sensorischen oder menta-
len Fähigkeiten oder Mangel an Erfahrung und Wissen benutzt
werden, wenn sie beaufsichtigt oder bezüglich des sicheren
Gebrauchs des Gerätes unterwiesen wurden und die daraus
resultierenden Gefahren verstehen.
•
Reinigung und Benutzer-Wartung dürfen nicht von Kindern ohne
Beaufsichtigung durchgeführt werden.
•
Kinder dürfen nicht mit dem Gerät spielen.
•
Kinder sollten beaufsichtigt werden, um sicherzustellen, dass sie
nicht mit dem Gerät spielen.
•
Verwahren und benutzen Sie das Gerät außerhalb der Reichweite
von Kindern unter 8 Jahren.
•
Setzen Sie das Gerät niemals Nässe aus.
HINWEIS
Ergänzende Informationen zur Bedienung des Produktes.
CV1003-IO-16s.book Seite 16 Mittwoch, 14. Februar 2018 1:56 13

DE
CV1003 Sicherheitshinweise
17
•
Verwenden Sie kein Zubehör, dass nicht vom Hersteller
empfohlen ist. Dies kann zur Verletzungen und Materialschäden
führen.
•
Verwenden Sie nur vom Hersteller empfohlenes Zubehör.
•
Lehnen Sie keine Gegenstände gegen den Staubsauger.
2.2 Sicherheit beim Betrieb des Gerätes
!
VORSICHT!
•
Ziehen Sie den Stecker nie am Anschlusskabel aus der Steckdose.
•
Ziehen Sie den Netzstecker aus der Steckdose, wenn Sie
Wartungsarbeiten vornehmen.
•
Benutzen Sie das Gerät nie in Räumen, in denen feuergefährliche
Stoffe lagern oder sich brennbare Gase gebildet haben. Funken
vom Motor können diese entzünden.
•
Halten Sie die Düsen während des Betriebs von Augen, Ohren
und Gesicht fern. Achten Sie darauf, dass Haare, lose Kleidung
und Finger nicht in die Öffnungen oder an sich drehende Teile
kommen.
•
Halten Sie Kinder und Tiere beim Gebrauch des Gerätes in einem
sicheren Abstand.
•
Benutzen Sie das Gerät nicht mit nassen Händen.
A
ACHTUNG!
•
Saugen Sie keine
– nassen Gegenstände
– lösungsmittelhaltigen oder ätzenden Flüssigkeiten
– heißen, glühenden, harten oder spitzen Gegenstände
– giftigen Materialien
Diese können das Gerät oder den Filter beschädigen.
•
Saugen Sie keine großen Gegenstände wie Abfallpapier oder
Tücher. Diese können den Schlauch verstopfen.
•
Wenn der Motorfilter schmutzig ist, spülen Sie ihn in warmem
Wasser aus, oder setzen einen neuen Filter ein. Setzen Sie nur
vollständig trockene Filter ein.
•
Verwenden Sie das Gerät ausschließlich in Räumen, nie im Freien.
•
Achten Sie darauf, dass keine Öffnungen verstopft werden. Reini-
gen Sie ggf. die Öffnungen, bevor Sie das Gerät benutzen.
•
Nehmen Sie das Gerät nicht ohne Filter oder ohne Staubbeutel in
Betrieb.
CV1003-IO-16s.book Seite 17 Mittwoch, 14. Februar 2018 1:56 13

DE
Lieferumfang CV1003
18
•
Treten sie nicht auf den Schlauch, und ziehen sie nicht zu stark am
Schlauch.
3 Lieferumfang
4Zubehör
Als Zubehör erhältlich (nicht im Lieferumfang enthalten):
5 Bestimmungsgemäßer Gebrauch
Der Zentralstaubsauger CV1003 (Art.-Nr. 9103501124) ist ein Staubsauger für
den Einbau in eine geeignete Hohlwand oder in vorhandene Einbauten in
Wohnwagen, Wohnmobilen oder Booten. Dieses Gerät ist nicht für den
gewerblichen Einsatz vorgesehen. Es darf nicht im Freien verwendet werden.
6 Technische Beschreibung
Der Saugschlauch des Zentralstaubsaugers wird direkt am Gerät
angeschlossen.
Nr. in
Abb. 1, Seite 2
Menge Bezeichnung
1 1 Zentralstaubsauger
2 1 Bodendüse
3 1 Aufsatzbürste
4 1 Staubdüse
51Fugendüse
6 1 Teleskoprohr
71Saugschlauch
8 2 Staubbeutel
Bezeichnung Art.-Nr.
Ersatz-Staubbeutel (5er-Pack inkl. ein Motorfilter) 9103501125
CV1003-IO-16s.book Seite 18 Mittwoch, 14. Februar 2018 1:56 13

DE
CV1003 Staubsauger montieren
19
Bei Benutzung des Zentralstaubsaugers muss dieser über den Schalter ein- und
ausgeschaltet werden. Das Gerät verfügt über eine Saugautomatik, die aktiviert
wird, wenn der Saugschlauch in die Schlauchsteckdose eingesteckt wird.
6.1 Bedienelemente
7Staubsauger montieren
!
A
Nr. in
Abb. 2, Seite 2
Bezeichnung Erklärung
1 Schalter I/O Schaltet den Staubsauger ein oder aus.
2 Schiebeblende Verschließt den Schlauchanschluss am
Gerät.
3 Schieber Öffnet die Gerätefront (z. B. für den
Wechsel des Staubbeutels).
4 Motorfilter Schützt den Motor vor Verunreinigung.
WARNUNG! Gefahr von Stromschlägen und schweren Ver-
letzungen.
Achten Sie beim Bohren und Sägen auf Elektrokabel, die sich in der
Wand befinden.
ACHTUNG!
•
Montieren Sie den Staubsauger an einem trockenen Ort.
•
Montieren Sie den Staubsauger nicht in einem Bereich, an dem
hohe Temperaturen herrschen.
•
Biegen Sie das Anschlusskabel nicht um scharfe Kanten oder
Ecken. Halten Sie das Anschlusskabel von beheizten Flächen
fern.
•
Für die Montage des Staubsaugers muss die Wandstärke min.
10 mm und max. 25 mm betragen.
•
Beachten Sie, dass sich eine Steckdose in der Nähe befindet,
über die der Staubsauger mit Strom versorgt werden kann. Ver-
wenden Sie keine Verlängerungskabel.
•
Falls der Staubsauger in kleinen Räumen mit schlechter Belüf-
tung (z. B. Einbauschrank) montiert wird, muss ein Luftauslass
mit Luftauslassgitter von mindestens 70 mm Querschnitt einge-
baut werden, um die durch das Gerät erwärmte Luft nach außen
zu transportieren.
CV1003-IO-16s.book Seite 19 Mittwoch, 14. Februar 2018 1:56 13

DE
Staubsauger benutzen CV1003
20
➤ Vergewissern Sie sich, dass der Staubbeutel und der Motorfilter eingesetzt
sind.
➤ Prüfen Sie vor der Montage des Staubsaugers, ob er funktioniert.
A
➤ Montieren Sie den Staubsauger (Abb. 3, Seite 3 bis Abb. 9, Seite 4).
!
➤ Schließen Sie das 230-V-Anschlusskabel an eine geeignete Steckdose an
(Abb. 0, Seite 4).
8 Staubsauger benutzen
A
8.1 Mit Zentralstaubsauger staubsaugen
➤ Öffnen Sie die Schiebeblende (Abb. 2 2, Seite 2), indem Sie sie nach
rechts schieben.
➤ Stecken Sie den Schlauch in den Schlauchanschluss am Gerät.
➤ Stellen Sie den Schalter in Stellung „I“ (Abb. 2 1, Seite 2), um das Gerät
einzuschalten.
✓ Der Staubsauger wird eingeschaltet.
➤ Stellen Sie den Schalter in Stellung „O“ (Abb. 2 1, Seite 2), um das Gerät
auszuschalten.
➤ Ziehen Sie den Schlauch aus dem Schlauchanschluss am Gerät.
➤ Schließen Sie die Schiebeblende (Abb. 2 2, Seite 2), indem Sie sie nach
links schieben.
ACHTUNG!
Die Schrauben am Gehäuse dürfen nicht komplett herausgedreht
werden, da sie mit einem Federmechanismus versehen sind.
WARNUNG!
Gefahr von Stromschlägen und schweren Verletzungen.
Verwenden Sie nur das mitgelieferte 230-V-Anschlusskabel.
ACHTUNG!
•
Verwenden Sie den Staubsauger nicht ohne Staubbeutel oder
ohne Motorfilter.
•
Verwenden Sie ausschließlich vom Hersteller empfohlene
Ersatz- und Zubehörteile.
CV1003-IO-16s.book Seite 20 Mittwoch, 14. Februar 2018 1:56 13
A página está carregando ...
A página está carregando ...
A página está carregando ...
A página está carregando ...
A página está carregando ...
A página está carregando ...
A página está carregando ...
A página está carregando ...
A página está carregando ...
A página está carregando ...
A página está carregando ...
A página está carregando ...
A página está carregando ...
A página está carregando ...
A página está carregando ...
A página está carregando ...
A página está carregando ...
A página está carregando ...
A página está carregando ...
A página está carregando ...
A página está carregando ...
A página está carregando ...
A página está carregando ...
A página está carregando ...
A página está carregando ...
A página está carregando ...
A página está carregando ...
A página está carregando ...
A página está carregando ...
A página está carregando ...
A página está carregando ...
A página está carregando ...
A página está carregando ...
A página está carregando ...
A página está carregando ...
A página está carregando ...
A página está carregando ...
A página está carregando ...
A página está carregando ...
A página está carregando ...
A página está carregando ...
A página está carregando ...
A página está carregando ...
A página está carregando ...
A página está carregando ...
A página está carregando ...
A página está carregando ...
A página está carregando ...
A página está carregando ...
A página está carregando ...
A página está carregando ...
A página está carregando ...
A página está carregando ...
A página está carregando ...
A página está carregando ...
A página está carregando ...
A página está carregando ...
A página está carregando ...
A página está carregando ...
A página está carregando ...
A página está carregando ...
A página está carregando ...
A página está carregando ...
A página está carregando ...
A página está carregando ...
A página está carregando ...
A página está carregando ...
A página está carregando ...
A página está carregando ...
A página está carregando ...
A página está carregando ...
A página está carregando ...
A página está carregando ...
A página está carregando ...
A página está carregando ...
A página está carregando ...
A página está carregando ...
A página está carregando ...
A página está carregando ...
A página está carregando ...
A página está carregando ...
A página está carregando ...
A página está carregando ...
A página está carregando ...
A página está carregando ...
A página está carregando ...
A página está carregando ...
A página está carregando ...
A página está carregando ...
A página está carregando ...
A página está carregando ...
A página está carregando ...
A página está carregando ...
A página está carregando ...
A página está carregando ...
A página está carregando ...
A página está carregando ...
A página está carregando ...
A página está carregando ...
A página está carregando ...
A página está carregando ...
A página está carregando ...
A página está carregando ...
A página está carregando ...
A página está carregando ...
A página está carregando ...
A página está carregando ...
A página está carregando ...
A página está carregando ...
A página está carregando ...
A página está carregando ...
A página está carregando ...
A página está carregando ...
A página está carregando ...
A página está carregando ...
A página está carregando ...
A página está carregando ...
A página está carregando ...
A página está carregando ...
A página está carregando ...
A página está carregando ...
A página está carregando ...
A página está carregando ...
A página está carregando ...
A página está carregando ...
A página está carregando ...
A página está carregando ...
A página está carregando ...
A página está carregando ...
A página está carregando ...
A página está carregando ...
A página está carregando ...
-
 1
1
-
 2
2
-
 3
3
-
 4
4
-
 5
5
-
 6
6
-
 7
7
-
 8
8
-
 9
9
-
 10
10
-
 11
11
-
 12
12
-
 13
13
-
 14
14
-
 15
15
-
 16
16
-
 17
17
-
 18
18
-
 19
19
-
 20
20
-
 21
21
-
 22
22
-
 23
23
-
 24
24
-
 25
25
-
 26
26
-
 27
27
-
 28
28
-
 29
29
-
 30
30
-
 31
31
-
 32
32
-
 33
33
-
 34
34
-
 35
35
-
 36
36
-
 37
37
-
 38
38
-
 39
39
-
 40
40
-
 41
41
-
 42
42
-
 43
43
-
 44
44
-
 45
45
-
 46
46
-
 47
47
-
 48
48
-
 49
49
-
 50
50
-
 51
51
-
 52
52
-
 53
53
-
 54
54
-
 55
55
-
 56
56
-
 57
57
-
 58
58
-
 59
59
-
 60
60
-
 61
61
-
 62
62
-
 63
63
-
 64
64
-
 65
65
-
 66
66
-
 67
67
-
 68
68
-
 69
69
-
 70
70
-
 71
71
-
 72
72
-
 73
73
-
 74
74
-
 75
75
-
 76
76
-
 77
77
-
 78
78
-
 79
79
-
 80
80
-
 81
81
-
 82
82
-
 83
83
-
 84
84
-
 85
85
-
 86
86
-
 87
87
-
 88
88
-
 89
89
-
 90
90
-
 91
91
-
 92
92
-
 93
93
-
 94
94
-
 95
95
-
 96
96
-
 97
97
-
 98
98
-
 99
99
-
 100
100
-
 101
101
-
 102
102
-
 103
103
-
 104
104
-
 105
105
-
 106
106
-
 107
107
-
 108
108
-
 109
109
-
 110
110
-
 111
111
-
 112
112
-
 113
113
-
 114
114
-
 115
115
-
 116
116
-
 117
117
-
 118
118
-
 119
119
-
 120
120
-
 121
121
-
 122
122
-
 123
123
-
 124
124
-
 125
125
-
 126
126
-
 127
127
-
 128
128
-
 129
129
-
 130
130
-
 131
131
-
 132
132
-
 133
133
-
 134
134
-
 135
135
-
 136
136
-
 137
137
-
 138
138
-
 139
139
-
 140
140
-
 141
141
-
 142
142
-
 143
143
-
 144
144
-
 145
145
-
 146
146
-
 147
147
-
 148
148
-
 149
149
-
 150
150
-
 151
151
-
 152
152


em outros idiomas
- français: Dometic CV1003 Mode d'emploi
- italiano: Dometic CV1003 Istruzioni per l'uso
- slovenčina: Dometic CV1003 Návod na používanie
- Deutsch: Dometic CV1003 Bedienungsanleitung
- dansk: Dometic CV1003 Betjeningsvejledning