
!"#$%&'&()*+,-.
360° All Around Webcam
macOS® / Windows® / Chrome OS™ Compatible
Português
Botão de modo
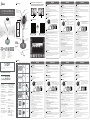
Seis modos de exibição. Pressione o botão “Modo” para selecionar o modo da câmara.
1. Modo Ecrã inteiro
2. Modo de visão 360º
3. Modo Anfitrião: utilize a barra tátil para especificar a localização do participante
4. Modo Anfitrião duplo: utilize a barra tátil para especificar as localizações dos dois
participantes
5. Modo Vista única 90°: selecione o modo de vista única e coloque a câmara na posição
vertical
6. Visão de ângulo amplo 120°
Iniciar uma videochamada com a câmara JVCU360
Notas especiais
Certifique-se de que o seu PC, Mac® ou Chromebook™ tem acesso à Internet. Tanto você
como a pessoa a quem pretende ligar precisam de utilizar uma aplicação de videochamadas.
Selecione o dispositivo de vídeo e microfone corretos nas definições da aplicação de
videochamadas.
1. A câmara JVCU360 permite videochamadas em full HD 1080P, com um mínimo de pelo
menos 2 megabits de velocidade de carregamento.
2. As chamadas em 1080p poderão ser afetadas pela largura de banda disponível, a
velocidade de CPU, o tipo de aplicação de videochamadas, etc.
3.Ampla compatibilidade: Zoom™, Facebook™ Messenger, Skype™, Microsoft Teams™, etc
Para Windows® 10
1. Aceda a Iniciar > Definições > Privacidade > Câmara/Microfone
2.Escolha a sua definição preferida para que todas as aplicações acedam à câmara/
microfone.
3.Ative a sua câmara/microfone para aplicações.
Privacy settings for macOS®
1. No seu Mac®, escolha o menu Apple® > Preferências do sistema, clique em Segurança e
Privacidade e, em seguida, clique em Privacidade.
2. Selecione Câmara/Microfone.
3. Selecione a caixa junto a uma aplicação para permitir que a mesma aceda à câmara/micro-
fone. Desmarque a caixa para desativar o acesso para essa aplicação. Se desativar o acesso
para uma aplicação, ser-lhe-á pedido para ativar novamente na próxima vez que a
aplicação tentar utilizar a câmara/microfone.
1. Se pressionar o botão de interrupção do som, as outras pessoas apenas poderão ver o vídeo
e não poderão ouvir o som. Isso será indicado pela luz LED.
2. Para evitar e eliminar o retorno do microfone/áudio, a distância recomendada entre o
microfone e o altifalante é de 1,5 a 3 metros.
3. Projetado para grupos médios e grandes
Indicador LED
Barra tátil
1.Deslize ou toque nesta área com a ponta dos
dedos
2.Ajuste a posição e o ângulo do anfitrião utilizando
as linhas vermelha e verde para orientação.
3.Adequado para o modo de anfitrião e modo de
duplo anfitrião
Luz azul: Câmara em utilização
Luz roxa: JVCU360 está ligado e conectado ao computador
Luz vermelha: microfone desativado
202210-V6
STOP!
TECHNICAL SUPPORT
Customer Service: 888-988-0488
Technical Support: 888-689-4088
Email: ser[email protected]
SOPORTE TÉCNICO
Número gratuito: +1-888-988-0488
Horario de atención:
Lun-Vier. 10:00 a.m – 6:00 U.S.A-E.S.T
Email: [email protected]
TECHNISCHER SUPPORT
Kostenloser Anruf bei: +1-888-988-0488
Sprechstunden:
Mon.-Frei. 10.00 – 18.00 U.S.A-E.S.T
E-mail: [email protected]
SUPPORT TECHNIQUE
Numéro gratuit : +1-888-988-0488
Heures d’ouverture :
Lun.-Ven. 10:00 a.m – 06:00 U.S.A-E.S.T
Email : [email protected]
TECHNIKAI SEGÍTSÉG
Vevőszolgálat (angol nyelven): 888-988-0488
Technikai támogatás (angol nyelven):
888-689-4088
E-mail: [email protected]
TECHNICKÁ PODPORA
Zákaznická linka: 888-988-0488
Technická podpora: 888-689-4088
E-mail: [email protected]
Kaijet Technology International B.V.
Phone Number: +31-(0)6-2880 2882
Address: Zomerdoorn 20,3068
MZ Rotterdam,Netherlands
E-mail: [email protected]
If you have any problems with this product please contact our technical
support team for assistance.
DK: Startvejledning
NO: Hurtiginstallasjonsveiledning
FI: Pika-asennusopas
HU: Gyors telepítési útmutató
RU : Руководство по быстрой установке
日本語 :
繁中文 : 快速安裝手冊
简中文 : 快速安装手册
Guide D'installation Rapide
FR:
Kurzanleitung Für Installation
D
E:
Quick Installation Guide
E
N
:
Guía De Instalación Rápida
E
S
:
IT : Guida rapida all'installazione
NL : Beknopte installatiehandleiding
PT : Guia de instalação rápida
SE : Snabbinstallationsguide
Adjustable Stand
From 19.3 cm/ 7.6 in. to
23.5 cm/ 9.25 in.
Cable Length
300 cm/ 118.11 in.
LED Indicator :
Blue = Camera in use
Purple = Powered on
Red = Microphone muted Touch Bar
Mode Select
Microphone
Microphone
Mute / Unmute
USB™ Type-A and USB-C®
90°
90°
Function Description
Six Display Modes
Webcam Companion App
Some applications may cause the image to appear reversed.
In this situation, please press and hold the “mode” button until the
image flips (about 3 seconds) to reverse the image on the screen.
Display Modes Touch Bar Support
N/A
N/A
N/A
N/A
Vertical 90° Rotation
Full Screen
360°
Single View
90°
Wide Angle
View 120°
360° All
Around View
Host Mode
Dual Host
Mode
English
Mode Button
Press the "Mode" button to select one of six different camera modes.
1. Full screen mode
2. 360° all around view mode
3. Host mode: use the touch bar to specify the participant’s location
4. Dual host mode: use the touch bar to specify the two participants’ locations
5. Single view mode 90°: select single mode and turn the camera to the vertical position
6. Wide angle view 120°
Start a video call with your JVCU360
Special Notes
Ensure your PC, Mac®, or Chromebook™ has Internet service, and that both you and the person
you need to call are using a video calling application. Select the correct video device and
microphone in the settings menu in the video calling application.
1. The JVCU360 provides full HD 1080P video calling, with a minimum of 2 megabits upload
speed.
2. 1080p calling may be affected by available network bandwidth, CPU speed, type of video
calling application, etc.
3. Wide compatibility: Zoom™, Facebook™ Messenger, Skype™, Microsoft Teams™, etc.
For Windows® 10
1. Go to Start > Settings > Privacy > Camera/Microphone
2. Choose your preferred settings to allow apps to access your camera and microphone.
3. Turn on your camera and microphone from within the settings of your video calling
application.
Privacy settings for macOS®
1. On your Mac® choose the Apple® menu > System Preferences, click Security & Privacy, then
click Privacy.
2. Select Camera/Microphone.
3. Select the checkbox next to an app to allow it to access the camera and microphone. Deselect
the checkbox to turn off access for that app. If you turn off access for an app, you will be
asked to turn it on again the next time that app tries to use your camera or microphone.
1. If you push the mute button, people will still be able to see you, but will not hear you. This will
be indicated by the LED light.
2. To prevent & eliminate microphone/audio feedback, the recommended distance between the
microphone and the speaker is 5 to 10 ft. depending on the space and layout of your area.
3. Designed with medium to large groups in mind.
LED Indicator
Touch Bar :
1. Swipe or touch this area with your fingertips
2. Adjust the position and angle of the host using
the red and green lines for guidance.
3. Suitable for host mode and dual host mode
Blue light : camera in use
Purple light : the JVCU360 is connected to the computer and powered on
Red light : microphone muted
Français
Bouton Mode
Six modes d'affichage - Appuyez sur le bouton « Mode » pour sélectionner le mode de la
caméra.
1. Mode plein écran
2. Mode de visualisation à 360°
3. Mode hôte : utilisez la barre tactile pour spécifier l'emplacement de l'autre participant
4. Mode « deux hôtes » : utilisez la barre tactile pour spécifier l'emplacement des deux
participants
5. Mode vue unique 90° : sélectionnez le mode vue unique et tournez la caméra en position
verticale
6. Vue Panoramique 120°
Commencer un appel vidéo avec votre JVCU360
A Noter
Assurez-vous que votre PC, Mac® ou Chromebook™ est connecté à un service Internet, et
que vous et la personne que vous appelez utilisez tout les deux une application d’appel
vidéo. Sélectionnez le bon appareil vidéo et le bon microphone dans les paramètres de
l’application d’appel vidéo.
1. Le JVCU360 permet de faire des appels vidéo en haute définition 1080p, avec une vitesse
de téléchargement d’au moins 2 mégabits.
2. Les appels 1080p sont affectés par la bande passante disponible, la vitesse du processeur,
le type d’application d’appel vidéo, etc.
3. Vaste Compatibilité : Zoom™, Facebook™ Messenger, Skype™, Microsoft Teams™, etc.
Pour Windows® 10
1. Allez dans Démarrer > Paramètres > Confidentialité > Appareil photo/Microphone
2. Choisissez le réglage préféré pour autoriser les applications à accéder à votre appareil
photo/microphone.
3. Allumez votre appareil photo/microphone pour les applications.
Paramètres de confidentialité pour macOS®
1. Sur votre Mac®, choisissez le menu Apple®> Préférences système, cliquez sur Sécurité &
Confidentialité, puis cliquez sur Confidentialité.
2. Sélectionnez Appareil photo/Microphone.
3. Cochez la case à côté d'une application pour lui permettre d'accéder à l'appareil
photo/microphone. Décochez la case pour désactiver l'accès de cette application. Si vous
désactivez l'accès d’une application, vous serez invité à le réactiver la prochaine fois que
cette application tente d'utiliser votre caméra/microphone.
1. Si vous appuyez sur le bouton de sourdine, les autres personnes ne verront que votre vidéo,
et n'entendront pas votre audio. Cela sera indiqué par le voyant LED.
2. Pour éviter et éliminer le feedback micro/audio, la distance recommandée entre le
microphone et le haut-parleur doit être de 5 à 10 pieds.
3. Conçu pour les groupes moyens à grands.
Indicateur LED
Barre tactile
1.Glissez ou touchez cette zone du bout des doigts
2.Ajustez la position et l'angle de l'hôte à l'aide des
lignes rouge et verte de guidage.
3.Adapté au mode hôte et au mode double hôte
Lumière bleue : Camera en utilisation
Lumière violette : le JVCU360 est connecté à un ordinateur et est allumé
Couleur rouge : le microphone est coupé
Deutsch
Modus-Taste
Drücken Sie die "Mode"-Taste, um einen von sechs verschiedenen Kameramodi auszuwählen
1. Vollbildmodus
2. 360°-Rundum-Ansichtsmodus
3. Host-Modus: Verwenden Sie die Berührungsleiste, um die Position des Teilnehmers
festzulegen
4. Dualer Host-Modus: Verwenden Sie die Berührungsleiste, um die Position der Teilnehmer
festzulegen
5. Einzelansichtsmodus 90°: Einzelmodus wählen und Kamera in die vertikale Position drehen
6. Weitwinkelansicht 120°
Einen Videoanruf mit Ihrem JVCU360 starten
Besondere Hinweise
Stellen Sie sicher, dass Ihr PC, Mac® oder Chromebook™ über Internet verfügt. Sie und die
Person, die Sie anrufen, müssen eine Videotelefonie-App nutzen. Wählen Sie das richtige
Videogerät und Mikrofon in den Einstellungen der Videotelefonie-App .
1. JVCU360 bietet Full-HD-1080p-Videoanruf mit einer minimalen Upload-Geschwindigkeit
von mindestens 2 Megabyte.
2. 1080p-Anruf kann durch verfügbare Netzwerkbandbreite, CPU-Geschwindigkeit, Art der
Videotelefonie-App usw. beeinflusst werden.
3. Hohe Kompatibilität: Zoom™, Facebook™ Messenger, Skype™, Microsoft Teams™ usw.
Für Windows® 10
1. Wählen Sie Start > Einstellungen > Privatsphäre > Kamera/Mikrofon
2.Wählen Sie Ihre bevorzugte Einstellung um Apps den Zugriff zu Ihrer/m Kamera/Mikro zu
erlauben.
3.Schalten Sie Ihr(e) Kamera/Mikrofon für Apps ein.
Datenschutzeinstellungen für macOS®
1. Wählen Sie an Ihrem Mac® das Apple®-Menü > Systemeinstellungen, klicken Sie auf
Sicherheit & Privatsphäre und dann auf Privatsphäre.
2. Wählen Sie Kamera/Mikrofon.
3. Wählen Sie das Kontrollkästchen neben einer App, damit sie auf Kamera/Mikrofon
zugreifen kann. Wählen Sie das Kontrollkästchen zum Ausschalten des Zugriffs für diese
App. Wenn Sie den Zugriff für eine App ausschalten, werden Sie gebeten, es wieder
einzuschalten, wenn es das nächste Mal versucht, Ihr(e) Kamera/Mikrofon zu nutzen.
1. Wenn Sie die Menü-Taste drücken, sehen Personen nur Ihr Video, hören aber nicht Ihr
Audio. Dies wird durch die LED-Leuchte angezeigt.
2. Zur Verhinderung und Eliminierung von Mikrofon-/Audiofeedback sollte der Abstand
zwischen Mikrofon und Lautsprecher 1,5 bis 3 m betragen.
3. Entwickelt für mittlere bis große Gruppen.
LED-Anzeige
Berührungsleiste 1.In diesem Bereich mit Ihren Fingerspitzen wischen
oder berühren
2.Stellen Sie die Position und den Winkel des Hosts
mit Hilfe der roten und grünen Linien zur
Orientierung ein
3.Geeignet für Host-Modus und Dual-Host-Modus
Blaues Licht : Kamera in Betrieb
Violettes Licht : Die JVCU360 ist an den Computer angeschlossen und eingeschaltet.
Rotes Licht : Mikrofon stumm geschaltet
Italiano
Tasto Modalità
Sei modalità di visualizzazione Premere il tasto “Modalità” per selezionare la modalità
della videocamera.
1. Modalità Schermo intero
2. Modalità di visualizzazione completa a 360°
3. Modalità Host: utilizzare la touch bar per specificare la posizione dei partecipanti
4. Modalità Doppio host: utilizzare la touch bar per specificare la posizione dei due
partecipanti
5. Modalità Visualizzazione singola 90°: selezionare la modalità singola e portare la
videocamera in posizione verticale
6. Vista grandangolare a 120°
Avvio di una videochiamata con JVCU360
Note speciali
Assicurarsi che PC, Mac® o Chromebook™ disponga di un servizio Internet e che l’utente e la
persona con cui si comunica utilizzino un'applicazione di videochiamata.
Selezionare il dispositivo video e il microfono corretti nelle impostazioni dell'applicazione di
videochiamata.
1. JVCU360 fornisce videochiamate Full HD 1080P, con una velocità di upload di almeno 2
megabit.
2. La chiamata a 1080p può essere influenzata dalla larghezza di banda di rete disponibile,
dalla velocità della CPU, dal tipo di applicazione di videochiamata, ecc.
3. Compatibilità Wide: Zoom™, Facebook™ Messenger, Skype™, Microsoft Teams™, ecc.
Per Windows® 10
1. Andare su Start > Impostazioni > Privacy > Videocamera/Microfono
2. Scegliere l’impostazione predefinita di Consenti app per accedere a videocamera/
microfono.
3. Attivare videocamera/microfono per le app.
Impostazioni sulla privacy per macOS®
1. Su Mac®, selezionare il menu Apple® > Preferenze di Sistema, fare clic su Sicurezza e
Privacy, quindi fare clic su Privacy.
2. Selezionare Videocamera/Microfono.
3. Selezionare la casella di controllo accanto a un'app per consentirle di accedere a
videocamera/microfono. Deselezionare la casella di controllo per disattivare l'accesso per
quell'app. Se si disattiva l'accesso per un'app, verrà richiesto di riattivarlo la prossima volta
che l'app tenta di utilizzare videocamera/microfono.
1. Se si preme il tasto di disattivazione audio, le persone vedranno solo il proprio video, ma
non ascolteranno l'audio. Ciò sarà indicato dal LED.
2. Per prevenire ed eliminare il feedback microfono/audio, la distanza consigliata tra il
microfono e l'altoparlante è da 5 a 10 ft.
3. Progettato per gruppi medio-grandi.
LED
Touch bar
1.Scorrere o toccare quest'area con i polpastrelli
2.Regolare la posizione e l'angolazione dell'host
utilizzando le linee rosse e verdi come guida.
3.Adatto per la modalità Host e la modalità
Doppio host
Spia blu : Videocamera in uso
Spia viola : JVCU360 è collegato al computer e acceso
Spia rossa : microfono disattivato
Nederlands
Modustoets
Druk op de "Mode"-toets om een van de zes verschillende cameramodi te selecteren.
1. Volledig scherm-modus
2. 360° Kijkhoekmodus
3. Hostmodus: Gebruik de aanraakbalk om de locatie van de deelnemer op te geven
4. Dubbele hostmodus: Gebruik de aanraakbalk om de locaties van de twee deelnemers
op te geven
5. Modus voor enkele weergave 90°: Selecteer de modus voor enkele weergave en draai
de camera naar de verticale positie
6. Groothoekbeeld 120°
Start een videogesprek met uw JVCU360
Speciale opmerkingen
Zorg ervoor dat uw PC, Mac® of Chromebook™ internetservice heeft, en zowel u als de
persoon die u belt moeten een applicatie voor videobellen gebruiken.
Selecteer het juiste videoapparaat en de juiste microfoon in het instellingenmenu in de
applicatie voor videobellen.
1. De JVCU360 biedt videobellen in Full HD 1080P, met een uploadsnelheid van minimaal 2
megabits.
2. 1080P-bellen kan worden beïnvloed door de beschikbare netwerkbandbreedte,
CPU-snelheid, type videobellen applicatie, enz.
3. Uitgebreide compatibiliteit: Zoom™, Facebook™ Messenger, Skype™, Microsoft Teams™,
etc.
Voor Windows® 10
1. Ga naar Start > Instellingen > Privacy > Camera/Microfoon
2. Kies uw voorkeursinstelling om Apps toegang te verlenen tot uw camera en microfoon.
3. Schakel de camera en microfoon in voor apps.
Privacy-instellingen voor macOS®
1. Kies op de Mac® het menu Apple® > Systeemvoorkeuren, klik op Beveiliging en Privacy,
en klik vervolgens op Privacy.
2. Selecteer Camera/Microfoon.
3. Selecteer de checkbox naast een app zodat deze de Camera/Microfoon kan gebruiken.
Deselecteer de checkbox om toegang voor die app uit te schakelen. Als u de toegang voor
een app uitschakelt, wordt u gevraagd deze weer in te schakelen de volgende keer dat die
app uw camera of microfoon probeert te gebruiken.
1. Als u op de mute-knop drukt, zien mensen alleen uw video, maar horen ze uw audio niet. Dit
wordt aangegeven door het LED-lampje.
2. Om feedback van microfoon/audio te voorkomen en te elimineren, is de aanbevolen afstand
tussen de microfoon en de luidspreker 1.5 tot 3 meter, afhankelijk van de indeling van de
ruimte.
3. Ontworpen met het oog op middelgrote tot grote groepen.
LED-indicatielampje
Aanraakbalk
1. Swipe of raak dit gebied aan met uw
vingertoppen
2. Pas de positie en de hoek van de host aan door
de rode en groene lijnen te gebruiken als richtlijn.
3. Geschikt voor hostmodus en dubbele hostmodus
Blauw licht : Camera in gebruik
Paars licht : de JVCU360 is aangesloten op de computer en is ingeschakeld
Rood licht : microfoon gedempt
Español
Botón Modo
Dispone de seis modos de visualización. Presione el botón "Modo" para seleccionar el
modo de la cámara.
1. Modo Pantalla completa.
2. Modo de vista panorámica de 360°
3. Modo Host: use la barra táctil para especificar la ubicación del participante.
4. Modo Host dual: use la barra táctil para especificar las ubicaciones de los dos
participantes.
5. Modo Vista individual 90°: seleccione el modo individual y gire la cámara a la posición
vertical.
6. Amplio ángulo de visualización de 120°
Iniciar una videollamada con su JVCU360
Notas especiales
Asegúrese de que su PC, Mac® o Chromebook™ tengan servicio de Internet, y tanto usted
como la persona a la que llama deben usar una aplicación de videollamada. Seleccione los
dispositivos de vídeo y micrófono correctos en la configuración de la aplicación de
videollamadas.
1. Su JVCU360 proporciona videollamadas Full HD 1080P, con un mínimo de al menos 2
megabits de velocidad de carga.
2. Las llamadas de 1080p pueden verse afectadas por el ancho de banda de red disponible, la
velocidad de la CPU, el tipo de aplicación de video llamada, etc.
3. Amplia compatibilidad: Zoom™, Facebook™ Messenger, Skype™, Microsoft Teams™, etc.
Para Windows® 10
1. Vaya a inicio > Configuración > Privacidad > Cámara/Micrófono.
2. Elija su configuración preferida para permitir que las aplicaciones accedan a la cámara/mi-
crófono.
3. Encienda su cámara/micrófono para aplicaciones.
Configuración de privacidad para macOS®
1. En su Mac®, elija el menú de Apple® > Preferencias del Sistema, haga clic en seguridad y
privacidad y, a continuación, haga clic en privacidad.
2. Seleccione la cámara/micrófono.
3. Seleccione la casilla junto a una aplicación para permitir el acceso a la cámara/micrófono.
Anule la selección de la casilla para desactivar el acceso a esa aplicación. Si desactiva el
acceso a una aplicación, se le pedirá que lo vuelva a activar la próxima vez que la
aplicación intente usar su cámara/micrófono.
1. Si presiona el botón de silencio, la gente solo verá su vídeo, pero no escuchará su audio.
Esto se indicará mediante la luz del LED.
2. Para evitar y eliminar la retroalimentación del audio y del micrófono, la distancia
recomendada entre el micrófono y el altavoz es de 5 a 10 pies.
3. Diseñado con grupos medianos a grandes en mente.
Indicador LED
Barra táctil
1.Deslizar o tocar esta área con la yema de los
dedos
2.Ajuste la posición y el ángulo del host utilizando
las líneas rojas y verdes como guía.
3.Adecuado para el modo host y el modo host dual
Luz azul : Cámara en uso
Luz violeta : la cámara JVCU360 está conectada al equipo y encendido
Luz roja : micrófono silenciado
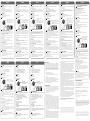
Webcam Companion App for Windows®Webcam Companion App for macOS®
JVU Series
Companion

USB is a trademark of USB Implementers Forum, Inc., its aliates or its respective owners, registered or used in many jurisdictions
worldwide. Windows and Microsoft are trademarks of Microsoft Corp., its aliates or its respective owners, registered or used in many
jurisdictions worldwide. HDMI is a trademark of HDMI Licensing Administrator, Inc., its aliates or its respective owners, registered or used
in many jurisdictions worldwide. Mac and macOS are trademarks of Apple Inc., its aliates or its respective owners, registered or used in
many jurisdictions worldwide. Intel and Core are trademarks of Intel Corporation, its aliates or its respective owners, registered or used
in many jurisdictions worldwide. Other trademarks and trade names may be used in this document to refer to either the entities claiming
the marks and/or names or their products and are the property of their respective owners. All company, product and service names used
are for identication purposes only. Use of these names, logos, and brands does not imply endorsement. We disclaim any interest in the
marks of others.
REGULATORY COMPLIANCE
FCC
This equipment has been tested and found to comply with FCC Part 15, Subpart B, ANSI C63.4-2014,
ICES-003 Issue 6, January 2016 (Updated April 2019).
Operation is subject to the following two conditions:
•This device may not cause harmful interference
•This device must accept any interference, including interference that may cause undesired
operation of the device.
CE
This equipment is in compliance with the requirements of the following regulations: EN
55032:2015+AC:2016 Class B, EN 61000-3-2:2014, EN 61000-3-3:2013, EN 55035:2017
RCM
Standard(s): AS/NZS CISPR 32:2015 Class B
VCCI
This equipment is in compliance with the requirements of the following regulations:
CISPR 32 © IEC: 2016 Class B
Disclaimer
Information in this document is subject to change without notice. The manufacturer does not make
any representations or warranties (implied or otherwise) regarding the accuracy and completeness
of this document and shall in no event be liable for any loss of profit or any commercial damage,
including but not limited to special, incidental, consequential, or other damage. No part of this
document may be reproduced or transmitted in any form by any means, electronic or mechanical,
including photocopying, recording or information recording and retrieval systems without the
expressed written permission of the manufacturer.
FCC Information
This equipment has been tested and found to comply with the limits for a Class B digital device,
pursuant to part 15 of the FCC Rules. These limits are designed to provide reasonable protection
against harmful interference in a residential installation. This equipment generates, uses and can
radiate radio frequency energy and, if not installed and used in accordance with the instructions,
may cause harmful interference to radio communications. However, there is no guarantee that
interference will not occur in a particular installation. If this equipment does cause harmful
interference to radio or television reception, which can be determined by turning the equipment off
and on, the user is encouraged to try to correct the interference by one or more of the following
measures:
- Reorient or relocate the receiving antenna.
- Increase the separation between the equipment and receiver.
- Connect the equipment into an outlet on a circuit different from that to which the receiver
is connected.
- Consult the dealer or an experienced radio/TV technician for help.
This device complies with part 15 of the FCC Rules. Operation is subject to the following two
conditions: (1) This device may not cause harmful interference, and (2) this device must accept any
interference received, including interference that may cause undesired operation.
Changes or modifications not expressly approved by the party responsible for compliance could
void the user’s authority to operate this device.
LIMITED WARRANTY
j5create offers a limited 1-year warranty. User’s wear & tear damage is not included. The user shall
call or email j5create customer service with the defect information of the product and obtain a
return authorization number. Users are responsible for one-way return freight cost and we will take
care of one-way freight back. In order to obtain a return authorization number, users should have
the following information handy when calling or emailing the service team:
(i) a copy of the original purchase invoice to verify your warranty
(ii) a product serial number
(iii) a description of the problem
(iv) customer’s name, address, and telephone number
j5create does not warrant that the operation of the product will be uninterrupted or error-free.
j5create is not responsible for damage arising from failure to follow instructions relating to the
product’s use. This warranty does not apply to: (a) consumable parts, unless damage has occurred
due to a defect in materials or workmanship; (b) cosmetic damage, including but not limited to
scratches, dents, and broken plastic on ports; (c) damage caused by use with non-j5create products;
(d) damage caused by natural disasters; (e) damage caused by human misuse (lost, accident, abuse,
misuse or other external causes); (f) damage caused by operating the product outside the permitted
or intended uses described by j5create; (g) damage caused by service (including upgrades and
expansions) performed by anyone who is not a representative of j5create or a j5create Authorized
Service Provider; (h) a product or part that has been modified to alter functionality or capability
without the written permission of j5create; or (i) if any j5create serial number on the product has
been removed or defaced. If such a situation occurs, j5create will calculate the cost of materials and
repair for your reference. This warranty is given by j5create in lieu of any other warranties expressed
or implied.
LIMITATION OF WARRANTY
THIS WARRANTY GIVES YOU SPECIFIC LEGAL RIGHTS, AND YOU MAY HAVE OTHER RIGHTS THAT
VARY FROM STATE TO STATE (OR BY COUNTRY OR PROVINCE). OTHER THAN AS PERMITTED BY
LAW, J5CREATE DOES NOT EXCLUDE, LIMIT OR SUSPEND OTHER RIGHTS YOU MAY HAVE,
INCLUDING THOSE THAT MAY ARISE FROM THE NONCONFORMITY OF A SALES CONTRACT. FOR A
FULL UNDERSTANDING OF YOUR RIGHTS YOU SHOULD CONSULT THE LAWS OF YOUR COUNTRY,
PROVINCE OR STATE. TO THE EXTENT NOT PROHIBITED BY LAW IN YOUR STATE, PROVINCE,
JURISDICTION OR COUNTRY, THIS WARRANTY AND THE REMEDIES SET FORTH ARE EXCLUSIVE
模式切換鈕
LED指示燈
六種顯示模式切換
1. 全螢幕模式
2. 360°全景模式
3. 主持人模式: 以觸控點選或滑動方式調整主持人位置或角度
4. 雙主持人模式: 以觸控點選或滑動方式調整雙主持人位置或角度
5. 90°廣角模式: 選擇90° 視角模式並將鏡頭調整為直立
6. 120°視角模式: 選擇120° 視角模式並將鏡頭調整為直立
使用JVCU360 開始視訊通話
備註
請先確認您的電腦已連接網路,您也需要事先安裝視訊通話軟體才可與他人進行視訊通話,並在
該通話軟體的設定選項中,將視訊設備和麥克風設定為JVCU360。
1. JVCU360 提供高畫質1080P視頻通話,網路傳輸速度需至少2 Mbps以上。
2. 通話品質可能會受到網路頻寬、CPU速度、視訊通話類型等其他外在因素影響。
3. JVCU360具備廣泛的軟體相容性,可適用於 Zoom™,Facebook™,Messenger,Skype™,
Microsoft Teams™ 等多種視訊通話軟體。
Windows® 10 的設定
1. 開始 > 設定 > 隱私權 > 相機/麥克風
2. 選擇允許應用程式存取您的相機/麥克風。
3. 打開相機/麥克風。
macOS® 的設定
1. 於螢幕左上角選擇蘋果選單列 >系統偏好設定,點擊「安全性和隱私權」,然後點擊「隱私權」。
2. 選擇攝影機/麥克風。
3. 勾選您所使用視訊軟體旁邊的選擇框,以允許其使用攝影機/麥克風。 取消選擇框以關閉該軟
體的使用權限。 如果您關閉某個軟體的使用權限,下次該軟體再次嘗試使用您的攝影機/麥克
風時,系統會要求您將其權限打開。
觸控環操作說明:
1. 若你點選靜音按鈕,人們只會看到影像
2. 為了避免回音麥克風產生回音干擾,建議麥克風與喇叭距離應間隔150~300 公分
3. 此攝影鏡頭建議於中型會議使用
1. 用指尖滑動或處觸控此區
2. 出現 紅、綠線標示 ,即可調整主持人位置及角度
3. 適用於主持人模式與雙主持人模式
藍燈:裝置啟用中
紫燈:裝置已連接上電腦
紅燈:麥克風已切換至靜音模式
Svenska
Lägesknapp
Sex visningslägen Tryck på knappen "Läge" för att välja kameraläge.
1. Helskärmsläge
2. Läge med 360° graders sikt
3. Värdläge: använd pekfältet för att specificera deltagarnas plats
4. Dubbel värd-läge: använd pekfältet för att specificera deltagarnas plats
5. Ett visningsläge 90°: välj enkelt läge och vrid kameran till vertikalt läge
6. 120° graders vidvinkel
Starta ett videosamtal med din JVCU360
Särskilda meddelanden
Kontrollera att dator, Mac® eller Chromebook™ har Internettjänst, och både du och
personen du ringer upp måste använda ett videosamtalsprogram. Välj rätt videoenhet och
mikrofonenhet i inställningarna i videosamtalsprogrammet.
1. JVCU360 tillhandahåller fullständiga HD 1080P videosamtal, med minst 2 megabit
uppladdningshastighet.
2.1080p samtal kan påverkas av tillgänglig nätverksbandbredd, CPU-hastighet, typ av
videosamtalsprogram osv.
3. Stor kompatibilitet: Zoom™, Facebook™ Messenger, Skype™, Microsoft Teams™ m.fl.
För Windows® 10
1. Gå till Start > Inställningar > Sekretess > Kamera/Mikrofon
2. Välj en inställning för att tillåta att appar får tillgång till din kamera/mikrofon.
3. Starta kameran/mikrofonen för appar.
Sekretessinställningar för macOS®
1. På din Mac® väljer du Apple®-menyn > Systempreferenser, klicka på Säkerhet och
sekretess, och klickar därefter på Sekretess.
2. Välj Kamera/Mikrofon.
3. Markera kryssrutan bredvid en app för att ge den tillstånd att komma åt kameran/mikro-
fonen. Avmarkera kryssrutan för att stänga av åtkomsten till appen. Om du stänger av
åtkomsten till en app blir du ombedd att sätta på den igen nästa gång som appen försöker
använda kameran/mikrofonen.
1. Om du trycker på sordinknappen, kommer människor bara att se videon men kan inte höra
ljudet. Detta visas med LED-indikatorn.
2. För att förhindra och eliminera mikrofon-/akustisk rundgång, är det rekommenderade
avståndet mellan mikrofonen och högtalaren drygt 1,5-3,0 m (5-10 ft.)
3. Designad för medelstora till stora grupper
LED-indikator
Pekfält
1.Svep eller tryck på fältet med fingertopparna
2.Justera värdenhetens läge och vinkel med hjälp av
de röda och gröna hjälplinjerna.
3.Lämpligt för värdläge och dubbelt värdläge
Luz azul: Câmara em utilização
Luz roxa: JVCU360 está ligado e conectado ao computador
Rött ljus: mikrofonljud avstängt
モードボタン
JVCU360でビデオ通話を開始する
特記事項
Windows® 10の場合
macOS®のプライバシー設定
1.
LEDステータス表示
タッチ バ ー 使 い 方 :
模式切换纽
六种显示模式切换。
1. 全屏幕模式
2. 360°全景模式
3. 主持人模式: 以触控点选或滑动方式调整主持人位置或角度
4. 双主持人模式: 以触控点选或滑动方式调整双主持人位置或角度
5. 90°广角模式: 选择90° 视角模式并将镜头调整为直立
6. 120°视角模式: 选择120° 视角模式并将镜头调整为直立
使用JVCU360 开始视讯通话
备注
请先确认您的电脑已连接网络,您也需要事先安装视讯通话软件才可与他人进行视讯通话,并在
该通话软件的设置选项中,将摄像头和麦克风设定为JVCU360。
1. JVCU360 提供高清1080P视讯通话,网络传输速度需至少2 Mbps以上。
2. 通话质量可能会受到网络频宽、CPU速度、视讯通话类型等其他外在因素影响。
3. JVCU360具备广泛的软件相容性,可适用于 Zoom™,Facebook™,Messenger,Skype™,
Microsoft Teams™ 等多种视讯通话软件。
针对 Windows® 10 的设定:
1. 开始 > 设置 > 隐私 > 相机/麦克风
2. 选择允许应用访问您的相机/麦克风。
3. 打开相机/麦克风。
针对 macOS® 的设定
1. 于屏幕左上角选择苹果菜单 >系统偏好设置,点击「安全性和隐私」,然后点击「隐私」。
2. 选择摄影机/麦克风。
3. 勾选您所使用视讯软件旁边的选择框,以允许其使用摄像头/麦克风。取消选择框以关闭该软
件的使用权限。如果您关闭某个软件的使用权限,下次该软件再次尝试使用您的摄像头/麦克
风时,系统会要求您将其权限打开。
1. 若你点选静音按钮,人们只会看到影像,这由LED指示灯指示
2. 为了避免回音麦克风产生回音干扰,建议麦克风与喇叭距离应间隔150~300 公分
3. 此会议摄影镜头专为中型会议设计
LED指示灯
触控环操作说明:
1. 用指尖滑动或处触控此区
2. 出现 红、绿线标示 ,即可调整主持人位置及角度
3. 适用于主持人模式与双主持人模式
蓝灯:装置启用中
紫灯:装置已连接上计算机
红灯:麦克风已切换至静音模式
AND IN LIEU OF ALL OTHER WARRANTIES, REMEDIES AND CONDITIONS, WHETHER ORAL, WRITTEN,
STATUTORY, EXPRESS OR IMPLIED.
J5CREATE'S RESPONSIBILITY FOR MALFUNCTIONS AND DEFECTS IN HARDWARE AND/OR SOFTWARE
IS LIMITED TO REPAIR OR REPLACEMENT AS SET FORTH IN THIS WARRANTY. J5CREATE’S LIABILITY
DOES NOT EXTEND BEYOND THE REMEDIES PROVIDED FOR IN THIS LIMITED WARRANTY, AND
J5CREATE DOES NOT ACCEPT LIABILITY FOR CONSEQUENTIAL OR INCIDENTAL DAMAGES, FOR
THIRD-PARTY CLAIMS AGAINST YOU FOR DAMAGES, FOR PRODUCTS NOT BEING AVAILABLE FOR
USE, OR FOR LOST OR DAMAGED DATA OR SOFTWARE. J5CREATE DOES NOT WARRANT THAT THE
OPERATION OF ANY J5CREATE PRODUCT WILL BE UNINTERRUPTED OR ERROR FREE.
J5CREATE’S LIABILITY IN ANY SITUATION WILL BE NO MORE THAN THE AMOUNT YOU PAID FOR THE
SPECIFIC PRODUCT THAT IS THE SUBJECT OF A CLAIM. THIS IS THE MAXIMUM AMOUNT FOR WHICH
WE ARE RESPONSIBLE.
EXCEPT FOR THE EXPRESS WARRANTIES CONTAINED IN THIS WARRANTY AND TO THE EXTENT NOT
PROHIBITED BY LAW, J5CREATE DISCLAIMS ALL OTHER WARRANTIES AND CONDITIONS, EXPRESS OR
IMPLIED, STATUTORY OR OTHERWISE, INCLUDING WITHOUT LIMITATION, WARRANTIES OF
MERCHANTABILITY, MERCHANTABLE QUALITY AND FITNESS FOR A PARTICULAR PURPOSE AND
WARRANTIES AND CONDITIONS AGAINST HIDDEN OR LATENT DEFECTS. SOME STATES, PROVINCES,
JURISDICTIONS OR COUNTRIES DO NOT ALLOW DISCLAIMERS OF IMPLIED WARRANTIES AND
CONDITIONS, SO THIS DISCLAIMER MAY NOT APPLY TO YOU.
TO THE EXTENT SUCH WARRANTIES AND CONDITIONS CANNOT BE DISCLAIMED UNDER THE LAWS
OF THE UNITED STATES, CANADA (AND ITS PROVINCES) OR OTHERWISE, J5CREATE LIMITS THE
DURATION AND REMEDIES OF SUCH WARRANTIES AND CONDITIONS TO THE DURATION OF THIS
EXPRESS LIMITED WARRANTY AND, AT J5CREATE'S OPTION, REPAIR OR REPLACEMENT SERVICES.
SOME STATES, PROVINCES, JURISDICTIONS OR COUNTRIES MAY NOT ALLOW LIMITATIONS ON HOW
LONG AN IMPLIED WARRANTY OR CONDITION MAY LAST, SO THE LIMITATION DESCRIBED ABOVE
MAY NOT APPLY TO YOU.
NO WARRANTIES OR CONDITIONS, WHETHER EXPRESS OR IMPLIED, WILL APPLY AFTER THE LIMITED
WARRANTY PERIOD HAS EXPIRED. SOME STATES, PROVINCES, JURISDICTIONS OR COUNTRIES DO
NOT ALLOW LIMITATIONS ON HOW LONG AN IMPLIED WARRANTY OR CONDITION LASTS, SO THIS
LIMITATION MAY NOT APPLY TO YOU.
WARRANTY SUPPORT ONLY APPLIES WHEN THE COVERED PRODUCT IS LOCATED WITHIN THE
COUNTRY IN WHICH J5CREATE ORIGINALLY SOLD THE SYSTEM, AS REFLECTED IN J5CREATE'S
RECORDS. IF YOU NEED SUPPORT FOR THE PRODUCT OUTSIDE OF THE COUNTRY OF ORIGIN (FOR
EXAMPLE, WHILE TRAVELING, OR IF THE SYSTEM HAS BEEN RELOCATED TO A NEW COUNTRY), THEN
J5CREATE MAY OFFER YOU OTHER SUPPORT OPTIONS FOR AN ADDITIONAL CHARGE.
For more information please visit our website at http://www.j5create.com
Copyright© 2022 j5create. All rights reserved. All trade names are registered trademarks of their
respective owners. Features and specifications are subject to change without notice. Product may not
be exactly as shown in the diagrams.
Windows, Skype and Microsoft Teams are trademarks of Microsoft Corp., its aliates or its respective owners, registered or used in many
jurisdictions worldwide. macOS, Mac and Apple are trademarks of Apple Inc., its aliates or its respective owners, registered or used in many
jurisdictions worldwide. USB and USB-C are trademarks of USB Implementers Forum, Inc., its aliates or its respective owners, registered or used
in many jurisdictions worldwide. Zoom is a trademark of Zoom Video Communications, Inc., its aliates or its respective owners, registered or
used in many jurisdictions worldwide. Chromebook and Chrome OS are trademarks of Google LLC, its aliates or its respective owners,
registered or used in many jurisdictions worldwide. Facebook is a trademark of Facebook, its aliates or its respective owners, registered or used
in many jurisdictions worldwide. Other trademarks and trade names may be used in this document to refer to either the entities claiming the
marks and/or names or their products and are the property of their respective owners. All company, product and service names used are for
identication purposes only. Use of these names, logos, and brands does not imply endorsement. We disclaim any interest in the marks of others.
Suomi
Tilapainike
Paina "Mode" (Tila) -painiketta valitaksesi yhden kuudesta kameratilasta.
1. Koko näyttö -tila
2. 360°:n kokonaisnäkymätila
3. Isäntätila: määritä kosketustangolla osanottajan sijainti
4. Kaksois-isäntätila: määritä kosketustangolla kahden osanottajan sijainnit
5. Yksi näkymä -tila 90°: valitse yksi tila ja käännä kamera pystyasentoon
6. Laajakulmanäkymä 120°
Aloita videopuhelu mallisi: JVCU360
Erityishuomautukset
Varmista, että PC-, Mac®- tai Chromebook™-tietokoneella on internet-palvelu, ja että sinä ja
henkilö, jolle soitat, käytätte videopuhelusovellusta (esim. Zoom™, Microsoft Teams™). Valitse
oikea videolaite ja mikrofoni videopuhelusovelluksen asetukset-valikossa.
1. JVCU360 tarjoaa täyden HD 1080P -videopuhelun vähintään 2 megabitin siirtonopeudella.
2. 4K-puheluun voi vaikuttaa käytettävissä olevan verkon kaistanleveys, suorittimen nopeus,
videopuhelusovelluksen tyyppi jne.
3. Laaja yhteensopivuus: Zoom™, Facebook™ Messenger, Skype™, Microsoft Teams™, Google™
Hangouts™ jne.
Windows® 10
1. Siirry kohtaan Aloitus > Asetukset > Tietosuoja > Kamera/Mikrofoni
2. Valitse haluamasi asetukset salliaksesi sovelluksille kameran ja mikrofonin käyttöoikeuden.
3. Kytke kamera ja mikrofoni päälle videopuhelusovelluksesi asetuksista.
macOS®-tietosuoja-asetukset
1. Valitse Mac®-tietokoneessa Apple®-valikko > Järjestelmäasetukset, osoita Suojaus ja
Tietosuoja, osoita sitten Tietosuoja.
2. Valitse Kamera/Mikrofoni.
3. Rastita sovelluksen vieressä oleva valintaruutu myöntääksesi sille kameran ja mikrofonin
käyttöoikeuden. Poista valintaruudun valinta kytkeäksesi kyseisen sovelluksen käyttöoikeudet
pois päältä. Jos kytket sovelluksen käyttöoikeudet pois päältä, sinua pyydetään kytkemään ne
takaisin päälle, kun sovellus seuraavan kerran yrittää käyttää kameraa tai mikrofonia.
1. Jos painat mykistyspainiketta, muut voivat nähdä sinut edelleen, mutta he eivät kuule sinua.
Tämä ilmaistaan LED-valolla.
2. Mikrofonin/audion äänenkierron estämiseksi ja poistamiseksi mikrofonin ja kaiuttimen välinen
suositeltava etäisyys on n. 1,5–3 m.
3. Suunniteltu keskikoisia ja suuria ryhmiä ajatellen.
LED-merkkivalo
Kosketustanko:
1. Pyyhkäise tai kosketa tätä aluetta sormenpäilläsi
2. Säädä isännän sijainti ja kulma käyttämällä sinisiä
ja punaisia viivoja ohjaimina.
3. Käytettävissä isäntä- ja kaksi isäntää -tilassa
Sininen valot: kamera käytössä
Violetti valo: JVCU360 on liitetty tietokoneeseen ja käynnistetty
Punainen valo: mikrofoni mykistetty
Русский
Клавиша "Мод"
Нажмите клавишу «Mode», чтобы выбрать один из шести различных режимов
камеры:
1. Полноэкранный режим
2. Круговой обзор 360°
3. Режим ведущего: используйте сенсорную панель, чтобы указать местоположение
ведущего
4. Режим двух ведущих: используйте сенсорную панель, чтобы указать
местоположение двух ведущих
5. Одиночный режим 90°: выберите одиночный режим и поверните камеру в
вертикальное положение
6. Широкий угол обзора 120°
Начните видеозвонок с JVCU360
Примечания
Убедитесь, что ваш ПК, Mac® или Chromebook™ подключен к Интернету, а вы, и
человек, которому вы звоните, запустили приложение для видеозвонков. Выберите
правильное видеоустройство и микрофон в меню настроек в видеовызове.
1. JVCU360 обеспечивает видеосвязь в формате Full HD 1080P с минимальной скоростью
загрузки не менее 2 мегабит.
2. Вызов в разрешении 1080p может зависеть от доступной пропускной способности сети,
скорости процессора, типа видеовызова, приложения и т. д.
3. Широкая совместимость: Zoom™, Facebook™ Messenger, Skype™, Microsoft Teams™ и т. д.
Для Windows® 10
1. Перейдите в Пуск > Настройки > Конфиденциальность > Камера/Микрофон.
2. Выберите предпочтительные настройки, чтобы разрешить приложениям доступ к вашей
камере/микрофону.
3. Включите камеру/микрофон для приложений.
Настройки конфиденциальности для macOS®
1. Выберите меню Apple® на Mac® > Системные настройки, выберите Защита и
безопасность, а затем конфиденциальность.
2. Выберите Камера/Микрофон.
3. Установите флажок рядом с приложением, чтобы разрешить ему доступ к
камере/микрофону. Уберите флажок, чтобы отключить доступ для этого приложения.
Если вы отключите доступ для приложения, вам будет предложено включить его снова
в следующий раз, когда это приложение попытается использовать вашу
камеру/микрофон.
1. Если вы нажмете клавишу отключения звука, люди все равно смогут вас видеть, но не
будут вас слышать. Это будет обозначаться LED индикатором.
2. Для предотвращения акустической обратной связи рекомендуется соблюдать расстояние
между микрофоном и динамиком, которое в зависимости от свободного пространства и
планировки помещения может составлять от 1.5 до 3м.
3. Веб-камера разработана для средних и больших групп людей.
LED индикатор
Сенсорная панель:
1. Проведите или коснитесь этой области
2. Отрегулируйте положение ведущего с
помощью красной и зеленой линий
3. Подходит для режима ведущего и двух
ведущих
Синий: веб-камера используется
Фиолетовый: веб-камера подключена к компьютеру и включена
Красный: микрофон отключен
Dansk
Funktionsknap
Tryk på knappen "Funktion" for, at vælge en af seks forskellige kamerafunktioner.
1. Fuldskærmsfunktion
2. Visning i 360°
3. Værtsfunktion: Brug berøringslinjen til, at angive deltagerens placering
4. Dobbelt værtsfunktion: Brug berøringslinjen til at angive de to deltageres placering
5. Enkeltvisningsfunktion 90°: Vælg enkeltfunktion, og drej kameraet, så det er lodret
6. Visning i vidvinkel på 120°
Start et videoopkald med din JVCU360
Særlige bemærkninger
Sørg for, at din pc, Mac® eller Chromebook™ er forbundet til internettet, og at både du og
personen, du skal ringe til, bruger et videoopkaldsprogram (fx Zoom™ eller Microsoft Teams™).
Vælg den rigtige videoenhed og mikrofon i indstillingsmenuen i videoopkaldsprogrammet.
1. Med din JVCU360 kan du lave videoopkald i fuld HD 1080P med en uploadhastighed på
mindst 2 megabit.
2. Opkald i 1080p påvirkes muligvis af netværksbåndbredden, CPU-hastigheden, videoopkald-
sprogrammet osv.
3. Bred kompatibilitet: Zoom™, Facebook™ Messenger, Skype™, Microsoft Teams™, Google™
Hangouts™, osv.
I Windows® 10
1. Gå til Start > Indstillinger > Privatliv > Kamera/mikrofon
2. Vælg dine foretrukne indstillinger for, at give programmerne adgang til dit kamera og din
mikrofon.
3. Slå dit kamera og din mikrofon til i indstillingerne i videoopkaldsprogrammet.
Privatlivsindstillinger i macOS®
1. På din Mac® skal du vælge menuen Apple® > Systemindstillinger. Klik på Sikkerhed og
privatliv, og klik derefter på Privatliv.
2. Vælg Kamera/mikrofon.
3. Sæt et kryds ud for et program, for at give det adgang til kameraet og mikrofonen. Fjern
krydset ud for et program, for at fjerne adgangstilladelsen til programmet. Hvis du slår
adgangen fra i et program, bliver du bedt om at slå den til igen, når programmet igen skal
bruge dit kamera eller din mikrofon.
1. Hvis du trykker på lydløs-knappen, vil folk stadig kunne se dig, men de kan ikke høre dig.
Dette vises med lysindikatoren.
2. For at undgå og fjern feedback på mikrofonen og lyden, skal afstanden mellem mikrofonen og
højttaleren være 1,5-3 meter, afhængigt af dine omgivelser.
3. Beregnet til mellemstore til store grupper.
Lysindikator
Berøringslinje:
1. Swipe or touch this area with your fingertips
2. Adjust the position and angle of the host using
the red and green lines for guidance.
3. Suitable for host mode and dual host mode
Blåt lys: Kameraet i brug
Lilla lys: JVCU360 er sluttet til computeren og tændt
Rødt lys: Mikrofonen er slået fra
Norsk
Modus-knapp
Trykk «Modus»-knappen for å velge en av seks forskjellige kameramoduser.
1. Fullskjermmodus
2. 360° visningsmodus rundt hele
3. Vertsmodus: bruk berøringslinjen for å angi plasseringen til deltakeren
4. Dobbel vertsmodus: Bruk berøringslinjen for å angi plasseringene til de to deltakerne
5. Enkeltvisningsmodus 90°: velg enkeltmodus og drei kameraet til vertikal posisjon
6. Vidvinkelvisning 120°
Start en videosamtale med modellen din: JVCU360
Spesielle merknader
Sørg for at PC-en, Mac®-en eller Chromebook™-en er koblet til internett og at både du og
personen du ringer bruker en videosamtaleapplikasjon (f.eks. Zoom™, Microsoft Teams™). Velg
riktig videoenhet og mikrofon i innstillingsmenyen i videsamtaleappen.
1. JVCU360 gir videosamtaler med full HD 1080P med en minimumshastighet på minst 2
megabits.
2. 1080p-anrop kan bli påvirket av tilgjengelig nettverksbåndbredde, CPU-hastighet, type
videosamtaleapplikasjon osv.
3. Bred kompatibilitet: Zoom™, Facebook™ Messenger, Skype™, Microsoft Teams™, Google™
Hangouts™ osv..
For Windows® 10
1. Gå til Start > Innstillinger > Personvern > Kamera/mikrofon
2. Velg innstillingene du vil bruke for å gi apper tilgang til kameraet og mikrofonen.
3. Slå på kameraet og mikrofonen fra innstillingene til videosamtaleprogrammet.
Personverninnstillinger for macOS®
1. På Mac® velger du Apple®-menyen > Systemvalg, så klikker du Sikkerhet og personvern og
deretter Personvern.
2. Velg Kamera/Mikrofon.
3. Merk av i avmerkingsboksen ved siden av en app for å gi den tilgang til kameraet og
mikrofonen. Fjern merket i avmerkingsboksen for å slå av tilgang for den appen. Hvis du slår
av tilgangen for en app, blir du bedt om å slå den på igjen neste gang den appen prøver å
bruke kameraet eller mikrofonen.
1. Hvis du trykker demp-knappen, vil folk fortsatt kunne se deg, men ikke høre deg. Dette
indikeres av LED-lampen.
2. For å forhindre og eliminere feedback fra mikrofon/lyd er den anbefalte avstanden mellom
mikrofonen og høyttaleren 5 til 10 fot avhengig av rommet og utformingen til området.
3. Designet med tanke på mellomstore til store grupper.
LED-indikator
Berøringslinje:
1. Sveip eller berør dette området med
fingertuppene
2. Juster posisjonen og vinkelen til verten ved å
bruke de røde og grønne linjene for veiledning.
3. Egnet for vertsmodus og dobbel vertsmodus
Lyser blått: kamera i bruk
Lyser lilla: JVCU360 er koblet til datamaskinen og slått på
Rødt lys: mikrofon dempet
Технические особенности
• Камера для видеоконференций с углом обзора 360°
• Разрешение Full HD 1080p с частотой 30 Гц
• Встроенный всенаправленный микрофон
• Шесть режимов отображения с гибкими настройками
• Угол обзора с ручной регулировкой
• Работает с различными приложениями для видеоконференций
• Поддержка USB™ Type-A и USB-C®
• Цвет белый
• USB™ UVC/UAC с функцией plug-and-play, установка драйвера не требуется
Веб-камера с круговым обзором 360° (JVCU360)
Magyar
Üzemmód gomb
Nyomja meg a „Mode” (Üzemmód) gombot a hat különböző kamera üzemmód kiválasztásához.
1. Teljes képernyős üzemmód
2. 360°-os körkörös nézet mód
3. Házigazda mód: az érintősáv segítségével adja meg a résztvevő helyét
4. Kettős házigazda mód: az érintősáv használatával adhatja meg a két résztvevő helyét
5.
90°-os szimpla nézet mód: válassza a szimpla módot, és fordítsa a kamerát függőleges helyzetbe
6. 120°-os nagy látósztög
Videohívás indítása a JVCU360 készülékkel
Különleges megjegyzések
Győződjön meg arról, hogy PC-je, Mac®-je vagy Chromebook™ készüléke rendelkezik
internetszolgáltatással, és hogy Ön és a hívandó személy is használ videohívó alkalmazást (pl.
Zoom™, Microsoft Teams™). Válassza ki a megfelelő videokészüléket és mikrofont a videohívó
alkalmazás beállítási menüjében.
1. A JVCU360 teljes HD 1080P felbontású videohívást biztosít legalább 2 Mb/mp feltöltési
sebességgel.
2. A 4K hívásokat befolyásolhatja a rendelkezésre álló hálózati sávszélesség, a processzor
sebessége, a videohívó alkalmazás típusa stb.
3. Széles körű kompatibilitás: Zoom™, Facebook™ Messenger, Skype™, Microsoft Teams™,
Google™ Hangouts™ stb.
Windows® 10 esetében
1. Lépjen a Start > Beállítások > Adatvédelem > Kamera/Mikrofon elemre
2. Válassza ki a kívánt beállításokat, hogy az alkalmazások hozzáférhessenek a kamerához és a
mikrofonhoz.
3. Kapcsolja be a kamerát és a mikrofont a videohívó alkalmazás beállításai között.
Adatvédelmi beállítások macOS® számára
1. Mac® számítógépén válassza az Apple® menü > Rendszerbeállítások menüpontot,
kattintson a Biztonság és adatvédelem elemre, majd az Adatvédelem gombra.
2. Válassza a Kamera/Mikrofon lehetőséget.
3. Jelölje be az alkalmazás melletti jelölőnégyzetet, hogy engedélyezze a kamera és a mikrofon
használatát. Törölje a jelölőnégyzet bejelölését az adott alkalmazás hozzáférésének
kikapcsolásához. Ha kikapcsolja egy alkalmazás hozzáférését, a rendszer megkéri, hogy
kapcsolja be újra, amikor az adott alkalmazás legközelebb megpróbálja használni a kamerát
vagy a mikrofont.
1. Ha megnyomja a némító gombot, az emberek továbbra is látják, de nem hallják Önt. Ezt a LED
fény jelzi.
2. A mikrofon-/hanggerjedés megelőzése és kiküszöbölése érdekében a mikrofon és a hangszóró
közötti ajánlott távolság 5-10 láb legyen, a helytől és a terület elrendezésétől függően.
3. Közepes és nagy csoportok számára tervezték.
LED-jelzőfény
Érintősáv: 1. Húzza el vagy érintse meg ezt a területet az
ujjbegyeivel
2. Állítsa be a házigazda helyzetét és szögét a piros
és zöld vonalak segítségével.
3. Alkalmas házigazda és kettős házigazda
üzemmódhoz
Kék színű fény: a kamera használatban van
Lila fény: a JVCU360 csatlakoztatva van a számítógéphez és be van kapcsolva
Piros fény: mikrofon elnémítva
-
 1
1
-
 2
2


em outras línguas
- français: J5create JVCU360 Mode d'emploi
- italiano: J5create JVCU360 Guida utente
- English: J5create JVCU360 User guide
- dansk: J5create JVCU360 Brugervejledning

