210.0 mm
1. Удерживайте нажатой кнопку питания в течение 3 секунд, при этом синий
индикатор загорится на 3 секунды и погаснет после завершения подключения.
2.
Удерживайте нажатой кнопку выключения в течение 3 секунд, при этом
перед выключением синий индикатор мигнет 3 раза.
3.
Нажмите кнопку питания, чтобы перейти в режим сопряжения по Bluetooth,
который будет длиться 300 секунд, при этом начнет мигать синий индикатор.
1.
Mantenga presionado el botón de alimentación durante 3 segundos y la luz indicadora
azul se encenderá durante 3 segundos y se apagar á una vez finalizada la conexión.
2. Mantenga presionado el botón de apagado durante 3 segundos y la luz indicadora azul
parpadeará 3 veces antes del apagado.
3.
Presione el botón de alimentación para entrar en el modo de asociación Bluetooth que
dura 300 segundos; la luz indicadora azul parpadea.
1.Maintenez le bouton d'alimentation enfoncé pendant 3 secondes, et le voyant
bleu s'allume pendant 3 secondes et s'éteint une fois que la connexion
terminée.2.Maintenez le bouton d'arrêt enfoncé pendant 3 secondes et le
voyant bleu clignote 3 fois avant l'arrêt.3.Appuyez sur le bouton d'alimentation
pour accéder au mode d'appairage Bluetooth d'une durée de 300 secondes et le
voyant bleu clignote.
1. Segure o botão liga/desliga por 3 segundos e a luz indicadora azul acenderá por 3
segundos e apagará após o término da conexão.
2. Segure o botão de desligamento por 3 segundos e a luz indicadora az ul pisca 3
vezes antes de desligar.
3. Pressione o botão liga/desliga para entrar no modo de emparelhamento Bluetooth
com duração de 300 segundos e a luz indicadora azul pisca.
1.
Tenere premuto il tasto di alimentazione per 3 secondi e l'indicatore luminoso blu si
accende per 3 secondi e si spegne al termine della connessione.
2.
Tenere premuto il tasto di spegnimento per 3 secondi e la spia blu lampeggia 3 volte
prima dello spegnimento.
3.
Premere il tasto di alimentazione per accedere alla modalità di associazione Bluetooth
per 300 secondi e l'indicatore luminoso blu lampeggia.
1.
Hold the power button for 3 seconds, and the blue indicator light is on for 3
seconds and off after the connection is finished.
2.
Hold the shutdown button for 3 seconds, and the blue indicator light flashes 3
times before shutdown.
3.
Press the power button to enter the Bluetooth pairing mode lasting for 300
seconds, and the blue indicator light flashes.
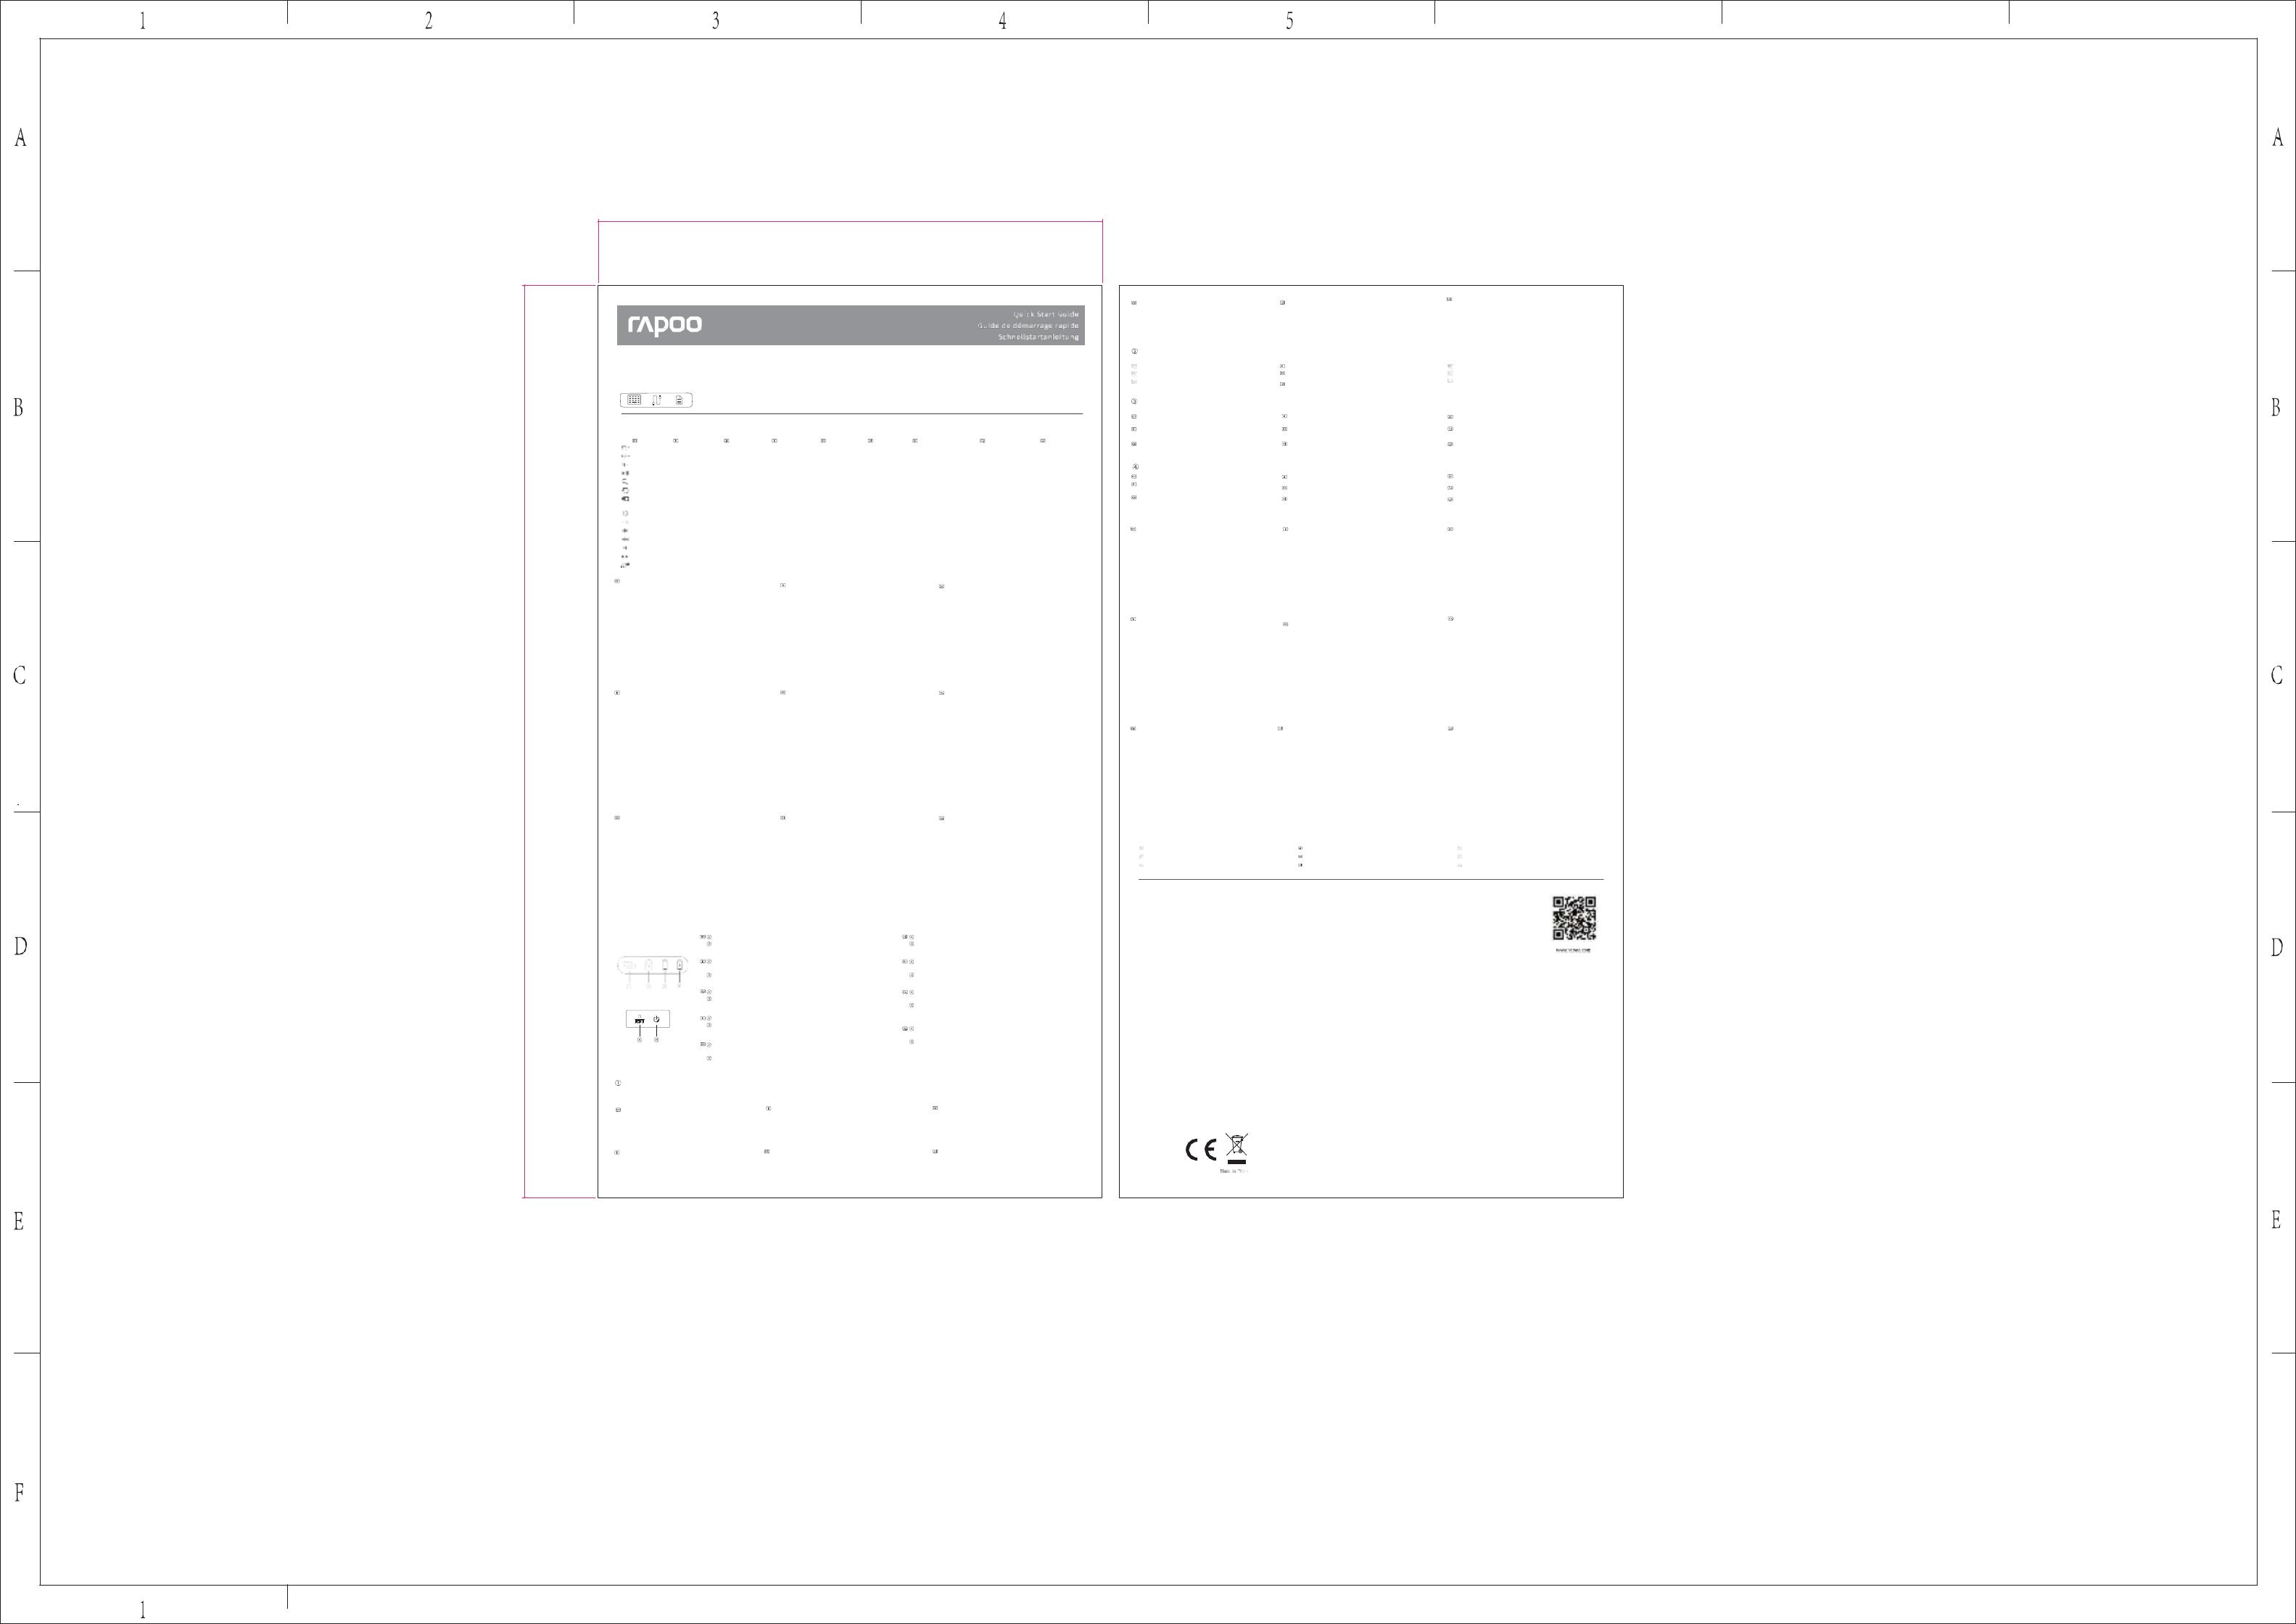
Booting/shutdown/Bluetooth pairing indication / Start-/Abschalt-/Bluetooth-Kopplungsanzeige/Indication de démarrage / arrêt / d'appairage Bluetooth/Indicazione di avvio/spegnimen-
to/associazione Bluetooth/Indicación de arranque, apagado y asociación Bluetooth/Indicatie voor opstarten/uitschakelen/Bluetooth-koppeling/Inicialização/desligamento/Iindicação de
emparelhamento Bluetooth / Индикация загрузки / выключения / сопряжения по Bluetooth / Позначення Первинне завантаження/Вимкнення системи/Поεднання в пару по
Bluetooth
Клавиша сброса: Если при нажатии какой-либо клавиши нет никакой реакции, нажмите
эту кнопку.
Клавиша питания и сопряжения по Bluetooth: При длительном нажатии происходит
включение или выключение устройства, при кратковременном нажатии выполняется
переход в режим сопряжения.
Попер ед нь о нал аштована кл ав
i
ша: Якщ о нема реакц
i"
на натискан ня будь-яких
i
нши х
кнопок, натисн
i
ть цю клав
i
шу
Кнопка Живлення
i
По
ε
днання в пару Bluetooth Довго натискайте, щоб ув
i
мкнути або
вимкнути пристр
i
й,
i
коротко натискайте, щоб ув
i
йти в режим по
ε
днання в пару.
Reset-Taste: Wenn bei Betätigung einer Taste keine Reaktion erfolgt, drücken Sie die se Taste bitte
Ein-/Austaste und Bl uetooth-Kopplungst aste: Zum Ei n- oder A usschalten des Gerätes lange
drücken und zum Aufrufen de s Kopplungsmodus kurz drücken
Tasto di ripristino: In assenza di risposta quando si preme un tasto , premere questo tasto
Tasto di alimentazione e associazione Bluetooth: Premere a lungo per accendere o spegnere il
dispositivo e premere brevemente per accedere alla modalità di associazione
Botón de restablecimiento: Cuando no haya respuesta al presionar cualquier botón, presione
esta tecla.
Botón de alimentación y asociació n Bluetoot h: Manteng a presionado este botón para encend er
o apagar el dispositivo y presiónelo brevemente para entrar en el mod o de a sociació n
Changes or modifications not expressly approved by the party responsible for compliance could void the user's author ity to operate the equipment.
Reset-toet s: Wann eer er geen reactie is wanneer u op een kn op drukt, drukt u op deze toets.
Voedings- en Bluetooth--koppelingsknop: Houd de knop lang ingedrukt om het apparaat in of uit
te schakelen en druk kort om naar de koppelingsmodus te gaan
Reset Key: Wh en there is no response whe n pressing any button, please press this key
Power & Bluetooth pairing button: Long press to turn on or off the device and short press to enter
pairing mode
Windows® XP/Vista/7/8/10 of later, Android、Mac、IOS
Windows® XP/Vista/7/ 8/10 oder höher, Android、Mac、IOS
Zoom in (Збiльшення) / Zoom out (Зменшенн я): Два пальцi розсувайте/зводьте разом
Вiдкрити Cortana: Клацнiть трьома пальцями (Win+s) (пiдтримуε лише Windows 10)
Дiя вiдкривання + центр: Клацнiть трьома пальцями (Win+А) (пiдтр имуε лише
Windows 10)
Перемикання мiж вiдкритими вiкнами: Проведення влiво трьома пальцями (ALT+TAB+←)
Перемикання мiж вiдкритими вiкнами: Проведення вправо трьома пальцями (ALT+TAB+→)
Перегляд задачi: Проведення вгору трьома пальцями (Win+Tab)
Показати/приховати робочий стiл: Проведення вниз трьома пальцями
(windows+D)
Inzoomen/uitzoomen: twee vingers uit elkaar/samen brengen
Cortana openen: Met drie vinger s klikke n (Win+s() alleen ondersteuning voor Windows 10)
Actie+centrum openen: Met vier vingers kl ikken (win+A() a lleen ondersteuning voor
Windows 10)
Schakelen tussen geopende ve nsters: Naar l inks vegen met drie vingers(ALT+TAB+←)
Schakelen tussen geopende ve nsters: Naar r echts vegen met drie vingers(ALT+TAB+→)
Taakweergave: Om hoog vegen met drie vingers(Win+Tab)
Bureaublad weergeven/verbergen: Omlaag vegen met drie vingers (windows+D)
Vergrößern /verkleinern: Zwei Finger auseinanderziehen/zusammenschieben
Cortana öffnen: Mit drei Fingern klicken (Wi n + S) (unterstützt nur Windows 10)
Aktionscenter öffnen: Mi t vier Fingern klicken (W in + A) (unterstützt nur Windows 10)
Zwischen geöffneten Fenstern umschalten: Mit drei Fingern nach links wischen (Alt + Tab + ←)
Zwischen geöffneten Fenstern umschalten: Mit drei Fingern nach rechts wischen (Alt + Tab + →)
Aufgabenansicht: Mit drei Fingern nach oben w ischen (Win + Tab)
Desktop anzeigen/ausblenden: Mit drei Fingern n ach unten wischen (Win + D)
Windows® XP/Vista/7/8/10 або вище,Android、Mac、IOS
Windows® XP/Vista/7/8/10 o posterior, Android、Mac、IOS
Wind ows® X P/Vista/7/ 8/1 0 ou version ultérieure,A ndroi d、Mac、IOS
Instructions/Anweisungen/Instruction /Istruzioni/ Instrucción /Instructie/Instruções /Инструкция/Iнструкцiя
Function Key (Tecla de função)
Charging indicator/Ladeanzeige/Voyant de recharge/Indicatore di carica/Indicador de carga/Laadindicator/Indicador de carregamento/Iндикатор зарядження Индикатор зарядки
Package Contents/Contenu de l’emballage/Pack-
ungsinhalt/Contenuto della confezione/Conteni-
dos del Embalaje/Inhoud van de verpakking/Con-
teúdos da embalagem/Комплект поставки/Вміст
пакунк у
Letter case indication/Indication de la casse des lettres /Großbuchstaben-Anzeige /Indicazione maiuscole/minuscole /Indicación de mayúsculas y minúsculas /Aanduiding hoofdlet-
ter/kleine letter /Indicação de maiúsculas /Индикация регистра букв /Позначення регiстру шрифту
1.
Утримуйте кнопку живлення протягом 3 секунд,
i
блакитний
i
ндикатор
св
i
титиметься 3 секунди
i
вимкнеться п
i
сля завершення п
i
дключення
2.
Утримуйте кнопку вимкнення системи 3 секунди,
i
блакитний
i
ндикатор блимне 3
рази, перш н
i
ж система вимкнеться.
3.
Натисн
i
ть кнопку живлення, щоб ув
i
йти до режиму по
ε
днання в пару Bluetooth,
який триватиме 300 секунд. Мерехт
i
тиме блакитний
i
ндикатор.
1. H oud de voedingsknop gedurende 3 seconden ingedrukt en het blauwe
indicatorlampje licht op gedurende 3 seconden en dooft dan nadat de verbinding is
voltooid.
2.
Houd de uitschakelknop 3 seconden ingedrukt en het blauwe indicatorlampje
knippert drie keer voordat het apparaat wordt uitgeschakeld.
3.
Druk op de voedingsknop om naar de Bluetooth-koppelingsmodus te gaan die
300 seconden duurt, en het blauwe indicatorlampje knippert.
1. H alten Sie die Ein-/Austaste 3 Sekunden gedrückt und die blaue Anzeige
leuchtet 3 Sekunden lang. Nach Abschluss der Verbindung erlischt die
Anzeige.
2. H alten Sie die Abschalttaste 3 Sekunden gedrückt und die blaue Anzeige
blinkt vor der A bschaltung 3-mal.
3.
Drücken Sie zum Aufrufen des 300 Sekunden andauernden Bluetooth-Kop-
plungsmodus die Ein-/Austaste und die blaue Anzeige blinkt.
XK200
Bluetooth Keyboard(SF version)
Clavier Bluetooth(Version SF)
Bluetooth-Tastatur (SF-Version)
Bluetooth Keyboard(SF version)/Bluetooth-Tastatur (SF-Version)/Clavier Bluetooth(Version SF)/Tastiera Bluetooth (versione SF)/Teclado Bluetooth (versión SF)/
Bluetooth-toetsenbord(SF-versie)/Teclado Bluetooth(Versão SF)/Bluetooth-клавиатура (версия SF)/Клавіатура Bluetooth (версія SF)
Функцiональна клавiша
Гучнiсть +
Previous tr ack (Faixa anterior)
Next track (Faixa seguinte)
Гучнiсть -
Наступна дорiжка
Commutateur de pavé tactile Touchpad-Schalter
Interruptor del panel táctil Touchpadschakelaar
Touch Pad Switch (Alternar Touch Pad) Переключатель сенсорной панели Перемикач сенсорно" панелi
Swip e cursor : Move usin g a sin gle finger
Left click: Click us ing a single finger
Right cl ick: Click us ing two fingers
Drag: Double click and drag a finger on the touchpad
Vertical scrolling: Swipe up and down using two finge rs
Horizontal scrolling: Swipe left and r ight using two fingers
Scorrere il cursore: Muoversi usando un solo dito
Clic tasto sinistro: Fare clic con un solo dito
Clic tasto destro: Fare clic con due dita
Trascinare: Fare doppio clic e trascinare un dito sul touchpad
Scorrimento verticale: Scorrere verso l'alto e verso il basso con due dita
Scorrimento orizzontale: Scorrere verso sinistra e verso destra con due dita
Deslizar o cursor: Mova com um único dedo
Clicar com o botão esquerdo: Clique com um único dedo
Clicar com o botão direito: Clique com dois dedos
Arrastar: Clique duas vezes e arraste um dedo no touchpad
Rolagem vertical: Deslize para cima e para baixo usando dois dedos
Rolagem horizontal: Deslize para a esquerda e para a direita usando dois dedos
Zoom in/Zoom out: Two fing ers separate/get together
Ingrandimento/riduzione: Due dita che si allontanano/si avvicinano
Open C ortana: Click us ing th ree fingers(Win +s() S upport W indows 10 o nly)
Aprire Cortana: Fare c lic con tre dita (Win+s() supporta solo Windows 10)
Open Action+center: C lick using four fingers(win+A)(Support Windows 10 only)
Aprire Azione+centro: Fare clic con quatto dita(win+A)(supporta solo Windows 10)
Switch between opened windows: Swipe left using three finger(s ALT+TAB+←)
Passare tra fin estre aperte: Scorrere a sinistra con tre dita(ALT+TAB+←)
Switch between opened windows: Swi pe right using three fingers(ALT+TAB+→)
Passare tra finestre aperte: Scorrere a destra con tr e dita(ALT+TAB+→)
Tasks view : Sw ipe up usin g three fingers(Win+Tab)
Visualizzazione attività: Scorrere verso l'alto con tre dita(Win+Tab)
Show/Hide desktop: Swipe down using three fing ers (windows+D)
Mostrare/nascondere desktop: Scorrere verso il basso con tre dita (Windows+D)
Aumentar Zoom diminuir zoom: Dois dedos se separando/ficando juntos
Abrir a Cortana: Clique com três dedos (Win+s)(Compatível apenas com Windows 10)
Abrir Actio n Center: Clique com quatro dedos(win+A)Compatível com Windows 10
apenas)
Alternar entre as janelas abertas: Deslize para a esquerda usando três dedos(ALT+TAB+←)
Alternar entre as janelas abertas: Deslize para a direita usando três dedos(ALT+TAB+→)
Visualização de tarefas: Deslize para cima usando tr ês dedos(Win+Tab)
Mostrar/Ocultar área de trabalho: Deslize para baixo usando três dedos (windows+D)
Balayage du curseur :Déplacer avec u n seul doigt
Clic gauche :Cliquer avec un seul doigt
Clic droit :Cliquer avec deux doigts
Faire glisser :Doub le-cliquez et faites glisser un doigt sur le pavé tacti le
Défilement vertical :Balayez vers le haut et ver s le bas avec deux doigts
Défilement horizontal :Balayez vers la gauche et la droite avec deux doigts
Zoom avant/ Zoom arrière :Deux doigts se séparent / se réunissent
Ouvrir Cortana :Cliquez avec trois doigts (Win + s() Prise en charge de Windows 10 uniquement)
Ouvrir Action+centre :Cliquez avec quatre doigt(Wins + A)(Prise en charge de Windows
10 uniquement)
Basc uler entre les fenêtres ouvertes :Balayez vers la gauche avec trois doigt(ALTs + TAB
+←) Ba sculer entre les fenêtres ouvertes :Balayez vers la droite avec trois doi gt (ALTs +
TAB + →) Vue des tâches :Faites glisser vers le haut avec trois doigt(Wins + Tab)
Afficher/ Cac her sur le bureau :Balayez vers le bas avec trois doigts (Windows + D)
Deslizar rápidamente el cursor: mo ver utilizando un solo dedo
Clic con el b otón izquierdo: hacer clic utilizando un so lo dedo
Clic con el botón derecho: hacer clic utilizando dos dedos
Arrastrar: hacer doble clic y arrastrar un dedo sobre el panel táctil
Desplazamiento vertical: deslizar rápidamente hacia arriba y hacia abajo utilizando dos dedos
Desplazamiento horizontal: deslizar rápidamente hacia la izquierda y hacia la derecha
utilizando dos dedos
Проведение курсором: переместите с помощью одного пальца
Щелчок левой кнопкой : щелкните одним пальцем
Щелчок правой кнопкой: щелкните двумя пальцами
Перетаскивание: дважды щелкните и прове дите пальцем по сенсорной панели
Вертикальная прокрутка: проведите вверх и вниз двумя пальцами
Горизонтальная прокрутка: проведите влево и вправо двумя пальцами
Acercar y alejar: separar o acercar dos dedos
Abrir Cortana: hacer clic utilizando tres dedos (Win+s) (solo es compatible con Windows 10)
Abre Acción+centro: hacer clic utilizando cuatro dedos (Wi n+A) (solo es compatible con
Windows 10)
Cambiar entre ventanas abiertas: deslizar hacia la izquierda utilizando tres dedos
(ALT+TAB+←)
Cambiar entre ventanas abiertas: deslizar hacia la derecha utilizando tres dedos
(ALT+TAB+←)
Vista de tareas: deslizar hacia arriba utilizando tres de dos (Win+Tab)
Mostrar u ocu ltar el escritorio: deslizar hacia abajo utilizando tres dedos (Windows + D)
Увеличение/уменьшение: разведите/соедините вместе два пальца
Открыть Кортану: щелкните тр емя пальцами (Win+S) (поддержка только для
Windows 10)
Открыть Action Center: щелкните четырьмя пальцами (Win+A) (поддержка только
для Windows 10)
Переключение между открытыми окнами: проведите влево тремя пальцами
(ALT+TAB+←)
Переключение между открытыми окнами: проведите вправо тремя пальцами
(ALT+TAB+→)
Обзор заданий: проведите вверх тремя пальцами (Win+Tab)
Показать/скрыть рабочий стол: проведите вниз тремя пальцами (Windows+D)
Cursor bewegen: Mit einem einzelnen Finger bewegen
Linksklick: Mit einem einzelnen Finger klicken
Rechtsklick: Mit zwei Fingern klicken
Ziehen: Mit e inem Finger zweimal klicken und am Touchpad wischen
Vertikales Blättern: Mit zwei Fingern nach oben und unten wischen
Horizontales Blättern: Mit zwei Fingern nach links und rechts wischen
Cursor vegen: verplaatsen met één vinger
Links klikken: klikken met één vinger
Rechts klikken: klikken met twee vingers
Slepen: Dubbelklikken en een vinger over de rouchpad slepen
Verticaal schuiven: o mhoog en omlaag vegen met twee vingers
Horizontaal schuiven: naar links en rechts vegen met twee vingers
Проведення курсору: Пересувайте одним пальцем
Клацання лiвою кнопкою: Клацнiть о дним пальцем
Клацання правою кнопкою: Клацнiть двома пальцями
Перетягування: Двiчi клацнiть i перетягнiть пальцем по сенсорнiй панелi
Вертикальне прокручува ння: Проводьте вгору i вниз двома пальцями
Горизонтальне прокручуванн я: Проводьте влiво i вправо двома пальцями
Touche de réinitialisation :Lorsqu'il n'y a pas de réponse lorsque vous appuyez sur un bouton,
veuillez app uyer sur cette touch e
Bouton d'appairage d'alimentation et de Bluetooth :Appuyez longuement pour allumer ou
éteindre l'appareil et appuyez briè vement pour entrer en mode d'appairage
Reset Key (Tecla de reset): Qu an do não houver resposta ao pressionar qualqu er botão, pressione
esta tecla
Botão de emparelhamento de energia e Bluetooth: Pressione e mantenha pressionado para ligar
ou desligar o dispositivo e pressione rapidamente para entrar no modo de pareamento
The blue indicator light is on when the keyboard is in the capital letter status
Le voyant bleu s'allume lorsque le clavier est en majuscule
Die blaue Anzeige leuchtet auf, w enn sich die Tastatur im Großbuchsta-
ben-Modus befindet
L’indicatore luminoso blu si accende quando la tastiera è in modalità maiuscole
La luz indicadora azul está encendida cuando el teclado está en el estado de letra
mayúscula.
Het blauwe indicatorlampje licht op wanneer he t toetsenbord op hoofdletters staat.
A luz indicadora azul acende quando o teclado está no status de letra maiúscula
При переключении клавиатуры в верхний регистр будет гореть синий индикатор.
Св
i
титиметься блакитний
i
ндикатор, коли клав
i
атуру буде заф
i
ксовано у верхньому
рег
i
стр
i
(капс лок).
Low power indication/Indication de puissance faible/Anzeige bei geringer Kapazität/Indicazione di carica bassa/Indicador de carga baja/Aanduiding energiebesparing/Indicação de baixa
energia/Индикация низкой мощности/Позначення низького рiвню живлення
When the voltage is lower than 3.2V, the red indicator light flashes,
indicating the need for charging
Quando la tensione è inferiore a 3,2 V, l’indicatore luminoso lampeggia, indicando la
necessità di ricarica
Quando a tensão é inferior a 3,2V, a luz indicadora vermelha pisca, indicando a
necessidade de carregamento
Lorsque la tension est inférieure à 3,2 V, le voyant rouge clignote, indiquant
la nécessité d'effectuer une recharge
Cuando el voltaje es inferior a 3,2 V, la luz indicadora roja parpadea, lo que indica la
necesidad de cargar
Wenn die Spannung weniger als 3,2 V beträgt, blinkt die rote Anzeige,
damit Sie wissen, dass das Gerät aufgeladen werden muss
Wanneer de spanning lager is dan 3,2V, knippert het rode indicatorlampje wat
aangeeft dat opladen nodig is.
Когда напряжение опустится ниже 3,2 В, начнет мигать красный индикатор,
сообщая о необходимости зарядки.
Коли живлення нижче 3,2 В, мерехтить червоний
i
ндикатор, спов
i
щаючи про
необх
i
дн
i
сть зарядження
When XK200 is charging, red LED is on. When it is fully char ged, red LED is off.
Lorsque le XK200 se recharge, la LED rouge est allumée.Lorsqu'il est
complètement rechargé, la LED rouge s'éteint.
Wenn XK200 geladen wird, leuchtet die rote LED. Bei vollständiger
Aufladung erlischt die rote LED.
Quando XK200 è in carica, il LED rosso si accende. Quando è completamente carico,
il LED rosso si spegne.
Cuando su XK200 se está cargando, el LED rojo está encendido. Cuando está
completamente cargado, el LED rojo se apaga.
Wanneer de XK200 wordt opgeladen, is de rode LED aan. Wanneer het opladen is
voltooid, dooft de rode LED.
Quando o XK200 está carreg ando, o LED vermelho fica aceso. Quando está totalmente
carregado, o LED vermelho apaga.
Во время зарядки клавиатуры XK200 горит красный светодиод. Когда клавиатура
будет полностью заряжена, красный светодиод гаснет.
Коли заряджу
ε
ться XK200, червоний св
i
тлод
i
од ув
i
мкнено. Коли його повн
i
стю
заряджено, червоний св
i
тлод
i
од вимкнеться.
1.
Hold the power button for more than 3 seconds to boo t.
2.
Press the power button so tha t the keyboard is searchable in 300 seconds.
3.
Finish Bluetooth pairing on your device.
Bluetooth pairing
Windows®7 and 8:
1.Click the ""Start"" button, then select Control Panel > Add a device
2.Select the RAPOO BT5.0 KB from the list.
3.Click Next and follow any other instructions that may appear on the screen.
Windows®10:
1.Click the ""Start"" button, then select Settings > Devices > Bluetooth.
2.Select the RAPOO BT5.0 KB from the list.
3. Click Pair and follow any other instructions that may appear on the screen.
1.
Tenere premuto il tasto di alimentazione per più di 3 secondi per l'avvio.
2.
Premere il tasto di alimentazione in modo che sia possibile cercare la tastiera in 300
secondi.
3. C ompletare l'associazione Bl uetooth sul dispositivo.
Associazione Bluetooth
Windows®7 e 8:
1.
Fare clic sul tasto "Start", quindi selezionare Pannello di controllo > Aggiungi un
dispositivo.
2.
Selezionare la tastiera o il mouse dall'elenco.
3.Fare clic su Avanti e se guire le istruzioni che appaiono sullo schermo.
Windows®10:
1.Fare clic sul tasto "Start", quindi selezionare Impostazioni > Dispositivi > Bluetooth.
2.Selezionare la tastiera o il mouse dall'elenco.
3. Fare clic su Associa e seguire le istruzioni che appaiono sullo schermo.
1.
Segure o botão liga / desliga por mais de 3 segundos para inicializar.
2. Pressione o botão liga/desliga para que o teclado possa ser pesquisado em 300 segundos.
3.
Finalizar o emparelhamento Bluetooth no seu dispositivo.
Emparelhamento Bluetooth
Windows®7 e 8:
1.
Clique no botão "Iniciar" e, em seguida, selecione Painel de Controlo > Adicionar um
dispositivo
2.
Selecione o teclado ou o rato na lista.
3. Clique em Seguinte e siga as instruções que possam ser apresentadas no ecrã.
Windows®10:
1. Clique no botão "Iniciar" e, em seguida, selecione Definições > Dispositivos > Bluetooth.
2.
Selecione o teclado ou o rato na lista.
3. Clique em Emparelhar e siga as instruções que possam ser apresentadas no ecrã.
1.Maintenez le bouton d'alimentation enfoncé pendant plus de 3 secondes pour
démarrer.2.Appuyez sur le bouton d'alimentation pour que le clavier puisse être
recherchable en 300 secondes.3.Terminez l'appairage Bluetooth sur votre
dispositif.
Appairage Bluetooth
Windows®7 et 8:
1.Cliquez sur le bouton ""Démarrer"", puis sélectionnez Panneau de configuration
> Ajouter un périphérique
2.Sélectionnez le clavier ou la souris dans la liste.
3.Cliquez sur Suivant et suivez les autres instructions pouvant apparaître à l'écran.
Windows®10:
1.
Cliquez sur le bouton ""Démarrer"", puis sélectionnez Paramètres > Périphériques >
Bluetooth.
2.
Sélectionnez le clavier ou la souris dans la liste.
3.
Cliquez sur Appairer et suivez les autres instru ctions pouvant apparaître à
l'écran.
1.
Mantenga presionado el botón de alimentación durante más de 3 segundos para
encender.
2.
Presione el botón de alimentación para que se pueda buscar en el teclado en 300
segundos.
3.
Finalice la asociación Bluetooth en el dispositivo.
Asociación Bluetooth
Windows®7 y 8:
1.
Haga clic en el botón "Inicio" y, a continuación, seleccione Panel de control > Agregar
un dispositivo.
2. Seleccione el teclado o ratón en la lista.
3. Haga clic en Siguiente y siga todas las instrucciones que aparezcan en la pantalla.
Windows®10:
1. Haga clic en el botón "Inicio" y seleccione Configuración > Dispositivos > Bluetooth.
2. Seleccione el teclado o ratón en la lista.
3. Haga clic en Asociar y siga todas las instrucciones que apar ezcan en la pantalla.
1. Для загрузки удерж ивайте кнопку питания более 3 секунд.
2. Н ажмите кнопку питания, чтобы клавиатура была доступна для поиска через 300
секунд.
3.
Завершите сопряжение по Bluetooth на своем устройстве.
Сопряжение по Bluetooth
Windows®7 и 8:
1. Н ажмите кнопку «Пуск», выберите «Панель управления» > «Добавить устройство»
2.
Выберите клавиатуру или мышь из списка.
3.
Нажмите кнопку «Далее» и следуйте остальным инструкциям, которые могут
появиться на экране.
Windows®10:
1. Н ажмите кнопку «Пуск», выберите «Настройки» > «Устройства» > Bluetooth.
2.
Выберите клавиатуру или мышь из списка.
3.
Нажмите кнопку «Сопряжение» и следуйте остальным инструкциям, которые могут
появиться на экране.
1. Ein-/Austaste zum Hochfahren länger als 3 Sekunden gedrückt halten.
2.
Ein-/Austaste drücken, damit die Tastatur 300 Sekunden lang auffindbar ist.
3.
Bluetooth-Kopplung an Ihrem Gerät abschließen.
Bluetooth-Kopplung
Windows®7 und 8:
1. Klicken Sie auf die Start-S chaltfläche und wählen Sie Systemsteuerung > Gerät
hinzufügen
2. Wählen Sie Tas tatur oder Maus aus der Liste.
3.
Klicken Sie auf Weiter und be folgen Sie möglicherweise am Bildsch irm angezeigten
Anweisungen.
Windows®10:
1.KlickenSieaufdieStart-Schaltfläche,wählenSiedannEinstellungen>Geräte>Bluetooth.
2. Wählen Sie Tas tatur oder Maus aus der Liste.
3.
Klicken Sie auf Koppeln und befolgen Sie die möglicherweise am Bildschirm
angezeigten Anweisungen.
1. H oud de voedingsknop langer dan 3 seconden ingedrukt om op te starten.
2. Druk op de voedingsknop zodat het toetsenbord doorzoekbaar is in 300 seconden.
3.
Voltooit de Bluetooth-koppeling op uw apparaat.
Bluetooth-koppeling
Windows®7 en 8:
1. Klik op de knop "Start" en selecteer vervolgens Configuratiescherm > Een apparaat
toevoegen
2.
Selecteer het toetsenbord of de muis in de lijst.
3. Klik op Volgende en volg alle overige instructies die mogelijk verschijnen op het scherm.
Windows®10:
1.
Klik op de knop "Start" en selecteer vervolgens Instellingen > Apparaten > Bluetooth.
2.
Selecteer het toetsenbord of de muis in de lijst.
3. Klik op Koppelen en volg eventuele andere instructies die mogelijk verschijnen op het scherm.
1.
Утримуйте кнопку живлення понад 3 секунди, щоб завантажити.
2.
Натисн
i
ть кнопку живлення, щоб клав
i
атуру було видно для пошуку через 300
секунд.
3.
Заверш
i
ть по
ε
днання в пару Bluetooth на пристро
"
.
По
ε
днання в пару по Bluetooth
Windows®7 i 8:
1.
Клацн
i
ть кнопку Start (Пуск), пот
i
м вибер
i
ть Control Panel (Контрольна панель) > Add
a device (Додати пристр
i
й)
2.
Вибер
i
ть з
i
списку мишу або клав
i
атуру.
3.
Клацн
i
ть Next (Дал
i
) та виконуйте вс
i
наступн
i i
нструкц
i"
, що з'являться на екран
i
.
Windows®10:
1. Клацн
i
ть кнопку Start (Пуск), вибер
i
ть Settings (Налаштування) > Devices (Пристро
"
) >
Bluetooth.
2.
Вибер
i
ть клав
i
атуру або мишу з
i
списку.
3.
Клацн
i
ть Pair (По
ε
днати у пару)
i
виконуйте вс
i
наступн
i i
нструкц
i"
, що з'являться на
екран
i
.
System requirements / Exigences du système / Systemvoraussetzungen / Requisiti di sistema / Requerimientos del sistema / Systeemvereisten / Requisitos do
Sistema / Системнi вимоги / Системные требования
Windows® XP/Vista/7/8/10 or later,Android,Mac,IOS
Windows® XP/Vista/7/8/10 o versioni successive, Android、Mac、IOS
Windows® XP/Vista/7/8/10 ou mais rece nte, Android、Mac、IOS
Windows® XP/Vista/7/8/10 или боле е поздней верс ии, Android、Mac、IOS
NOTE:
This equipment has been tested and found to comply w ith the limits for a C lass B dig ital device, pursuant to part 15 of the FCC Rules. These limits are designed to provide reasonable protection against harmful interference
in a residential installation. This equipment generates uses and can radiate radio frequency energy and, if not installed and used in accordance with the instructions, may cause harmful interference to radio
communications. However, there is no guarantee that interference will not occur in a particular installation. If th is equipment does cause harmful interfe rence to radio or television reception, which can be determined by
turning the equipment off and on, the user is encouraged to try to correct the interference by one or more of the following measures :
-
Reorient or relocate the receiving antenna.
-
Increase the separation between the equipment and receiver.
-Connect the equipment into an outlet on a circuit different from that to which the receiver is connected.
-Consult the dealer or an experienced radio/TV technician for help
This d evice complies with Part 15 of the FCC Rules. Operation is subject to the following two conditions:
(1)
this device m ay not cause harmful in terference, and
(2)
this device must accept any interference received, including interference that may cause undesired operation.
