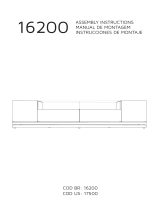
1V : 00
COD BR: 86200
COD US: 89500
MANUAL DE MONTAGEM
ASSEMBLY INSTRUCTIONS
INSTRUCCIONES DE MONTAJE

2V : 00

3V : 00
Introdução
Introducción
Introduction
Leia atentamente este manual e siga os passos indicados para uma perfeita montagem.
Lea este manual y siga los pasos para el ajuste perfecto.
Read this manual and follow the steps for the perfect fit.
Sumário
Resumen
Summary
3
4
5
5
4
6
Montagem do móvel
Furniture assembly
Montaje de la mueble
Introdução
Introduction
Introducción
Antes de começar
Before starting
Antes de comenzar
Identificação das peças
Identifying parts
Identificación de las piezas
Evite acidentes
Avoid accidents
Evitar accidentes
Dimensões e ferramentas
Dimensions and tools
Dimensiones y herramientas

4V : 00
Evite acidentes
Prevenir accidentes
Avoid accidents
X
Forre a área de montagem com um
cobertor ou tapete. Assim, você evita
avarias nas peças durante o processo de
montagem.
Cubrir la zona de ensamble con una manta o
alfombra. De este modo, se evitan daños
en las piezas durante el proceso de montaje.
Cover the assembly area with a blanket or carpet
to avoid damages on the parts during the
assembly process.
Antes de começar
Antes de comenzar
Before starting
Antes de começar a montagem prepare o ambiente, deixando-o completamente limpo e
com bom espaço para iniciar o trabalho.
Antes de comenzar el montaje preparar el ambiente, dejándolo completamente limpio y
con bueno espacio para comenzar el trabajo.
Prepare the room before starting the assembly, leaving it completely clean and the area in
good condition to start the work.
Utilize o papelão da própria embalagem,
bem como a isomanta de proteção para
separar e apoiar as peças retiradas das caixas.
Utilice el cartón de la embalaje y la espuma protectora
para separar y apoyan las piezas
desmontadas de las cajas.
Use the cardboard of the packaging and
the foam sheets protection to separate and support
the parts removed from the boxes.
No se suba ni se apoye en el movel.
Do not climb or lean on the furniture.
Não escale ou se apoie no móvel.

5V : 00
Dimensões e ferramentas
Dimensions and tools
Dimensiones y herramientas
Dimensões:
L: 442 A: 516 P: 442 mm
Dimensiones:
L: 442 A: 516 P: 442 mm
Dimensions:
W: 17.40 H: 20.32 D: 17.40 inches
Número do lote de
fabricação do seu
produto.
Numero de lote
fabricación de su
producto.
Manufacturing batch
number of the product.
Para identificar o número da peça, verifique o verso da mesma, lá você encontra informações
do lote de fabricação, código de identificação do produto e o número da peça.
Para identificar el número de pieza, compruebe en la parte posterior de cada una, ahí también se
puede encontrar información del número de lote de producción, el código de indentificación del
producto y el número de la pieza.
To identify the part number, check its back. There, you can find information from the production
batch, product reference code and part number.
LOT 00000 PROD 000000 PC 000
Número de
identificação
do seu produto.
Numero de
identificación
de su producto.
Reference number of
the product.
Número da peça.
LOT 000000 PRODUC 000000 PC 000
Número de pieza.
Part number.

6V : 00
ADESIVO
STICKER
ADHESIVO
x10
0599 x 7 0136 x 4
0494 x 7
1668 x 11
1533 x 8
3525 x 8
02
02
01
04
06
03
COD BR: 86200
COD US: 89500
TAMPO
LATERAL
BANDEIRA
TAMPO SUPERIOR
SARRAFO MAIOR
001
002
003
004
006
PEÇA DESCRIÇÃO
1
2
1
1
2
1
2
1
1
2
1
1
1
1
1
1
1
1
1
1
PART DESCRIPTION
TABLETOP
SIDE
BACK SUPPORT
UPPER BORAD
BAT TEN
QUANT. CAIXA
QTY BOX
001
002
003
004
006
1
2
1
1
2
CUBIERTA
LATERAL
REFUERZO
CUBIERTA SUPERIOR
SOPORTE
001
002
003
004
006
PIEZA DESCRIPCIÓN
1
1
1
1
1
CANTIDAD CAJA
ACESSÓRIOS INCLUÍDOS NA CAIXA 01 - HARDWARE INCLUDED IN BOX 01 - ACCESORIOS INCLUÍDOS EN LA CAJA 01

7V : 00
PASSO 1
Posicionar sapata 2x0136
na lateral 02, parafusar
4x1533 e minifix 1x0599.
STEP 1
Place sapata 2x0136
in side 02, screw 4x1533
and screw minifix 1x0599.
PASO 1
Poner sapata 2x0136 en
lateral 02, atornillar 4x1533
y el minifix 1x0599
LATERAL 2x / SIDE 2x / LATERAL 2x
0599
A
A
=10KG - 22LB
02
1533
0136

8V : 00
1668
BANDEIRA / BACK SUPPORT / REFUERZO
PASSO 2
Encaixar cavilhas 2x1668
na Bandeira 03.
STEP 2
Insert dowels 2x1668
on Back Support 03.
PASO 2
Clavijas de ajuste 2x1668
en el Refuerzo 03.
04
PASSO 3
Parafusar 4x3525 fixando os sarrafos
06 no Tampo Superior 04,
encaixar cavilhas 4x1668.
STEP 3
Screw 4x3525 to fix Batten 06
to Upper Board 04, Insert dowels
4x1668.
PASO 3
Atornillar 4x3525 fijando el Soportes
06 en Cubierta Superior 04, Clavijas
de ajuste 4x1668.
TAMPO SUPERIOR / UPPER BOARD / CUBIERTA SUPERIOR
TAMPO / TOP BOARD / CUBIERTA
03
1668
3525
06
0599
PASSO 4
Parafusar minifix 4x0599 no Tampo
01.
STEP 4
Screw minifix 4x0599 on Top
Bord 01.
PASO 4
Atornillar el minifix 4x0599 de la
Cubierta 01.
01
Pintura para o lado externo.
Painted side out.
Lado pintado el exterior.

9V : 00
MONTAGEM DA ESTRUTURA / STRUCTURE ASSEMBLY / MONTAJE DE LA ESTRUCTURA
03
PASSO 6
Encaixar Laterais 02 na
bandeira 03.
STEP 6
Attach Side 02 on Back support 03.
PASO 6
Montar la Laterales 02 en el
Refuerzo 06.
3525
PA S SO 5.1
Após encaixar Tampo 01 no
Tampo Sup. 04 aparafusar 4x3525.
S T E P 5.1
After attach Top Board 01 to
Upper Board 04 and screw
4x3525.
PA SO 5.1
Después de montar el Cubierta 01
en el Cubierta superior 04 y
atornillar el 4x3525.
04
PASSO 5
Encaixar Tampo 01 no Tampo Sup. 04.
STEP 5
Attach Top Board 01 to Upper Board.
PASO 5
Montar el Cubierta 01 en el Cubierta
superior 04.
UNINDO OS TAMPOS / UNITED THE TOP BOARDS / UNIENDO LAS CUBIERTAS
01
02
02

10V : 00
1668
PASSO 8
Encaixar cavilhas 4x1668
nas Laterais.
STEP 8
Insert dowels 4x1668
on Sides.
PASO 8
Clavijas de ajuste 4x1668
en Lateral.
0494
ADESIVO
STICKER
ADHESIVO
PASSO 7
Parafusar castanhas 2x0494
e colar 2 adesivos.
STEP 7
Screwing nuts 2x0494
and place 2 stickers.
PASO 7
Atornillar las tuercas 2x0494
y pegar 2 adhesivos.
PASSO 9
Encaixar Tampos 01 e 04.
STEP 9
Attach Top Boards 01 and 04.
PASO 9
Montar la parte superior 01 y 04.

11
V : 00
0494
ADHESIVO
ADESIVO
STICKER
PA S SO 9 .1
Parafusar castanhas 4x0494
e colar 4 adesivos.
S T E P 9.1
Screwing nuts 4x0494
And paste 4 stickers.
PA SO 9.1
Atornillar las tuercas 4x0494
y pegar 4 adhesivos.

12V : 00
8642
-
 1
1
-
 2
2
-
 3
3
-
 4
4
-
 5
5
-
 6
6
-
 7
7
-
 8
8
-
 9
9
-
 10
10
-
 11
11
-
 12
12
Manhattan Comfort 86200 Assembly Instructions Manual
- Tipo
- Assembly Instructions Manual
- Este manual também é adequado para
em outras línguas
- español: Manhattan Comfort 86200
- English: Manhattan Comfort 86200
Artigos relacionados
Outros documentos
-
Lego 8273 Building Instruction
-
ROOMS TO GO 21097527 Assembly Instructions
-
ROOMS TO GO 20092526 Assembly Instructions
-
 Politorno Verona Desk 1055 Assembly Instructions
-
Artely Ever II Manual do usuário
-
 Artely Cine II Manual do usuário
-
 Artely Monaco Manual do usuário
-
Gelius REQUINTE 45 Manual do usuário
-
Crosley KAMELEON Manual do proprietário
-
 Sunbay Azul Guia de usuario


