A página está carregando...

1V : 00
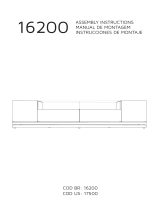
COD BR: 18100
MANUAL DE MONTAGEM
ASSEMBLY INSTRUCTIONS
INSTRUCCIONES DE MONTAJE

2
V : 00
Introdução
Introducción
Introduction
Leia atentamente este manual e siga os passos indicados para uma perfeita montagem.
Lea este manual y siga los pasos para el ajuste perfecto.
Read this manual and follow the steps for the perfect fit.
Sumário
Resumen
Summary
2
3
4
4
3
5
Montagem do móvel
Furniture assembly
Montaje de la mueble
Introdução
Introduction
Introducción
Antes de começar
Before starting
Antes de comenzar
Identificação das peças
Identifying parts
Identificación de las piezas
Evite acidentes
Avoid accidents
Evitar accidentes
Dimensões e ferramentas
Dimensions and tools
Dimensiones y herramientas

3
V : 00
Forre a área de montagem com um
cobertor ou tapete. Assim, você evita
avarias nas peças durante o processo de
montagem.
Cubrir la zona de ensamble con una manta o
alfombra. De este modo, se evitan daños
en las piezas durante el proceso de montaje.
Cover the assembly area with a blanket or carpet
to avoid damaging the parts during the
assembly process.
Antes de começar
Antes de comenzar
Before starting
Antes de começar a montagem prepare o ambiente, deixando-o completamente limpo e
com bom espaço para iniciar o trabalho.
Antes de comenzar el montaje preparar el ambiente, dejándolo completamente limpio y
con bueno espacio para comenzar el trabajo.
Prepare the room before starting the assembly, leaving it completely clean and the area in
good condition to start the work.
Utilize o papelão da própria embalagem,
bem como a isomanta de proteção para
separar e apoiar as peças retiradas das caixas.
Utilice el cartón de la embalaje y la espuma protectora
para separar y apoyan las piezas
desmontadas de las cajas.
Use the cardboard of the packaging and
the foam sheets protection to separate and support
the parts removed from the boxes.
Evite acidentes
Prevenir accidentes
Avoid accidents
No se suba ni se apoye en el mueble.
Do not climb or lean on the furniture.
Não escale ou se apoie no móvel.
X

4
V : 00
Número do lote de
fabricação do seu
produto.
Numero de lote
fabricación de su
producto.
Manufacturing batch
number of the product.
Para identificar o número da peça, verifique o verso da mesma, lá você encontra informações
do lote de fabricação, código de identificação do produto e o número da peça.
Para identificar el número de pieza, compruebe en la parte posterior de cada una, ahí también se
puede encontrar información del número de lote de producción, el código de indentificación del
producto y el número de la pieza.
To identify the part number, check its back. There you can find information from the production
batch, product reference code and part number.
LOT 00000 PROD 000000 PC 000
Número de
identificação
do seu produto.
Numero de
identificación
de su producto.
Reference number of
the product.
Número da peça.
LOT 000000 PRODUC 000000 PC 000
Número de pieza.
Part number.
Dimensões e ferramentas
Dimensions and tools
Dimensiones y herramientas
Dimensões:
L: 1795 A: 610 P: 356 mm
Dimensions:
W: 70.67 H: 24.02 D:14.02 inches
Dimensiones:
L: 1795 A: 610 P: 356 mm

5
V : 00
COD BR: 18100
021
022
023
024
025
026
027
028
029
050
FUNDO
BASE
TAMPO
PAINEL SUPERIOR NICHO
FUNDO NICHO
NICHO LATER AL
INFERIOR NICHO
DIVISÓRIA MAIOR
DIVISORIA MENOR
PÉ
021
022
023
024
025
026
027
028
029
050
BACKPL AT E
BASE
TOP BOARD
NICHE TOP PANEL
NICHE BACK PANEL
SIDE NICHE
NICHE BOTTOM
LONG DIVIDER
SHORT DIVIDER
LEG
PEÇA DESCRIÇÃO QUANT. CAIXA
1
1
1
2
2
2
2
1
1
4
1
1
1
1
1
1
1
1
1
1
1
1
1
2
2
2
2
1
1
4
1
1
1
1
1
1
1
1
1
1
1
1
1
2
2
2
2
1
1
4
1
1
1
1
1
1
1
1
1
1
PART DESCRIPTION QTY BOX
27
25
29
28
26
24
23
22
26
25
24
27
21
50
50
021
022
023
024
025
026
027
028
029
050
FONDO
BASE
CUBIERTA
PANEL SUPERIOR NICHO
FONDO NICHO
NICHO LATERAL
NICHO INFERIOR
DIVISION MAYOR
DIVISION MENOR
PATA
PIEZA DESCRIPCIÓN CANTIDAD CAJA

6
V : 00
B
A
A
=20KG - 44LB =03KG - 6.61LB
B
B B B B
ADESIVO
STICKER
ADHESIVO
x10
ACESSÓRIOS INCLUÍDOS NA CAIXA 01 - HARDWARE INCLUDED IN BOX 01 - ACCESORIOS INCLUÍDOS EN LA CAJA 01.
0599 x 13
0494 x 13 1668 x 26
8471 x 4
8056 x 18 9333 x 09 0357 x 25
3706 x 9

7
V : 00
22
23
BASE / BASE / BASE
0599
0599
PASSO 01
Parafusar minifix 5x0599
na Base 22.
STEP 01
Screw minifix 5x0599
on Base 22.
PASO 01
Atornillar el minifix 5x0599
en la Base 22.
PASSO 02
Parafusar minifix 4x0599
na Tampo 23.
STEP 02
Screw minifix 4x0599
on Top Board 23.
PASO 02
Atornillar el minifix 4x0599
en la Cubierta 23.
TAMPO / TOP BOARD / CUBIERTA
25
FUNDO NICHO / NICHE BOTTOM / FONDO NICHE
1668
2x
PASSO 03
Encaixar cavilhas 4x1668
na Fundo Nicho 25.
STEP 03
Insert dowels 4x1668
on Niche Bottom 25.
PASO 03
Clavijas de ajuste 4x1668
en Fondo Nicho 25.

8
V : 00
26
1668
0599
PASSO 04
Encaixar cavilhas 4x1668 e
parafusar minifix 1x0599
na Nicho Lateral 26.
STEP 04
Insert dowels 4x1668 and
screw minifix 1x0599
on Niche Side 26.
PASO 04
Clavijas de ajuste 4x1668 y
atornillar el minifix 1x0599
en el Nicho Lateral 26.
PASSO 05
Encaixar cavilhas 4x1668 e
parafusar minifix 1x0599
na Divisoria Maior 28.
STEP 05
Insert dowels 4x1668 and
screw minifix 1x0599
on Long Divider 28.
PASO 05
Clavijas de ajuste 4x1668 y
atornillar el minifix 1x0599
en la Division Mayor 28.
DIVISORIA MENOR / SHORT DIVIDER / DIVISION MENOR
DIVISORIA MAIOR / LONG DIVIDER / DIVISION MAYOR
NICHO LATERAL / NICHE SIDE / NICHO LATERAL
1668
PASSO 06
Encaixar cavilhas 4x1668
na Divisoria menor 29.
STEP 06
Insert dowels 4x1668
on Short Divider 29.
PASO 06
Clavijas de ajuste 4x1668
en Division Menor 29.
29
28
1668
0599
2x

9
V : 00
26
26
29
28
PASSO 07
Encaixar Divisoria 29.
Parafusar castanhas 1x0494
e colar 1 adesivo.
STEP 07
Attach Divider 29.
Screw nuts 1x0494 and place
1 sticker.
PASO 07
Enganchar la Division 29.
Atornillar las tuercas 1x0494
y pegar 1 adhesivo.
PASSO 08
Encaixar Laterais 26.
Parafusar castanhas 2x0494.
STEP 08
Attach Sides 26.
Screw nuts 2x0494.
PASO 08
Enganchar las Laterales 26.
Atornillar las tuercas 2x0494.
0494
ADESIVO
STICKER
ADHESIVO
0494
23
26
26
PASSO 09
Encaixar Laterais 26 no Tampo 23.
Parafusar castanhas 2x0494
e colar 2 adesivos.
STEP 09
Attach Sides 26 to Top Board 23.
Screw nuts 2x0494 and place
2 stickers.
PASO 09
Montar las Laterales 26 en la Cubierta 23.
Atornillar las tuercas 2x0494
y pegar 2 adhesivos.
0494
ADESIVO
STICKER
ADHESIVO

10
V : 00
24
24
PASSO 11
Encaixar Panel Superior nicho 24.
Parafusar 8x3706
STEP 11
Attach Niche Top 24.
Screw 8x3706
PASO 11
Montar el Panel Superior Nicho 24.
Atornillar 8x3706.
3706
22
PASSO 12
Encaixar Base 22. Parafusar castanhas
3x0494 e colar 3 adesivos.
STEP 12
Attach Base 22. Screw nuts 3x0494
and place 3 stickers.
PASO 12
Montar Base 22. Atornillar las tuercas
3x0494 y pegar 3 adhesivos.
PASSO 10
Encaixar Fundo Nicho 25 no Tampo 23.
Parafusar castanhas 2x0494.
STEP 10
Attach Niche Bottom 25 to Top Board 23.
Screw nuts 2x0494.
PASO 10
Montar el Fondo Nicho 25 en la Cubierta 22.
Atornillar las tuercas 2x0494.
0494
0494
ADESIVO
STICKER
ADHESIVO
23
25
25

11
V : 00
PASSO 13
Encaixar Inferior Nicho 27 na Base 22.
Parafusar 8x9333.
STEP 13
Attach Bottom Niche 27 to Base 22.
Screw 8x9333.
PASO 13
Montar el Fondo Nicho 27 en la Base 22.
Atornillar 8x9333.
0494
9333
PASSO 12.1
Parafusar 2x0494.
STEP 12.1
Screw nuts 2x0494.
PASO 12.1
Atornillar las tuercas 2x0494.
22
22
27
27
8471
PASSO 14
Encaixar 4x8471 e parafusar 16x8056
na Base 22.
STEP 14
Attach 4x8471 and screw 16x8056
on Base 22.
PASO 14
Montar 4x8471 y atornillar el 16x8056
en Base 22.
8056
Posicionar usando furo guia.
Place them using pilot hole.
Posicionar usando agujero piloto.

12
V : 00
9074
22
PASSO 15
Encaixar e rosquear 4x Pes 50
na Base 22.
STEP 15
Attach and screw 4x Leg 50 in
the Base 22.
PASO 15
Montar y atornillar 4x Pata 50
en Base 22.
0357
PASSO 16
Encaixar Fundo 21, pregar 0357.
STEP 16
Attach Backplate 21, nailing 0357.
PASO 16
Enganchar el fondo 21,clavar 0357.
1/12