Valex 1422532 Manual do proprietário
- Categoria
- Brocas combi sem fio
- Tipo
- Manual do proprietário

MCacBat
06.09.2018
Cacciavite a batteria / Li-ion
ISTRUZIONI PER L’USO E ISTRUZIONI DI SICUREZZA
Istruzioni originali
Battery-screwdriver / Li-ion
INSTRUCTION MANUAL AND SAFETY INSTRUCTIONS
Translation of the original instructions
ATTENZIONE! Prima di usare l’apparecchio, leggete attentamente le istruzioni per l’uso
CAUTION! Before starting the tool, read the operating instructions carefully
Final dimension: A5

- 2 -
i
AVVERTENZE DI SICUREZZA GENERALE PER
L’UTENSILE
!ATTENZIONE! Leggere tutte le avvertenze e tutte le
istruzioni.
La mancata ottemperanza alle avvertenze e alle istruzioni
può dare luogo a scosse elettriche, incendio e/o lesioni serie.
La scrupolosa osservanza di queste avvertenze con l’utilizzo
dei mezzi di protezione individuale, minimizzano i rischi di
incidente ma non li eliminano completamente.
Conservare tutte le avvertenze e le istruzioni per riferimenti
futuri.
Il termine “utensile elettrico” delle avvertenze si riferisce agli
utensili elettrici azionati a batteria (senza cavo, con batteria
estraibile o con batteria non estraibile) e apparecchi (carica-
batteria) collegati alla rete (con cavo).
Queste istruzioni si riferiscono ad un utensile elettrico fabbricato
in più modelli e versioni; leggete attentamente le istruzioni ed
applicatele all’utensile elettrico in vostro possesso.
1) Sicurezza dell’area di lavoro
a) Tenere pulita e ben illuminata l’area di lavoro. Le aree
ingombre e/o poco illuminate possono provocare incidenti.
b) Non far funzionare utensili elettrici in atmosfere esplosive,
ad esempio in presenza di liquidi, gas, o polveri infiammabili.
Gli utensili elettrici creano scintille che possono provocare
l’accensione di polveri o fumi.
c) Tenere i bambini e i passanti a distanza durante il funzio-
namento di un utensile elettrico. Le distrazioni possono far
perdere il controllo dell’utensile.
d) Mantenete in un luogo sicuro i sacchi di nylon presenti
nell’imballaggio. I sacchi possono provocare il soffocamento
e i bambini non devono entrarne in possesso.
e) Usate l’utensile in un luogo con un sufficiente ricambio
d’aria. L’areazione è necessaria per il raffreddamento dell’uten-
sile e per eliminare impurità nell’aria provocate dalla lavorazione.
f) Non far funzionare utensili elettrici all’aperto in presenza
di pioggia, nebbia, temporale, alte e basse temperature, o
in ambienti bagnati o umidi. L’utilizzo in queste condizioni può
provocare la folgorazione.
2) Sicurezza elettrica
a) La spina dell’apparecchio elettrico deve corrispondere alla
presa. Mai modificare la spina in alcun modo. Non utilizzare
adattatori con apparecchi elettrici dotati di messa a terra (a
massa). Spine non modificate e prese corrispondenti riducono
il rischio di scossa elettrica.
b) Evitare il contatto del corpo con superfici messe a terra o
a massa quali tubi, radiatori, cucine e frigoriferi. Se il vostro
corpo è a terra o a massa, il rischio di scossa elettrica aumenta.
c) Non esporre gli apparecchi elettrici alla pioggia e non
utilizzarli in luoghi umidi. L’ingresso di acqua in un utensile
elettrico aumenta il rischio di scossa elettrica.
d) Non usurare il cavo. Non utilizzare mai il cavo per trasportare,
tirare o scollegare dalla presa di rete. Tenere il cavo distante da
calore, olio, bordi affilati o parti in movimento. Cavi danneggiati
o attorcigliati aumentano il rischio di scossa elettrica.
e) Utilizzare un’alimentazione elettrica protetta da un interrut-
tore differenziale (RCD). L’utilizzo di un interruttore differenziale
(RCD) riduce il rischio di scossa elettrica.
f) L’alimentazione elettrica deve corrispondere a quella in-
dicata sull’apparecchio elettrico. Una alimentazione elettrica
non idonea genera malfunzionamenti ed incidenti.
g) Verificate periodicamente il cavo di alimentazione elet-
trica. Non schiacciate o calpestate il cavo di alimentazione
elettrica. Un cavo danneggiato è fonte di scosse elettriche. Se
danneggiato estraete la spina e non usate l’utensile elettrico.
h) In caso di dubbio in campo elettrico affidatevi ad tecnico
specializzato di comprovata esperienza. L’utilizzo dell’elettricità
in modo non sicuro è molto pericoloso per la vostra ed altrui
incolumità.
3) Sicurezza personale
a) Non distrarsi mai, controllare quello che si sta facendo
e usare il buon senso quando si azionano utensili elettrici.
Non azionare l’utensile quando si è stanchi o sotto l’influsso
di droghe, alcol o medicinali. Un momento di disattenzione
durante l’azionamento di utensili elettrici può dare luogo a serie
lesioni personali.
b) Usare un’apparecchiatura di protezione personale. Indos-
sare sempre protezioni per gli occhi. Le apparecchiature di
protezione quali maschere antipolvere, calzature di sicurezza
antiscivolo, guanti di sicurezza o protezioni per l’udito riducono
la possibilità di subire lesioni personali.
c) Prevenire le accensioni accidentali. Assicurarsi che
l’interruttore sia in posizione di spento prima di collegare
l’utensile ai gruppi di batterie, prima di prenderlo o di tra-
sportarlo. Trasportare utensili elettrici con il dito sull’interruttore
può provocare incidenti.
d) Rimuovere qualsiasi chiave di regolazione prima di ac-
cendere l’utensile elettrico. Una chiave lasciata attaccata ad
una parte rotante dell’utensile elettrico può provocare lesioni
personali.
e) Non sbilanciarsi. Mantenere sempre la posizione e l’e-
quilibrio appropriati. Questo permette di controllare meglio
l’utensile elettrico in situazioni impreviste.
f) Vestirsi in modo appropriato. Non indossare vestiti larghi o
gioielli. Tenere capelli, indumenti e guanti distanti dalle parti
in movimento. Vestiti larghi, gioielli o capelli lunghi possono
impigliarsi nelle parti in movimento.
g) Se sono previsti dispositivi da collegare ad impianti per
l’estrazione e la raccolta di polvere, accertarsi che siano
collegati e usati in maniera appropriata. L’uso di questi
dispositivi può ridurre i rischi correlati alla polvere.
h) L’utilizzatore è responsabile verso terzi di eventuali in-
cidenti o danni a persone o cose. Un uso improprio provoca
incidenti e danni.
i) E’ vietato l’utilizzo a piedi nudi o con piedi e/o mani
bagnati/e. L’utilizzo in queste condizioni può provocare la
folgorazione.
l) La lavorazione di materiali nocivi alla salute deve avvenire
nel rispetto delle leggi vigenti. Alcuni tipi di polveri e materiali
come metalli, legni, vernici ecc. sono molto dannosi alla salute.
Salvaguardare la propria ed altrui salute adottando protezioni
ed accorgimenti idonei.
m) Non avvicinarsi alle feritoie di espulsione dell’aria di
raffreddamento. L’aria generata può contenere residui di lavora-
zione, piccole parti dannose per le vie respiratorie e per gli occhi.
n) Non coprire e non infilare cose sulle feritoie di raffred-
damento. La mancata ventilazione dell’utensile elettrico può
generare un incendio. Accedere a parti interne può danneggiare
l’utensile e provocare la folgorazione.
o) Non utilizzare l’utensile elettrico se le protezioni (schermi,
pannelli, sportelli ecc.) sono aperti, danneggiati o mancanti.
Le protezioni correttamente installate salvaguardano la vostra
salute e consentono un utilizzo in sicurezza.
p) Per utensili elettrici dotati di indicatore laser: non fissare il
fascio luminoso, non puntare il fascio contro persone animali
e veicoli, non puntare il fascio sugli occhi e sulla pelle. L’uso
improprio del laser provoca gravi danni alla vista e alla pelle.

- 3 -
4) Uso e manutenzione degli utensili elettrici
a) Non forzare l’utensile elettrico. Usare l’utensile adatto per
l’operazione da eseguire. L’utensile elettrico appropriato per-
mette di eseguire il lavoro con maggiore efficienza e sicurezza
senza essere costretti a superare i parametri d’uso previsti.
b) Non usare l’utensile elettrico se l’interruttore di accensione
e spegnimento non si aziona correttamente. Qualsiasi utensile
elettrico che non può essere controllato con l’interruttore è
pericoloso e deve essere sottoposto a riparazioni.
c) Scollegare la spina dalla rete di alimentazione e/o il gruppo
di batterie dall’utensile elettrico prima di effettuare qualsiasi
regolazione, cambiare accessori o riporre gli utensili elettrici.
Tali misure di sicurezza preventiva riducono il rischio di avvio
accidentale dell’utensile elettrico.
d) Riporre utensili elettrici inutilizzati fuori della portata
dei bambini e non permetterne l’uso a persone inesperte
dell’utensile o che non conoscano queste istruzioni. Gli
utensili elettrici sono pericolosi se utilizzati da persone inesperte.
e) Effettuare la manutenzione necessaria sugli utensili elet-
trici. Verificare il possibile errato allineamento o bloccaggio
delle parti in movimento, la rottura delle parti e qualsiasi
altra condizione che possa influenzare il funzionamento degli
utensili elettrici. Se è danneggiato, far riparare l’utensile
elettrico prima di utilizzarlo. Numerosi incidenti sono provocati
proprio dal cattivo stato di manutenzione degli utensili elettrici.
f) Mantenere puliti e affilati gli strumenti di taglio (se pre-
senti). Strumenti di taglio in buone condizioni di manutenzione
e con bordi di taglio affilati sono meno suscettibili di bloccarsi
e sono più facili da controllare.
g) Usare l’utensile elettrico, gli accessori e le punte ecc.,
in conformità con queste istruzioni, tenendo conto delle
condizioni di lavorazione e dell’operazione da eseguire. L’uso
dell’utensile elettrico per operazioni diverse da quelle previste
può dare luogo a situazioni pericolose.
h) Sostenere l’utensile con le impugnature isolate, quando si
effettua un’operazione nel corso della quale l’organo di lavoro
può venire in contatto con dei cavi nascosti. Gli organi di lavoro
venendo in contatto con un conduttore “in tensione” possono
mettere “in tensione” le parti metalliche dell’utensile elettrico e
provocare una scossa elettrica (elettrocuzione) all’operatore.
i) Mantenete una distanza di sicurezza dalle parti in movimen-
to. Toccare parti in movimento provoca lesioni serie.
l) Non modificate l’utensile elettrico. Togliere, sostituire o
aggiungere componenti non previsti dalle istruzioni, è vietato
ed annulla la garanzia.
m) Non abbandonare l’utensile elettrico in funzione. Spegne-
telo prima di lasciarlo incustodito per evitare possibili incidenti.
n) L’utensile elettrico non deve mai venire a contatto con
l’acqua o altri liquidi. L’utilizzo in queste condizioni può pro-
vocare la folgorazione.
5) Uso e precauzioni d’uso degli utensili a batteria
a) Ricaricare soltanto con il caricabatterie specificato dal
costruttore. Un caricabatterie che è adeguato per un tipo di
gruppo di batterie può creare un rischio di incendio quando
viene utilizzato con altri gruppi di batterie.
b) Usare utensili elettrici solo con i gruppi di batterie specifi-
catamente designati. L’uso di qualsiasi altro gruppo di batterie
può creare il rischio di lesioni e incendi.
c) Quando il gruppo di batterie non è in uso, tenerlo lontano
da altri oggetti di metallo quali graffette, monete, chiavi,
viti, o altri piccoli oggetti metallici che possono creare un
collegamento tra i due morsetti. Cortocircuitare i morsetti della
batteria può provocare ustioni o incendi.
d) Se la batteria è in cattive condizioni, può fuoriuscire del
liquido; evitare ogni contatto. Se si verifica un contatto acci-
dentale, sciacquare immediatamente con acqua. Se il liquido
entra negli occhi, cercare immediato aiuto medico. Il liquido
fuoriuscito dalla batteria può provocare irritazioni o ustioni.
e) Mantenete l’apparecchio e le batterie lontano da fonti di
calore e dal fuoco. Non esporre a temperature superiori a
50°C. Alte temperature possono provocare l’esplosione delle
batterie.
6) Assistenza
a) Fare effettuare le operazioni di manutenzione sugli utensili
elettrici da parte di personale tecnico qualificato che utilizza
soltanto ricambi originali. Questo permetterà di mantenere la
sicurezza dell’utensile elettrico.
b) Non tentare di riparare l’utensile elettrico o di accedere ad
organi interni. Interventi effettuati da personale non qualificato e
non autorizzato dalla Ditta costruttrice può generare seri pericoli
ed annulla la garanzia.
c) Richiedete solo ricambi originali. L’utilizzo di ricambi non
originali può compromettere la sicurezza dell’utensile elettrico.
AVVERTENZE DI SICUREZZA DEL
CACCIAVITE A BATTERIA
1) Sicurezza
a) Le lavorazioni a soffitto, con utensile rivolto verso l’alto,
è fonte di maggior pericolo per l’utilizzatore. Utilizzate un
casco a protezione del capo per eventuali cadute di materiale.
Indossate occhiali a protezione della vista.
b) Se l’utensile si blocca durante l’utilizzo, spegnerlo subito.
Non forzate con operazioni gravose per l’utensile.
c) Mantenete ben saldo l’utensile. Gli sforzi provocati dalla
lavorazione provocano sollecitazioni che è necessario contra-
stare con la vostra forza.
d) Assicurate il pezzo in lavorazione con una morsa o altro. Un
pezzo trattenuto con la mano può improvvisamente provocare
un incidente.
e) Attendete l’arresto completo dell’utensile elettrico prima di
posarlo. Le parti in movimento possono provocarne la caduta.
f) Se l’utensile si arresta non continuate a premere il pulsante
di avvio. La batteria potrebbe irrimediabilmente danneggiarsi.
g) Non far funzionare l’apparecchio se é collegato al cari-
cabatterie.
h) La luce per illuminare deve essere usata solo se l’appa-
recchio é funzionante. Con l’apparecchio scarico non usare
la luce ed effettuare una carica completa.
AVVERTENZE DI SICUREZZA DELLA BATTERIA
E DEL CARICABATTERIA
a) Non smontare o lacerare l’involucro della batteria. Non
colpirla e non lasciarla cadere a terra. Batterie danneggiate
possono provocare seri pericoli.
b) Non esporre la batteria al calore o al fuoco. Non esporre
alla luce solare diretta. Non lasciarla all’interno di veicoli.
Non esporre a temperatura maggiore di 50°C. Pericolo di
esplosione.
c) Una batteria usata impropriamente può provocare la fuo-
riuscita di vapori. Arieggiare il locale e consultare un medico
in caso di necessità.
d) Mettere le batterie e gli apparecchi elettrici fuori dalla
portata dei bambini. E’ buona norma mantenere i bambini
lontano dagli apparecchi elettrici.
e) Non inserite alcun oggetto metallico nel vano porta
batteria. Non depositate la batteria assieme ad alti oggetti
metalli (come la cassetta attrezzi) o assieme ad altre batterie.
Pericolo di generare un corto circuito elettrico.
f) Utilizzare il caricabatterie in ambienti chiusi al riparo dalla
pioggia e dall’umidità. Prevenite possibili folgorazioni elettriche.
g) Mantenete il caricabatterie sempre pulito. Polvere e spor-
cizia impediscono la corretta ricarica.

- 4 -
h) Prima di ogni impiego controllare il caricabatterie, il cavo
e la spina. Non utilizzatelo in caso di danni o guasti. Non aprire
mai il caricabatterie e ripararlo soltanto da personale qualificato
e soltanto con pezzi di ricambio originali.
i) Non utilizzare il caricabatterie su basi facilmente infiam-
mabili (come carta, tessuti, legno ecc.) oppure in ambienti
infiammabili o esplodenti. Prevenite possibili incendi a seguito
di surriscaldamenti.
l) Ricaricate la batteria con temperatura ambiente compresa
tra 10°C e 35°C. Temperature inferiori o superiori possono
danneggiare la batteria e non permettere la normale ricarica.
m) Scollegate il caricabatterie dalla rete rete elettrica quando
non lo usate. Non lasciate il caricabatterie acceso con la
batteria completamente carica. Prevenite possibili incidenti.
n) È normale che il caricabatterie e la batteria si riscaldino
durante la fase di carica. E’ però necessario lasciarli raffred-
dare entrambi, fino a temperatura ambiente, tra due ricariche
consecutive. Temperature elevate possono provocare guasti o
esplosione della batteria.
o) Sostituite le batterie che hanno terminato il loro ciclo di
utilizzo. Se la batteria si scarica molto velocemente e/o i cicli di
ricarica sono molto corti, è il segnale che si sta esaurendo e va
pertanto sostituita. Per utensili con batteria interna é necessario
rivolgersi ad un centro assistenza autorizzato.
p) Utilizzate esclusivamente batterie di ricambio originali,
del tipo e con caratteristiche uguali a quella fornita con
l’utensile. L’uso di batterie di tipo o con voltaggio diverso
possono danneggiare l’utensile e generare pericoli. Acquistate
esclusivamente ricambi originali.
q) Alcune batterie sono dotate di protezione termica autori-
pristinante che inibisce la ricarica nel caso si raggiungano
temperature troppo elevate; in questo caso il caricabatterie
emetterà una luce lampeggiante rossa. Rimuovere la batteria
dal proprio alloggiamento per alcuni minuti prima di reinserirla
nel caricabatterie. La carica riprenderà automaticamente quando
la temperatura sarà rientrata entro valori di sicurezza.
r) La tensione di alimentazione del caricabatterie deve cor-
rispondere a quella dichiarata sulla targa dati dello stesso.
Non utilizzate nessun altro tipo di alimentazione.
s) È consigliato l’uso di un apparecchio salvavita sulla linea
di alimentazione elettrica. Consultate il vostro elettricista di
fiducia.
t) Non danneggiare o calpestare il cavo di alimentazione. Non
trascinate il caricabatterie tirando il cavo. Non tirate il cavo
per estrarre la spina dalla rete di alimentazione.
u) Un eventuali cavo di prolunga deve avere una sezione
superiore a quella del cavo del caricabatteria e dimensionato
in base alla sua lunghezza.
v) Se l’utensile elettrico si blocca perchè la batteria è scarica,
non insistere a premere il pulsante di avvio altrimenti la
batteria si guasta irrimediabilmente.
AVVERTENZE DI SICUREZZA PER LA RUMORO-
SITA’ E PER LE VIBRAZIONI
Il livello di rumorosità e di vibrazioni riportate nel foglio allegato,
sono valori medi di utilizzo dell’elettroutensile. L’impiego di ele-
menti di taglio diversi, materiali diversi, assenza di manutenzione
all’elettroutensile influiscono in modo significativo nelle emis-
sioni sonore e nelle vibrazioni. Di conseguenza adottate tutte le
misure preventive in modo da eliminare possibili danni dovuti ad
un rumore elevato e alle sollecitazioni da vibrazioni; indossate
cuffie antirumore, guanti antivibrazioni, effettuate delle pause
durante la lavorazione, mantenete efficiente l’elettroutensile e
gli accessori (punte, bit ecc.).
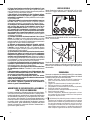
RISCHI RESIDUI
Queste illustrazioni mostrano i rischi principali nell’uso della
macchina. Leggete attentamente il libretto istruzioni della
macchina.
Temperature elevate provocano l’esplosione delle batterie.
Non esponetele ai raggi diretti del sole, non lasciatele dentro i
veicoli, non bruciatele.
Rischio di scossa elettrica con pericolo di morte. Non toccate le
parti in tensione elettrica e mantenete una distanza di sicurezza.
Prima di ogni manutenzione scollegate la spina dalla presa di
alimentazione.
SIMBOLOGIA
Osservate con attenzione la simbologia della fig.B e memorizzate
il rispettivo significato. Una corretta interpretazione dei simboli
consente un uso più sicuro della macchina.
1 Modello, dati tecnici, numero del lotto di costruzione. Le
prime 2 cifre del lotto indicano l’anno di costruzione.
2 Attenzione!
3 Leggete con attenzione tutte le istruzioni prima dell’uso
4 Solo per uso interno e in ambienti asciutti.
5 Caricabatteria con trasformatore di sicurezza (se presente)
6 Fusibile di protezione (se presente)
7 Interruttore termico autoripristinabile (se presente)
8 Doppio isolamento elettrico
9 Pericolo di esplosione. Mantenete l’apparecchio e le bat-
terie lontano da fonti di calore e dal fuoco. Non esporre a
temperature superiori a 50°C.
10 I rifiuti elettrici ed elettronici possono contenere sostanze
pericolose per l’ambiente e per la salute umana; non devono
pertanto essere smaltiti con quelli domestici ma mediante
una raccolta separata negli appositi centri di raccolta o
riconsegnati al venditore nel caso di acquisto di una ap-
parecchiatura nuova analoga. Lo smaltimento abusivo dei
rifiuti comporta l’applicazione di sanzioni amministrative.

- 5 -
11 Le batterie incluse nell’apparecchio possono essere
smaltite assieme ad esso. Non gettate nel fuoco e non di-
sperdete nell’ambiente le batterie esauste ma consegnatele
agli appositi centri per il loro smaltimento. Non smaltire
assieme ai rifiuti domestici.
V Volts
Hz Hertz
~ corrente alternata
corrente continua
A Ampere
W Watts
kg chilogrammi
nO velocità a vuoto
mm millimetri
s secondi
h ore
min-1 giri al minuto
dB decibel
°C gradi centigradi
Li-Ion Ioni di Litio
______________________________________________
Vi ringraziamo per averci preferito nella scelta di questo utensile
elettrico, di seguito chiamato “cacciavite a batteria”.
!ATTENZIONE! Il cacciavite a batteria é idoneo ad avvitare e
svitare viteria mediante opportuni inserti. E’ vietato l’utilizzo
di materiali pericolosi e in ambienti con pericolo di incendio/
esplosione.
Queste istruzioni riportano le informazioni e quanto ritenuto
necessario per il buon uso, la conoscenza e la normale manu-
tenzione dell’utensile. Esse non riportano le informazioni sulle
tecniche di fissaggio mediante viteria; l’utilizzatore troverà mag-
giori notizie su libri e pubblicazioni specifiche o partecipando a
corsi di specializzazione.
COMPONENTI
Fare riferimento alla fig. A e seguenti, allegate alle presenti
istruzioni.
1 Impugnatura
2 Pulsante di avviamento e arresto
3 Mandrino
4 Dispositivo indicatore dello stato di carica delle batterie (se
presente)
5 Pulsante di test della carica della batteria (se presente)
6 Spia di presenza rete durante la carica delle batterie (se
presente)
7 Pulsante di accensione e spegnimento della luce (se
presente)
8 Luce (se presente)
9 Presa per caricabatteria
10 Ghiera di regolazione della coppia di serraggio (se presente)
11 Spinotto del caricabatteria
12 Caricabatterie
13 Adattatore / prolunga (se presente)
14 Selettore senso di rotazione e blocco accensione
15 Ghiera di protezione (se presente)
16 Mandrino ad angolo (se presente)
17 Mandrino disassato (se presente)
18 Pulsante di sblocco impugnatura (se presente)
19 Torcia (se presente)
20 Pulsante accensione e spegnimento torcia (se presente)
INSTALLAZIONE
!ATTENZIONE! La Ditta costruttrice declina ogni respon-
sabilità per gli eventuali danni diretti e/o indiretti causati da
un errato allacciamento.
!ATTENZIONE! Prima di effettuare le seguenti operazioni
assicuratevi che la spina sia scollegata dalla rete elettrica.
TRASPORTO
Per trasportare l’utensile utilizzate sempre il suo imballo o
la sua valigetta (se presente); questo lo preserverà da urti,
polvere e umidità che ne possono compromettere il regolare
funzionamento.
Durante il trasporto sganciate la batteria dall’utensile (se
estraibile).
MOVIMENTAZIONE
Se presente posizionate il commutatore del senso di rotazione
nella posizione di mezzo in modo da impedire avviamenti
accidentali.
Afferrate l’utensile per l’impugnatura e dopo l’uso appoggiatelo
di fianco.
MESSA IN SERVIZIO
Nel luogo che utilizzerete l’utensile elettrico è opportuno
considerare:
-che la zona non sia umida e sia al riparo dagli agenti atmosferici.
-che attorno sia prevista un’ampia zona operativa libera da
impedimenti.
-che vi sia una buona illuminazione.
-che sia utilizzata in vicinanza dell’interruttore generale con
differenziale (per il caricabatterie).
-che l’impianto di alimentazione sia dotato di messa a terra
conforme alle norme (solo se l’utensile elettrico è di classe I,
cioè dotato di spina con cavo di terra).
-che la temperatura ambiente sia compresa tra 10° e 35° C.
-che l’ambiente non sia in atmosfera infiammabile/esplosiva.
Estraete la macchina ed i componenti e verificate visivamente
la loro perfetta integrità; a questo punto procedete ad una
accurata pulizia per togliere gli eventuali oli protettivi utilizzati
per il trasporto.
CARICA DELLA BATTERIA (fig.A)
!ATTENZIONE! Prima di utilizzare l’utensile è necessario
effettuare una carica completa della batteria.
!ATTENZIONE! Ricaricare soltanto con il caricabatterie
specificato dal costruttore. Un caricabatterie che è adeguato
per un tipo di gruppo di batterie può creare un rischio di
incendio quando viene utilizzato con altri gruppi di batterie.
Utensile con batteria non estraibile
Prima dell’uso, eseguite una ricarica completa inserendo lo
spinotto del caricabatterie (pos.11 fig.A) nella presa dell’ap-
parecchio (pos.9 fig.A) prima di collegare il caricabatterie alla
presa elettrica. Per i tempi di ricarica vedere il foglio allegato
al presente manuale.
A seconda del modello in vostro possesso, il collegamento
dell’apparecchio al caricabatterie può essere segnalato dall’ac-
censione di una spia; quando la carica è completa, la spia si
spegne o cambia di colore.
Non utilizzate l’apparecchio mentre é in fase di carica.
A carica ultimata, scollegate il caricabatterie dalla rete di ali-
mentazione elettrica e poi dall’apparecchio.
Utensile con batteria estraibile
Estraete la batteria dalla sede dell’utensile agendo sui dispositivi
di bloccaggio e inseritela a fondo nel vano del caricabatterie

- 6 -
facendo corrispondere le rispettive polarità. Il vano può essere
sagomato asimmetricamente in modo da impedire l’inserimento
della batteria con polarità errata.
Il caricabatterie può inoltre essere fornito con alimentatore
separato, in questo caso eseguite il reciproco collegamento
mediante il cavo in dotazione.
Inserite la spina del caricabatterie in una presa di corrente e,
se presente, premete il pulsante di inizio carica. L’accensione
della luce di carica, se presente, segnala l’inizio della carica della
batteria. La durata della carica per una batteria completamente
scarica è indicata nei dati tecnici allegati alle presenti istruzioni.
A seconda del tipo di caricabatterie in vostro possesso, la spia
di carica rimane permanentemente accesa, oppure la fine della
carica può essere segnalata dall’accensione della apposita spia
o da una spia di colore diverso.
È possibile inoltre che il caricabatterie sia equipaggiato con
un dispositivo di sicurezza che lo spegne a carica completata.
A carica ultimata staccate la spina del caricabatterie, sganciate
la batteria ed inseritela nell’alloggiamento dell’utensile, fino a
sentire il “click” di innesto.
Per mantenere efficiente la batteria, non scaricarla com-
pletamente.
Eseguite una successiva ricarica completa:
- Dopo ogni utilizzo.
- Dopo di un lungo periodo di utilizzo.
- Almeno ogni 4 mesi, anche in caso di inutilizzo.
- Se durante il lavoro notate un calo evidente delle prestazioni
dell’apparecchio.
I fattori che influiscono sulla durata della batteria sono: numero
dei cicli di carica/scarica, stress da utilizzo gravoso, tempo dalla
sua fabbricazione, assenza di manutenzione,
assenza di ricarica, permanenza a temperature maggiori di 20°C.
MONTAGGIO INSERTO
TIPO MANDRINO CON CALAMITA:
Inserite a mano l’inserto (bit) nella sede esagonale del mandrino
(pos.3) che verrà trattenuto per effetto di una calamita.
Per estrarlo tirate a mano nel verso opposto (fig.E).
TIPO MANDRINO CON GHIERA DI BLOCCAGGIO :
Inserite a mano l’inserto nella sede esagonale del mandrino.
Per estrarlo, spingere la ghiera di sblocco mandrino nel senso
della freccia (fig.E).
SOSTITUZIONE MANDRINO
La sostituzione del mandrino si rende utile in quei casi in cui é
difficoltoso l’accesso alla vite.
Osservate attentamente la fig.F (se presente) ed operate di
conseguenza.
ROTAZIONE IMPUGNATURA
La rotazione dell’impugnatura si rende utile in quei casi in cui
é difficoltoso l’accesso alla vite.
Osservate attentamente la fig.G (se presente) ed operate di
conseguenza.
AVVIAMENTO E ARRESTO
Avviamento
Per avviare premete il pulsante (pos.2)
L’interruttore è del tipo ad “azione mantenuta”; pertanto l’utensile
elettrico rimarrà acceso per il tempo che voi mantenete premuto
l’interruttore.
Se l’interruttore é del tipo con inversione di rotazione, é suffi-
ciente premere la parte alta o la parte bassa (azione a bascula)
per avvitare o svitare la vite. Prima di invertire la rotazione
attendere l’arresto completo del mandrino: una repentina azione
di inversione può causare l’arresto dell’utensile e generare un
guasto non coperto dalla garanzia.
Arresto
Per arrestare l’utensile rilasciate l’interruttore (pos.2).
Vi consigliamo di ripetere queste operazioni alcune volte prima
di iniziare il lavoro in modo da familiarizzare il più possibile
con i comandi.
Se osservate delle anomalie di funzionamento spegnete l’uten-
sile elettrico e consultate il capitolo “Problemi, cause e rimedi”.
Quando non lavorate spegnete e staccate la spina dalla presa.
USO
Dopo aver letto attentamente i capitoli precedenti, seguite scru-
polosamente questi consigli che vi permetteranno di ottenere il
massimo delle prestazioni.
Procedete con calma in modo da prendere familiarità con tutti
i comandi; solo dopo aver acquisito una buona esperienza
riuscirete a sfruttarne a fondo tutte le potenzialità.
REGOLAZIONE SENSO DI ROTAZIONE DEL MANDRINO (fig.D
se presente)
ATTENZIONE! L’operazione di inversione del senso di
rotazione deve essere eseguita con l’utensile spento ed il
mandrino fermo.
Per operazioni di foratura e avvitamento viti a filetto destro
(rotazione oraria) spostate il selettore senso di rotazione
(pos.2) su ‘R’.
Per operazioni di svitamento, rimozione di punte incastrate e
avvitamento viti con filetto sinistro (rotazione antioraria) spostate
il selettore senso di rotazione su ‘L’.
REGOLAZIONE DELLA FRIZIONE (pos.10 se presente)
La frizione è regolabile dal valore ‘1’ al valore massimo e
normalmente è da regolare solo per le operazioni di avvitatura.
Agendo sulla ghiera per variazione coppia di serraggio (pos.10),
fate combaciare uno dei valori indicati col riferimento posto sulla
sommità, ricordando che:
- al valore ‘1’ corrisponde una coppia minima, da utilizzare per
avvitare piccole viti su materiale tenero
- la coppia aumenta all’aumentare del numero indicato sulla
ghiera fino al raggiungimento del massimo valore , da utilizzare
per forare.
ILLUMINAZIONE ZONA DI LAVORO (se presente)
La luce di illuminazione (pos.8) si accende/spegne automati-
camente all’azionamento dell’interruttore dell’utensile oppure
premendo l’interruttore (pos.7). Al termine dell’uso spegnere
sempre la luce.
INDICATORE CARICA DELLA BATTERIA (fig.F, se presente)
A seconda del modello in vostro possesso, può essere presente
l’indicazione dello stato di carica della batteria (pos.4), incorpo-
rato nell’utensile o nella batteria stessa. A seconda del modello,
per visualizzare lo stato di carica è necessario premere il pul-
sante presente vicino all’indicatore o il pulsante di avviamento.
INSERTI DI AVVITAMENTO “BIT” (non presenti)
Acquistate degli inserti di qualità, con attacco idoneo alle carat-
teristiche di questo utensile e con puntale di avvitamento adatto
alla viteria usata. Rivolgetevi al vostro rivenditore di fiducia che
potrà consigliarvi al meglio.
La nostra azienda produce un’ampia gamma di inserti adatti ai
più svariati impieghi.

- 7 -
VITERIA (non presente)
Come per gli inserti è indispensabile che anche la viteria sia di
qualità, in modo da ottenere il miglior risultato finale. Per ogni
tipo di materiale da fissare esiste a commercio la viteria adatta,
acquistatela quindi secondo bisogno; se necessario interponete
delle rondelle per aumentare la superficie di tenuta.
OPERAZIONE DI AVVITAMENTO
Posizionate la vite sul pannello da fissare e con un martello
piantatela leggermente in posizione perpendicolare.
Per alcuni materiali è necessario eseguire un preforo, questo per
facilitare l’avvitamento e per evitare che il pannello si spacchi
(in modo particolare con il legno e la plastica).
Impugnate saldamente l’utensile con una mano e infilate la
punta dell’inserto nella testa della vite. Premete leggermente
sulla vite ed avviate l’utensile.
Al termine dell’operazione, che in genere dura alcuni secondi,
estrarre l’avvitatore e spegnetelo rilasciando l’interruttore.
Insistere con l’avvitamento può provocare: la rottura dell’inserto,
rovinare la testa della vite, un guasto all’utensile elettrico (non
coperto dalla garanzia). In questo caso svitate la vite, eseguite
un preforo e riavvitate.
Non insistete su viti che non si avvitano!
FUNZIONE TORCIA (se presente, pos. 19 fig.H)
Per accendere/ spegnere la torcia azionare l’interruttore, pos. 20.
MANUTENZIONE
!ATTENZIONE! Prima di ogni controllo o regolazione stac-
cate la batteria dall’utensile (se disinseribile) e staccate l’ali-
mentazione elettrica del caricabatterie scollegando la spina.
!ATTENZIONE! Non manomettete o tentate di riparare
l’utensile elettrico.
La durata e il costo d’esercizio dipendono anche da una costante
e scrupolosa manutenzione.
Pulite regolarmente ed abbiate cura del vostro utensile elettrico,
vi garantirete una perfetta efficienza ed una lunga durata dello
stesso.
- Rimuovete la polvere e i residui di lavorazione con un pennello
a setole morbide.
- Non spruzzate o bagnate d’acqua l’utensile elettrico, pericolo
di infiltrazioni interne.
- Non usate infiammabili, detergenti o solventi vari.
- Le parti in plastica sono aggredibili da agenti chimici.
- Prestate particolare attenzione alla pulizia dell’interruttore, alle
feritoie di ventilazione del motore, al mandrino, alla batteria e
caricabatteria.
L’utensile non richiede particolari manutenzioni in quanto è
lubrificato con grasso permanente all’interno dello stesso. Una
eventuale revisione interna deve essere effettuata solo da un
centro assistenza autorizzato.
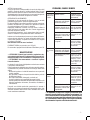
PROBLEMI, CAUSE E RIMEDI
PROBLEMA CAUSE RIMEDI
L’utensile
elettrico non
si avvia
Batteria scarica Effettuare una ri-
carica completa
alla batteria
Batteria non inserita cor-
rettamente nell’alloggia-
mento dell’utensile
Sganciate la bat-
teria e inseritela
correttamente
Selettore del senso di
rotazione inserito in po-
sizione centrale di blocco
Spostate il selet-
tore in una delle
due posizioni R
o L
La batteria è surriscal-
data ed è intervenuta la
protezione interna auto-
ripristinabile
Attendere che la
batteria si raf-
freddi
Utensile elettrico o batte-
ria guasti Sostituite la bat-
teria o/e rivolge-
tevi ad un centro
di assistenza
autorizzato
La batteria
non si rica-
rica
Batteria non inserita cor-
rettamente nell’alloggia-
mento del caricabatterie
Sganciate la bat-
teria e inseritela
correttamente
Caricabatterie non pronto
per la ricarica Inserire la spina
nella presa di
alimentazione
elettrica. Preme-
re il pulsante di
avvio carica (se
presente).
Caricabatterie o batteria
guasti Sostituite la bat-
teria o/e rivolge-
tevi ad un centro
di assistenza
autorizzato
L’utensile si
arresta Batteria scarica Se disponibile in-
serire un nuova
batteria carica,
oppure effettua-
re una ricarica
completa.
La batteria è surriscal-
data ed è intervenuta la
protezione interna auto-
ripristinabile
Attendere che la
batteria si raf-
freddi
!ATTENZIONE! Se dopo aver eseguito gli interventi sopra
descritti l’utensile elettrico non funziona correttamente o in
caso di anomalie diverse da quelle indicate, portatelo presso
un centro di assistenza autorizzato esibendo la prova di acqui-
sto e richiedendo ricambi originali. Fate sempre riferimento
alle informazioni riportate sull’etichetta dati tecnici.

- 8 -
IMMAGAZZINAMENTO
Effettuate una accurata pulizia di tutto l’utensile e sue parti ac-
cessorie (vedi paragrafo Manutenzione). Riponete la macchina
lontano dalla portata dei bambini, in posizione stabile e sicura.
Il luogo dovrà essere asciutto, privo da polveri, temperato e
protetto dai raggi solari diretti.
Al locale di rimessaggio non devono avere accesso i bambini
e gli estranei.
SMALTIMENTO
Per la salvaguardia ambientale procedete secondo le leggi vigen-
ti del Paese in cui vi trovate. Rivolgetevi alle autorità competenti
per maggiori notizie in merito.
Quando la macchina non è più utilizzabile né riparabile, conse-
gnatela con l’imballo ad un punto di raccolta per il riciclaggio.
Estraete le batterie (se presenti) e smaltitele in modo separato.
I rifiuti elettrici ed elettronici possono contenere sostanze
pericolose per l’ambiente e per la salute umana; non devono
pertanto essere smaltiti con quelli domestici ma mediante una
raccolta separata negli appositi centri di raccolta o riconse-
gnati al venditore nel caso di acquisto di una apparecchiatura
nuova anologa. Lo smaltimento abusivo dei rifiuti comporta
l’applicazione di sanzioni amministative.
Smaltimento batterie: Le batterie incluse nell’apparec-
chio possono essere smaltite assieme ad esso.
Non gettate nel fuoco e non disperdete nell’ambiente le
batterie esauste ma consegnatele agli appositi centri per il
loro smaltimento. Non smaltire assieme ai rifiuti domestici.
GARANZIA
Il prodotto è tutelato a norma di legge contro non conformità
rispetto alle caratteristiche dichiarate purché sia stato utilizzato
esclusivamente nel modo descritto dalle istruzioni, non sia stato
manomesso in alcun modo, sia stato conservato correttamente,
sia stato riparato da tecnici autorizzati e, ove previsto, siano stati
utilizzati solo ricambi originali.
In caso di utilizzo industriale o professionale oppure in caso di
impiego simile la garanzia ha validità di 12 mesi.
Per emettere una richiesta di intervento in garanzia è neces-
sario presentare la prova di acquisto al rivenditore o ad centro
assistenza autorizzato.

- 9 -
g
TOOL GENERAL SAFETY WARNINGS
!IMPORTANT! Read all the warnings and instructions.
Failure to comply with the warnings and instructions may
cause electric shock, fire and/or serious injuries.
Strict observance of these warnings with the use of personal
protective equipment minimizes risks of accidents but does
not completely rule them out.
Keep all the warnings and instructions for future reference.
The term “electrical tool” in the warnings refers to battery-
operated electrical tools (without cables, with an extractable
or non-extractable battery) and apparatus (battery charger)
connected to the mains (with a cable).
These instructions refer to an electrical tool manufactured in
numerous models and versions; read the instructions carefully
and apply them to your electric tool.
1) Safety in the work area
a) Keep the work area clean and well lit. Overcrowded and/
or badly lit areas may cause accidents.
b) Do not operate electrical tools in explosive atmospheres,
e.g. in the presence of inflammable liquids, gases or powders.
Electrical tools create sparks that may ignite powders or fumes.
c) Keep children and passers-by at a distance when operating
an electrical tool. Distractions may cause you to lose control
of the tool.
d) Keep the nylon packaging bags in a safe place. Bags can
cause suffocation and must be kept out of the reach of children.
e) Use the tool in a well-ventilated place. Ventilation is ne-
cessary for cooling the tool and for eliminating air impurities
produced when working.
f) Do not operate electrical tools outdoors in the presence of
rain, fog, storms, high or low temperatures, or in damp or wet
environments. Use in these conditions may cause electrocution.
2) Electrical safety
a) The electrical appliance’s plug must correspond to the
socket. Never modify the plug in any way. Do not use adaptors
with earthed electrical appliances. Unmodified plugs and
suitable sockets reduce the risk of electric shocks.
b) Do not allow the body of the tool to come into contact
with earthed surfaces such as pipes, radiators, cookers
and refrigerators. If your body is earthed, the risk of electric
shock increases.
c) Do not expose electrical appliances to rain and do not use
them in wet environments. Water permeating into an electrical
tool increases the risk of electric shocks.
d) Do not let the cable become worn. Never use the cable to
transport, pull or disconnect the tool from the power supply
socket. Keep the cable away from heat, oil, sharp edges or
moving parts. Damaged or twisted cables increase the risk of
electric shocks.
e) Use an electric power supply protected by a differential
switch (RCD). The use of a suitable residual current device
(RCD) reduces the risk of electric shock.
f) The power supply must correspond to that indicated on the
electrical appliance. An unsuitable power supply generates
malfunctioning and accidents.
g) Frequently check the power supply cable. Do not crush or
tread on the power supply cable. A damaged cable causes
electric shock. If it is damaged, unplug the electrical tool and
do not use it.
h) For any doubts in the electrical field please contact a
qualified and experienced technician. The unsafe use of
electricity is very dangerous for yours and other people’s safety.
3) Personal safety
a) Never allow yourself to be distracted. Control what you are
doing and use your common sense when using electrical to-
ols. Never use the tool when you are tired or under the influence
of drugs, alcohol or medicines. A moment of distraction when
using electrical tools could cause serious personal injuries.
b) Use personal protective equipment. Always wear eye
protection. Protective equipment such as dust repelling masks,
anti-slip safety shoes, safety gloves or ear protections reduce
the possibility of personal injuries.
c) Prevent switching the tool on accidentally. Make sure that
the switch is in the off position before connecting the tool to
the electric power supply and/or to battery units and before
taking or transporting it. Carrying electrical tools with your
finger on the switch or connecting them to the electric power
supply with the switch in the on position can cause accidents.
d) Remove any adjustment wrench before switching on the
electrical tool. Any key or spanner left attached to a rotating part
of the electrical tool may cause personal injuries.
e) Do not lose your balance. Always keep an appropriate
position and balance. This allows better control of the electrical
tool in unexpected situations.
f) Wear appropriate clothing. Do not wear loose clothing or
jewellery. Keep hair, clothing and gloves away from moving
parts. Loose clothing, jewellery or long hair may get entangled
in the moving parts.
g) If any devices to be connected to dust extraction and
collection systems are provided, make sure that they are
connected and used appropriately. The use of these devices
may reduce the risks connected with dust.
h) The user is responsible for other people as far as accidents
or damage to people or property are concerned. Improper use
causes accidents and damages.
i) Never use with bare or wet feet/hands. Use in these con-
ditions may cause electrocution.
l) Processing of harmful materials must be performed in
compliance with the laws in force. Some types of dust and
materials such as metals, wood, paints, etc. are very harmful
to health. Protect yours and other people’s health using suitable
protections and devices.
m) Do not approach the cooling air ejection slots. The air
generated may contain machining residuals and small parts that
are harmful for your respiratory tracts and eyes.
n) Do not cover or insert things in the cooling slots. Unsuitable
ventilation of the electrical tool may start a fire. Accessing the
internal parts may damage the tool and cause electrocution.
o) Do not use the electrical tool if the guards (screens, panels,
doors etc) are open, damaged or missing. Correctly installed
guards protect your health and allow safe use.
p) For electrical tools equipped with a laser indicator: do
not stare at the light beam, do not point the beam at people,
animals or vehicles and do not point the beam at eyes or
skin. Improper use of the laser causes serious damage to
sight and skin.
4) Use and maintenance of electrical tools
a) Do not force the electrical tool. Use a suitable tool for
the operation to be carried out. An appropriate electrical tool
can perform the work with higher efficiency and safety without
having to exceed the parameters intended for its use.
b) Do not use the electrical tool if the on/off switch is not
activated properly. Any electrical tool that cannot be controlled
by its switch is dangerous and must be repaired before use.
c) Disconnect the plug from the power supply and/or from
the electrical tool battery unit before any adjustment,
replace the accessories or store the electrical tools. These
preventive safety measures reduce the risk of accidental start

- 10 -
of the electrical tool.
d) Store unused electrical tools out of reach of children and
do not allow them to be used by any unskilled people or
who are not aware of these instructions. Electrical tools are
dangerous if used by unskilled people.
e) Carry out the required maintenance on electrical tools.
Check any possible misalignment or locking of the moving parts,
any breakage of the parts and any other condition that may
affect the operation of electrical tools. If there is any damage,
the electrical tool must be fixed before use. Numerous accidents
are caused by improper maintenance of electrical tools.
f) Keep the cutting elements, where fitted, clean and sharpe-
ned. Cutting elements in good conditions and with sharp edges
are less likely to get blocked and can be controlled more easily.
g) Use the electrical tool, accessories and bits etc. according
to these instructions, considering the work conditions and the
operation to be performed. The use of the electrical tool for
operations other than those for which it is intended may cause
dangerous situations.
h) Support the tool with the insulated handles, when perfor-
ming an operation during which the work device could come
into contact with hidden cables.
If the work devices come into contact with a “live” conductor
the metal parts of the electrical tool could become “live” and
cause an electric shock (electrocution) to the operator.
i) Keep a safe distance from moving parts. Touching moving
parts causes serious injuries.
l) Do not modify the electrical tool. Taking off, replacing or
adding components not included in the instructions is prohibited
and causes the warranty to become null and void.
m) Do not leave the electrical tool running unattended. Turn it
off before leaving it unattended in order to prevent any accidents.
n) The electrical tool must never come into contact with
water or other liquids. Use in these conditions may cause
electrocution.
5) Use and precautions for use of battery-operated tools
a) Recharge only with the battery charger indicated by the
manufacturer. An inappropriate battery charger can cause a
fire hazard when used with other battery units.
b) Use electrical tools only with specifically designated
battery units. The use of any other battery unit can cause a
risk of injury or fire hazard.
c) When the battery unit is not in use, keep away from other
metal objects such as, paper clips, coins, keys, screws or other
small metal objects which could create a connection between
the two terminals. Short-circuiting the battery terminals can
cause burns or fires.
d) If it is in poor condition, the battery liquid may leak. In
such case, avoid any contact. In case of accidental contact,
rinse immediately with water. If case of contact with eyes,
immediately contact a doctor. The liquid leaking out of the
battery can cause irritations or burns.
e) Keep the equipment and the batteries far from heat sources
and fire. Do not expose them to temperatures over 50°C. High
temperatures can cause the batteries to explode.
6) Support
a) Have maintenance operations on electrical tools carried
out by qualified technical staff only using original spare
parts. This allows the constant safety of the electrical tool to
be maintained.
b) Do not attempt to repair the electrical tool or to access
internal parts. Interventions by unqualified personnel and
unauthorised by the manufacturer could create serious risks
and will cause the warranty to be null and void.
c) Request only original spare parts. The use of non-original
spare parts may compromise the safety of the electrical tool.
SAFETY WARNINGS OF THE BATTERY
SCREWDRIVER
a) Working on the ceiling with the tool upwards can be more
dangerous for the operator. Use a protection helmet in case any
material falls down. Wear eye protection goggles.
b) If the tool stops during use, switch it off immediately. Do
not force difficult operations for the tool.
c) Hold the tool firmly. The strains caused by working lead to
stress which must be contrasted with your force.
d) Fasten the item you are working on with a vice or another
device. An item held by hand can suddenly cause an accident.
e) Wait for the electrical tool to stop completely before putting
it down. The moving parts could cause falling.
f) If the tool stops do not continue to press the start button.
The battery could be irreparably damaged.
g) Do not operate the appliance when it is connected to the
battery charger.
h) The illumination light must only be used if the appliance
is operating. If the appliance is not charged do not use the light
and charge the battery fully.
SAFETY WARNINGS OF THE BATTERY AND
BATTERY CHARGER
a) Do not disassemble or tear the battery case. Do not hit it or
drop it. Damaged batteries can cause serious danger.
b) Do not expose the battery to heat or fire. Do not expose it to
direct sunlight. Do not leave it inside vehicles. Do not expose
it to temperatures over 50°C. Risk of explosion.
c) A battery used incorrectly can cause vapours to leak out.
Ventilate the room and consult a doctor if necessary.
d) Keep batteries and electrical equipment out of the reach
of children. It is good practice to keep children away from
electrical equipment.
e) Do not put any metal objects into the battery compartment.
Do not put the battery away with other metal objects (like
the tool box) or with other batteries. Risk of generating a
short circuit.
f) Use the battery charger in closed rooms sheltered from
rain and humidity. Prevent possible electric shocks.
g) Always keep the battery charger clean. Dust and dirt prevent
correct charging.
h) Before use, always check the battery charger, cable and
plug. Do not use it in the event of damage or faults. Never open
the battery charger and only have it repaired by qualified staff
and only with original spare parts.
i) Do not use the battery charger on easily flammable
surfaces (e.g. paper, fabric, wood, etc.) or in flammable or
explosive environments. Prevent any fires due to overheating.
l) Charge the battery at room temperature between 10°C and
35°C. Lower or higher temperatures can damage the battery
and inhibit normal charging.
m) Unplug the battery charger when not in use. Do not leave
the battery charger switched on with the battery completely
charged. Prevent possible accidents.
n) It is normal for the battery charger and the battery to
heat up while being charged. However, both must be left
to cool down to room temperature between consecutive
charging. High temperatures can cause damage or explosion
of the battery.
o) Replace batteries that have come to the end of their use
cycle. If the battery loses its charge very quickly and/or the
charging cycles are very short, it means that it is nearly dead
and therefore needs replacing. For tools with internal batteries,
contact an authorised service centre.

- 11 -
p) Only replace it with original batteries, of the same type
and characteristics as the one supplied with the tool. The use
of batteries of different types and voltages can damage the tool
and cause danger. Only buy original spare parts.
q) Some batteries have auto reset thermal protection, which
prevents charging should the temperature be too high; in
this case the battery charger will emit a flashing red light.
Remove the battery from its housing for a few minutes before
putting it back in the battery charger. The charging will start
again automatically when the temperature has returned within
the safe range of values.
r) The power supply voltage of the battery charger must
match that indicated on the technical data nameplate. Do
not use any other type of power supply.
s) It is advisable to install a trip switch on the electrical power
supply line. Consult your electrician.
t) Do not damage or tread on the power supply cable. Do not
pull the battery charger by the cable. Do not pull the cable in
order to unplug it from the power supply.
u) Any extension cable must have a higher section than that
of the battery charger cable and correctly sized according
to its length.
v) If the power tool is blocked because the battery is out, do
not continue to press the start button, otherwise the battery
fails hopelessly.
SAFETY WARNINGS
FOR NOISE AND VIBRATIONS
The level of noise and vibrations shown on the attached sheet
are average values for the use of the electrical tool. The use of
different cutting elements, different materials, the use or not of
the percussion function and lack of maintenance on the electrical
tool significantly affect the sound emissions and vibrations.
Therefore, adopt all the preventive measures in order to elimi-
nate any possible damage due to loud noises and strain from
vibrations; wear ear phones, anti-vibration gloves, take breaks
while working and keep the electrical tool and accessories
(bits, etc.) efficient.
REMAINING RISKS
These illustrations show the main risks involved with using
the machine. Read the machine instruction manual carefully.
High temperatures cause the batteries to explode. Do not expose
them to direct sunlight, do not leave them inside vehicles and
do not burn them.
Risk of electric shock and danger of death. Do not touch the
electrically live parts and keep a safe distance. Before any main-
tenance operations, unplug the machine from the power supply.
SYMBOLS
Carefully observe the symbols in fig.B and memorise the re-
spective meaning. Correct interpretation of the symbols allows
safer use of the machine.
1 Machine model, technical specifications, manufacturing
batch number. The first 2 figures of the batch indicate the
year of manufacture.
2 Important!
3 Carefully read the instructions before use.
4 Only for internal use
5 Battery charger with safety transformer (if fitted)
6 Protection fuse (if fitted)
7 Auto reset thermal switch (if fitted)
8 Double electric insulation
9 Risk of explosion. Keep the equipment and the batteries far
from heat sources and fire. Do not expose them to tempe-
ratures over 50°C.
10 Electric and electronic waste may contain potentially
hazardous substances for the environment and human health.
It should therefore not be disposed of with domestic waste,
but by means of differentiated collection at specific centres
or returned to the vendor in the event of purchasing a new
identical tool. The illegal disposal of such equipment may
result in prosecution to the full extent of the law.
11 The batteries included in the equipment can be disposed
of along with it. Do not throw the used batteries on the fire
and do not dispose of them in the environment, but take
them to special disposal centres. Do not dispose of them
with domestic waste.
V volts
Hz hertz
~ alternating current
direct current
A Ampere
W watts
kg kilograms
nO no-load speed
mm millimetres
s second
h hour
min-1 R.P.M.
dB decibel
double electric insulation
°C Celsius degree
Li-Ion Lithium Ion

- 12 -
We thank you for having purchased this electrical tool that will
hereafter also be referred to as “battery-operated screwdriver”.
!IMPORTANT! The battery-operated screwdriver is suitable
for screwing and unscrewing screws using suitable bits. It is
prohibited to use dangerous materials in environments with
risk of fire/explosion.
These instructions contain information deemed necessary for
proper use, knowledge and standard tool maintenance. They
do not include information on screw fixing techniques; the user
can find additional information in specific books or publications
or by attending special training courses.
COMPONENTS
Refer to fig.A and the following figures, attached to these
instructions.
1 Handle
2 ON/OFF button
3 Chuck
4 Battery charge status indicator (where fitted)
5 Battery charge test button (where fitted)
6 Power on light during battery charging (where fitted)
7 Light on/off button (where fitted)
8 Light (where fitted)
9 Battery charger socket
10 Tightening torque adjustment ferrule (where fitted)
11 Battery charger plug
12 Battery charger
13 Adapter / extension
14 Rotation direction and start lock switch
15 Protection ring nut (if fitted)
16 Corner chuck (if fitted)
17 Misaligned chuck (if fitted)
18 Hand grip release button (if fitted)
19 LED light torch (if present)
20 LED light torch ON/OFF button (if present)
INSTALLATION
!IMPORTANT! The manufacturer is not liable for any direct
and/or indirect damage caused by incorrect connections.
!IMPORTANT! Before carrying out the following operations,
make sure that the plug is disconnected from the mains.
TRANSPORT
Always use the packaging or case (when provided) when
transporting the tool; this will protect it from impact, dust and
humidity which can compromise normal operation.
When transporting the tool remove the battery from the tool
(if extractable).
MOVING
Position the rotation direction switch (if fitted) in the middle
position in order to prevent accidental start-up.
Hold the tool by the hand grip and after use put it down on
its side.
STARTING UP
When choosing where to use the electrical tool, the following
should be considered:
- that the place is not damp and is protected from the elements.
- that there should be a large operational area free from obsta-
cles.
- that there is good lighting.
- that it needs to be used close to the general differential switch
(for the battery charger).
- that the power supply system is earthed and conforms to
the standards (only if the electrical tool is class 1, which is
equipped with a plug with earth cable).
- that the room temperature should be between 10° and 35° C.
- that the environment is not in a flammable/explosive atmo-
sphere.
Take out the machine and components and visually check
that they are perfectly intact; then proceed to thoroughly clean
them in order to remove any protective oils used for transport.
BATTERY CHARGING (fig.A)
!IMPORTANT! Before using the tool it is necessary to fully
charge the battery.
!IMPORTANT! Recharge only with the battery charger indi-
cated by the manufacturer. An inappropriate battery charger
can cause a fire hazard when used with other battery units.
Tool with non-extractable battery
Before use, carry out a complete recharge by inserting the
charger plug (pos.11 fig.A) into the appliance socket (pos.9
fig.A) before connecting the charger to the electrical outlet.
See the attached sheet for battery charge times.
According to the purchased model, the connection of the device
to the battery charger can be signaled by the lighting up of a
warning light; when the charge is complete, the light goes out
or changes color.
Do not use the appliance while charging.
When fully charged, disconnect the battery charger from the
power supply and then from the appliance.
Tool with extractable battery
Take the battery out of the tool housing using the locking de-
vices and push it in fully to the battery charger compartment
making sure polarity is respected. The compartment may have
an asymmetrical shape in order to prevent the battery being
inserted the wrong way round.
The battery charger may also be provided with a separate
power supply; if so, make the reciprocal connection using the
cable supplied.
Plug in the battery charger to the mains and, if fitted, press the
start charging button. The charging light, if fitted, comes on
when the battery starts being charged. The charging time for
a completely empty battery is indicated in the technical data
attached to these instructions.
According to the type of battery charger in your possession,
the charging light stays on permanently, or the end of charging
may be indicated by the relevant light coming on or a different
coloured light.
It is also possible that the battery charger is equipped with a
safety device that switches it off when it is fully charged.
After charging unplug the battery charger, take out the battery
and insert it in the tool housing until you hear its click into place.
In order to keep the battery efficient, do not fully discharge it.
Fully charging the battery:
- After every use.
- After a long period of use.
- At least every 4 months, even in cases of disuse.
- If while working you notice a clear drop in the performance
of the tool.
The factors that influence the battery lifetime are: number of
charge/empty cycles, stress from heavy use, time since it
was manufactured, lack of maintenance, absence of charging,
permanence of temperatures greater than 20°C.

- 13 -
BIT ASSEMBLY
CHUCK TYPE: MAGNETIC
Insert the bit by hand in the hexagonal housing in the chuck
(pos. 3), which will be held in place by a magnet.
To take it out pull in the opposite direction by hand (fig.E).
CHUCK TYPE: WITH BLOCK LOCK
Insert the BIT into the hexagonal seat of the spindle by hand.
To pull it out, push the spindle lock nut in the direction of the
arrow (fig. E).
CHUCK REPLACEMENT
Replacing the chuck can be useful in cases where it is difficult
to access the screw.
Carefully observe fig. F (if provided) and operate accordingly.
HAND GRIP ROTATION
Rotating the hand grip can be useful in cases where it is difficult
to access the screw.
Carefully observe fig. G (if provided) and operate accordingly.
STARTING AND STOPPING
Starting
To start press the button (pos.2).
The switch is a ‘maintained action’ switch so the electrical tool
will stay on when you keep the switch pressed.
If the switch is the reverse rotation type, just press on the top
or bottom part to screw or unscrew the screw. Before reversing
the rotation, wait for the chuck to stop completely: a sudden
reverse action can cause the tool to stop and generate a fault
not covered by the warranty.
Stopping
To stop the tool, release the switch (pos. 2).
We recommend repeating these operations several times before
starting work, in order to familiarise yourself with the controls
as far as possible.
If you notice any working defects, switch off the electrical tool
and consult the chapter “Problems, causes and solutions”.
When not using the tool, turn it off.
OPERATIONAL TIPS
After reading the previous chapters carefully, apply these tips
scrupulously to obtain maximum performance.
Proceed calmly so as to become familiar with all the controls;
after having gained sufficient experience you will be able to
make full use of its potential.
CHUCK ROTATION DIRECTION REGULATION (fig. D if fitted)
IMPORTANT! The rotation direction inversion operation must
be performed with the tool off and the chuck stationary.
For drilling operations and tightening right thread screws
(clockwise), move the rotation direction switch (pos.2) to ‘R’.
For unscrewing operations, or removal of embedded bits and
tightening left thread screws (anti-clockwise), move the rotation
direction switch to ‘L’.
FRICTION REGULATION (pos. 10 if fitted)
The friction can be adjusted from ‘1’ to the maximum setting
and normally only needs adjusting for screwing operations.
Using the ring nut to vary the tightening torque (pos.10), match
up one of the values indicated with the reference on the top of
the drill body, remembering that:
- ‘1 ’ corresponds to minimum torque, to use for screw small
screws in soft material.
- the torque increases with the number indicated on the ring
nut until the maximum value is reached , to use for drilling.
LIGHTING FOR WORK AREA (if fitted)
The light (pos. 8) comes on or off automatically when the tool
switch is operated or by pressing the switch (pos. 7). After use
always switch off the light.
BATTERY CHARGING INDICATOR (fig.E, if fitted)
According to the model in your possession, there may be an
indication of the battery charging status (pos.4), as part of the
tool or in the battery itself. Refer to fig.F (if fitted) and if neces-
sary press the button in the indicator itself (pos.5).
According to the model, to display the charge status, press the
button next to the indicator or the start button.
SCREWING INSERTS (BITS) (not supplied)
Buy only high quality bits with suitable attachment for the
characteristics of this tool and with a push rod suitable for the
screws in use. Contact your retailer who will be able to give
you the best advice.
Our company produces a wide range of bits suitable for
various uses.
SCREWS (not supplied)
It is important to use high quality bolts and screws so as to
obtain the best possible final result. For each kind of material to
be fixed there is a suitable type of bolts and screws; therefore,
buy it according to necessity. If necessary, use washers to
increase the surface area.
SCREWING OPERATION
Place the screw on the panel to be fixed and with a hammer tap
it lightly in a perpendicular position.
For some materials it is necessary to make a pre-hole in order
to facilitate the screwing and to prevent the panel breaking
(especially with wood and plastic).
Grip the tool firmly with one hand and insert the tip of the bit in
the screw head. Press lightly on the screw and screw the tool.
At the end of this operation, which usually lasts a few seconds,
remove the screwdriver and turn it off by releasing the switch.
Continuing to screw forcefully may cause: the breakage of the
bit, damage to the screw head, and a failure of the electrical
tool (not covered by the warranty). In this case, unscrew the
screw, make a pre-hole and re-screw.
Do not force screws that do not screw!
LED LIGHT TORCH FUNCTION (if present, pos. 19 fig.H )
To turn the flashlight on/off, switch on the button pos. 20.
MAINTENANCE
!IMPORTANT! Before any checks or adjustments take the
battery out of the tool (if extractable) and unplug the battery
charger from the mains.
!IMPORTANT! Do not tamper or attempt to repair the
electrical tool.
The working life and costs also depend on constant and meti-
culous maintenance.
Take good care of your electrical tool and clean it regularly. In
this way its efficiency will be ensured and its lifespan extended.
- Remove dust and machining residuals with a brush with
soft bristles.
- Do not wet or spray water over the electrical tool - risk of
internal infiltrations.
- Do not use any inflammables, detergents or solvents.
- The plastic parts can easily be damaged by chemical agents.

- 14 -
- Be careful when cleaning the switch, motor fan slots, chuck,
battery and battery charger.
The tool does not require any special maintenance inasmuch as
it is lubricated with permanent grease inside. Any internal servi-
cing must only be performed by an authorised service centre.
PROBLEMS, CAUSES AND SOLUTIONS
PROBLEM CAUSES SOLUTIONS
The electri-
cal tool fails
to start
Battery empty Fully charge the bat-
tery
Battery not correctly
inserted in the tool
housing
Take out the battery
and insert it correctly
Rotation direction
switch in central lock
position
Move the switch to
one of the two posi-
tions R or L
The battery has
overheated and the
internal auto reset
protection has cut in
Wait for the battery to
cool down
Electrical tool or bat-
tery faulty Replace the battery
and/or contact an
authorised service
centre
The battery
does not
charge
Battery not correctly
inserted in the battery
charger housing
Take out the battery
and insert it correctly
Battery charger not
ready for charging Plug it into the elec-
tric power supply.
Press the start char-
ging button (if fitted)
Battery charger or
battery faulty Replace the battery
and/or contact an
authorised service
centre
The tool
stops Dead battery If available, insert a
new charged battery,
or fully charge the
battery.
The battery has
overheated and the
internal auto reset
protection has cut in
Wait for the battery to
cool down
!IMPORTANT! If the electrical tool still fails to operate
correctly after you have carried out the above operations,
or in the event of anomalies other than those described
above, take it to an authorised service centre with proof of
purchase and ask for original spare parts. Always provide
the information shown on the technical data label.
STORAGE
Clean the tool and all its accessories thoroughly (see Mainte-
nance section).
Keep the machine out of reach of children, in a stable and safe
position. The place must be dry, free from dust, temperate and
protected from direct sunlight.
Keep children and unauthorised personnel out of the storage
room.
DISPOSAL
In order to protect the environment, proceed according to the
local laws in force. Contact the relevant authorities for more
information.
When the machine is not longer useable or repairable, deliver
the machine and packaging to a recycling centre. Take out the
batteries (where fitted) and dispose of them separately.
Electric and electronic waste may contain substances that
are dangerous for the environment and for human health. For this
reason they must never be disposed of together with domestic
waste, but collected separately in specific collection centres or
returned to the retailer when similar new equipment has been
purchased. The illegal disposal of such equipment may result
in prosecution to the full extent of the law.
Battery disposal: The batteries included in the equipment
can be disposed of along with it.
Do not throw the used batteries on the fire and do not dispose
of them in the environment, but take them to special disposal
centres. Do not dispose of them with domestic waste.
WARRANTY
The product is protected by law against non-compliance with the
declared characteristics provided it is used only in the manner
described in the instructions, it has not been tampered with
in any way, it has been stored properly, has been repaired by
authorized and, where applicable, have been used only original
spare parts.
In the case of industrial or professional use or when using such
a guarantee is valid for 12 months.
To issue a claim under warranty you must present proof of
purchase to your dealer or authorized service center.

- 15 -

-
 1
1
-
 2
2
-
 3
3
-
 4
4
-
 5
5
-
 6
6
-
 7
7
-
 8
8
-
 9
9
-
 10
10
-
 11
11
-
 12
12
-
 13
13
-
 14
14
-
 15
15
-
 16
16


Valex 1422532 Manual do proprietário
- Categoria
- Brocas combi sem fio
- Tipo
- Manual do proprietário
em outras línguas
- italiano: Valex 1422532 Manuale del proprietario
- English: Valex 1422532 Owner's manual
Artigos relacionados


Outros documentos
-
Parkside PBHA 12 A1 Translation Of The Original Instructions
-
Parkside PBSA 20-Li A1 Translation Of The Original Instructions
-
Parkside PABS 20-Li A1 Instruções de operação
-
-
Parkside PAS 3.6 A1 Operation and Safety Notes
-
Parkside PFBS 12 B3 Manual do usuário
-
-
Efco SAi 60 BOOST Manual do proprietário