Zibro LC 30 Manual do usuário
- Categoria
- Aquecedores de ambiente
- Tipo
- Manual do usuário

LC – 30
GB OPERATING MANUAL .............................. PAGE 2
DE GEBRAUCHSANWEISUNG............................ PAGE 14
FR MANUAL D’UTILISATION ............................ PAGE 26
NL GEBRUIKSAANWIJZING ............................. PAGE 38
ES INSTRUCCIONES DE USO ............................ PAGE 50
IT ISTRUZIONI D’USO ................................. PAGE 62
PT MANUAL DE INTRUÇÕES ............................ PAGE 74
DK BRUGERVEJLEDNING ............................... PAGE 86
NO BRUKERINSTRUKSEN ............................... PAGE 98
SE INSTRUKTIONERNA INNAN ANVANDNING.............. PAGE 110
FI KäyTTöOHJEET ................................... PAGE 122

4
2
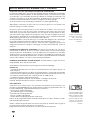
Thank you for choosing a “TOYOTOMI” product!
Toyotomi products are used by satisfied customers worldwide. In order to
assure the comfortable and safe use of our products by customers in each
country, our products conform to the safety standards not only in Japan but
also in every country around the world we do business with.
Toyotomi tailors its products to satisfy its customer’s needs by always
pursuing our business philosophy, “sharing joys in daily living”. We will
continue to research, develop and manufacture products that match people’s
lifestyle for efficiency, safety and comfort.
We hope that you’ll enjoy your Toyotomi appliance for years to come!
We invite you to read this instruction manual first, to ensure the maximum
lifetime for this appliance.
Get to know us better… visit us at www.toyotomi.eu for our full line of
products.
1 Read the diRections foR Use fiRst.
2 in case of anY doUbt, contact YoUR dealeR.
3 PoUR liRe, déPliez la deRnièRe Page. e e e e e e e e e e e e e 3 befoRe YoU staRt Reading, consUlt the Main coMPonents list on the last Page.

4
3
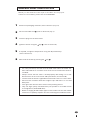
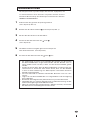
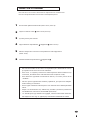
GENERAL DIRECTIONS FOR USE
Below you will find the main steps to be taken for using your
heater. For more details, please refer to the MANUAL.
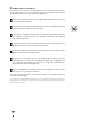
• As a fire precaution, the tank must be filled either when the heater has
been switched off or in another room than the room where the heater is
installed.
• Always ensure that the tank is closed properly after filling it at a safe
distance from all sources of heat and open flames (see Section B).
• The first time the heater is ignited it will smell like “new” for a short time.
• Store all fuel containers with their original caps and seals in a cool and
dark place.
• Fuel ages. Use new fuel at the start of every heating season.
• Only use high quality and water-free pure paraffin in accordance with
local legislation (TOYOTOMI fuel).
• Before changing brands and/or types of fuel make sure that the mobile
heater first completely empties all of the remaining fuel inside the heater.
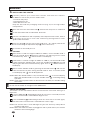
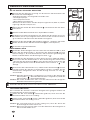
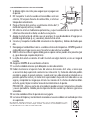
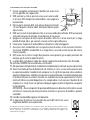
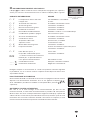
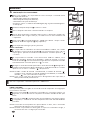
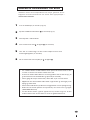
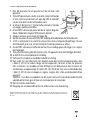
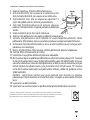
Remove all packaging materials (refer to Section A, Fig. A).
Fill the removable tank 6 (refer to Section B, Fig. C).
Insert the plug into the wall-socket.
Ignite the heater using the
key L (refer to Section D).
If required, change the temperature using the adjustment keys
(refer to Section E).
Switch off the heater by pressing the
key L.
1
2
3
4
5
6
3 PoUR liRe, déPliez la deRnièRe Page. e e e e e e e e e e e e e 3 befoRe YoU staRt Reading, consUlt the Main coMPonents list on the last Page.

4
4
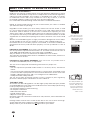
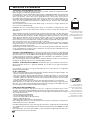
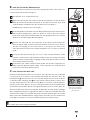
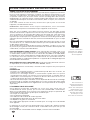
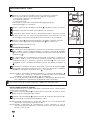
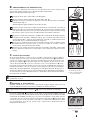
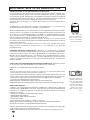
This transportation cap
is packed separately in
the box. Only this cap
ensures trouble-free
transportation of the
heater after use.
Store it well!
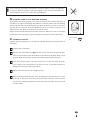
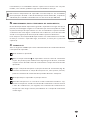
WHAT YOU NEED TO KNOW IN ADVANCE
VENTILATE SUFFICIENTLY
Read this user manual carefully before using the appliance and keep it for future
reference. Install this device only when it complies with local/national legislation,
ordinances and standards. This product is intended to be used as a heater
in residential houses and is only suitable for use in dry locations, in normal
household conditions, indoors in living room, kitchen and garage.
For comfortable and safe heating ensure that there is sufficient ventilation.
NOTE: To avoid unexpected shut off, we recommend to put a door or window
ajar when the heater is operating.
Regardless of the model, you must always make sure that the heater is used
in a room large enough to enable the heater to be used safely without extra
ventilation (refer to Section P). If the room is smaller than required, you must
always open a door or window slightly (ensuring an opening of approx. 2.5 cm).
It is important that every room where the heater is used has sufficient air intake
and efficient air outflow (both openings must have a minimum cross section of 50
cm
2
).
We also recommend doing this in highly insulated or draught-free rooms and/or
at high altitude. Do not use your heater in cellars or other underground areas.
No modifications to the safety system are allowed, as that will invalidate the
guarantee that the air probe will work properly. Consult your dealer in case of
doubt.
ESPECIALLY FOR FRANCE: Your heater was designed to operate exclusively on
fuel for liquid fuel-operated mobile heaters in accordance with the Decrees of
18-07-2002 and 25-06-2010. The use of other fuels is forbidden.
Ask your dealer or check our website for the addresses of our retailers.
The liquid fuel-operated mobile heater is intended as an extra heater, and not as a
continuous source of heat.
ESPECIALLY FOR UNITED KINGDOM: Only use Class C1 paraffin fuel in
accordance with BS2869; Part 2, or equivalent.
The user must comply with the following instructions for proper use:
DO NOT
- use the liquid fuel-operated mobile heater in caravans, boats, and vehicle
cabins.
- use the liquid fuel-operated mobile heater in insufficiently ventilated rooms
(consult the table of properties for the minimum dimensions of the room to be
heated), underground rooms and / or at a height of over 1900 metres.
- modify the heater safety features.
The use of this type of heating in public rooms is subject to prior regulatory
permission. Obtain proper information on this in advance.
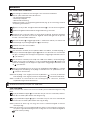
THE RIGHT FUEL
Your heater has been designed for use with high-quality water-free pure paraffin
oil (TOYOTOMI fuel). Only fuels of this kind will ensure clean and proper burning.
Lower quality fuel may result in:
increased possibility of malfunctioning
incomplete combustion
reduced heater lifetime
smoke and/or fumes
deposits on the grid or mantle
Using the right fuel is therefore essential for safe, efficient, and comfortable use
of your heater.
Damage and/or malfunctions of the heater due to the use of other than high-
quality water-free pure paraffin oil is not covered by the warranty.
Always refer to your local dealer for the right fuel for your heater.
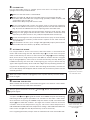
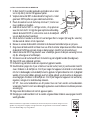
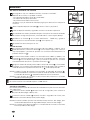
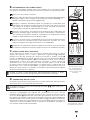
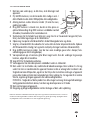
Only the use of the
correct fuel will ensure
safe, efficient, and
comfortable use of
your heater.

4
5
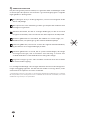
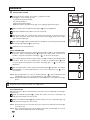
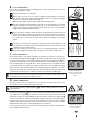
14 TIPS FOR SAFE USE
1 Children should be supervised to ensure that they do not play
with the appliance.
2 DO NOT move the heater when it is burning or still hot. DO
NOT refill nor service the heater when it is burning or still hot.
3 Position the front of the heater at a distance of minimum 1.5
metres from walls, curtains, and furniture.
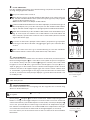
4 DO NOT use the heater in dusty rooms. You will not have
optimum burning in such rooms. DO NOT use the heater
in the immediate surrounding of a bath, a shower or a
swimmingpool.
5 Switch off the heater, before you leave or go sleeping. Unplug the heater as well, when you go
away for a longer period of time (e.g. holidays).
6 Store and move fuel only in suitable tanks and jerrycans.
7 Make sure that the fuel is not exposed to heat or extreme temperature changes. ALWAYS store
the fuel in a cool, dry and dark place (sunlight will affect the quality).
8 NEVER use the heater in places where harmful gasses or fumes may be present (e.g. exhaust
gasses or paint fumes).
9 Beware that the grid of the heater becomes hot. If the appliance is covered there is a risk of
fire.
10 ALWAYS make sure that there is sufficient ventilation.
11 The heater must not be located immediately below a socket-outlet.
12 Children of less than 3 years should be kept away unless continuously supervised. Children aged
from 3 years and less than 8 years shall only switch on/off the appliance provided that it has
been placed or installed in its intended normal operating position and they have been given
supervision or instruction concerning use of the appliance in a safe way and understand the
hazards involved. Children aged from 3 years and less than 8 years shall not plug in, regulate
and clean the appliance or perform user maintenance.
CAUTION - Some parts of this product can become very hot and cause burns. Particular
attention has to be given where children and vulnerable people are present.
13 Children shall not play with the appliance.
14 Cleaning and user maintenance shall not be made by children without supervision.
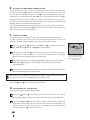
Defective electrical devices and batteries must be kept separate from household
waste. Ensure that there is effective recycling where possible. Ask you local council or
dealer for expert advice on recycling.

!
4
6
MANUAL
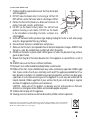
A INSTALLING THE HEATER
1
Carefully remove your heater from the box and check the contents.
In addition to the heater you also need to have:
a manual fuel pump
a transportation cap
these directions for use
Keep the box and the packaging materials (Fig. A) for storage and/or
transportation.
2
Open the lid of the removable tank D and remove the piece of cardboard.
3
Fill the removable tank as indicated in Section B.
4
The floor should be firm and completely level. Reposition the heater, when it
is not level. Do not try to correct the situation by placing books or other
goods under the heater.
5
Insert the plug J into the wall-socket (230 Volts - AC / 50 Hz) and set the
correct time using the adjustment keys N (refer to Section C).
6
Your heater is now ready for use.
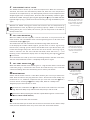
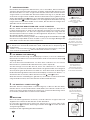
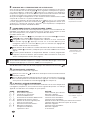
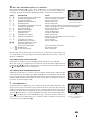
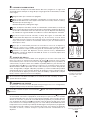
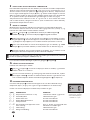
SET ALTITUDE
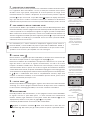
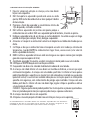
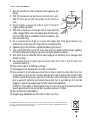
1
If the heater is used at a height of 800 m to 1300 m, use the altitude mode 1.
Push the altitude button with thin rod like a clip and plug into the outlet
simultaneously. Then “1 ” will be shown on the display.
2
If the heater is used at a height of 1300 m to 1900 m, use the altitude mode
2. After setting the altitude mode 1, push the altitude button with thin rod
and plug into the outlet simultaneouosly again. Then “2
” will be shown on
the display.
3
Switch off the altitude mode by pressing the altitude button and into the
outlet simultaneously after setting altitude mode 2. Then “0” will be shown
on the display and “
” will be disappeared.
NOTE: When the altitude mode 1 is set, the altitude mark “
” is lit on the display.
When the altitude mode 2 is set, the altitude mark “
” is blinking during
operation.
NOTE: In the event of power failure or disconnection of heater, the altitude setting
will remain.
Do not use the heater at a height of over 1900 meters.
SWITCH THE VOLUME
This heater can be switched the buzzer sound volume. The initial setting is in
High level.
1
Push the SAVE key and holding it down for more than 3 seconds, then the
buzzer sound volume is switched from High to Low.
2
Push the SAVE key and holding it down for more than 3 seconds again,
then the buzzer sound volume is switched from Low to High.
NOTE:
The volume level is Low and High only, but the alarm by safety device
sounds in High level.
NOTE:
When the heater has been unplugged or after a power failure, the volume
will be the initial setting High.
B
A

!
4
7
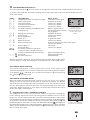
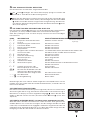
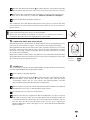
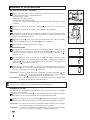
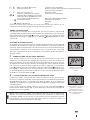
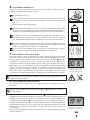
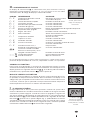
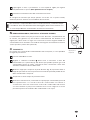
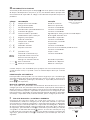
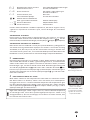
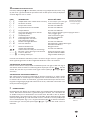
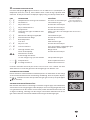
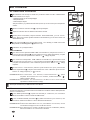
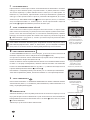
G: The required tempe-
rature on the left, the
measured temperature
on the right.
F: When the 4-digit
stops blinking, the set-
ting has been locked to
the indicated value.
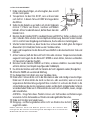
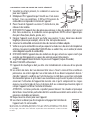
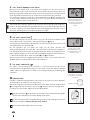
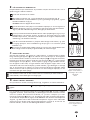
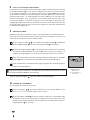
B FILLING FUEL
Fill the removable tank in a suitable place since there can always be some
spillage. Follow the procedure below:
1
Make sure that the heater is switched off.
2
Open the upper lid and lift the removable tank out of the heater (Fig. B).
Put down the removable tank (cap pointing upwards, handle on floor) and
screw off the fuel cap (Fig. C).
NOTE: Some drops may leak from the tank.
3
Fill the removable tank using a fuel pump (refer to fuel pump operation
instructions.) Make sure that it is in a higher position than the removable tank
(Fig. D). Insert the ribbed hose into the opening of the removable tank.
4
Check the removable tank fuel gauge while filling the tank (Fig. E). Stop
filling once the gauge indicates that the tank is full. Never overfill the tank,
especially not when the fuel is very cold (fuel expands when it heats up).
5
Let the remaining fuel in the pump flow back into the jerrycan and carefully
remove the pump. Carefully screw the fuel cap back on the tank. Clean off
any spilled fuel.
6
Check whether the fuel cap is straight and tightened properly. Reinstall the
removable tank in the heater (cap down). Close the lid.
C SETTING THE CLOCK
It is only possible to set the correct time, when the heater is connected to the
mains and not burning. Use the adjustment keys N to set the time. First press
either of the two keys to switch on the function (the 4-digit K will start blinking).
Next, set the hours using the key on the left (Nhour) and the minutes using the
key on the right (Mmin.). Press once to increase the value by one step. When you
hold down the key, the value will continue going up, until you release the key
again. After approximately 10 seconds the 4-digit will stop blinking and the set-
ting will be locked (Fig. F). 5 minutes after switching off the heater, the informa-
tion on the display will disappear and the heater will automatically switch into the
stand-by position.
When the heater has been unplugged (or after a power failure), the time needs
to be set again.
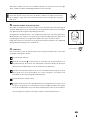
D IGNITING THE HEATER
When used for the first time, a new heater may give out a smell for a short while.
You should therefore provide extra ventilation.
Always ignite the heater with the
button L
. Never use matches or a
cigarette lighter.
Just press the button L to ignite the heater. The POWER lamp will start blinking,
indicating that the ignition procedure has started. This will take a short while.
Once the heater is burning, the POWER lamp will remain lit (red). The information
display K will show two numbers. The light next to them indicates that these
numbers refer to the temperatures (Fig. G). The actual room temperature is
indicated below ROOM, while the temperature setting is indicated below SET. The
latter can be changed with the adjustment keys (refer to Section E).
Prior to igniting the heater, always check for sufficient fuel in the removable tank.
E
empty
full
C
D

!
4
8
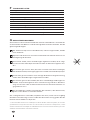
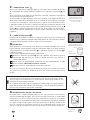
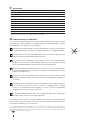
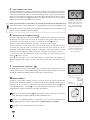
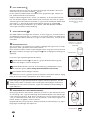
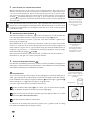
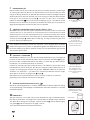
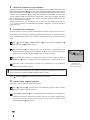
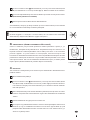
H: The TIMER indicator
light indicates that the
timer function has been
switched on.
E SETTING THE REQUIRED TEMPERATURE
The temperature setting can only be adjusted, when the heater is burning. Use
the adjustment keys N to adjust the temperature. First press either of the two
keys to switch on the function (the °C mark K will start blinking). Next, adjust the
temperature using the key on the right (Mmin.) to set the temperature to a higher
setting and the key on the left (Nhour) to lower the temperature. Press once to
increase the value one step. After approximately 10 seconds the °C mark will stop
blinking and the setting will be locked (Fig. G).
The available temperature settings range from 6°C minimum to 28°C maximum.
When the heater has been unplugged (or after a power failure), the temperature
will reset to the factory setting of 20°C.
F USING THE TIMER
The timer allows you to switch on the heater automatically at a preset time.
In order to switch on the timer, the correct time must have been set (refer to
Section C) and the heater should be off. Follow the procedure below:
1
Press the
button L and then the TIMER key O immediately after that.
The TIMER lamp and the 4-digit K will start blinking.
2
Use the adjustment keys N to set the time at which the heater must ignite.
Use the key on the left (Nhour) to set the hours and the key on the right
(Mmin.) to set the minutes (interval of 5 minutes).
3
After approximately 10 seconds the 4-digit will show CLOCK again and the
TIMER lamp will light up, indicating that the timer function has been
activated (Fig. H).
4
The timer will ensure that the room will have been heated to approximately
the required temperature at the set time.
When you want to switch off the heater and ignite it again with the timer, all
you have to do is press the TIMER key (refer to Section G).
Press the
button L once to clear the timer setting.
G SWITCHING OFF THE HEATER
There are two ways to switch off the heater:
1
Press the
button L. The information display will show the CLOCK
signal. Within approximately one minute the flame will have extinguished.
2
Press the TIMER key O, when you want to switch off the heater and ignite it
again with the timer the next time. This not only switches off the heater, but
it also activates the timer function. You can change the required time with
the adjustment keys N (refer to Section F).

4
9
H THE INFORMATION DISPLAY
The information display K not only serves as an indicator of the (set) time and temperature (Sections C,
E, and F), it also indicates any malfunctioning of the heater. The code on the information display tells you
what is the matter:
CODE INFORMATION WHAT TO DO
e - 0 Temperature within the heater too high. Cool-down and re-ignite.
f - 0 Power interrupted. Re-ignite the heater.
e - 1 Faulty thermostat. Contact your dealer.
f - 1 Faulty burner thermistor. Contact your dealer.
e - 2 Starting problems. Contact your dealer.
e - 23
Re-ignite the heater immediately after
extinguishing.
Wait for approx. 30 sec.
and re-ignite after inserting
the plug again.
e - 5 Tipping-over protection. Re-ignite the heater.
e - 6 Poor burning. Contact your dealer.
e - 7 Room temperature If necessary,
above 32°C. re-ignite the heater.
e - 8 Defective booster. Contact your dealer.
e - 8 1 Abnormal frequency. Insert the plug into the wall-socket again.
Contact your dealer.
e - 9 Air filter dirty; or Clean filter.
Fuel pump dirty. Contact your dealer.
The heater has been in operation
continuously for a period of 65 hours
and has turned itself off automatically. Switch the heater back on.
-- : --
+
Out of fuel. Refill removable tank.
-- : --
+
Too little ventilation. Ventilate better.
Always contact your dealer for any malfunctioning not listed above and/or when
the error keeps occuring after taking the corrective measure as described above.
AUTOMATIC DEACTIVATION
This heater is fitted with a safety system that ensures that it switches off
automatically after 65 hours continuous operation. The following will then appear
in the display:
. If desired, you can switch the heater on again by pressing
the
button
L
(see Section D).
AUTOMATIC CLEANING MODE
When the heater has been burning continuously for two hours at its highest
setting, the burner will automatically start an autoclean procedure. The display
will show the autocleaningcode cl:05 running back to cl:01. The procedure takes 5
minutes, during which the heater will burn at its lowest setting, while the burner
autocleans. When the burner is clean again, the heater will automatically switch
back to the highest setting again.
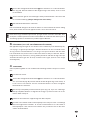
I CHILDPROOF LOCK / PARENTAL CONTROL
The childproof lock can be used to prevent children accidentally changing the
heater settings. When the heater is burning and the childproof lock is on, the
heater can only be switched off. Other functions are blocked then. If the heater
has already been switched off, the childproof lock also prevents accidental ignition
of the heater.
Activate the childproof lock by pressing the appropriate key M and
holding it down for more than 3 seconds. The KEY-LOCK indicator
will appear on
the information display (Fig. I), indicating that the childproof lock has been activated.
Switch off the childproof lock by pressing the key M and holding it down for more
than 3 seconds once again.
I: When the mark
appears, the childproof
lock has been activated.
In case of any
malfunctioning the
information display will
tell you what is the
matter.

!
4
10
J THE CORRECT USE OF ‘SAVE’
The ‘SAVE’ function allows you to limit the temperature. When this function is
activated, the heater will automatically switch off, when the room temperature
exceeds the set temperature by 3°C. Subsequently, when the room temperature has
dropped again to the set temperature, the heater will automatically switch on again.
Activate the ‘SAVE’ setting by pressing the appropriate key. The SAVE indicator
light will light up (Fig. J). Switch off the function by pressing the SAVE key once
again.
Without the ‘SAVE’ setting your heater will maintain the set temperature by
approximation as well, by adjusting its heating capacity. ‘SAVE’ is an economy
setting, which you can use when, for instance, you are not present in the room or
to keep it frost-free.
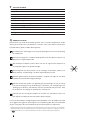
K THE ‘FUEL’ INDICATOR
When the FUEL indicator appears, it means that there is only fuel left for 10
more minutes. The count-down of the remaining heating time can be seen in the
information display K (Fig. K).
You remove the fuel tank and refill it outside the living room (Section B).
In the display the number 10 will appear, you will hear an alarm signal every
two minutes, warning you to refill the removable tank. If you do not react, the
heater will extinguish by itself. The heater will also sound a warning signal,
when it switches off. The fuel indicator will blink, while four lines (--:--) are
blinking in the information display. You can stop this by pressing the
button
L once more.
Once the heater has used up all its fuel and extinguished, it will take some time,
after the refill, before the heater is completely ready for use again.
L THE ‘VENT’ INDICATOR
When the VENT indicator starts blinking, this is a sign that the room is not vented
sufficiently (Fig. L). The heater will switch off automatically. If the indicator
continues blinking after extra ventilation, please contact your dealer.
M MAINTENANCE
Switch off the heater and let it cool down, before you start any maintenance
work. Also disconnect the plug from the mains. Your heater needs hardly any
maintenance. It is, however, important that you clean the vent filter 8 with a
vacuum cleaner and the grid 2 with a damp cloth, both on a weekly basis.
Regularly inspect the fuel filter as well:
1
Remove the removable tank 6 from the heater and remove the fuel filter
(Fig. M). Some drops may leak from the filter; keep a cloth at hand.
2
Remove the dirt by tapping the fuel filter upside-down against a hard surface.
(Never clean it with water!)
3
Reinstall the fuel filter into the heater.
We recommend that you remove dust and stains from time to time with a damp
cloth, because otherwise these may cause stains that are hard to remove.
M
Fuel filter
K: When the FUEL
indicator has appeard,
the information display
will show the number of
minutes of fuel left in
the tank.
L: A blinking VENT
indicator is a sign
that you need extra
ventilation.
J: When the SAVE light
lights up, the heater will
automatically switch on
or off in order to remain
within a specified tem-
perature range.

!
4
11
Do not remove any heater components yourself. Always contact your dealer
for repairs. When the power cord is damaged, it may only be replaced by an
authorised fitter. Use a new cord of the type H05 VV-F.
N STORAGE (END OF THE HEATING SEASON)
At the end of the heating season, you must store the heater in a dust-free place, if
possible in its original packaging. Unused fuel cannot be used in the next heating
season. We therefore recommend that you burn up all fuel. If there is still some
fuel left, do not throw it away, but dispose of it in accordance with the local
regulations for the disposal of domestic chemical waste.
Always start the new heating season with fresh fuel. When you start re-using the
heater follow the instructions again (starting from Section A and as specified).
O TRANSPORTATION
Take the following measures to avoid fuel leakage during the transportation of
the heater:
1
Let the heater cool down.
2
Remove the removable tank 6 from the heater and remove the fuel filter
(refer to Section M, Fig. M). Some drops may leak from the filter; keep a cloth
at hand. Store the fuel filter and the removable tank outside the heater.
3
Place the transportation cap into the position of the fuel filter (Fig. N).
Press it tight. The transportation cap will, as much as possible, prevent oil
leakage from the heater during transport.
4
Always move the heater in an upright position.
5
Make the fixed tank empty with a fuel pump before transportation or in case
of wrong or dirty fuel. First remove the fuel filter and then insert the fuel
pump into the empty fixed tank. Follow the same procedure if the fuel tank
contains water.
Transportation
cap
N

4
12
P SPECIFICATIONS
Ignition electrical Dimensions (mm) width 376
Fuel paraffin including base plate: depth 296
Capacity (kW) max. 3.00 height 428
Capacity (kW) min. 0.80 Accessories: - manual fuel pump
Suitable space (m
3
)
**
48-120 - transportation cap
Fuel consumption (l/hr)
*
0.313 Mains 230 V
-- AC / 50 Hz
Fuel consumption (g/hr)
*
250
Electrical consumption
:
Burning time per tank (hr)
*
17.3
-
igniter 320 W
Capacity removable tank (litres) 5.4 - continuous 13 W
Weight (kg) 8.0 Fuse rating 250V, 5A
* At maximum setting ** Specified values are indicative
Q WARRANTY PROVISIONS
Your heater comes with a 48-month warranty starting on the date of purchase.
Within this period all defects in material or workmanship will be repaired without
any charge. The following provisions shall apply regarding this warranty:
1
We expressly dismiss all other claims for damages, including consequential
damages.
2
Any repairs or replacements of components within the term of warranty will
not result in an extension of the term of warranty.
3
The warranty shall no longer apply, when the heater has been modified,
non-original parts have been used, or when it is repaired by third parties.
4
The warranty shall not apply to parts that are subject to normal wear, such as
the burner mat, any kind of gasket and the manual fuel pump.
5
The warranty shall only apply, when you present the original, dated proof of
purchase, provided no changes have been made to it.
6
The warranty shall not apply to damages caused by actions not in compliance
with the Directions for Use, neglect, and the use of an incorrect type of fuel,
or fuel past its use-by date. The use of incorrect fuel can even be dangerous*.
7
Transportation costs and the risks involved during the transportation of the
heater or heater components shall always be at the expense of the purchaser.
In order to avoid unnecessary costs, we recommend that you always read the
’Directions for Use’ carefully first. In case they offer no solution, please take the
heater to your dealer for repair.
* Highly inflammable substances may induce uncontrollable burning, causing flames to break out. Should this
happen, never try to move the heater, but always switch off the heater immediately. In case of emergency you
may use a fire extinguisher, but only a type B extinguisher: a carbon dioxide or powder extinguisher.

4
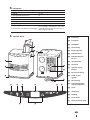
13
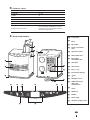
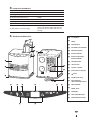
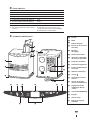
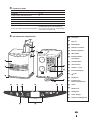
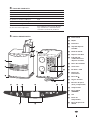
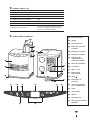
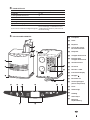
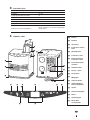
Front plate
Grid
Base plate
Lid for removable
tank
Operation panel
Removable tank
Fuel gauge
removable tank
Vent filter
Thermostat
Plug + cord
Information display
key
Childproof lock
Adjustment keys
(time and
temperature)
Timer
SAVE key
Handle
Timer lamp
Altitude setting button
J
K
L
M
N
O
6
8
J
N
M O
K L
R PRODUCT FICHE
(a) Supplier's name/Trademark TOYOTOMI Europe Sales B.V.
(b) Model LC-30
(c) EEC A
(d) Direct heat output 3.0kW
(e) Indirect heat output N/A
(f) EEI 94.9%
(g) Useful energy effi ciency 100%
(h) Specifi c precaution
For assembly, installation or main-
tenance instructions, please refer to
the operating manual.
S MAIN COMPONENTS

'
14
Vielen Dank für den Kauf des Marken-Heizofens von Toyotomi!
Der japanische Hersteller Toyotomi Co. Ltd. ist seit mehr als 65 Jahren
weltweiter Marktführer im Bereich mobiler Petroleumöfen. Toyotomi steht für
Service, Qualität und Garantie. Auf der ganzen Welt nutzen zufriedene Kunden
die komfortablen und sicheren Heizöfen. Toyotomi-Produkte erfüllen einen
sehr hohen Sicherheitsstandard, sie erfüllen die Sicherheitsnormen nicht nur
in Japan, sondern auch in allen Ländern auf der Welt, in denen die Produkte
verkauft werden.
Effizienz, Sicherheit und Komfort sind oberste Ziele bei Toyotomi.
Wir hoffen, dass Sie Ihr Toyotomi-Produkt viele Jahre geniessen können.
Bitte lesen Sie zunächst sorgfältig die Anleitung, um Ihr Gerät optimal
einzusetzen.
Informieren Sie sich auch über unsere anderen Produkten. Besuchen Sie uns
auf www.toyotomi.eu für unsere gesamte Produktlinie.
1 Lesen sie zuerst die BetrieBsanLeitung.
2 Wenden sie sich im zWeifeLsfaLL an ihren händLer.
3 Vor dem Lesen der anLeitung, konsuLtieren sie die hauptkomponenten Liste auf der Letzten
seite.

'
15
Entfernen Sie das gesamte Verpackungsmaterial
(siehe Kapitel A, Abb. A).
Befüllen Sie den Brennstofftank 6 (siehe Kapitel B, Abb. C).
Stecken Sie den Stecker in die Steckdose.
Starten Sie den Heizofen über die
-Taste L
(siehe Kapitel D).
Verändern Sie wenn nötig die gewünschte Temperatur
über die Einstelltasten (siehe Kapitel E).
Schalten Sie den Heizofen über die
-Taste L aus.
1
2
3
4
5
6
KURZANLEITUNG
• Zur Vorbeugung von Feuer muss entweder der Heizofen vor dem Füllen
des Brennstoffbehälters ausgeschaltet werden oder der Behälter muss in
einem anderen Raum als dem, in dem sich der Heizofen befindet, gefüllt
werden.
• Sorgen Sie immer dafür, dass der Brennstoffbehälter nach dem Füllen gut
verschlossen ist. Achten Sie beim Füllen darauf, dass sich der Behälter
in einer sicheren Entfernung von Wärmequellen und offenen Flammen
befindet (siehe Kapitel B).
• Das erste Mal wird Ihr Heizofen während des Brennens noch kurz ‘neu’
riechen.
• Lagern Sie alle Brennstoffbehälter mit Originaldeckel und Versiegelung
kühl und dunkel.
• Brennstoff altert. Beginnen Sie jede Heiz saison mit neuem Brennstoff.
• Verwenden Sie nur sauberes Heizpetroleum in Übereinstimmung mit der
lokalen Gesetzgebung (TOYOTOMI Brennstoff).
• Wenn Sie zwischen den einzelnen Sorten / Marken wechseln, müssen Sie
den Heizofen erst voll ständig leer brennen lassen.
3 Vor dem Lesen der anLeitung, konsuLtieren sie die hauptkomponenten Liste auf der Letzten
seite.
Nachfolgend sind in groben Zügen die Schritte angegeben, die
zur Inbetriebnahme Ihres Heizofen ausgeführt werden müssen.
Detaillierte Beschreibung der Handlungen entnehmen Sie bitte der
GEBRAUCHSANWEISUNG.

'
16
Den Transport-
verschluß finden Sie
im Verpackungs karton.
Nur hiermit kann
der Heizofen nach
Benutzung problemlos
transportiert werden.
Bewahren Sie den
Verschluß also gut auf!
WICHTIG ZU WISSEN
JEDERZEIT AUSREICHEND LÜFTEN
Nur mit dem richtigen Brennstoff ist eine sichere, effiziente und komfortable
Benutzung Ihres Heizofens gewährleistet
Lesen Sie bitte vor der Anwendung des Geräts sorgfältig die Bedienungsanleitung
und bewahren Sie sie für eine zukünftige Einsichtnahme auf. Das Gerät nur
dann installieren, wenn die örtlich geltenden bzw. nationalen Vorschriften,
Verordnungen und Normen erfüllt sind. Dieses Produkt ist für den Gebrauch als
Heizofen in Wohngebäuden bestimmt, und darf nur in trockener Umgebung,
unter normalen Haushaltsverhältnissen, in Wohnräumen, Küchen und in Garagen
verwendet werden.
Um eine komfortable und sichere Beheizung zu erreichen, sorgen Sie bitte für
eine ausreichende Belüftung.
HINWEIS: Um ein unerwartetes Abschalten zu vermeiden, empfehlen wir, eine
Tür oder ein Fenster einen Spalt offen stehen zu lassen, wenn das Heizgerät in
Betrieb ist.
Jedes Modell benötigt eine bestimmte minimale Raumgröße, um den Heizofen
sicher, ohne zusätzliche Belüftung, betreiben zu können (siehe Kapitel P). Wenn
der betreffende Raum kleiner als der angegebene Minimumwert ist, dann muß
dafür gesorgt werden, daß immer ein Fenster oder eine Tür einen Spalt breit
offen bleibt (ca. 2,5 cm). Es ist wichtig, dass jeder Raum, in dem der Heizofen
benutzt wird, ausreichend belüftet und gut entlüftet wird (beide Öffnungen müs-
sen einen Querschnitt von mindestens 50 cm
2
haben).
Wir empfehlen auch, dies in gut isolierten oder zugluftfreien Räumen und/oder
auf großer Höhe zu tun. Benutzen Sie den Heizofen nicht in Keller- oder anderen
unterirdisch gelegenen Räumen.
Änderungen am Sicherheitssystem sind unzulässig und würden die Garantie
einer einwandfreien Funktion des Luftfühlers nichtig machen. Wenden Sie sich
im Zweifelsfall an Ihren Händler.
SPEZIELL FÜR FRANKREICH: Ihr Heizofen wurde ausschließlich für den Betrieb
mit Brennstoff für mit flüssigem Brennstoff betriebene mobile Heizöfen gemäß
den Richtlinien vom 18.07.2002 und 25.06.2010 ausgelegt. Die Verwendung ande-
rer Brennstoffe ist verboten. Fragen Sie Ihren Händler. Die Adressen unserer
Händler finden Sie auf unserer Website.
Der mit flüssigem Brennstoff betriebene mobile Heizofen wurde als zusätzliches
Heizgerät ausgelegt und nicht als ständige Wärmequelle.
SPEZIELL FÜR GROSSBRITANNIEN: Verwenden Sie ausschließlich Petroleum-
Brennstoff der Klasse C1 gemäß BS2869 Teil 2 oder einen gleichwertigen
Brennstoff.
Im Hinblick auf die richtige Verwendung muss der Benutzer folgende
Anweisungen befolgen:
ES IST VERBOTEN
- den mit flüssigem Brennstoff betriebenen mobilen Heizofen in Wohnwagen, auf
Booten und in Fahrerhäusern zu benutzen.
- den mit flüssigem Brennstoff betriebenen mobilen Heizofen in unzureichend
belüfteten Räumen (die Mindestmaße für zu beheizende Räume entnehmen Sie
bitte der Tabelle mit den technischen Daten), Kellerräumen bzw. in einer Höhe
von über 1900 m zu benutzen.
- Änderungen an den Sicherheitsvorrichtungen des Heizofens vorzunehmen.
Wenn diese Art von Heizung in öffentlich zugänglichen Räumen eingesetzt wer-
den soll, muss eine entsprechende Genehmigung vorliegen. Erkundigen Sie sich
rechtzeitig nach den entsprechenden Vorschriften.
DER RICHTIGE BRENNSTOFF
Ihr Heizofen wurde für die Benutzung von, sauberem Heizpetroleum hoher
Qualität, entwickelt (TOYOTOMI Brennstoff). Nur dieser Brennstoff sorgt für eine
saubere und optimale
Verbrennung. Brennstoff geringerer Qualität kann zu folgen-
den Problemen führen:
erhöhte Störungsanfälligkeit
unvollständige Verbrennung
verkürzte Lebensdauer des Heizofens
Rauch und/oder Geruch
Ablagerung auf dem Gitter oder Gehäuse
Der richtige Brennstoff ist also wichtig für einen sicheren, effizienten und komfor-
tablen Gebrauch Ihres Heizofens.
Eine Beschädigung bzw. eine Störung des Heizofens aufgrund der Verwendung
von anderem als hochwertigem wasserfreiem Heizpetrolem fällt nicht unter die
Garantie.
Informieren Sie sich bei Ihrem Händler in Ihrer direkten Umgebung über den rich-
tigen Brennstoff für Ihren Heizofen.
Nur mit dem richtigen
Brennstoff ist eine
sichere, effiziente und
komfortable Benutzung
Ihres Heizofen
gewährleistet.

'
17
14 TIPS ZUR SICHERHEIT
1 Kinder sind zu beaufsichtigen, um sicherzugehen, dass sie nicht
mit dem Gerät spielen.
2 Transportieren Sie den Ofen NICHT, wenn er brennt oder
noch heiß ist. In diesem Fall auch KEINE Wartungsarbeiten
durchführen.
3 Stellen Sie den Heizofen so auf, daß er sich mit der Vorderseite
minimal 1,5 Meter von Mauern, Gardinen und Möbeln
befindet. Achten Sie ebenfalls darauf, daß der Raum über dem
Heizofen frei ist.
4 Benutzen Sie den Heizofen NICHT in staubigen Räumen und NICHT an Stellen, an denen es stark
zieht. In beiden Fällen erhalten Sie keine optimale Verbrennung. Benutzen Sie den Heizofen
nicht in unmittel- barer Umgebung einer Badewanne, Dusche oder eines Swimmingpools.
5 Schalten Sie den Heizofen aus, bevor Sie das Haus verlassen oder zu Bett gehen. Bei längerer
Abwesenheit (z.B. Urlaub) den Stecker aus der Steckdose ziehen.
6 Lagern und transportieren Sie den Brennstoff ausschließlich in den dazu bestimmten Tanks und
Kanistern.
7 Achten Sie darauf, daß der Brennstoff nicht Hitze oder extremen Temperaturunterschieden
ausgesetzt wird. Lagern Sie den Brennstoff IMMER an einem kühlen, trockenen und dunklen
Ort (Sonnenlicht schadet der Qualität).
8 Benutzen Sie den Heizofen NIEMALS an Stellen, an denen schädliche Gase oder Dämpfe
auftreten könnten (zum Beispiel Auspuffgase oder Farbdämpfe).
9 Das Gitter des Heizofens wird heiß. Der Heizofen darf nicht abgedeckt werden (Brandgefahr).
10 Achten Sie IMMER auf ausreichende Belüftung.
11 Das Heizgerät darf nicht direkt unter einer Steckdose stehen.
12 Kinder unter 3 Jahren dürfen nicht in die Nähe kommen oder sind ständig zu beaufsichtigen.
Kinder von 3-8 Jahren dürfen das Gerät nur dann ein- oder ausschalten, wenn es in seiner
vorgesehenen Betriebsstellung aufgestellt bzw. installiert ist und wenn die Kinder in die
sichere Bedienung des Geräts eingewiesen wurden und die damit einhergehenden Gefahren
verstanden haben. Kinder von 3-8 Jahren dürfen das Gerät nicht anschließen, steuern, reinigen
oder instand halten.
ACHTUNG - Einige Teile dieses Produkts können sehr heiß werden und Verbrennungen
verursachen. Achten Sie besonders auf Kinder und andere gefährdete Menschen.
13 Kinder nicht mit dem Gerät spielen lassen.
14 Reinigungs- und Wartungsarbeiten sollten nicht von Kindern ohne Aufsicht
ausge-führt werden.
Defekte elektrische Geräte und Batterien gehören nicht in den Hausmüll. Bitte
entsorgen Sie den örtlichen Vorschriften gemäß. Erkundigen Sie sich eventuell bei
der Behörde oder bei Ihrem Fachhändler.

!
'
18
GEBRAUCHSANWEISUNG
A DIE INSTALLATION DES HEIZOFENS
1
Nehmen Sie den Heizofen vorsichtig aus dem Karton und kontrollieren Sie
den Inhalt auf Vollständigkeit.
Außer dem Heizofen muß folgendes vorhanden sein:
eine Syphonpumpe
ein Transportverschluß
diese Gebrauchsanweisung
Bewahren Sie den Karton und das Verpackungsmaterial (Abb. A) zwecks
Lagerung und/oder Transport auf.
2
Öffnen Sie den Deckel des Brennstofftanks 4 und entfernen Sie das Stück-
chen Karton.
3
Befüllen Sie den Brennstofftank wie in Kapitel B beschrieben.
4
Der Boden muß stabil und waagrecht sein. Stellen Sie den Kamin an eine an-
dere Stelle, falls er nicht waagrecht steht. Versuchen Sie nicht durch Unterla-
ge von Büchern oder Ähnlichem den Stand zu korrigieren.
5
Stecken Sie den Stecker J in die Steckdose (230 Volt - AC/50 Hz) und stellen
Sie die aktuelle Uhrzeit über die Einstelltasten N ein (siehe Kapitel C).
6
Ihr Heizofen ist jetzt betriebsbereit.
EINSATZGEBIET/-HÖHE
1
Verwenden Sie das Heizgerät auf einer Höhe zwischen 800 und 1300 m, dann
nutzen Sie den Höhenmodus 1. Drücken Sie die Höhentaste mit einer
dünnen Stange (z. B. einer Büroklammer) und stecken Sie gleichzeitig den
Stecker in die Steckdose. Auf der Anzeige erscheint “1
”.
2
Verwenden Sie das Heizgerät auf einer Höhe zwischen 1300 und 1900 m,
dann nutzen Sie den Höhenmodus 2. Nach Einstellung des Höhenmodus
1 drücken Sie die Höhentaste mit einer dünnen Stange und stecken Sie
gleichzeitig den Stecker erneut in die Steckdose. Dann erscheint “2
” in der
Anzeige.
3
Schalten Sie den Höhenmodus aus, indem Sie die Höhentaste drücken
und gleichzeitig den Stecker in die Steckdose stecken, nachdem Sie den
Höhenmodus 2 eingestellt haben. Auf der Anzeige erscheint “0” und “
”
verschwindet.
HINWEIS:
Wenn der Höhenmodus 1 eingestellt ist, erscheint in der Anzeige das
Höhensymbol “
”. Wenn der Höhenmodus 2 eingestellt ist, blinkt das
Höhensymbol “
” während des Betriebs.
HINWEIS:
Bei einem Stromausfall oder nach dem Abtrennen des Heizgeräts
bleibt die Höheneinstellung erhalten.
Verwenden Sie den Heizer nicht in einer Höhe von über 1900 Metern.
LAUTSTÄRKE EINSTELLEN
Die Lautstärke des Summers an diesem Heizgerät kann geregelt werden. Die
Ausgangsstellung ist hohe Lautstärke.
1
Halten Sie die Taste SAVE 3 Sekunden gedrückt, dann wechselt die
Summerlautstärke von hoch zu niedrig.
2
Halten Sie die Taste SAVE erneut 3 Sekunden gedrückt, dann wechselt die
Summerlautstärke von niedrig zu hoch.
HINWEIS:
Die Lautstärke kann hoch oder niedrig sein, doch der Alarm des
Sicherheitsgeräts ertönt immer laut.
HINWEIS:
Bei einem Stromausfall oder nach dem Abtrennen des Heizgeräts ist
die Lautstärke wieder hoch.
B
A

!
'
19
F: Wenn die 4-Stellige
Zahl nicht mehr blinkt,
sind die Einstellungen
gespeichert.
B DAS BEFÜLLEN MIT BRENNSTOFF
Füllen Sie den Brennstofftank an einer dazu geeigneten Stelle (falls etwas ver-
schüttet wird). Gehen Sie wie folgt vor:
1
Der Heizofen muss ausgeschaltet sein.
2
Öffnen Sie den Deckel und ziehen Sie den Brennstofftank aus dem Heizofen
(Abb. B). Stellen Sie den Brennstofftank ab (Tankverschluß nach oben, Griff
auf dem Boden) und drehen Sie den Tankverschluß auf (Abb. C).
HINWEIS: Der Tank kann kurz nachtropfen.
3
Füllen Sie den Brennstofftank mit einer Brennstoffpumpe (siehe Gebrauchsan-
weisung Brennstoffpumpe). Dabei ist darauf zu achten, dass der Kanister
höher steht als der Brennstofftank (Abb. D). Den geriffelten Schlauch stecken
Sie dann in die Öffnung des Brennstofftanks.
4
Achten Sie während des Füllvorgangs auf die Brennstoffanzeige des
Brennstofftanks (Abb. E). Wenn Sie sehen, daß der Tank fast voll ist, stellen-
Sie den Füllvorgang ein. Den Tank niemals zu voll füllen. Vor allem nicht,
wenn der Brennstoff sehr kalt ist (Brennstoff dehnt sich aus, wenn er wärmer
wird).
5
Lassen Sie den Brennstoff, der sich noch in der Pumpe befindet, in den
Kanister zurückströmen und entfernen Sie die Pumpe vorsichtig. Schrauben
Sie den Tankverschluß wieder sorgfältig auf den Tank. Wischen Sie eventuell
verschütteten Brennstoff weg.
6
Kontrollieren Sie, ob der Tankverschluß gerade sitzt und fest angezogen ist.
Setzen Sie den Brennstofftank wieder in den Heizofen ein (Tankverschluß
nach unten). Schließen Sie den Deckel.
C DAS EINSTELLEN DER UHR
Die Zeiteinstellung können Sie nur vornehmen, wenn der Heizofen nicht in Betrieb
ist, der Stecker sich jedoch in der Steckdose befindet. Sie benutzen dazu die
Einstelltasten N. Drücken Sie zuerst auf eine der beiden Tasten um die Funktion
zu aktivieren (die 4-Stellige Zahl K im Informations-Display blinkt.). Danach kön-
nen Sie die Stunden mit der linken Taste (Nhour) einstellen und die Minuten
mit der rechten Taste (Mmin.). Durch einmaliges Drücken der Taste wird der Wert
stufenweise erhöht. Wenn Sie die Taste gedrückt halten, erhöht sich der Wert, bis
die Taste losgelassen wird. Nach ungefähr 10 Sekunden leuchtet die die 4-Stellige
Zahl und die Einstellung ist vorgenommen (Abb. F). 5 Minuten nachdem der Ofen
ausgeschaltet worden ist, wird die Information auf dem Display gelöscht und der
Ofen wird in den Standby-Modus umgeschaltet. Nachdem auf eine willkürliche
Taste gedrückt worden ist, erscheint wieder die Uhrzeit auf dem Display.
Wenn der Stecker aus der Steckdose gezogen wurde (oder bei Stromausfall)
muß die Zeit erneut eingestellt werden.
E
leer voll
C
D

!
'
20
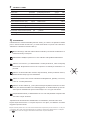
H: Die Kontroll-Lampe
TIMER zeigt an, daß die
Zeitschaltuhr aktiviert
ist.
D DAS STARTEN DES HEIZOFENS
Ein neuer Ofen verursacht zu Beginn etwas Geruch. Sorgen Sie deswegen für
zusätzliche Belüftung.
Starten Sie den Heizofen immer mit die
-Taste L. Niemals Streichhölzer oder
ein Feuerzeug benutzen.
Um den Heizofen zu starten, brauchen Sie nur die
-Taste L zu betätigen. Die
An/Aus-Lampe blinkt dann, um zu zeigen, daß der Zündvorgang läuft. Es
dauert einige Zeit bis der Vorgang abgeschlossen ist. Anschließend leuchtet die
An/Aus-Lampe ständig. Das Informations-Display K zeigt zwei Zahlen an. An
den Kontroll-Lampen neben den Zahlen können Sie sehen, daß sich diese auf
die Temperatur beziehen (Abb. G). Unter ROOM steht die tatsächliche Raum-
temperatur, während unter SET die von Ihnen eingestellte Temperatur angezeigt
wird. Letztere können Sie über die Einstelltasten verändern (siehe Kapitel E).
Kontrollieren Sie vor dem Starten des Heizofens immer ob sich noch genügend
Brennstoff im Brennstofftank befindet.
E TEMPERATUREINSTELLUNG
Sie können die eingestellte Temperatur nur verändern, wenn der Heizofen einge-
schaltet ist. Hierzu benutzen Sie die Einstelltasten N. Drücken Sie zuerst auf eine
der beiden Tasten um die Funktion zu aktivieren (die °C K Blinkt). Danach können
Sie die Temperatur mit der rechten Taste (Mmin.) höher und mit der linken Taste
(Nhour) niedriger einstellen. Nach ungefähr 10 Sekunen blinkt die 4-Stellige Zahl
nicht mehr, die Einstellung ist abgeschlossen (Abb. G).
Sie können die Temperatur auf minimal 6°C und maximal 28°C einstellen.
Wenn der Stecker aus der Steckdose gezogen wurde (oder bei Stromausfall) ist
die eingestellte Temperatur wieder auf dem Standardwert von 20°C.
F DIE BENUTZUNG DER ZEITSCHALTUHR (TIMER)
Mit Hilfe der Zeitschaltuhr kann der Heizofen zu einem vorprogrammierten
Zeitpunkt automatisch eingeschaltet werden.
Um die Zeitschaltuhr programmieren zu können, muß die aktuelle Uhrzeit einge-
stellt (siehe Kapitel C) und der Heizofen ausgeschaltet sein.
Sie gehen wie folgt vor:
1
Die
-Taste L betätigen und direkt danach die TIMER Taste O drücken.
Die Zeitschaltuhrlampe und die 4-Stellige Zahl K blinken.
2
Stellen Sie die Startzeit für den Heizofen über die Einstelltasten N ein.
Die linke Taste (Nhour) ist für die Stunden, die rechte Taste (Mmin.)
für die Einstellung der Minuten (Die Zeit lässt sich in 5 Minuten-Intervallen
einstellen).
3
Nach ungefähr 10 Sekunden zeigen die 4 Zahlen CLOCK an, und die Zeitschal-
tuhrlampe zeigt an, daß die Zeitschaltuhr aktiviert wurde (Abb. H).
4
Die Zeitschaltuhr sorgt dafür, daß der Raum zur programmierten Zeit die
gewünschte Temperatur annähernd erreicht hat.
Wenn Sie den Heizofen ausschalten möchten und ihn über die Zeitschaltuhr
wieder einschalten lassen wollen, dann brauchen Sie nur die Taste TIMER zu
betätigen (siehe Kapitel G).
Um die Einstellung der Zeitschaltuhr rückgängig zu machen, betätigen Sie ein-
mal die
-Taste L.
G: Links die eingestellte
Temperatur, rechts die
tatsächliche Temperatur.
A página está carregando...
A página está carregando...
A página está carregando...
A página está carregando...
A página está carregando...
A página está carregando...
A página está carregando...
A página está carregando...
A página está carregando...
A página está carregando...
A página está carregando...
A página está carregando...
A página está carregando...
A página está carregando...
A página está carregando...
A página está carregando...
A página está carregando...
A página está carregando...
A página está carregando...
A página está carregando...
A página está carregando...
A página está carregando...
A página está carregando...
A página está carregando...
A página está carregando...
A página está carregando...
A página está carregando...
A página está carregando...
A página está carregando...
A página está carregando...
A página está carregando...
A página está carregando...
A página está carregando...
A página está carregando...
A página está carregando...
A página está carregando...
A página está carregando...
A página está carregando...
A página está carregando...
A página está carregando...
A página está carregando...
A página está carregando...
A página está carregando...
A página está carregando...
A página está carregando...
A página está carregando...
A página está carregando...
A página está carregando...
A página está carregando...
A página está carregando...
A página está carregando...
A página está carregando...
A página está carregando...
A página está carregando...
A página está carregando...
A página está carregando...
A página está carregando...
A página está carregando...
A página está carregando...
A página está carregando...
A página está carregando...
A página está carregando...
A página está carregando...
A página está carregando...
A página está carregando...
A página está carregando...
A página está carregando...
A página está carregando...
A página está carregando...
A página está carregando...
A página está carregando...
A página está carregando...
A página está carregando...
A página está carregando...
A página está carregando...
A página está carregando...
A página está carregando...
A página está carregando...
A página está carregando...
A página está carregando...
A página está carregando...
A página está carregando...
A página está carregando...
A página está carregando...
A página está carregando...
A página está carregando...
A página está carregando...
A página está carregando...
A página está carregando...
A página está carregando...
A página está carregando...
A página está carregando...
A página está carregando...
A página está carregando...
A página está carregando...
A página está carregando...
A página está carregando...
A página está carregando...
A página está carregando...
A página está carregando...
A página está carregando...
A página está carregando...
A página está carregando...
A página está carregando...
A página está carregando...
A página está carregando...
A página está carregando...
A página está carregando...
A página está carregando...
A página está carregando...
A página está carregando...
A página está carregando...
A página está carregando...
A página está carregando...
-
 1
1
-
 2
2
-
 3
3
-
 4
4
-
 5
5
-
 6
6
-
 7
7
-
 8
8
-
 9
9
-
 10
10
-
 11
11
-
 12
12
-
 13
13
-
 14
14
-
 15
15
-
 16
16
-
 17
17
-
 18
18
-
 19
19
-
 20
20
-
 21
21
-
 22
22
-
 23
23
-
 24
24
-
 25
25
-
 26
26
-
 27
27
-
 28
28
-
 29
29
-
 30
30
-
 31
31
-
 32
32
-
 33
33
-
 34
34
-
 35
35
-
 36
36
-
 37
37
-
 38
38
-
 39
39
-
 40
40
-
 41
41
-
 42
42
-
 43
43
-
 44
44
-
 45
45
-
 46
46
-
 47
47
-
 48
48
-
 49
49
-
 50
50
-
 51
51
-
 52
52
-
 53
53
-
 54
54
-
 55
55
-
 56
56
-
 57
57
-
 58
58
-
 59
59
-
 60
60
-
 61
61
-
 62
62
-
 63
63
-
 64
64
-
 65
65
-
 66
66
-
 67
67
-
 68
68
-
 69
69
-
 70
70
-
 71
71
-
 72
72
-
 73
73
-
 74
74
-
 75
75
-
 76
76
-
 77
77
-
 78
78
-
 79
79
-
 80
80
-
 81
81
-
 82
82
-
 83
83
-
 84
84
-
 85
85
-
 86
86
-
 87
87
-
 88
88
-
 89
89
-
 90
90
-
 91
91
-
 92
92
-
 93
93
-
 94
94
-
 95
95
-
 96
96
-
 97
97
-
 98
98
-
 99
99
-
 100
100
-
 101
101
-
 102
102
-
 103
103
-
 104
104
-
 105
105
-
 106
106
-
 107
107
-
 108
108
-
 109
109
-
 110
110
-
 111
111
-
 112
112
-
 113
113
-
 114
114
-
 115
115
-
 116
116
-
 117
117
-
 118
118
-
 119
119
-
 120
120
-
 121
121
-
 122
122
-
 123
123
-
 124
124
-
 125
125
-
 126
126
-
 127
127
-
 128
128
-
 129
129
-
 130
130
-
 131
131
-
 132
132
-
 133
133
-
 134
134


Zibro LC 30 Manual do usuário
- Categoria
- Aquecedores de ambiente
- Tipo
- Manual do usuário
em outras línguas
- español: Zibro LC 30 Manual de usuario
- français: Zibro LC 30 Manuel utilisateur
- italiano: Zibro LC 30 Manuale utente
- Nederlands: Zibro LC 30 Handleiding
- Deutsch: Zibro LC 30 Benutzerhandbuch
- dansk: Zibro LC 30 Brugermanual
- svenska: Zibro LC 30 Användarmanual
Artigos relacionados
-
Toyotomi zibro LC – 32 Manual do proprietário
-
Zibro LC 40 Manual do proprietário
-
-
-
-
Zibro LC-SL530 Toyotomi Manual do proprietário
-
-
-
-