
345 Encinal Street
Santa Cruz, California 95060
831.458.7700
www.plantronics.com
Printed in the U.S.A. 46932-01 © 4•0 0 Plantronics Inc.
CT10MultiLangCover.R1 7/3/00 2:16 PM Page 1

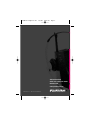
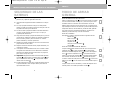
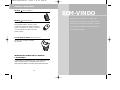
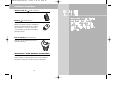
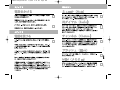
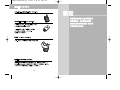
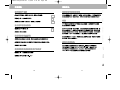
Cordless Headset
Telephone
Model CT10
User Guide
Guide d’Utilisation
Guía para el usuario
Manual de usuário
CT10MultiLangCover.R1 7/3/00 2:16 PM Page 2

A
D
B
E
C
F
G
P
U
L
S
E
T
O
N
E
D
C
9
V
Off On
Ringer
M
u
t
e
R
e
d
ia
l
M
e
m
C
h
a
n
n
e
l
F
la
s
h
1
2
A
B
C
8
T
U
V
7
P
R
S
5
J
K
L
4
G
H
I
0
O
P
E
R
3
D
E
F
6
M
N
O
9
W
X
Y
*
#
T
A
L
K
H
AN
G
U
P
P
o
w
e
r
C
h
a
r
g
e
T
a
l
k
P
a
g
e
Mute
Redial
Mem
Channel
Flash
1
2
A
B
C
8
T
U
V
7
P
R
S
5
J
K
L
4
G
H
I
0
O
P
E
R
3
DEF
6
MNO
9
WXY
*
#
T
A
L
K
H
A
N
G
U
P
P
o
w
e
r
C
h
a
r
g
e
T
a
l
k
P
a
g
e
M
u
te
Red
ial
M
e
m
C
ha
nne
l
Fla
sh
T
A
L
K
H
A
N
G
U
P
1
2
A
B
C
9
W
X
Y
8
T
U
V
7
P
R
S
6
M
N
O
5
J
K
L
4
G
H
I
3
D
E
F
0
O
P
E
R
*
#
M
u
te
R
e
d
ia
l
M
e
m
C
h
a
n
n
e
l
F
la
s
h
T
A
L
K
HA
NG
UP
1
2
A
B
C
9
W
X
Y
8
T
U
V
7
P
R
S
6
M
N
O
5
J
K
L
4
G
H
I
3
D
E
F
0
O
P
E
R
*
#
B
i
CT10MultiLangCover.R1 7/3/00 2:16 PM Page 3

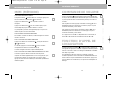
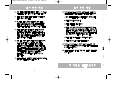
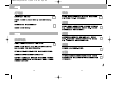
DIAGRAM
P
U
L
S
E
T
O
N
E
D
C
9
V
Power
Charge
Tal k
P
a
g
e
Off On
Ringer
Mute
Redial
Mem
Channel
Flash
TALK
H
A
N
G
U
P
1
2
ABC
9
W
X
Y
8
TUV
7
PRS
6
M
N
O
5
JKL
4
GHI
3
D
E
F
0
O
P
ER
*
#
1
3
2
6
5
10
9
12
13
15
14
18
17
16
21
20
19
23
22
26
25
24
29
28
27
32
30
33
31
11
7
8
4
ii
CT10MultiLangCover.R1 7/3/00 2:16 PM Page 4

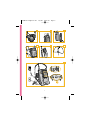
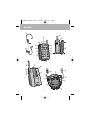
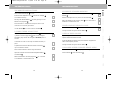
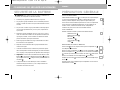
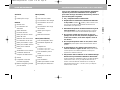
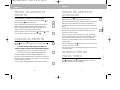
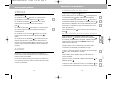
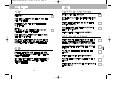
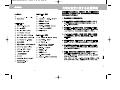
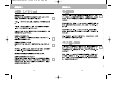
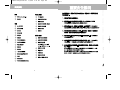
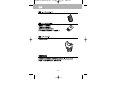
Headset
Headset (P/N 47349-01)
Clothing Clip
Remote
CT10 Remote
Mute Indicator Light
Mute Button
Jack
Redial Button
Channel Button
Headset Cable Retainer
In-Use Indicator Light
Talk/Hangup Button
Flash Button
Memory (Mem) Button
12 Button Keypad
Dual Function Receive
Volume Control
Antenna
Ringer ON/OFF
Rechargeable Battery
and Belt Clip
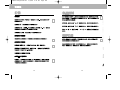
Base (Front)
CT10 Base
Headset Holder/Antenna
Power Indicator Light
In-Use Indicator Light (Talk)
Battery Charge Indicator
Light
Remote Charging Well
Page Button
Base (Underside)
AC Adapter Jack
AC Adapter Plug
AC Adapter
(P/N 46924-01 for 120V) or
(P/N 46935-01 for 220V – 240 V)
Telephone Wall Jack
Telephone Line Cord
Telephone Jack
Cord Retainer Clip
Pulse/Tone Switch
2
5
3
4
8
17
7
16
15
14
13
12
11
9
1
6
DIAGRAM KEY
18
iii
10
26
25
24
23
22
21
20
27
28
19
33
32
31
30
29
25
DIAGRAM KEY
CT10MultiLangCover.R1 7/3/00 2:16 PM Page 5

CT10MultiLangCover.R1 7/3/00 2:16 PM Page 6

WEL
CO
ME
Thank you for selecting the CT10
Cordless Headset Telephone System from
Plantronics. This User Guide will help you
install your CT10 Telephone System
and learn its basic operation
CT10MultiLangInside.R1 7/3/00 2:20 PM Page 1

3
2
When using your telephone equipment, basic safety
precautions should always be followed to reduce the risk of
fire, electric shock, and injury to persons, including the
following:
1. Read and understand all instructions.
2. Follow all warnings and instructions marked on the
product. The symbol identifies and alerts the user to the presence of
important operating and service instructions.
3. Unplug this product from the wall outlet before cleaning.
Do not use liquid cleaners or aerosol cleaners. Use a damp cloth for
cleaning.
4. Do not locate base unit near water, for example, near a
bathtub, wash bowl, kitchen sink, or laundry tub, in a
wet basement or near a swimming pool.
5. Do not place this product on an unstable cart, stand or
table. The product may fall, causing serious damage to the product.
6. This product should never be placed near or over a
radiator or heat register. This product should not be placed in a
built-in installation unless proper ventilation is provided.
7. This product should be used with the supplied Class 2
Direct Plug-In Power Unit rated 9 VDC 500 mA. Plantronics
Part No. 46924-01 has a rated input voltage of 120 VAC, 60 Hz and
an output voltage of 9 VDC at 500mA. Plantronics Part No. 46935-01
has a rated input voltage of 220 VAC - 240 VAC, 50 Hz and an output
voltage of 9 VDC at 500mA.
IMPORTANT SAFETY INSTRUCTIONS
IMPORTANT SAFETY INSTRUCTIONS
8. Do not allow anything to rest on the power cord. Do
not locate this product where the cord will be abused by persons
walking on it.
9. Do not overload outlets and extension cords as this can
result in the risk of fire or electric shock.
10. Never push objects of any kind into this product
through base unit slots as they may touch dangerous voltage
points or short out parts that could result in a risk of fire or electric
shock. Never spill liquid of any kind on the product.
11. To reduce the risk of electric shock, do not disassem-
ble this product, but take it to qualified service personnel when
service or repair work is required. Opening or removing covers
may expose you to dangerous voltages or other risks. Incorrect re-
assembly can cause electric shock when the product is subsequent-
ly used.
12. Avoid using telephone equipment during an electrical
storm. The CT10 System has built-in surge protection circuits that
meet or exceed FCC requirements. However, an incident such as a
lightning strike at or near the telephone lines, could cause serious
damage. There may also be a remote risk of electric shock or dam-
age from lightning. If the CT10 System is installed in an area with
frequent and/or severe electrical storms, it is suggested that the
telephone be disconnected during these storms or that additional
surge suppression equipment be added to the installation.
13. Do not use the telephone equipment to report a gas
leak in the vicinity of the leak.
SAVE THESE INSTRUCTIONS
ENGLISH FRANÇAIS ESPAN
˜
OL PORTUGUE
ˆ
S KOREAN JAPANESE CHINESE
CT10MultiLangInside.R1 7/3/00 2:20 PM Page 2

5
ENGLISH FRANÇAIS ESPAN
˜
OL PORTUGUE
ˆ
S KOREAN JAPANESE CHINESE
IMPORTANT SAFETY INSTRUCTIONS
SAVE THESE INSTRUCTIONS
CAUTION: To reduce the risk of fire or injury to persons, read and
follow these instructions.
1. Use only the battery pack supplied with this product.
2. Do not dispose of battery pack in a fire. The cells may explode.
Check with local codes for possible disposal instructions.
3. Do not open or mutilate battery pack. Released electrolyte is corro-
sive and may cause damage to eyes or skin and may be toxic if
swallowed.
4. Exercise care in handling the battery pack in order not to "short" the
battery contacts with conducting materials such as rings, bracelets,
and keys. The battery or conductor may overheat and cause burns.
5. Charge the battery pack in accordance with instructions supplied
with this unit.
6. Observe proper orientation between battery pack and charger con-
tacts.
7. Contact your local, county, or state hazardous waste management
authorities for information on recycling or disposal programs in your
area.
8. Important: The new battery pack must be attached to the Remote
and charged in the Charging Well until the Charge Indicator
Light goes off before it can be used away from the Base .
9. The maximum standby time for a freshly charged battery pack is
approximately 7 days. The maximum talk time is approximately 6
hours.
19
23
24
3
BATTERY SAFETY
4
14. Unplug this product from the wall outlet and refer
servicing to qualified service personnel under the
following conditions
a) When the power supply cord or plug is damaged or frayed.
b) If liquid has been spilled into the product.
c) If the product has been exposed to rain or water.
d) If the product does not operate normally by following the operating
instructions. Adjust only those controls that are covered by the
operating instructions because improper adjustments of other
controls may result in damage and will often require extensive work
by a qualified technician to restore the product to normal operation.
e) If the product has been dropped or the base unit has been
damaged.
f) If the product exhibits a distinct change in performance.
15. This product requires AC power in order to operate. In order to
have phone service during a power outage, have another telephone
available that is powered only by the telephone line.
16. Keep all product cords and cables away from operating
machinery.
IMPORTANT SAFETY INSTRUCTIONS
CT10MultiLangInside.R1 7/3/00 2:20 PM Page 4

7
ENGLISH FRANÇAIS ESPAN
˜
OL PORTUGUE
ˆ
S KOREAN JAPANESE CHINESE
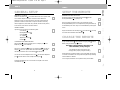
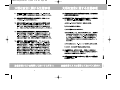
STEP 1
SETUP THE REMOTE
PREPARING THE REMOTE FOR USE
Remove the paper separator between the Remote and the
Rechargeable Battery by pulling it out.
Note: If the paper rips before coming out. The Remote and the
Rechargeable Battery Pack can be separated by sliding the Remote up
and the Battery Pack down. They can be reassembled by reversing this
action.
Plug the Headset into the Headset Jack on the Remote and snap
the Cable into the Headset Cable Retainer .
9
3
6
18
3
CHARGE THE REMOTE
Firmly slide the Remote into the Remote Charging Well until the
Battery Charge Indicator Light flashes.
The Battery Charge Indicator Light will go off
when the battery is fully charged.
(It’s important to make good contact in the
charging well to properly charge the battery.)
The Remote may be operated while in its Charging Well after gaining
5 seconds of orientation. The Charge Indicator Light will stop flickering
when orientation is attained.
Once charged, the Remote can be operated away from the Base.
23
24
3
6
SELECTING A LOCATION
Install the CT10 Base Unit in a location that is near an AC power outlet
and a modular telephone line jack. The base’s location effects the
telephone’s range. Try several locations to see which provides the best
performance. Select a location that is away from electrical machinery,
electrical appliances, metal walls, filing cabinets, wireless security alarms,
room monitors, and areas of excessive moisture.
GETTING STARTED
Unpack the unit and check for the following items:
CT10 Remote
Rechargeable Battery
CT10 Base
AC Adapter
Telephone Line Cord
Headset
CONNECTING THE TELEPHONE BASE
Place the Base on its back exposing the AC Adapter Jack and
Telephone Jack on its underside.
Plug the AC Adapter Plug into the AC Adapter Jack . Plug the AC
Adapter into an AC power outlet. The Power Indicator will light
after being connected. The In-Use Indicator will remain off.
Connect one end of the Telephone Line Cord into the Base’s Telephone
Jack and the other end into a Telephone Wall Jack .
Press both the Telephone Line Cord and the AC Adapter Cord into the
Cord Retainer Clip .
32
29
31
30
22
21
28
26
27
31
26
19
1
30
28
19
18
3
19
G
A
STEP 1
A
G
G
B
E
E
D
G
C
GENERAL SETUP
CT10MultiLangInside.R1 7/3/00 2:21 PM Page 6

9
ENGLISH FRANÇAIS ESPAN
˜
OL PORTUGUE
ˆ
S KOREAN JAPANESE CHINESE
STEP 3
STEP 2
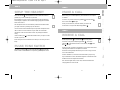
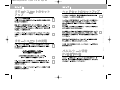
MAKE A CALL
Before using your cordless telephone, put the headset on and adjust it
as needed.
To make a call, press the Talk/Hangup Button on the Remote .
The In-Use Indicator will light.
When you hear dial tone, enter the number you want to call.
To disconnect a call, press the Talk/Hangup Button .
11
10
3
11
RECEIVE A CALL
Set the Ringer Switch on the Remote to the ON position.
To answer a call press the Talk/Hangup Button . The In-Use
Indicator on the Remote and the In-Use Indicator (Talk) on the
Base will light.
When you press any button on the Remote, a short sound will be heard
indicating that the Base has accepted the command.
Three short warning beeps indicate that you are out of range, or there
is too much interference.
If there is interference, move closer to the base before you press any
key. If interference is severe, the Remote might lose communication with
the Base and the call might be disconnected.
This does not happen often, but if it does, return the Remote to the
Charging Well for a few seconds.
19
22
10
11
3
17
8
Put on the Headset , and adjust the band until it rests with almost no
pressure on your ear and the top of your head.
If the headset is too loose, remove it and gently push the headset band
inward slightly to tighten it. If the headset is tight, gently pull the headset
band out to loosen it.
The microphone boom can be swiveled to position the headset on either
your right or left ear by rotating it up over the head.
Use one hand to hold the headset in place. Adjust the microphone boom
until it is about 1 inch from the side of your mouth. Do not twist the
microphone on the end of the boom as this may damage the internal
wiring.
Use the Clothing Clip to attach the headset cord to your lapel or collar
and out of your way.
Leave enough slack in the headset cord so that you can move your head
freely.
2
1
F
SETUP THE HEADSET
The Pulse/Tone Switch is located under the Base simply push the
switch to Pulse or Tone as desired or required by your telephone service.
19
33
PULSE/TONE SWITCH
STEP 1
F
F
G
G
CT10MultiLangInside.R1 7/3/00 2:21 PM Page 8

11
ENGLISH FRANÇAIS ESPAN
˜
OL PORTUGUE
ˆ
S KOREAN JAPANESE CHINESE
SPECIAL BUTTONS
MEM (MEMORY)
TO STORE NUMBERS
The In-Use Indicator Light should be off. If it is not off, press the
Talk/Hang Up Button once to shut it off.
Press the Mem Button followed by the numbers you want to store.
Press the Mem Button followed by the one digit number (0-9) on the
Telephone Keypad that you want to assign for that number.
You can repeat the process for storing numbers until the 10 single
numbers on the keypad are used up.
TO CHANGE STORED NUMBERS
To change a number stored in memory, simply store a new number in
that memory location.
TO DIAL STORED NUMBERS
Press the Talk/Hang Up Button . The In-Use Indicators and will
light up.
When the dial tone is heard, press the MEM Button , then press the
desired single digit (0-9) memory location button.
The stored number you have selected will be automatically dialed.
TO DIAL A STORED NUMBER DURING A CALL
The memory/recall function also works when additional numbers are
required during the call such as a numeric password. At the
appropriate time during the call press Mem and the assigned key to
rapidly transmit the stored numbers.
13
13
10
22
11
13
13
11
22
10
The Mute Button stops the voice transmission to the receiving party.
When activated, the red LED is "On." Press the Mute Button again to
deactivate the mute function.
4
5
G
MUTE
The Redial Button redials the last number dialled. To use, press the
Talk/Hang-up Button . When a dial tone is heard, press the Redial
Button.
The last number entered will be dialled just as you would have redialled it
manually.
11
7
REDIAL
Your cordless headset telephone has an auto scan feature that
automatically selects a clear channel when you press the Talk/Hangup
Button . If you experience interference during a call, press the Channel
Button to switch to another channel until you have good reception.
8
11
CHANNEL
FLASH
Use the Flash Button to access services such as call waiting, etc.
12
The CT10 speed dial memory can store up to 10 phone numbers,
containing a maximum of 16 digits. The 0 through 9 buttons on the
keypad recall and dial the phone numbers stored in memory.
MEM (MEMORY)
G
SPECIAL BUTTONS
G
G
G
G
G
G
G
CT10MultiLangInside.R1 7/3/00 2:21 PM Page 10

AUDIO
13
ENGLISH FRANÇAIS ESPAN
˜
OL PORTUGUE
ˆ
S KOREAN JAPANESE CHINESE
SPECIAL BUTTONS
REMOTE
In-Use Indicator Light — Green LED is "On" only when Remote Talk
Button is activated.
Mute Indicator Light — Red LED is "On" only when transmit audio
is "muted."
BASE
Power Indicator Light — Red LED is "On" whenever the power is
applied to the Base via the AC Power Adapter.
In-Use Indicator Light (Talk) — Green LED is "On" only when
Remote Talk Button is activated.
Charge Indicator Light — Amber LED flashes for 2 seconds while
verifying contact when Remote is placed in Charging Well . It
remains "On" while charging and turns off when battery is fully
charged.
24
23
11
22
21
19
4
11
10
3
Low Battery — Two (2) beeps generated at 30 second intervals
whenever battery power is low, heard only through the headset in TALK
mode.
Out-of-Range — Three (3) beeps generated whenever the Remote is
taken out-of-range of the Base, heard only through the headset in TALK
mode.
12
The Dual Function Volume Control Keys on the 12 Button Keypad
allow you to adjust the sound level that you hear through the headset. This
feature is especially useful for people who have trouble hearing, or are in
an especially noisy area like a kitchen or workshop.
To increase volume, push and hold the ‘▲/✱’ Key on the Remote for a
minimum of 2 seconds or until the volume is comfortable, then release the
key.
To decrease the volume, push and hold the ‘▼/#’ Key on the Remote for
a minimum of 2 seconds until the volume is comfortable, then release the
key.
Pressing the ‘✱’ or ‘#’ key for less than 1 second will cause the ‘✱’ or ‘#’
to function normally as ‘✱’ or ‘#’ keys.
14
15
G
VOLUME CONTROL
The Page Button on the Base allows someone to summon you. By
pressing the Page Button for less than 2 seconds, it sends a message to the
Remote by emitting two long, loud beeps.
If you have misplaced the Remote, press the Page Button for a minimum of
3 seconds and the Remote will emit a steady alert. Press the Talk Button
once you have located the Remote or put it into the Charging Well.
25
PAGE FUNCTION
SPECIAL BUTTONS
G
G
G
VISUAL
CT10MultiLangInside.R1 7/3/00 2:21 PM Page 12

15
MY REMOTE STOPPED WORKING
Separate and then reconnect the Rechargeable Battery and
Remote .
Remove and replace the AC power cord from the Base .
Return the Remote to the Charging Well for 5 seconds to re-
establish a communication link.
CALLER CANNOT HEAR MY VOICE
Make sure the Mute Button is off.
Change Channels using the Channel Button .
I HEAR A BUZZ OR HUM
Try locating your Base in different positions and make sure no
objects obstruct the Remote or Base.
Locate the Remote and Base away from electronic equipment or
other radio-frequency devices.
Change Channels using the Channel Button .
I CAN HEAR OTHER CORDLESS DEVICE USERS
Press the Channel Button until you get a clear signal.
Use the Remote closer to the Base .
19
3
8
8
8
5
24
19
3
18
TROUBLESHOOTING
14
THE REMOTE DOES NOT RING
Make sure that the Ringer is "On".
Ensure that the Telephone Cord and the AC Adapter
are installed correctly.
Recharge the Remote Battery by firmly placing it in the
Remote Charging Well .
Disconnect the AC Adapter from the power source and
reconnect it in a known good outlet.
Use the Remote in an area closer to the Base .
I CANNOT HEAR A DIAL TONE
Make sure your Remote Rechargeable Battery is secure-
ly seated in the Charging Well and/or fully charged.
The Battery may need to be charged for 8 hours prior to
first use.
Check that all cords are correctly connected and firmly in
place.
Adjust the Dual Function Receive Volume Control Key
up to increase the volume.
Make sure the Remote is within range of the Base.
Separate and then reconnect the Rechargeable Battery
and Remote .
Return the Remote to the Charging Well for 5 seconds
to re-establish a communication link.
24
3
18
15
24
18
19
3
24
18
28
30
17
TROUBLESHOOTING
A
E
G
C
A
E
G
E
ENGLISH FRANÇAIS ESPAN
˜
OL PORTUGUE
ˆ
S KOREAN JAPANESE CHINESE
C
A
E
G
CT10MultiLangInside.R1 7/3/00 2:21 PM Page 14

17
INDUSTRY CANADA NOTICE
This Class B digital apparatus complies with
Canada ICES003.
Notice: The Industry Canada label identifies certified equipment. This certification
means that the equipment meets certain telecommunications network protective,
operational and safety requirements. The Department does not guarantee the
equipment will operate to the users satisfaction.
Before installing this equipment, users should ensure that it is permissible to be
connected to the facilities of the local telecommunications company. The
equipment must also be installed using an acceptable method of connection. In
some cases, the company’s inside wiring associated with a single line individual
service may be extended by means of a certified connector assembly (telephone
extension cord). The customer should be aware that compliance with the above
conditions may not prevent degradation of service in some situations.
Repairs to certified equipment should be made by an authorised Canadian
maintenance facility designated by the supplier. Any repairs or alterations made
by the user to this equipment, or equipment malfunctions, may give the
telecommunications company cause to request the user to disconnect
the equipment.
Users should ensure for their own protection that the electrical ground
connections of the power utility, telephone lines and internal metallic water pipe
system, if present, are connected together. This precaution may be particularly
important in rural areas.
Caution: Users should not attempt to make such connections themselves, but
should contact the appropriate electric inspection authority, or electrician, as
appropriate.
Notice: The Ringer Equivalence Number (REN) assigned to each terminal device
provides an indication of the maximum number of terminals allowed to be
connected to a telephone interface. The termination on an interface may consist
of any combination of devices subject only to the requirement that the sum of the
Ringer Equivalence Numbers of all devices does not exceed 5.
See label on unit for REN No., as applicable.
16
I NEED MORE TALK TIME
A second Battery may be held in the Charging Well
while the Remote is in use. This provides an immediate
source of additional talk time. Extra Batteries are listed
under Supplies and Accessories.
MAINTENANCE
The CT10 System has been designed to give years of trou-
ble free service. To help insure its longevity, please read
the following maintenance instructions:
Keep the CT10 System dry. If it gets wet, first unplug the
AC adapter then wipe the unit dry immediately. Liquids
can contain minerals that can corrode electronic circuits.
Use and store the CT10 System only in normal temperature
environments. High temperatures can shorten the life of
electronic components and distort or melt its plastic parts.
Keep the CT10 System away from dust and dirt, which can
cause premature product failure.
Handle the CT10 System gently and carefully. Dropping it
can cause serious damage to circuitry, or plastic case,
which may result in causing it to malfunction.
PLANTRONICS HELP DESK
The Plantronics Help Desk is ready to assist you!
Dial 1.831.458.7700 (Prompt 1 then 2) Monday through Friday,
8:00 a.m. to 5:00 p.m. Pacific Standard Time; FAX Plantronics at
1.831.425.8654; visit our website at www.plantronics.com; or
contact your local distributor.
18
TROUBLESHOOTING
ENGLISH FRANÇAIS ESPAN
˜
OL PORTUGUE
ˆ
S KOREAN JAPANESE CHINESE
CT10MultiLangInside.R1 7/3/00 2:21 PM Page 16

19
WARRANTY AND SERVICE
The name Plantronics and the Plantronics logo are registered trademarks of
Plantronics, Inc. DuoSet, Quick Disconnect, Polaris and the clear colour and
curvature of the voice tube are trademarks of Plantronics, Inc.
Other Legal Rights
This Warranty gives you specific legal rights and you may also have other
rights which vary from state to state.
How to Obtain Warranty Repairs
To obtain in or out of warranty service, please prepay shipment and return the
unit to the appropriate facility listed below:
IN THE UNITED STATES IN CANADA (ONLY)
Plantronics Service Centre Plantronics Service Centre
345 Encinal Street 1455 Pitfield Boulevard
Santa Cruz, CA 95060 Saint-Laurent, Quebec H4S 1G3
Tel. 1.800.544.4660 Tel. 1.800.540.8363
1.831.458.7700 1.514.956.8363
Fax 1.800.279.0162 Fax 1.514.956.1825
Please use the original container, or pack the unit(s) in a sturdy carton with
sufficient packing material to prevent damage. Include the following
information:
1. A proof-of-purchase indicating model number and date of purchase.
2. Bill-to address
3. Ship-to address
4. Number and description of units shipped
5. Name and telephone number of person to call, should contact be necessary
6. Reason for return and description of the problem
Damage occurring during shipment is deemed the responsibility of the carrier,
and claims should be made directly with the carrier.
18
WARRANTY AND SERVICE
The following warranty and service information applies
only to the U.S. and Canada. For information in other
countries, please contact your local distributor.
Limited Warranty
Plantronics, Inc. (“Plantronics”) warrants to the original consumer purchaser
that, except for limitations and exclusions set forth below, this product shall be
free from defects in materials and workmanship for a period of one (1) year
from the date of original retail purchase (“Warranty Period”). The obligation of
Plantronics under this warranty shall be limited to repair or replacement, at
Plantronics’ option, without charge, of any part or unit that proves to be
defective in material or workmanship during the Warranty Period.
Exclusions From Warranty
This Warranty applies only to defects in factory materials and factory
workmanship. Any condition caused by accident, abuse, misuse or improper
operation, violation of instructions furnished by Plantronics, destruction or
alteration, improper electrical voltages or currents, or repair or maintenance
attempted by anyone other than Plantronics or an authorised service centre, is
not a defect covered by this Warranty. In such cases, Plantronics may charge
you for materials and labor, even during the warranty period. Parts subject to
wear and tear in normal usage are not covered by the Warranty.
Implied Warranties
Under state law, you may be entitled to the benefit of certain implied
warranties. THESE IMPLIED WARRANTIES WILL CONTINUE IN FORCE ONLY
DURING THE WARRANTY PERIOD. Some states do allow limitations on how
long an implied warranty lasts, so the above limitation may not apply to you.
Incidental or Consequential Damages
NEITHER PLANTRONICS NOR YOUR RETAIL DEALER OR SELLING
DISTRIBUTORS HAS ANY RESPONSIBILITY FOR ANY INCIDENTAL OR
CONSEQUENTIAL DAMAGES INCLUDING WITHOUT LIMITATION,
COMMERCIAL LOSS OR PROFIT, OR FOR ANY INCIDENTAL EXPENSES,
EXPENSES, LOSS OF TIME, OR INCONVENIENCE. Some states do not allow
exclusion or limitation of incidental or consequential damage, so the above
limitation or exclusion may not apply to you.
ENGLISH FRANÇAIS ESPAN
˜
OL PORTUGUE
ˆ
S KOREAN JAPANESE CHINESE
CT10MultiLangInside.R1 7/3/00 2:21 PM Page 18

BIENVENUE
Merci d’avoir choisi le Système de Casque
Téléphonique Sans-fil CT10 de Plantronics.
Ce Guide d’Utilisation vous aidera à
installer votre Système de Téléphone CT10
et vous apprendra son fonctionnement de
base.
20
SUPPLIES AND ACCESSORIES
Remote (P/N 47348-01)
Battery (P/N 46365-02)
Extend talk time by having a second
Battery charged and ready.
(Replace the remote battery pack
if it does not hold a charge for more than
2 hours after an overnight charge.)
Neck Strap (P/N 42157-01)
Allows Remote to be worn
around your neck.
INFORMATION ON SUPPLIES
AND ACCESSORIES
Contact your local distributor or visit our website at
www.plantronics.com. See also Diagram Key for additional
part numbers.
18
3
CT10MultiLangInside.R1 7/3/00 2:21 PM Page 20

3
Lorsque votre équipement téléphonique est en service, des
précautions de sécurité fondamentales doivent toujours être
respectées pour réduire les risques d’incendie, de choc
électrique, et de blessures corporelles, y compris ce qui suit :
1. Lire et comprendre toutes les consignes.
2. Respecter tous les avertissements et consignes
apparaissant sur le produit. Le symbole identifie et alerte
l’utilisateur de la présence d’importantes consignes opérationnelles et de
mise en oeuvre.
3. Débrancher cet équipement de la prise murale avant de
le nettoyer. Ne pas utiliser de produits de nettoyage liquides ou en
pulvérisateur. Nettoyer avec un chiffon humide.
4. Ne pas placer l’élément de base à proximité d’eau,
comme près d’une baignoire, cuvette, évier, bac de
buanderie, dans un sous-sol mouillé ou près d’une
piscine.
5. Ne pas placer ce produit sur un chariot, support ou table
instables. Le produit pourrait tomber et être considérablement
endommagé.
6. Le produit ne doit jamais être placé à proximité d’un
radiateur ou d’une bouche de chaleur, ni bien entendu
dessus; il ne doit pas être encastré sans une ventilation
adéquate.
7. Ce produit doit être utilisé avec l’Alimentation à
Branchement Direct de Classe 2 fourni, ayant une valeur
nominale de 9 VCC à 500 mA. La pièce Plantronics No. 46924-
01 a un voltage nominal d’entrée de 120 VCA, 60 Hz et un voltage de
sortie de 9 VCC à 500mA. La pièce Plantronics No. 46935-01 a un
voltage nominal d’entrée de 220 VCA – 240 VCA, 50 Hz et un voltage
de sortie de 9 VCC à 500mA.
CONSIGNES DE SÉCURITÉ IMPORTANTES
ENGLISH FRANÇAIS ESPAN
˜
OL PORTUGUE
ˆ
S KOREAN JAPANESE CHINESE
Casque
Casque (Nº de pièce 47349-01)
Pince à vêtements
Télé-Élément
Télé-Élément CT10
Voyant de ‘Secret’
Bouton de ‘Secret’
Prise de Casque
Bouton de ‘Bis’
Bouton de Canal
Amarre de Câble de Casque
Voyant ‘’En Service”
Bouton de Communication
Bouton de “Flash”
Bouton de Mémoire (Mem)
Clavier à 12 Boutons
Commande de Volume de
Réception à Double Fonction
Antenne
Sonnerie MARCHE/ARRÊT
Batterie Rechargeable et
Pince pour Ceinture
Base (Devant)
Base du CT10
Porte-Casque/Antenne
Voyant d’Alimentation
Voyant “En Service” (Parler)
Voyant de Chargement
Réceptacle de Recharge du
Télé-Élément
Bouton d’Appel de
Localisation
Base (Dessous)
Fiche d’Adaptateur CA
Prise d’Adaptateur CA
Adaptateur CA
(Nº de pièce 46924-01 pour 120V) ou
(Nº de pièce 46935-01 pour 220V – 240 V)
Prise de Téléphone Murale
Cordon Téléphonique
Prise de Téléphone
Pince de Maintien du Cordon
Commutateur
Impulsion/Digital
2
5
3
4
8
17
7
16
15
14
13
12
11
9
1
6
18
2
10
26
25
24
23
22
21
20
27
28
19
33
32
31
30
29
25
DIAGRAMME DES REPÈRS
CT10MultiLangInside.R1 7/3/00 2:21 PM Page 22

CONSERVER CES INSTRUCTIONSCONSERVER CES INSTRUCTIONS
5
13. Ne pas se servir d’équipement téléphonique pour
signaler une fuite de gaz à proximité de cette fuite
14. Débrancher ce produit de la prise murale et demander à
du personnel compétent d’effectuer le service dans les
conditions suivantes :
a)Lorsque le cordon d’alimentation ou la prise sont endommagés
ou élimés.
b)Si du liquide a été renversé dans le produit.
c) Si le produit a été exposé à la pluie ou à de l’eau.
d)Si le produit ne fonctionne pas normalement en suivant les
consignes normales de fonctionnement. Ne régler que les
commandes couvertes par les instructions de mise en oeuvre, car
un réglage incorrect d’autres commandes peut provoquer des
dégâts et nécessitera souvent beaucoup de travail par un
technicien compétent pour restaurer le fonctionnement normal du
produit.
e) Si le produit est tombé ou si l’élément de base est endommagé.
f) Si le produit reflète un changement notable de performances.
15. Ce produit nécessite une alimentation CA pour fonctionner.
Pour maintenir un service téléphonique pendant une interruption du
courant électrique, il faut disposer d’un autre téléphone alimenté
seulement par la ligne téléphonique.
16. Éloigner tous les cordons et câblages du produit de toute
machine en fonctionnement.
CONSIGNES DE SÉCURITÉ IMPORTANTES
ENGLISH FRANÇAIS ESPAN
˜
OL PORTUGUE
ˆ
S KOREAN JAPANESE CHINESE
4
CONSIGNES DE SÉCURITÉ IMPORTANTES
8. Ne permettre à rien de venir en appui sur le cordon
électrique. Ne pas placer ce produit là où le cordon sera mal-
traité par des gens marchant dessus.
9. Ne pas surcharger les prises ou les rallonges élec-
triques, car cela peut entraîner un risque d’incendie ou de choc
électrique.
10. N’insérer aucun objet dans ce produit par les fentes
de l’élément de base, car il pourrait contacter des
points à voltage élevé ou court-circuiter des pièces, ce
qui pourrait entraîner un risque d’incendie ou de choc électrique.
Ne renverser aucun liquide sur ce produit.
11. Pour réduire le risque d’incendie ou de choc élec-
trique, ne pas démonter ce produit, mais l’apporter chez
un réparateur compétent en cas de besoin de service ou de répa-
ration. L’ouverture ou l’enlèvement des couvercles pourrait vous
exposer à des voltages dangereux ou d’autres risques. Un remon-
tage incorrect peut entraîner un choc électrique lorsque le produit
sera remis en service.
12. Éviter de se servir d’équipement téléphonique pen-
dant un orage électrique. Le Système CT10 incorpore des
circuits de protection contre les surtensions qui sont égaux ou
supérieurs aux exigences de la FCC. Cependant, un incident tel
qu’une tombée de foudre sur ou près des lignes téléphoniques,
pourrait causer de sérieux dégâts. Il existe aussi un léger risque de
choc électrique ou de dégâts dus à la foudre. Si le Système CT10
est installé dans une région avec des orages électriques fréquents
et/ou sévères, il est suggéré de débrancher le téléphone pendant
ces orages ou d’ajouter à cette installation des équipements supplé-
mentaires de protection contre les surtensions.
CT10MultiLangInside.R1 7/3/00 2:21 PM Page 24

7
CHOIX D’UN EMPLACEMENT
Installer l’Élément de Base CT10 à un endroit près d’une prise électrique
CA et d’une prise téléphonique modulaire. L’emplacement de la base
affecte la portée du téléphone. Essayer plusieurs emplacements pour
trouver celui donnant les meilleures performances. Choisir un emplacement
loin de machines et d’équipements électriques, de murs métalliques, de
classeurs à tiroirs, d’alarmes de sécurité sans-fil, de dispositifs de
surveillance de pièces, et de zones d’une humidité excessive.
POUR COMMENCER
Déballer l’ensemble et vérifier la présence des éléments suivants:
Télé-Élément CT10
Batterie Rechargeable
Base CT10
Adaptateur CA
Cordon Téléphonique
Casque
BRANCHEMENT DE LA BASE DU TÉLÉPHONE
Placer la Base à l’envers, exposant ainsi les prises d’Adaptateur CA
et de Téléphone en dessous.
Brancher la Fiche d’Adaptateur CA dans la prise d’Adaptateur CA .
Brancher l’Adaptateur CA dans une prise CA. Le Témoin d’Alimentation
s’allumera après branchement. Le témoin "En Service" restera éteint.
Brancher une extrémité du Cordon Téléphonique dans la Prise
Téléphonique de la Base et l’autre extrémité dans la Prise Téléphonique
Murale .
Engager les deux cordons Téléphonique et d’Adaptateur CA dans la Pince
de Maintien de Cordons .
32
29
31
30
22
21
28
26
27
31
26
19
1
30
28
19
18
3
19
G
A
ÉTAPE 1
A
G
G
PRÉPARATION GÉNÉRALE
ENGLISH FRANÇAIS ESPAN
˜
OL PORTUGUE
ˆ
S KOREAN JAPANESE CHINESE
6
CONSIGNES DE SÉCURITÉ IMPORTANTES
ATTENTION: Pour réduire le risque d’incendie ou de blessures cor-
porelles, lire et respecter les instructions suivantes :
1. N’utiliser que le groupe de batteries fourni avec ce produit.
2. Ne pas jeter le groupe de batteries au feu. Les éléments pourraient
exploser. Consulter les codes locaux pour toutes instructions de mise
au rebut.
3. Ne pas ouvrir ou mutiler un groupe de batteries. L’électrolyte répan-
du est corrosif et peut blesser les yeux ou la peau, et peut être tox-
ique si avalé.
4. Manipuler le groupe de batteries avec soin, pour ne pas "court-cir-
cuiter" les contacts de la batterie avec des produits conducteurs tels
que bagues, bracelets, et clés. La batterie ou l’élément conducteur
pourrait surchauffer et provoquer des brûlures.
5. Mettre le groupe de batteries en charge conformément aux instruc-
tions fournies avec cet équipement.
6. Respecter la bonne orientation entre le groupe de batteries et les
contacts du chargeur.
7. Contacter les autorités locales, cantonales ou provinciales respons-
ables de la disposition de déchets dangereux pour toute information
sur le recyclage ou les programmes de disposition dans votre région.
8. Important: Le nouveau bloc de batteries doit être attaché au Télé-
Élément et chargé dans le Réceptacle de Recharge jusqu’à ce
que le Voyant de Charge s’éteigne avant de pouvoir l’utiliser loin
de la Base .
9. Le temps maximum en mode attente pour un bloc de batteries
fraîchement chargé est d’environ 7 jours. Le temps maximum de
conversation est d’environ 6 heures.
19
23
24
3
SÉCURITÉ DE LA BATTERIE
CT10MultiLangInside.R1 7/3/00 2:21 PM Page 26
A página está carregando...
A página está carregando...
A página está carregando...
A página está carregando...
A página está carregando...
A página está carregando...
A página está carregando...
A página está carregando...
A página está carregando...
A página está carregando...
A página está carregando...
A página está carregando...
A página está carregando...
A página está carregando...
A página está carregando...
A página está carregando...
A página está carregando...
A página está carregando...
A página está carregando...
A página está carregando...
A página está carregando...
A página está carregando...
A página está carregando...
A página está carregando...
A página está carregando...
A página está carregando...
A página está carregando...
A página está carregando...
A página está carregando...
A página está carregando...
A página está carregando...
A página está carregando...
A página está carregando...
A página está carregando...
A página está carregando...
A página está carregando...
A página está carregando...
A página está carregando...
A página está carregando...
A página está carregando...
A página está carregando...
A página está carregando...
A página está carregando...
A página está carregando...
A página está carregando...
A página está carregando...
A página está carregando...
A página está carregando...
A página está carregando...
A página está carregando...
A página está carregando...
A página está carregando...
A página está carregando...
-
 1
1
-
 2
2
-
 3
3
-
 4
4
-
 5
5
-
 6
6
-
 7
7
-
 8
8
-
 9
9
-
 10
10
-
 11
11
-
 12
12
-
 13
13
-
 14
14
-
 15
15
-
 16
16
-
 17
17
-
 18
18
-
 19
19
-
 20
20
-
 21
21
-
 22
22
-
 23
23
-
 24
24
-
 25
25
-
 26
26
-
 27
27
-
 28
28
-
 29
29
-
 30
30
-
 31
31
-
 32
32
-
 33
33
-
 34
34
-
 35
35
-
 36
36
-
 37
37
-
 38
38
-
 39
39
-
 40
40
-
 41
41
-
 42
42
-
 43
43
-
 44
44
-
 45
45
-
 46
46
-
 47
47
-
 48
48
-
 49
49
-
 50
50
-
 51
51
-
 52
52
-
 53
53
-
 54
54
-
 55
55
-
 56
56
-
 57
57
-
 58
58
-
 59
59
-
 60
60
-
 61
61
-
 62
62
-
 63
63
-
 64
64
-
 65
65
-
 66
66
-
 67
67
-
 68
68
-
 69
69
-
 70
70
-
 71
71
-
 72
72
-
 73
73


em outras línguas
- español: Plantronics CT10 El manual del propietario
- français: Plantronics CT10 Le manuel du propriétaire
- English: Plantronics CT10 Owner's manual
Artigos relacionados
-
Plantronics CT10 Manual do usuário
-
-
-
Plantronics T20 Manual do proprietário
-
-
-
-
Plantronics CS70N Manual do proprietário
-