
User manual / 用户手册
Question?
有疑问?
Contact Philips
请联系飞利浦
GC7330
GC7320
GC7240
GC7230
GC7220


1


6
Introduction
Congratulations on your purchase and welcome to Philips! To fully benet from the support that
Philips offers, register your product at www.philips.com/welcome.
This powerful pressurised ironing system produces non-stop steam, which helps you get your
ironing done faster. Thanks to its large water tank with extra-large lling opening, you can now iron
without interruption and rell the water tank immediately when it is empty.
We hope you will enjoy using this ironing system.
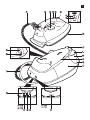
General description (Fig. 1)
A Supply hose
B Soft-touch handle (GC7240 only)
C Temperature dial
D Temperature light
E Steam activator & lock
- E1 Steam activator
- E2 Steam lock
F Steam boost button (GC7240 only)
G Soleplate
H Safe storage lock (GC7240 only)
I Filling funnel lid
J Filling funnel
K Iron stand
L Water tank
M Steam tank
N On/off switch (GC7320/GC7220 only)
O On/off button with power-on light (GC7330/GC7240/GC7230 only)
P ‘Water tank empty’ light (GC7330/GC7240/GC7230 only)
Q Steam setting selector (GC7330/GC7240/GC7230 only)
R Steam lights (GC7330/GC7240/GC7230 only)
S Mains cord
T Calc-Clean rinsing cap
U Cord storage hook
Important
Read this user manual carefully before you use the appliance and save it for future reference.
Danger
- Never immerse the iron or the steam tank in water.
Warning
- Check if the voltage indicated on the appliance corresponds to the local mains voltage before
you connect the appliance.
- Do not use the appliance if the plug, the mains cord, the supply hose or the appliance itself
shows visible damage, or if the appliance has been dropped or leaks.
- If the mains cord or the supply hose is damaged, you must have it replaced by Philips, a service
centre authorised by Philips or similarly qualied persons in order to avoid a hazard.
- Never leave the appliance unattended when it is connected to the mains.
- This appliance is not intended for use by persons (including children) with reduced physical,
sensory or mental capabilities, or lack of experience and knowledge, unless they have been given
supervision or instruction concerning use of the appliance by a person responsible for their safety.
- Keep the appliance and its cord out of the reach of children.
- Do not let the mains cord and supply hose come into contact with the hot soleplate of the iron.
ENGLISH

- If steam escapes from under the Calc-Clean rinsing cap when the appliance heats up, switch off
the appliance and tighten the Calc-Clean rinsing cap. If steam continues to escape when the
appliance heats up, switch off the appliance and contact a service centre authorised by Philips.
- Never remove the Calc-Clean rinsing cap when the steam tank is hot.
- Do not use any other cap on the steam tank than the Calc-Clean rinsing cap that has been
supplied with the appliance, as this cap also functions as a safety valve.
Caution
- If the appliance is provided with an earthed plug, it must be plugged into an earthed wall socket.
- Check the mains cord and the supply hose regularly for possible damage.
- Always place and use the iron and the steam tank on a stable, level and horizontal surface.
- The iron stand and the soleplate of the iron can become extremely hot and may cause burns if
touched. If you want to move the steam tank, do not touch the stand.
- When you have nished ironing, when you clean the appliance and also when you leave the iron
even for a short while: put the iron on the iron stand, switch off the appliance and remove the
mains plug from the wall socket.
- Rinse the steam tank regularly according to the instructions in the chapter ‘Cleaning and maintenance’.
- This appliance is intended for household use only.
Electromagnetic elds (EMF)
This Philips appliance complies with all standards regarding electromagnetic elds (EMF). If handled
properly and according to the instructions in this user manual, the appliance is safe to use based on
scientic evidence available today.
Before rst use
1 Remove any sticker or protective foil from the soleplate and clean the soleplate with a soft cloth.
2 Fully unwind and straighten the mains cord and supply hose.
3 Place the steam tank on a stable, level surface.
4 Place the iron on the iron stand.
Preparing for use
Filling the water tank before use
Note: You can ll the water tank at any time, also during use (see section ‘Relling the water tank’).
Never immerse the steam tank in water. Do not put perfume, vinegar, starch, descaling agents,
ironing aids or other chemicals in the steam tank.
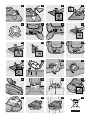
1 Openthellingfunnellid.(Fig.2)
2 Fillthewatertankwithtapwateruptothemaximumlevel(Fig.3).
Note: If the tap water in your area is very hard, we advise you to mix it with an equal amount of distilled
water, or to use distilled water only.
3 Properlyclosethellingfunnellid(‘click’).
Do not tilt or shake the steam tank when the water tank is full. Otherwise water may spill out of
thellingfunnel.
Relling the water tank during use
Note: When the water tank is empty, air gets into the pump and causes a pumping sound that is louder
than normal.
ENGLISH 7

- GC7320/GC7220: Fill the water tank when the water runs low.
- GC7330/GC7240/GC7230: Fill the water tank when the ‘water tank empty’ light ashes.
- You can rell the water tank at any time during ironing.
1 Openthellingfunnellid(Fig.2).
2 Fillthewatertankwithtapwateruptothemaximumlevel(Fig.3).
Note: If the tap water in your area is very hard, we advise you to mix it with an equal amount of distilled
water, or to use distilled water only.
3 Properlyclosethellingfunnellid(‘click’).
Do not tilt or shake the steam tank when the water tank is full. Otherwise water may spill out of
thellingfunnel.
4 Ifyouhavelockedthesteamactivator,releasethesteamlock(Fig.4).
5 Brieypressthesteamactivatortoresettheiron(Fig.5).
, After approx. 10 seconds, the iron is ready for steam ironing again.
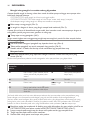
Setting the temperature
1 To set the required ironing temperature, turn the temperature dial to the appropriate
position(Fig.6).
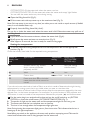
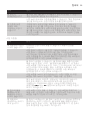
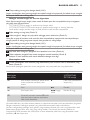
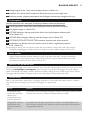
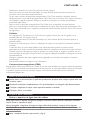
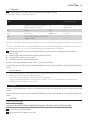
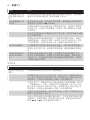
Check the laundry care label for the required ironing temperature:
Symbol on
laundry care
label
Type of fabric Temperature
setting
Steam setting
(GC7330/7240/
GC7230only)
B Synthetic fabrics (e.g. acetate,
acrylic, viscose, polyamide,
polyester) and silk
1 MIN (see ‘Ironing
without steam’)
C Wool 2 Low
D Cotton, linen 3 to MAX Low & high
Z Please note that Z on the label
means that the article cannot be
ironed.
If you do not know what kind or kinds of fabric an article is made of, determine the right ironing
temperature by ironing a part that is not visible when you wear or use the article.
If the fabric consists of various kinds of bres, always select the temperature required by the most
delicate bre, i.e. the lowest temperature. For example: if an article consists of 60% polyester and
40% cotton, it must be ironed at the temperature indicated for polyester ( 1) and without steam.
2 Putthemainspluginanearthedwallsocketandsettheon/offswitchtoon(GC7320/
GC7220)orpresstheon/offbutton(GC7330/GC7240/GC7230)(Fig.7).
, The power-on light on the steam tank and the temperature light on the iron go on.
, The steam tank and the iron soleplate start to heat up.
, The iron is hot enough when the temperature light goes out.
Note: During ironing, the temperature light goes on from time to time. This indicates that the iron is
heating up to the right temperature.
Note: When you switch on the appliance, the steam tank produces a pumping sound. This sound is
normal and indicates that water is being pumped into the steam tank.
ENGLISH8

Tips
- If you have ironed at a high temperature and then set the temperature dial to a lower setting,
wait until the temperature light goes on again before you continue ironing. This prevents damage
to your fabrics.
- Start ironing the articles that require the lowest ironing temperature, such as those made of
synthetic bres.
- Silk, woollen and synthetic materials: iron the reverse side of the fabric to prevent shiny patches.
- Iron velvet and other fabrics that tend to acquire shiny patches in one direction only (along with
the nap) while you apply very little pressure.
- Do not use steam when you iron coloured silk. This could cause stains.
Using the appliance
Note: Some smoke and particles may come out of the iron when you use it for the rst time. This is
normal and stops after a short while.
Note: When you switch on the appliance, the steam tank produces a pumping sound. This sound is
normal and indicates that water is being pumped into the steam tank.
Steam ironing
Never direct the steam at people.
Steam ironing is only possible at higher ironing temperatures (temperature settings
2 to MAX).
1 Make sure that there is enough water in the water tank.
2 Select an ironing temperature between 2andMAX.(Fig.6)
3 Putthemainspluginanearthedwallsocketandsettheon/offswitchtoon(GC7320/
GC7220)orpresstheon/offbutton(GC7330/GC7240/GC7230)(Fig.7).
, The power-on light on the steam tank and the iron temperature light go on to indicate that
the steam tank and the iron start to heat up.
, GC7330/GC7240/GC7230:Thehighsteamsettinglightashestoindicatethatthesteam
tank is heating up.
, After approx. 2 minutes, the steam light stays on continuously, to indicate that the water in
the steam tank is hot enough for steam ironing.
4 GC7330/GC7240/GC7230:Pressthesteamsettingselectortosetasteamsettingsuitable
fortheselectedironingtemperature:(Fig.8)
- Select the low steam setting for temperature setting 2.
- Select the low or high steam setting for temperature settings 3 to MAX.
5 Keepthesteamactivatorpressedinwhileyousteamiron.(Fig.9)
When you put the iron down after ironing, put it on its heel or on the iron stand.
- If you want to use the steam function continuously, slide the steam activator lock to the locking
position. To stop steaming, release the steam activator lock (Fig. 10).
- Release the steam lock when you put the iron on its heel or on the iron stand. This makes the
water in the water tank last longer.
Note: If you have not used the steam function for some time, the steam that was still present in the
supply hose will have condensed into water. When you start to steam iron again, this can cause some
spluttering in the appliance and some water droplets to escape from the soleplate.
Note: To prevent droplets from falling onto your garments, hold the iron over an old cloth. Press the steam
activator until the steam production has normalised before you start to steam iron again.
ENGLISH 9

Note: If dirt particles come out of the soleplate during steam ironing, rinse the steam tank strictly
according to the instructions in chapter ‘Cleaning and maintenance’, section ‘Rinsing the steam tank’.
Ironing without steam
Do not press the steam activator while you iron.
1 Settherequiredironingtemperature(seechapter‘Preparingforuse’,section‘Settingthe
temperature’).(Fig.6)
2 Putthemainspluginanearthedwallsocketandsettheon/offswitchtoon(GC7320/
GC7220)orpresstheon/offbutton(GC7330/GC7240/GC7230).(Fig.7)
, The soleplate starts to heat up.
3 GC7330/GC7240/GC7230:Pressthesteamselectorandselect‘nosteam’.(Fig.8)
, The‘no-steam’lightgoeson.
4 Iron without pressing the steam activator.
, If the steam tank is empty or has not heated up yet, you hear a clicking sound inside the tank.
This phenomenon is caused by the opening of the steam valve and is perfectly harmless.
After ironing
1 Switch off the appliance.
2 Remove the mains plug from the wall socket.
3 Put the iron on the iron stand and let the appliance cool down before you start to clean it.
Features
Vertical steam ironing
Never direct the steam at people.
1 Tosteamironhangingcurtainsandclothes(jackets,suits,coats),holdtheironinvertical
position(Fig.11).
2 Press the steam activator.
Variable steam & steam lights (GC7330/GC7240/GC7230 only)
- The appliance has two steam settings: low and high (see chapter ‘Using the appliance’, section
‘Steam ironing’).
- When the steam tank is ready for steam ironing, the steam light of the selected steam setting
stops ashing and is on continuously (Fig. 12).
’Water tank empty’ light (GC7330/GC7240/GC7230 only)
, Whenthewaterinthewatertankrunslowduringuse,the‘watertankempty’lightgoes
on(Fig.13).
1 Rellthewatertank(seechapter‘Preparingforuse’,section‘Rellingthewatertank’).
Steam boost (GC7240 only)
Never direct the steam at people.
The powerful steam boost helps to remove stubborn creases.
1 Set the temperature dial to a position between 3 and MAX.
2 Pressthesteamboostbutton(Fig.14).
ENGLISH10

Note: Some water droplets may occasionally come out of the soleplate when you use the steam boost
function. To prevent this, always use the steam function before you use the steam boost function.
Cleaning and maintenance
Iron
Lettheappliancecooldownsufcientlybeforeyoucleantheiron.Neverimmersetheironin
water nor rinse it under the tap.
1 Cleantheironwithadampcloth.
2 Wipe scale and any other deposits off the soleplate with a damp cloth and a non-abrasive
(liquid)cleaner.
Rinsing the steam tank
LettheappliancecooldownsufcientlybeforeyouremovetheCalc-Cleanrinsingcap.
Rinse the steam tank once a month or after you have relled the water tank 10 times.
1 Emptythewatertankbypouringthewaterintothesink(Fig.15).
2 Turnthecordstoragehookanticlockwise(1)andremoveit(2)(Fig.16).
3 TurntheCalc-Cleanrinsingcapanticlockwise(1)andremoveit(2)(Fig.17).
4 Shake the steam tank well over the sink.
5 Empty the steam tank by pouring the water into the sink.
6 PourfreshwaterthroughtheCalc-Cleanholewiththellingcup.(Fig.18)
7 Shakethesteamtankwelloverthesink(Fig.19)
8 Pourthewaterintothesinkagain.(Fig.20)
9 Repeat steps 6 and 7 if there are still impurities in the water.
10 FirmlyscrewtheCalc-Cleanrinsingcapclockwiseontothesteamtank.
11 Reattach the cord storage hook by turning it clockwise.
Storage
Makesuretheappliancehascooleddownsufcientlybeforeyouputitaway.
1 Remove the mains plug from the wall socket and let the appliance cool down.
2 Emptythewatertank(Fig.15).
3 GC7240:Insertthetipoftheironintothesafestoragelockonthestand(Fig.21).
4 GC7240:Pressthebackoftheironrmlydown(Fig.22).
5 GC7330/GC7320/GC7230/GC7220:Placetheironontheironstand.
6 Fixthesupplyhoseandmainscordinthecordstoragehook.(Fig.23)
Regularly check if the mains cord and the supply hose are still undamaged and safe.
- There are handgrips on either side of the steam tank for easy transport (Fig. 24).
ENGLISH 11

Environment
- Do not throw away the appliance with the normal household waste at the end of its life, but
hand it in at an ofcial collection point for recycling. By doing this, you help to preserve the
environment (Fig. 25).
Guarantee and service
If you need service or information or if you have a problem, please visit the Philips website at
www.philips.com/support or contact the Philips Consumer Care Centre in your country.
You nd its phone number in the worldwide guarantee leaet. If there is no Consumer Care Centre
in your country, go to your local Philips dealer.
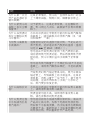
Frequently asked questions
This chapter lists the questions most frequently asked about the appliance. If you cannot nd the
answer to your question, contact the Customer Care Centre in your country.
General:
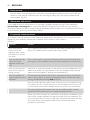
Question Answer
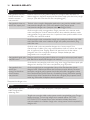
Why does smoke
come out of the
appliance after I have
switched it on for the
rst time?
This is normal. Some parts of the iron have been greased lightly in the
factory. This phenomenon ceases after a short while.
Why do dirt particles
come out of the
soleplate of the new
iron?
This is normal with a new iron. These particles are harmless and stop
coming out of the soleplate when you have used the iron a few times.
Why do dirt particles
come out of the iron
during ironing?
Impurities or chemicals present in the water may have deposited in the
steam tank and/or on the soleplate. Clean the soleplate and rinse the
steam tank (see chapter ‘Cleaning and maintenance’).
Why do droplets of
water escape from the
soleplate?
The temperature dial may be set to a temperature that is too low for
steam ironing. Select an ironing temperature that is suitable for steam
ironing (temperature settings 2 to MAX).
You may have used the steam boost function when you started ironing.
First steam iron for a while before you use the steam boost function. It
is normal that some water droplets come out of the iron occasionally.
You may have placed the steam tank on an unstable and/or uneven
surface. Place the steam tank on a stable and even surface.
When you start to steam iron, the hose is cold. Steam condenses in the
hose, which causes droplets of water to escape from the soleplate. This
is normal. Hold the iron over an old cloth and press the steam activator.
The cloth absorbs the droplets. After a few seconds the steam
production normalises.
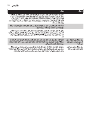
ENGLISH12

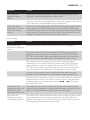
Question Answer
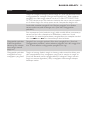
Why does the
soleplate become
dirty?
Impurities or chemicals present in water may have deposited on the
soleplate. Clean the soleplate with a damp cloth.
You may iron at too high temperatures. Clean the soleplate with a damp
cloth. Select the recommended ironing temperature.
Why does steam
escape from the Calc-
Clean hole during
ironing?
You may not have tightened the Calc-Clean rinsing cap properly. Switch
off the appliance and let it cool down. First remove the cord storage
hook and then remove the Calc-Clean rinsing cap. Wipe away the water
round the hole. Then reattach the Calc-Clean rinsing cap and the cord
storage hook again.Then switch the appliance back on.
Steam ironing:
Question Answer
Why doesn’t the
appliance produce any
steam?
The appliance may not be switched on. Switch on the appliance.
The steam tank may not be hot enough to produce steam. Wait for
approx. 2 minutes for the steam tank to heat up. GC7330/GC7240/
GC7230 only: the steam light stops ashing and stays on continuously
when the water in the steam tank is hot enough for steam ironing.
The water tank may be empty. Rell the water tank (see chapter
‘Preparing for use’, section ‘Relling the water tank’). Briey press the
steam activator and wait for approx. 10 seconds. GC7330/GC7240/
GC7230 only: the steam light stops ashing and stays on continuously
when the water in the steam tank is hot enough for steam ironing.
You are not pressing the steam activator. Keep the steam activator
pressed in while you steam iron (see chapter ‘Using the appliance’).
Superheated (i.e. high-quality) steam is hardly visible, especially when the
temperature dial is set to maximum position. To check if the iron really
produces steam, set the temperature dial to 3 or 2. The steam
then becomes visible.
Why doesn’t the
appliance produce any
steam after I have
relled the water tank?
The steam activator may be locked. Unlock the steam activator (see
chapter ‘Using the appliance’), briey press the steam activator and wait
approx. 10 seconds before using the steam activator again.
Why does the
appliance produce a
loud pumping sound?
The water tank is empty. When the water tank is empty, air gets into the
pump and causes a loud pumping sound. Rell the water tank (see
chapter ‘Preparing for use’, section ‘Relling the water tank during use’).
The pumping sound decreases after a while.
ENGLISH 13

14
Pendahuluan
Selamat atas pembelian Anda dan selamat datang di Philips! Untuk memanfaatkan sepenuhnya
dukungan yang ditawarkan Philips, daftarkan produk Anda di www.philips.com/welcome.
Sistem penyetrikaan bertekanan yang dahsyat ini menghasilkan uap non-stop sehingga membantu
Anda menyetrika lebih cepat. Berkat tangki airnya yang besar dengan lubang pengisian ekstra besar,
sekarang Anda dapat menyetrika tanpa gangguan atau harus segera mengisi ulang tangki air karena kosong.
Semoga Anda senang menggunakan sistem penyetrikaan ini.
Gambaran umum (Gbr. 1)
A Selang pasokan
B Gagang lunak (hanya GC7240)
C Putaran suhu
D Lampu suhu
E Pengaktif & kunci uap
- E1 Pengaktif uap
- E2 Kunci uap
F Tombol semburan uap (hanya GC7240)
G Tapak setrika
H Kunci pengaman penyimpanan (hanya GC7240)
I Tutup corong pengisian
J Corong pengisian
K Dudukan setrika
L Tangki air
M Tangki uap
N Sakelar on/off (hanya GC7320/GC7220)
O Tombol on/off dengan lampu tanda hidup (hanya GC7330/GC7240/GC7230)
P Lampu ‘Water tank empty’ (hanya GC7330/GC7240/GC7230)
Q Pemilih setelan uap (hanya GC7330/GC7240/GC7230)
R Lampu uap (hanya GC7330/GC7240/GC7230)
S Kabel listrik
T Tutup bilasan Calc-Clean
U Kaitan penyimpan kabel
Penting
Bacalah petunjuk penggunaan ini dengan saksama sebelum Anda menggunakan alat dan simpanlah
sebagai referensi di masa mendatang.
Bahaya
- Jangan sekali-kali merendam setrika atau tangki uap di dalam air.
Peringatan
- Periksalah apakah voltase pada alat sesuai dengan voltase listrik di rumah Anda, sebelum
menghubungkan alat.
- Jangan menggunakan alat jika steker, kabel listrik, selang pasokan atau alat itu sendiri menunjukkan
kerusakan yang dapat dilihat, atau jika alat pernah terjatuh atau bocor.
- Jika kabel listrik atau selang pasokan rusak, maka harus diganti oleh Philips, pusat layanan resmi
Philips atau orang yang mempunyai keahlian sejenis agar terhindar dari bahaya.
- Jangan sekali-kali meninggalkan alat tanpa pengawasan saat masih tersambung ke arus listrik.
- Alat ini tidak dimaksudkan untuk digunakan oleh orang (termasuk anak-anak) dengan cacat sik,
indera atau kecakapan mental yang kurang, atau kurang pengalaman dan pengetahuan, kecuali
jika mereka diberikan pengawasan atau petunjuk mengenai penggunaan alat oleh orang yang
bertanggung jawab bagi keselamatan mereka.
INDONESIA

- Jauhkan alat dan kabelnya dari jangkauan anak-anak.
- Pastikan kabel listrik dan selang pasokan tidak mengenai tapak setrika saat sedang panas.
- Jika uap keluar dari bawah tutup bilasan Calc-Clean sewaktu alat sedang memanas, matikan alat
dan kencangkan tutup bilasan Calc-Clean. Jika uap terus keluar sewaktu alat sedang memanas,
matikan alat lalu hubungi pusat servis resmi Philips.
- Jangan sekali-kali melepaskan tutup bilasan Calc-Clean saat tangki uap panas.
- Jangan menggunakan tutup lain apa pun pada tangki uap selain tutup bilasan Calc-Clean yang
disediakan bersama alat, karena penutup ini juga berfungsi sebagai katup pengaman.
Perhatian
- Jika alat dilengkapi dengan steker yang dibumikan, steker ini harus dimasukkan ke stopkontak
dinding yang juga telah dibumikan.
- Periksalah kabel listrik dan selang pasokan secara teratur, kalau-kalau ada kerusakan.
- Selalu letakkan dan gunakan setrika serta tangki uap pada permukaan horizontal yang rata dan stabil.
- Dudukan setrika dan tapak setrika dapat menjadi sangat panas dan menyebabkan luka bakar jika
tersentuh. Jika Anda ingin memindah tangki uap, jangan sentuh dudukannya.
- Bila Anda sudah selesai menyetrika, ketika membersihkan alat dan bila meninggalkan setrika
meskipun hanya sebentar: letakkan setrika pada dudukannya, matikan alat dan cabut stekernya
dari stopkontak dinding.
- Bilas tangki uap secara teratur sesuai petunjuk dalam bab ‘Membersihkan dan pemeliharaan’.
- Alat ini hanya untuk keperluan rumah tangga.
Medan elektromagnet (EMF)
Alat Philips ini mematuhi semua standar yang berkenaan dengan medan elektromagnet (EMF). Jika
ditangani sebagaimana layaknya dan sesuai dengan petunjuk dalam buku panduan ini, alat tersebut
aman digunakan menurut bukti ilmiah yang kini tersedia.
Sebelum menggunakan alat pertama kali
1 Lepaskan stiker atau kertas timah pelindung dari tapak setrika lalu bersihkan dengan kain halus.
2 Buka gulungan kabel listrik dan selang pasokan sepenuhnya dan luruskan.
3 Tempatkan tangki uap pada permukaan yang stabil dan rata.
4 Tempatkan setrika pada dudukannya.
Persiapan penggunaan
Isilah tangki air sebelum menggunakan setrika
Catatan: Anda dapat mengisi tangki air setiap saat, juga sewaktu sedang digunakan (lihat bagian
‘Mengisi ulang tangki air’).
Jangansekali-kalimerendamtangkiuapdidalamair.Janganmemasukkanparfum,cuka,kanji,zat
pembersih kerak, alat bantu penyetrikaan, atau bahan kimia lainnya ke dalam tangki uap.
1 Bukatutupcorongpengisi.(Gbr.2)
2 Isitangkiairdenganairkeranyangdinginsampailevelmaksimal(Gbr.3).
Catatan: Jika air keran di daerah Anda sangat sadah, kami sarankan untuk mencampurnya dengan air
suling dalam jumlah yang sama atau gunakan air suling saja.
3 Tutuprapatcorongpengisian(‘klik’).
Jangan memiringkan atau mengguncang tangki uap saat tangki air penuh. Air bisa tumpah, keluar
dari corong pengisian.
INDONESIA 15

Mengisi ulang tangki air sewaktu sedang digunakan
Catatan: Apabila tangki air kosong, udara akan masuk ke dalam pompa sehingga suara pompa akan
lebih keras daripada biasanya.
- GC7320/GC7220: Isilah tangki air bila airnya tinggal sedikit.
- GC7330/GC7240/GC7230: Isilah tangki air bila lampu ‘’water tank empty’ menyala.
- Anda dapat mengisi ulang tangki air setiap saat sewaktu menyetrika.
1 Bukatutupcorongpengisi(Gbr.2).
2 Isitangkiairdenganairkeranyangdinginsampailevelmaksimal(Gbr.3).
Catatan: Jika air keran di daerah Anda sangat sadah, kami sarankan untuk mencampurnya dengan air
suling dalam jumlah yang sama atau gunakan air suling saja.
3 Tutuprapatcorongpengisian(‘klik’).
Jangan memiringkan atau mengguncang tangki uap saat tangki air penuh. Air bisa tumpah, keluar
dari corong pengisian.
4 JikaAndasudahmenguncipengaktifuap,lepaskankunciuap(Gbr.4).
5 Tekansekilaspengaktifuapuntukmenyetelulangsetrika(Gbr.5).
, Setelah sekitar 10 detik, setrika siap untuk melakukan lagi penyetrikaan uap.
Menyetel suhu
1 Setel suhu penyetrikaan yang diperlukan dengan memutar tombol suhu ke posisi yang
sesuai(Gbr.6).
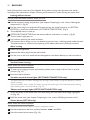
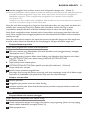
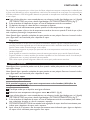
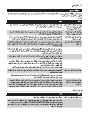
Periksa label perawatan pakaian untuk mengetahui suhu penyetrikaan yang diperlukan:
Simbol pada label
perawatan
pakaian
Jenis kain Setelan suhu Setelanuap(hanya
GC7330/7240/
GC7230)
B Kain sintetis (yakni, asetatt, akrilik,
viskos, poliamida, polyester) dan
sutera
1 MIN (lihat ‘Menyetrika
tanpa uap’)
C Wol 2 Rendah
D Katun, linen 3 hingga
MAX
Rendah & tinggi
Z Harap perhatikan tanda Z pada
label berarti pakaian tidak dapat
disetrika.
Jika Anda tidak tahu jenis kain atau bahannya terbuat dari apa, tentukan suhu penyetrikaan yang
benar dengan cara menyetrika pada bagian yang tak terlihat apabila Anda mengenakannya.
Jika kain terdiri atas beragam jenis serat, pilihlah selalu suhu yang diperlukan untuk serat kain yang
paling halus, yakni, suhu terendah. Misalnya: jika pakaian terdiri atas 60% poliester dan 40% katun,
pakaian itu harus disetrika pada suhu yang diindikasikan untuk poliester ( 1) dan tanpa uap.
2 Masukkanstekerkestopkontakdidindingyangtelahdibumikandanatursakelaron/offkeon
(GC7320/GC7220)atautekantombolon/off(GC7330/GC7240/GC7230)(Gbr.7).
, Lampumenyalapadatangkiuapdanlampusuhupadasetrikajugamenyalaterus.
, Tangki uap dan tapak setrika mulai memanas.
, Setrika tidak cukup panas saat lampu suhu padam.
INDONESIA16

Catatan: Sewaktu menyetrika, lampu suhu menyala sewaktu-waktu. Ini menandakan bahwa setrika
sedang memanas hingga mencapai suhu yang tepat.
Catatan: Setelah menyalakan setrika, tangki uap mengeluarkan bunyi pemompaan. Suara ini normal dan
menandakan bahwa air sedang dipompa ke dalam tangki uap.
Tip
- Jika Anda sudah menyetrika pada suhu tinggi kemudian menyetel tombol suhu ke setelan yang
lebih rendah, tunggulah sampai lampu suhu menyala lagi sebelum Anda melanjutkan penyetrikaan.
Hal ini mencegah kerusakan pada kain.
- Mulailah menyetrika bahan yang memerlukan suhu penyetrikaan paling rendah, seperti bahan
yang terbuat dari serat sintetis.
- Bahan sutera, wol dan sintetis: setrika bagian belakang kain agar tidak menimbulkan bercak mengkilap.
- Menyetrika kain beludru dan bahan lainnya cenderung menimbulkan bercak-bercak
mengkilap hanya pada satu arah (searah bulu) bila Anda agak menekan alat saat menyetrika.
- Jangan gunakan uap bila Anda menyetrika sutera berwarna. Hal ini dapat menyebabkan noda.
Menggunakan alat
Catatan: Mungkin ada sejumlah uap dan partikel keluar dari setrika sewaktu Anda menggunakannya
untuk pertama kali. Hal ini normal dan akan berhenti setelah beberapa lama.
Catatan: Setelah menyalakan setrika, tangki uap mengeluarkan bunyi pemompaan. Suara ini normal dan
menandakan bahwa air sedang dipompa ke dalam tangki uap.
Menyetrika dengan uap
Jangan sekali-kali mengarahkan uap ke orang.
Menyetrika dengan uap hanya mungkin dilakukan pada suhu penyetrikaan yang lebih
tinggi (setelan suhu 2hingga MAX).
1 Pastikan bahwa isi tangki air cukup.
2 Pilih suhu penyetrikaan antara 2danMAX.(Gbr.6)
3 Masukkanstekerkestopkontakdidindingyangtelahdibumikandanatursakelaron/offkeon
(GC7320/GC7220)atautekantombolon/off(GC7330/GC7240/GC7230)(Gbr.7).
, Lamputangkiuapmenyaladanlampusuhusetrikajugamenyalayangmenandakanbahwa
tangki uap dan setrika akan segera panas.
, GC7330/GC7240/GC7230:Lampusetelanuaptinggimenyalauntukmenandakanbahwa
tangki uap sedang memanas.
, Setelah kurang lebih 2 menit, lampu uap terus menyala, untuk menandakan bahwa air dalam
tangki uap cukup panas untuk menyetrika dengan uap.
4 GC7330/GC7240/GC7230:Tekanpemilihsetelanuapuntukmemilihsetelanuapyangsesuai
untuksuhupenyetrikaanyangdipilih:(Gbr.8)
- Pilih setelan uap rendah untuk setelan suhu 2.
- Pilih setelan uap rendah atau tinggi untuk setelan suhu3 hingga MAX.
5 TekanterusaktivatoruapsewaktuAndamenyetrikadenganuap.(Gbr.9)
Setelah selesai menyetrika, letakkan setrika pada tumitnya atau pada dudukan setrika.
- Jika Anda ingin menggunakan fungsi uap terus menerus, geser kunci pengaktif uap ke posisi
mengunci. Untuk berhenti menggunakan uap, buka kunci pengaktif uap (Gbr. 10).
- Lepaskan kunci uap setelah Anda menaruh setrika pada tumitnya atau pada dudukan setrika.
Dengan cara ini, air di dalam tangki air akan lebih awet.
INDONESIA 17

Catatan: Jika sudah lama Anda tidak menggunakan fungsi uap, maka uap yang masih ada di dalam
selang pasokan telah mengembun. Sewaktu Anda mulai lagi menggunakan setrika uap, ini akan
menyebabkan semburat air pada alat dan air menetes dari tapak setrika.
Catatan: Untuk mencegah tetesan air yang berjatuhan ke atas pakaian Anda, pegang setrika di atas
sehelai kain bekas. Tekan aktivator uap sampai produksi uap sudah normal kembali sebelum Anda mulai
menyetrika lagi dengan uap.
Catatan: Jika partikel kotoran keluar dari tapak setrika sewaktu penyetrikaan uap, bilas tangki uap
sesuai petunjuk dalam bab ‘Membersihkan dan pemeliharaan’, pada bagian ‘Membilas tangki uap’.
Menyetrika tanpa uap
Jangan menekan aktivator uap sewaktu Anda menyetrika.
1 Setelsuhupenyetrikaanyangdiperlukan(lihatbab‘Persiapanpenggunaan’,bagian‘Menyetel
suhu’).(Gbr.6)
2 Masukkanstekerkestopkontakdidindingyangtelahdibumikandanatursakelaron/offkeon
(GC7320/GC7220)atautekantombolon/off(GC7330/GC7240/GC7230).(Gbr.7)
, Tapak setrika mulai memanas.
3 GC7330/GC7240/GC7230:Tekansetelanuaplalupilih‘nosteam’.(Gbr.8)
, Lampu‘no-steam’akanpadam.
4 Menyetrika tanpa menekan aktivator uap.
, Jika tangki uap kosong atau belum memanas, Anda akan mendengar bunyi gemericik di dalam
tangki. Fenomena ini disebabkan oleh pembukaan katup uap dan tidak berbahaya.
Setelah menyetrika
1 Matikan setrika.
2 Lepaskan steker listrik dari stopkontak dinding.
3 Letakkan setrika pada dudukannya dan biarkan mendingin sebelum Anda mulai
membersihkannya.
Fitur
Menyetrika dengan uap secara vertikal
Jangan sekali-kali mengarahkan uap ke orang.
1 Untukmenyetrikauappadatiraidanpakaianyangtergantung(jaket,setelanjas,jasluar),
pegangsetrikapadaposisivertikal(Gbr.11).
2 Tekan aktivator uap.
Uap variabel & lampu uap (hanya GC7330/GC7240/GC7230)
- Setrika dilengkapi dua setelan uap: rendah dan tinggi (lihat bab ‘Menggunakan alat’, pada bagian
‘Menyetrika dengan uap’).
- Setelah tangki uap siap untuk menyetrika dengan uap, lampu uap setelan uap yang dipilih akan
berkedip dan menyala terus (Gbr. 12).
Lampu ‘Water tank empty’ (hanya GC7330/GC7240/GC7230)
, Apabilaairdidalamtangkitinggalsedikitsewaktusedangmenyetrika,lampu‘steamtank
empty’[tangkiuapkosong]menyala(Gbr.13).
1 Isiulangtangkiair(lihat‘Persiapanpenggunaan’;bagian‘Mengisiulangtangkiair’.).
INDONESIA18

Semburan uap (hanya GC7240)
Jangan sekali-kali mengarahkan uap ke orang.
Semburan uap yang kuat dapat membantu menghilangkan kusut yang membandel.
1 Setel tombol suhu ke posisi antara 3 dan MAX.
2 Tekantombolsemburanuap(Gbr.14).
Catatan: Mungkin ada sejumlah tetesan air yang keluar dari tapak setrika sewaktu Anda menggunakan
fungsi semburan uap. Untuk mencegah ini , selalu gunakan fungsi uap sebelum Anda menggunakan
fungsi semburan uap.
Membersihkan dan pemeliharaan
Setrika
Biarkan alat mendingin secukupnya sebelum Anda membersihkan setrika.Jangan sekali-kali
merendam setrika dalam air ataupun membilasnya di bawah keran.
1 Bersihkan setrika dengan kain lembab.
2 Sekakerakdanendapanlainnyadaritapaksetrikadengankainlembabdanpembersih(cairan)
non-abrasif.
Membilas tangki uap
Tunggu sampai setrika cukup dingin sebelum Anda melepaskan tutup tangki uap.
Bilas tangki uap sebulan sekali atau setelah Anda menggunakan mengisi ulang tangki air sebanyak 10 kali.
1 Kosongkantangkiairdenganmenuangkanairkebakcuci(Gbr.15).
2 Putarkaitanpenyimpankabelberlawananarahjarumjam(1)lalulepaskan(2)(Gbr.16).
3 PutartutupbilasanCalc-Cleanberlawananarahjarumjam(1)lalulepaskan(2)(Gbr.17).
4 Goncangkantangkiuapdiatasbakaircuci.
5 Kosongkan tangki uap dengan menuangkan air ke bak cuci.
6 TuangkanairbersihmelaluilubangCalc-Cleanpadacorongpengisian.(Gbr.18)
7 Goncangkantangkiuapdiatasbakcuci.(Gbr.19)
8 Tuangkanlagiairkedalambakcuci.(Gbr.20)
9 Ulangilangkah6dan7jikaairmasihtampakkotor.
10 KencangkankembalitutupbilasanCalc-Cleansearahjarumjampadatangkiuap.
11 Pasangkembalikaitanpenyimpankabeldenganmemutarnyasearahjarumjam.
Penyimpanan
Pastikan alat sudah cukup dingin sebelum menyimpannya.
1 Lepaskanstekerlistrikdaristopkontakdindingdanbiarkanalatmenjadidingin.
2 Kosongkantangkiair(Gbr.15).
3 GC7240:Sisipkanujungsetrikakedalamkuncipengamanpenyimpananpada
dudukannya(Gbr.21).
4 GC7240:Tekankuat-kuatbagianbelakangsetrikakebawah(Gbr.22).
INDONESIA 19

5 GC7330/GC7320/GC7230/GC7220:Letakkansetrikapadadudukannya.
6 Pasangselangpasokandankabellistrikpadakaitanpenyimpankabel.(Gbr.23)
Periksalah secara teratur apakah kabel listrik dan selang pasokan masih belum rusak dan aman.
- Terdapat pegangan pada salah satu samping tangki uap agar mudah memindahkannya (Gbr. 24).
Lingkungan
- Jangan membuang alat bersama limbah rumah tangga biasa jika alat sudah tidak dapat dipakai lagi,
tetapi serahkan ke tempat pengumpulan barang bekas yang resmi untuk didaur ulang. Dengan
melakukan hal ini, Anda ikut membantu melestarikan lingkungan (Gbr. 25).
Garansi dan layanan
Jika Anda membutuhkan servis atau informasi atau mengalami masalah, harap kunjungi situs web
Philips di www.philips.com/support atau hubungi Pusat Layanan Konsumen Philips di negara
Anda. Anda dapat menemukan nomor teleponnya dalam pamet garansi internasional. Jika tidak ada
Pusat Layanan Konsumen di negara Anda, kunjungi dealer Philips setempat.
Pertanyaan yang sering diajukan
Bab ini mencantumkan sejumlah pertanyaan yang sering diajukan mengenai alat ini. Jika Anda tidak
dapat menemukan jawaban atas pertanyaan Anda, hubungi Pusat Layanan Pelanggan di negara Anda.
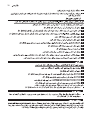
Umum:
Pertanyaan Jawab
Mengapa asap keluar
dari alat setelah saya
menghidupkannya
untuk pertama kali?
Ini adalah normal. Beberapa komponen setrika sudah dilumasi sedikit di
pabrik. Fenomena ini akan menyurut tak lama kemudian.
Mengapa ada partikel
kotor yang keluar dari
tapak setrika yang
baru?
Ini biasa terjadi pada setrika baru. Partikel-partikel ini tidak berbahaya dan
akan berhenti keluar dari tapak setrika setelah Anda menggunakannya
beberapa kali.
Mengapa ada partikel
kotor yang keluar dari
setrika sewaktu
penyetrikaan?
Kotoran dan bahan kimia yang dikandung air mungkin mengendap dalam
tangki uap dan/atau tapak setrika. Bersihkan tapak setrika dan bilas tangki
uap (lihat bab ‘Membersihkan dan pemeliharaan’).
Mengapa tetesan air
keluar dari tapak
setrika?
Tombol suhu mungkin disetel ke suhu yang terlalu rendah untuk
menyetrika dengan uap. Pilih suhu penyetrikaan yang sesuai (setelan suhu
2 hingga MAX).
Anda mungkin sudah menggunakan fungsi semburan uap sewaktu Anda
mulai menyetrika. Pertama-tama, lakukan penyetrikaan uap sebentar
sebelum Anda menggunakan fungsi semburan uap. Adalah hal normal
apabila sesekali ada air yang menetes dari setrika.
Anda mungkin telah meletakkan tangki uap pada permukaan yang tidak
stabil dan/atau tidak rata. Tempatkan tangki uap pada permukaan yang
stabil dan rata.
INDONESIA20
A página está carregando...
A página está carregando...
A página está carregando...
A página está carregando...
A página está carregando...
A página está carregando...
A página está carregando...
A página está carregando...
A página está carregando...
A página está carregando...
A página está carregando...
A página está carregando...
A página está carregando...
A página está carregando...
A página está carregando...
A página está carregando...
A página está carregando...
A página está carregando...
A página está carregando...
A página está carregando...
A página está carregando...
A página está carregando...
A página está carregando...
A página está carregando...
A página está carregando...
A página está carregando...
A página está carregando...
A página está carregando...
A página está carregando...
A página está carregando...
A página está carregando...
A página está carregando...
A página está carregando...
A página está carregando...
A página está carregando...
A página está carregando...
A página está carregando...
A página está carregando...
A página está carregando...
A página está carregando...
A página está carregando...
A página está carregando...
A página está carregando...
A página está carregando...
A página está carregando...
A página está carregando...
A página está carregando...
A página está carregando...
A página está carregando...
A página está carregando...
A página está carregando...
A página está carregando...
A página está carregando...
A página está carregando...
A página está carregando...
A página está carregando...
A página está carregando...
A página está carregando...
A página está carregando...
A página está carregando...
A página está carregando...
A página está carregando...
A página está carregando...
A página está carregando...
A página está carregando...
A página está carregando...
A página está carregando...
A página está carregando...
A página está carregando...
A página está carregando...
A página está carregando...
A página está carregando...
-
 1
1
-
 2
2
-
 3
3
-
 4
4
-
 5
5
-
 6
6
-
 7
7
-
 8
8
-
 9
9
-
 10
10
-
 11
11
-
 12
12
-
 13
13
-
 14
14
-
 15
15
-
 16
16
-
 17
17
-
 18
18
-
 19
19
-
 20
20
-
 21
21
-
 22
22
-
 23
23
-
 24
24
-
 25
25
-
 26
26
-
 27
27
-
 28
28
-
 29
29
-
 30
30
-
 31
31
-
 32
32
-
 33
33
-
 34
34
-
 35
35
-
 36
36
-
 37
37
-
 38
38
-
 39
39
-
 40
40
-
 41
41
-
 42
42
-
 43
43
-
 44
44
-
 45
45
-
 46
46
-
 47
47
-
 48
48
-
 49
49
-
 50
50
-
 51
51
-
 52
52
-
 53
53
-
 54
54
-
 55
55
-
 56
56
-
 57
57
-
 58
58
-
 59
59
-
 60
60
-
 61
61
-
 62
62
-
 63
63
-
 64
64
-
 65
65
-
 66
66
-
 67
67
-
 68
68
-
 69
69
-
 70
70
-
 71
71
-
 72
72
-
 73
73
-
 74
74
-
 75
75
-
 76
76
-
 77
77
-
 78
78
-
 79
79
-
 80
80
-
 81
81
-
 82
82
-
 83
83
-
 84
84
-
 85
85
-
 86
86
-
 87
87
-
 88
88
-
 89
89
-
 90
90
-
 91
91
-
 92
92


Philips GC7220/02 Manual do usuário
- Categoria
- Estações de engomar a vapor
- Tipo
- Manual do usuário
Artigos relacionados
-
Philips GC660/05 Manual do usuário
-
Philips GC8280 Manual do proprietário
-
Philips GC9642/60 Informação importante
-
Philips gc7320 02 Manual do usuário
-
Philips GC7240 Manual do proprietário
-
Philips GC9650/80 Manual do usuário
-
-
-
Philips GC7041/37R1 Manual do usuário
-
Philips GC8640/02 Manual do usuário