Muse M-620 SH Manual do usuário
- Categoria
- Alto-falantes portáteis
- Tipo
- Manual do usuário

R1. : Veille/ Marche
R2. MUTE : Activation/ désactivation du son.
R3. VOL +/- : Réglage du volume
R4. : Pour passer à la piste précédente
R5. : Pour passer à la piste suivante
R6. : Lecture/ Pause
R7. OPT : Pour sélectionner le mode optique.
R8. USB : Pour sélectionner le mode USB.
R9. COAX : Pour sélectionner le mode coaxial.
R10. BT : Pour sélectionner le mode Bluetooth.
R11. LINE: Pour sélectionner le mode auxiliaire.
R12. MUSIC/ MOVIE/ DIALOG : Pour sélectionner les eets sonores souhaités:
musique, lm, dialogue.
R1. : To turn unit on/o.
R2. MUTE : To mute or restore sound.
R3. VOL +/- : To adjust the volume level.
R4. : To skip to previous track
R5. : To skip to next track
R6. : Play/ pause
R7. OPT : To select optical mode.
R8. USB : To select USB mode.
R9. COAX : To select coaxial mode.
R10. BT : To select Bluetooth mode.
R11. LINE : To select aux mode.
R12. MUSIC/ MOVIE/ DIALOG : To select desired sound eects: music, movie,
dialog.
R1. : Para ligar e desligar o aparelho
R2. MUTE : Activação/ desactivação do som.
R3. VOL +/- : Regulação do volume
R4. : Para saltar para a faixa anterior
R5. : Para saltar para a faixa seguinte
R6. : Leitura/ Pausa
R7. OPT : Para selecionar o modo Ótico.
R8. USB : Para selecionar o modo USB.
R9. COAX : Para selecionar o modo Coaxial.
R10. BT : Para selecionar o modo Bluetooth.
R11. LINE : Para selecionar o modo AUX.
R12. MUSIC/ MOVIE/ DIALOG : Para selecionar os efeitos sonoros desejados:
música, lme, diálogo.
R1. : Gerät ein-/ ausschalten
R2. MUTE : Aktivieren/ Deaktivieren des Tons
R3. VOL +/- : Einstellen der Lautstärke
R4. : Zum vorherigen Titel springen
R5. : Zum nächsten Titel springen
R6. : Wiedergabe/ pause
R7. OPT : Zur Auswahl des optischen Modus.
R8. USB : Zur Auswahl des Bluetooth-Modus.
R9. COAX : Zur Auswahl des koaxialen Modus.
R10. BT : Zur Auswahl des Bluetooth-Modus.
R11. LINE : Zur Auswahl des Aux-Eingangsmodus.
R12. MUSIC/ MOVIE/ DIALOG : Zur Auswahl des gewünschten Soundeekts:
Musik, Film, Dialog.
DESCRIPTION DE L’APPAREIL LOCATION OF CONTROLS DESCRIÇÃO DO APARELHO BESCHREIBUNG DES GERÄTS
Télécommande Remote control
Telecomando
Fernbedienung
M-620 SH
Avant de jeter les piles, consultez votre revendeur car celui-ci peut les
reprendre pour les recycler.
Before throwing any batteries away, consult your distributor who may be
able to take them back for specic recycling.
Antes de eliminar as pilhas, consulte o seu revendedor pois este pode
retomá-las para reciclagem.
Werfen Sie leere Batterien nicht in den Hausmüll, sondern geben Sie
diese bei einer Sammelstelle oder bei Ihrem Händler ab.
Télécommande x1
Adaptateur Secteur x1
Câble RCA (Câble de connexion haut-parleur L/R) x1
Remote control x1
AC adaptor x1
RCA cable (L/R speaker connection cable) x1
Telecomando x1
Adaptador de corrente x1
Cabo RCA (Cabo de ligação da coluna L/R) x1
Fernbedienung x1
Netzstromadapter x1
RCA-Kabel (Verbindungskabel für L/R Lautsprecher) x1
Utilisez le câble RCA fourni pour connecter les deux haut-parleurs.
Use the supplied RCA cable to connect the two speakers.
Utilize o cabo RCA fornecido para ligar as duas colunas.
Verwenden Sie das mitgelieferte RCA-Kabel, um die beiden Lautsprecher zu
verbinden.
1. Connectez un appareil USB sur le port USB de l'unité. L'appareil passe en mode
USB et la lecture commence automatiquement. Le voyant LED de fonction
deviendra violet.
2. Sélectionnez la piste de votre choix avec / de la télécommande.
Remarques:
- Le mode USB peut être sélectionné par le bouton sur l'appareil ou le bouton
USB sur la télécommande uniquement lorsque le périphérique USB est connecté
à l'appareil.
- Le nombre total de chiers MP3 sur l'appareil USB ne doit pas dépasser 999.
- L'appareil USB ne peut pas contenir plus de 99 répertoires.
- La durée de lecture prend quelques secondes ou plus en fonction de la quantité
de chiers MP3 et de dossiers USB sur l'appareil.
- N’insérez rien d’autre qu’un périphérique USB dans le port prévu à cet eet. Vous
risqueriez d’abîmer l’appareil.
- Le port USB ne doit pas être directement connecté à un ordinateur : cela pourrait
endommager l’appareil.
- Il existe sur le marché de nombreux modèles de clefs USB. Nous ne pouvons
garantir une compatibilité avec tous les formats. Merci d’utiliser un autre
périphérique USB si le vôtre ne fonctionne pas.
1. Connect an USB device to the USB port on unit. It will switch to USB mode
and start playback automatically. The function LED indicator will become purple.
2. Select desired track with / on remote control.
Notes:
- USB mode can be selected by button on unit or USB button on remote control
only when the USB device is connected to the unit.
- The total number of MP3 les on the USB device should not exceed 999.
- The device may not contain more than 99 directories.
- The reading time takes about a few seconds or more depending on the amount of
MP3 les and folders on USB device.
- Do not put anything other than a USB device to the port of this unit. Other objects
may damage the USB mechanism.
- The USB socket must not be connected to the computer directly, for that may
damage the unit.
- There are many USB devices in the market. We cannot guarantee to support all
dierent models. Please try another USB device if your device is not supported.
1. Conecte um dispositivo USB na conexão USB do aparelho. Irá mudar para o
modo USB e iniciar a reprodução automaticamente. O indicador LED de função
irá car roxo.
2. Selecione a faixa desejada com / do telecomando.
Observação:
- O modo USB pode ser selecionado ao premir o botão na unidade ou no botão
USB no comando, apenas quando o dispositivo USB está ligado à unidade.
- O número total de arquivos de MP3 no dispositivo USB não deverá ser maior
que 999.
- O dispositivo USB não poderá ter mais que 99 diretórios.
- O tempo de leitura poderá ser de alguns segundos ou mais, dependendo da
quantidade de arquivos de MP3 e pastas no dispositivo USB.
- Não insira mais nada a não ser um periférico USB na porta prevista para este
efeito. Corre o risco de danicar o aparelho.
- A porta USB não deve ser directamente ligada a um computador: tal pode
danicar o aparelho.
- Existem no mercado inúmeros modelos de chaves USB e de leitores de MP3.
Não podemos garantir uma compatibilidade com todos os formatos. Utilize um
outro periférico USB se o seu não funcionar.
Sur la prise d'entrée OPTIQUE
Connectez votre source audio sur la prise OPT (ENTRÉE OPTIQUE) sur l’unité avec
un câble audio numérique optique (câble non fourni).
1. Appuyez plusieurs fois sur le bouton de l'appareil ou appuyez sur le bouton
OPT de la télécommande pour sélectionner le mode optique. Le voyant LED de
fonction deviendra blanc.
2. Démarrez la lecture depuis votre source audio.
3. Ajustez le volume sonore au niveau désiré.
4. Pour arrêter la lecture, déconnectez votre source audio de l’unité.
Remarque: OPTICAL IN est pour le format PCM seulement.
Vers la prise coaxiale
Utilisez le câble coaxial (non inclus) pour connecter la barre de son à la prise d'entrée
coaxiale de votre téléviseur ou de votre amplicateur. Appuyez plusieurs fois sur le
bouton de l'appareil jusqu'à ce que le voyant LED de fonction devienne vert, ou
appuyez sur le bouton COAX de la télécommande pour sélectionner directement le
mode coaxial.
Vers les prises LINE IN RCA
1. Connectez votre appareil auxiliaire (ex: lecteur DVD) sur les prises LINE IN L/R à
l'arrière de l'unité avec un câble audio RCA (câble non fourni).
2. Appuyez plusieurs fois sur le bouton de l'appareil jusqu'à ce que le voyant LED
de fonction devienne jaune, ou appuyez sur le bouton LINE de la télécommande
pour sélectionner directement le mode AUX.
3. Commencez la lecture de votre source auxiliaire.
4. Réglez le volume au niveau souhaité.
5. Pour arrêter la lecture, déconnectez votre source auxiliaire des prises LINE IN L/R.
To OPTICAL IN jack
Connect your audio source to the OPT jack on unit with a digital optical audio cable
(cable not included)
1. Press button on unit repeatedly or press OPT button on remote control to
select OPT mode. The function LED indicator will become white.
2. Start playback from your audio source.
3. Adjust the volume to desired level.
4. To stop playback, disconnect your audio source from this unit.
Note: OPTICAL IN is for PCM format only.
To coaxial jack
Use the coaxial cable (not included) to connect the soundbar to the coaxial input
jack on your TV or amplier. Press button on unit repeatedly until the function
LED indicator becomes green, or press COAX button on remote control to select
coaxial mode directly.
To LINE IN RCA jacks
1. Connect your auxiliary source (e.g. DVD player) to the LINE IN L/R jacks on back
of unit with RCA audio cable (cable not included).
2. Press button on unit repeatedly until the function LED indicator becomes
yellow, or press LINE button on remote control to select AUX mode directly.
3. Start playback from your auxiliary source.
4. Adjust the volume to desired level.
5. To stop playback, disconnect your auxiliary source from the LINE IN L/R jacks.
Para os conectores OPTICAL
Conecte a fonte de som no conector OPT do aparelho com um cabo de áudio
digital (não acompanha o produto).
1. Prima repetidamente o botão na unidade ou prima o botão OPT no comando
para selecionar o modo Ótico. O indicador LED de função cará branco.Inicie a
reprodução da sua fonte de som.
2. Ajuste o volume para o volume desejado.
3. Para interromper a reprodução, disconecte o seu dispositivo de áudio deste
aparelho.
ATENÇÃO: A entrada ótica (OPTICAL) é apenas para formatos PCM.
Para cha coaxial
Utilize o cabo coaxial (não incluído) para ligar a soundbar a cha de entrada coaxial
do seu televisor ou amplicador. Prima repetidamente o botão na unidade até
o indicador LED de função car verde, ou prima o botão COAX no comando para
selecionar diretamente o modo coaxial.
Na conexão de RCA LINE IN
1. Conecte a sua origem auxiliar (ex. Aparelho de DVD) na conexão de LINE IN L/R
localizada na parte de trás do aparelho através de um cabo de áudio RCA (cabo
não incluso).
2. Prima repetidamente o botão na unidade até o indicador LED de função
car amarelo, ou prima o botão LINE no comando para selecionar diretamente
o modo AUX.
3. Arranque a reprodução na sua fonte auxiliar.
4. Ajuste o volume sonoro para o nível pretendido.
5. Para interromper a reprodução, desconecte a sua origem auxiliar da conexão
LINE IN L/R.
L'adaptateur secteur fonctionne sur une alimentation AC comprise entre 100V
et 240V . L’adaptateur secteur fourni ne peut en aucun cas être utilisé sur un
autre type d’alimentation.
Avertissements
• L’adaptateur secteur fourni est exclusivement destiné à être utilisé avec cet
appareil. Ne l’utilisez donc pas avec d’autres appareils.
• An d’éviter d’abîmer l’appareil, éteignez-le avant de débrancher l’adaptateur
secteur de l’appareil.
• En cas de non-utilisation prolongée, débranchez l’adaptateur secteur de la prise
murale.
• Veillez à ce que la prise secteur se trouve à proximité et soit facilement accessible.
En cas de disfonctionnement, débranchez immédiatement la che d’alimentation
de la prise secteur.
• L’adaptateur secteur permet de débrancher l’appareil. Il doit rester facilement
accessible durant l’utilisation. Pour couper complètement l’alimentation de
l’appareil, débranchez l’adaptateur de la prise secteur.
• N’utilisez pas l’adaptateur secteur s’il est abîmé. Placez les câbles de manière
sûre et veillez à ce qu’ils ne soient ni coincés, ni pincés. Si le câble d’alimentation
est abîmé, contactez un technicien qualié.
Dans un souci d'économie d'énergie, à la n de la lecture ou bien encore si le
volume d'écoute est réglé à un niveau très bas et qu’aucune opération n'est
eectuée sur l'appareil pendant une période de 15 minutes celui ci se mettra
automatiquement en mode veille.
The supplied AC adaptor is suitable for use on AC mains supplies of 100-240V
50/60Hz and should only be connected to a mains supply within these parameters.
Cautions:
• The AC adaptor included with this unit is for its use only. Do not use it with other
equipment.
• Turn o the unit before unplugging the AC adaptor from the unit so as to avoid
the unit being damaged.
• When the unit is not going to be used for long time, disconnect the AC adaptor
from the AC outlet.
• Be sure to use it near the wall outlet and easily accessible. If a malfunction occurs,
disconnect the plug from the wall outlet at once.
• AC adaptor is used as the disconnect device. It shall remain readily operable and
should not be obstructed during intended use. To be completely disconnected
the apparatus from supply mains, the AC adaptor of the apparatus shall be
disconnected from the mains socket outlet completely.
• Never use an AC adaptor that is damaged, route power lead in a safe manner and
make sure it is not subjected to trapping or pinching. If the power lead is damaged
refer to a qualied service agent.
In a concern of saving energy, when playback has reached to the end or listening
volume is set at a very low level and no control is operated on the device for a
period of 15 minutes, the unit will automatically switch to Standby mode.
A fonte fornecida é adequada para ser utilizada em tomadas de 100 a 240V
50/60Hz e deverá ser apenas ligada a tomadas dentro dessas especicações.
Atenção:
• O adaptador de corrente fornecido destina-se apenas a ser utilizado com este
aparelho. Não o utilize, pois, com outros aparelhos.
• Desligue o aparelho antes de desligar o adaptador de corrente para evitar
danicar o leitor.
• No caso de não utilização prolongada, desligue o adaptador de corrente da
tomada.
• Coloque o aparelho na proximidade da tomada de parede e certiquese de que
esta se mantém facilmente acessível. Em caso de avaria, desligue imediatamente
o aparelho da tomada de parede.
• O adaptador de corrente permite desligar o aparelho. Deve ser mantido facilmente
acessível durante a utilização. Para cortar completamente a alimentação do
aparelho, desligue efectivamente o adaptador da tomada de corrente.
• Nunca utilize um adaptador de corrente danicado. Coloque o cabo de
alimentação de forma segura e de modo a não car preso nem esmagado. Se o
cabo estiver danicado, contacte um serviço de reparação.
No interesse de economizar energia, quando uma reprodução terminar ou o nível
de volume for denidocomo muito baixo e nenhuma operação for realizada por um
período de 15 minutos, o aparelho entrará automaticamente no modo de Espera.
Der Netzstromadapter funktioniert mit Wechselstrom zwischen 100 und 240V
Wechselstrom.
Der mitgelieferte Netzstromadapter darf auf keinen Fall mit einer Stromquelle mit
anderen Kenndaten als den genannten verwendet werden.
Vorsicht:
• Verwenden Sie den mitgelieferten Netzstromadapter ausschließlich für diesen
Player. Verwenden Sie ihn nicht mit anderen Geräten.
• Schalten Sie den Player aus, bevor Sie den Netzstromadapter aus der Steckdose
oder dem Player herausziehen; anderenfalls könnte der Player beschädigt
werden.
• Falls der Player über längere Zeit hinweg nicht benutzt werden soll, ziehen Sie
den Netzstromadapter aus der Netzsteckdose heraus.
• Vergewissern Sie sich, dass sichdie Netzsteckdose in der Nähe bendet
und leicht erreichbar ist. Falls eine Fehlfunktion auftritt, ziehen Sie sofort den
Netzstromadapter aus der Netzsteckdose heraus.
• Über den Netzstromadapter kann das Gerät von der Netzspannung getrennt
werden. Er sollte schnell eingeschaltet werden können und während der
vorgesehnen Verwendung nicht blockiert sein. Um das Gerät vollständig vom
Netzstrom zu trennen, muss der Netzstromadapter von der Netzsteckdose
vollständig getrennt werden.
• Verwenden Sie niemals einen beschädigten Netzstromadapter, verlegen Sie
das Netzanschlusskabel so, dass es sicher ist und nirgendwo eingeklemmt oder
gequetscht werden kann. Falls das Netzkabel beschädigt ist, wenden sie sich an
einen qualizierten Fachbetrieb.
Aus Energiespargründen aktiviert das Gerät automatisch den Standby-Modus,
wenn das Ende der Wiedergabe erreicht oder eine sehr geringe Lautstärke
eingestellt ist und 15 Minuten lang keine Eingabe am Gerät erfolgt.
Appuyez sur la touche pour mettre l’appareil en marche. Appuyez à nouveau sur
le bouton de la télécommande ou maintenez enfoncé le bouton sur l'appareil
pour l’éteindre.
Press button to turn on the unit. Press again on remote control or long press
on unit to turn o the unit.
No modo de espera, pressione o botão para ligar o aparelho. Prima novamente
o botão no comando ou prima e segure o botão na unidade para desligar a
unidade.
Betätigen Sie die Taste , um das Gerät einzuschalten. Drücken Sie erneut die
Taste auf der Fernbedienung oder halten Sie die Taste am Gerät gedrückt,
um das Gerät auszuschalten.
Le mode de fonction est sélectionné en appuyant plusieurs fois sur le bouton
de l'appareil ou en appuyant respectivement sur le bouton BT, OPT, COAX, LINE
ou USB de la télécommande.
Signication de la couleur du voyant LED de fonction pour les diérents modes:
Rouge: Veille
Bleu: Bluetooth
Blanc: Optique
Vert: Coaxial
Jaune: AUX (entrée Line in)
Violet: USB
Remarques:
- Une fois le périphérique USB inséré dans le port USB de l'appareil, il passera
automatiquement en mode USB.
- Le mode USB peut être sélectionné par le bouton sur l'appareil ou le bouton
USB sur la télécommande uniquement lorsque le périphérique USB est connecté
à l'appareil.
The function mode is selected by pressing button on unit repeatedly, or pressing
BT, OPT, COAX, LINE or USB button on remote control respectively.
Observe the color of function LED indicator for dierent mode:
Red: Standby
Blue: Bluetooth
White: Optical
Green: Coaxial
Yellow: Aux (Line in)
Purple: USB
Notes:
- Once insert the USB device to the USB port of unit, it will switch to USB mode
automatically.
- USB mode can be selected by button on unit or USB button on remote control
only when the USB device is connected to the unit.
O modo de função é selecionado quando prime repetidamente o botão
na unidade, ou prime os botões no comando BT, OPT, COAX, LINE ou USB
respetivamente.
Verique a cor do indicador LED de função para cada modo diferente:
Vermelho: Modo de espera
Azul: Bluetooth
Branco: Ótico
Verde: Coaxial
Amarelo: AUX (entrada de linha)
Roxo: USB
Observação:
- Depois de inserir o dispositivo USB na porta USB da unidade, este irá mudar para
o modo USB automaticamente.
- O modo USB pode ser selecionado ao premir o botão na unidade ou no botão
USB no comando, apenas quando o dispositivo USB está ligado à unidade.
Für die Auswahl eines Funktionsmodus drücken Sie wiederholt die Taste am
Gerät oder drücken Sie auf der Fernbedienung entsprechend die Tasten BT, OPT,
COAX, LINE bzw. USB.
Je nach Modus leuchtet die LED-Anzeige in einer anderen Farbe:
Rot: Standby
Blau: Bluetooth
Weiß: Optisch
Grün: Koaxial
Gelb: AUX (Line-In)
Lila: USB
Hinweise:
- Nach der Verbindung des externen USB-Geräts mit der USB-Buchse Ihres Geräts
wird automatisch der USB-Modus aktiviert.
- Den USB-Modus können Sie durch Drücken der Taste am Gerät oder der
Taste USB auf der Fernbedienung einstellen, allerdings nur dann, wenn ein USB-
Gerät mit dem Radio verbunden ist.
ALIMENTATION
Adaptateur secteur:
Entrée: 100-240V 50/60Hz
Puissance de sortie: CC 19,0V 1.89A 35.91W
BLUETOOTH
Version Bluetooth: V5.0
Bluetooth: 2.402-2.480GHz
Puissance de sortie des RF (fréquences radios): 5.34 dBm
Distance de fonctionnement: Jusqu'à 10 mètres mesurés en espace ouvert (les
murs et les structures peuvent aecter la portée de l'appareil)
Contrôle à distance: Jusqu'à 8 mètres, +/- 30 degrés.
Les caractéristiques et les spécications sont sujettes à modication sans préavis.
POWER SUPPLY:
AC ADAPTOR:
Input: AC 100-240V 50/60Hz
Output: DC 19.0V 1.89A 35.91W
BLUETOOTH
Bluetooth Version: V5.0
Bluetooth: 2.402-2.480GHz
RF Output Power: 5.34 dBm
Working Distance: Up to 10 meters measured in open space (wall and structures
may aect range of device)
Remote working distance: Up to 8 meters, +/- 30 degree
Specications are subject to change without notice.
ALIMENTAÇÃO:
Adaptador de corrente:
Entrada: 100-240V 50/60Hz
Saída: DC 19.0V 1.89A 35.91W
BLUETOOTH
Versão do Bluetooth: V5.0
Bluetooth: 2.402-2.480GHz
Potência de saíde de RF (Rádio Frequência): 5.34dBm
Distância de Funcionamento: Até 10 metros, medido em espaço aberto (paredes e
estruturas poderão afetar a distância de funcionamento do dispositivo).
Alcance do Controle Remoto: Até 8 metros, +/- 30 graus.
O desenho e as especicaçõesestão sujeitas a mudanças sem aviso prévio.
4. Réglez le volume à l'aide des touches de volume. Vous pouvez également régler
le volume sur l'appareil avec lequel vous êtes couplé.
Remarque: Le voyant LED de fonction restera allumé pendant la lecture.
Par la présente, NEW ONE S.A.S déclare que l'appareil "MUSE M-620 SH" est
conforme aux exigences essentielles et autres dispositions pertinentes de la
directive 2014/53/EU. La déclaration de conformité peut être consultée sur le site
www.muse-europe.com
Le mot Bluetooth® ainsi que les marques et logo sont des marques commerciales
déposées détenues par Bluetooth SIG, Inc. et l'utilisation de ces marques par New
One S.A.S se fait dans le cadre d'une autorisation. Les autres marques et noms
commerciaux sont les propriétés de leurs titulaires respectifs.
Coupler un appareil Bluetooth
1. Lorsque l'appareil est allumé, appuyez plusieurs fois sur le bouton de
l'appareil jusqu'à ce que le voyant LED de fonction devienne bleu, ou appuyez
sur le bouton BT de la télécommande pour sélectionner directement le mode
Bluetooth. Le voyant LED de fonction clignotera rapidement indiquant que
l’appareil est en mode de couplage.
2. Sur l'appareil Bluetooth, activez le Bluetooth et sélectionnez «MUSE M-620 SH»
dans la liste des appareils. (consultez le manuel d'instruction de l'appareil pour
les détails de connexion). Si l'appareil Bluetooth vous demande un mot de
passe, utilisez '0000'. Certains appareils Bluetooth vous demanderont d'accepter
la connexion. Vous entendrez un signal sonore une fois le couplage eectué Le
voyant LED de fonction clignotera lentement.
Astuce: Si vous souhaitez connecter votre enceinte Bluetooth à un autre appareil
Bluetooth, appuyez sur le bouton BT et maintenez-le enfoncé pour déconnecter le
périphérique, puis suivez les étapes ci-dessus pour établir une nouvelle connexion.
• Sur certains appareils, comme les ordinateurs, une fois couplé, vous devrez
sélectionner l'unité dans le menu Bluetooth et choisir « utiliser comme un dispositif
audio (Stéréo) » ou une phrase similaire.
• Le couplage reste intact lorsque l’unité et/ou l’appareil Bluetooth sont amenés
hors de la portée de liaison. Une connexion active sera rétablie lorsque votre
appareil Bluetooth reviendra dans la portée.
• Lorsque vous rallumez l'unité, elle essayera automatiquement de se reconnecter
avec le dernier appareil Bluetooth connecté.
Utiliser un appareil Bluetooth
1. Avec une unité couplée, (voir la section précédente), faites fonctionner votre
appareil Bluetooth et il diusera du son par le biais de l'enceinte M-620 SH.
2. Appuyez sur la touche de la télécommande pour mettre la lecture en pause.
Appuyer à nouveau pour reprendre la lecture.
3. Sélectionnez la piste de votre choix avec / de la télécommande.
The Bluetooth® word mark and logos are registered trademarks owned by Bluetooth
SIG, Inc. and any use of such marks by New One S.A.S is under license. Other
trademarks and trade names are those of their respective owners.
Pairing a Bluetooth Device
1. When the unit is ON, press button on unit repeatedly until the function LED
indicator becomes blue, or press BT button on remote control to select Bluetooth
mode directly. The function LED indicator will blink fast indicating it’s in pairing
mode.
2. On the Bluetooth device, enable Bluetooth and select “MUSE M-620 SH” from
the Device List. (Refer to the user manual of the device to be connected for
detailed operations.) If the Bluetooth device prompts for a pass code, use “0000”.
Some Bluetooth devices will ask you to accept the connection. You will hear
an indication sound when pairing is successful. The function LED indicator will
blink slowly.
Tip: If you want to connect your Bluetooth speaker to another Bluetooth audio
device, press and hold BT button to disconnect the current device, and then follow
the steps above to make a new connection.
• On some devices such as computers, once paired you must select the unit from
the Bluetooth menu and choose “Use as Audio Device (stereo)” or similar.
• Pairing remains intact when the unit and/or your Bluetooth device is taken out
of communication range. An active connection will be re-established when your
Bluetooth device returns within range.
• When the unit is turned on again, it will automatically try to reconnect with the most
recently paired Bluetooth device.
Using a Bluetooth Device
1. With a unit paired (see previous section), operate your Bluetooth device and its
sound will be heard through the M-620 SH’s speakers.
2. Press button on remote control to pause playback. Press again to resume
playback.
3. Select desired track with / on remote control.
4. Adjust the volume using the Volume buttons. You can also adjust the volume on
the device to which you are paired.
Note: The function LED indicator will stay lit during playback.
Hereby, NEW ONE S.A.S, declares that this MUSE M-620 SH is in compliance with
the essential requirements and other relevant provisions of Directive 2014/53/EU.
The declaration of conformity may be consulted at www.muse-europe.com
4. Ajuste o volume através dos botões de Volume. Você tamb ém poderá ajustar o
volume através do dispositivo com o qual você estiver pareado.
Nota: O indicador LED de função cará aceso durante a reprodução.
A NEW ONE S.A.S aqui declara que este produto « MUSE M-620 SH» cumpre
os requisitos essenciais e outras disposições relevantes da Norma 2014/53/EU.
A declaração de conformidade pode ser consultada em www.muse-europe.com
O nome Bluetooth® e logotipos são marcas registradas de propriedade da Bluetooth
SIG, Inc. e quaisquer usos destas marcas pela New One S.A.S estão licenciados.
Outras marcas e nomes registrados pertencem aos seus respectivos proprietários.
Pareando um dispositivo com Bluetooth
1. Quando a unidade estiver ligada, prima repetidamente no botão na unidade
até o indicador LED de função car azul, ou prima o botão BT no comando para
selecionar diretamente o modo Bluetooth. O indicador LED de função irá piscar
rapidamente, indicando que está em modo de emparelhamento.
2. No dispositivo com Bluetooth, ative o Bluetooth e selecione "MUSE M-620 SH"
na Lista de Dispositivos. (Consulte o manual de instruções do dispositivo que
estiver sendo conectado para mais detalhes). Caso o dispositivo com bluetooth
solicite uma senha, utilize "0000". Alguns dispositivos com Bluetooth solicitarão
que você aceite a conexão. Se a unidade estiver emparelhada corretamente,
pode ser ouvida uma voz e o indicador Bluetooth irá acender. O indicador LED
de função irá piscar lentamente.
Dica: Caso você queira conectar a sua caixa de som Bluetooth a outro dispositivo
com Bluetooth, pressione e segure o botão BT para desconectar o dispositivo e
siga os passos acima para fazer uma nova conexão.
• Em alguns dispositivos, como computadores, uma vez pareado, você precisará
selecionar o aparelho em um Menu Bluetooth e escolher "Utilizar como Dispositivo
de Áudio (estéreo)" ou semelhante.
• O pareamento permanecerá intacto quando o aparelho ou o seu dispositivo
com Bluetooth for retirado da área de comunicação. Uma conexão ativa será
restabelecida quando o dispositivo com Bluetooth voltar à área de alcance.
• Quando o aparelho for ligado novamente, ele tentará automaticamente
se reconectar ao dispositivo de Bluetooth com o qual ele tenha sido mais
recentemente pareado.
Utilizando um dispositivo com Bluetooth
1. Com o aparelho pareado (veja seção anterior), utilize o seu dispositivo com
Bluetooth e o seu som poderá ser escutado através das caixas de som do
M-620 SH.
2. Pressione o botão do telecomando para pausar uma reprodução. Pressione
novamente para continuar uma reprodução.
3. Selecione a faixa desejada com / do telecomando.
Der Bluetooth®-Markenname und damit verbundene Logos sind Eigentum der
Firma Bluetooth SIG, Inc. Jegliche Benutzung dieser Marken durch die Firma New
One S.A.S stehen unter Lizenz. Alle anderen Produkt- und Markennamen sind
Eigentum_der jeweiligen Besitzer.
Verbindungsaufbau mit einem Bluetooth-Gerät
1. Drücken Sie, während das Gerät EINGESCHALTET ist, wiederholt die Taste
, bis die LED-Anzeige blau blinkt, oder drücken Sie die Taste BT auf der
Fernbedienung, um den Bluetooth-Modus direkt einzustellen. Die LED-
Funktionsanzeige blinkt zügig blau und weist somit darauf hin, dass der
Kopplungsmodus aktiviert ist.
2. Aktivieren Sie die Bluetooth-Funktion auf Ihrem Bluetooth-Gerät, und
wählen Sie "MUSE M-620 SH" in der Geräteliste. (Lesen Sie bitte die
Bedienungsanleitung des jeweiligen Geräts für detaillierte Bedienungsschritte
zum Verbindungsaufbau.) Wenn das Bluetooth-Gerät Sie zur Eingabe eines
Schlüssels auordert, geben Sie bitte "0000" ein. Manche Bluetooth-Geräte
erfordern es zudem, dass die Verbindung bestätigt wird. Nach der erfolgreichen
Kopplung ertönt ein Signalton. Die Bluetooth-Anzeige hört auf zu blinken und
leuchtet stetig. Die LED-Funktionsanzeige blinkt langsam.
Tipp: Wenn Sie Ihren Bluetooth-Lautsprecher mit einem anderen Bluetooth-Audio-
Gerät verbinden möchten, halten Sie die Taste BT gedrückt, um das Gerät zu
trennen. Folgen Sie dann der oben erläuterten Vorgehensweise, um eine neue
Verbindung herzustellen.
• Auf einigen Geräten wie z. B. Computern müssen Sie bei bestehender Verbindung
das Gerät aus dem Bluetooth-Menü wählen und als Audiogerät aktivieren.
• Die Verbindung bleibt bestehen, wenn das Bluetooth-Gerät außer Reichweite
bzw. ausgeschaltet ist. Eine aktive Verbindung wird dann wieder hergestellt, wenn
das Bluetooth-Gerät sich wieder in Reichweite bendet.
• Wird das Gerät erneut eingeschaltet, versucht es automatisch, sich mit dem
zuletzt gekoppelten Bluetooth-Gerät zu verbinden.
ACCESSOIRES
ACCESSORIES
ACESSÓRIOS
ZUBEHÖR:
CONNEXION DES HAUT-PARLEURS
SPEAKER CONNECTION
LIGAÇÃO DA COLUNA
ANSCHLUSS DER LAUTSPRECHER
UNITÉ PRINCIPALE (HAUT-PARLEUR ACTIF)
MAIN UNIT (ACTIVE SPEAKER)
UNIDADE PRINCIPAL (COLUNA ATIVA)
HAUPTGERÄT (AKTIVER LAUTSPRECHER)
HAUT-PARLEUR PASSIF
PASSIVE SPEAKER
COLUNA PASSIVA
PASSIVER LAUTSPRECHER
TÉLÉCOMMANDE
REMOTE CONTROL
TELECOMANDO
FERNBEDIENUNG
LECTURE USB
USB PLAYBACK
REPRODUÇÃO DE USB
CONNEXION AVEC UN APPAREIL EXTERNE
CONNECTING WITH EXTERNAL DEVICES
CONECTANDO UM DISPOSITIVO EXTERNO
ALIMENTATION
POWER SUPPLY
ALIMENTAÇÃO STROMVERSORGUNG
MISE EN MARCHE ET ARRET DE L’APPAREIL
TURNING UNIT ON/OFF
LIGANDO/ DESLIGANDO O APARELHO
GERÄT EIN-/ AUSSCHALTEN
CHOIX DE LA FONCTION
SELECTING FUNCTION
SELECIONANDO A FUNÇÃO
FUNKTION AUSWÄHLEN
FICHE TECHNIQUE
TECHNICAL SPECIFICATION
ESPECIFICAÇÕES
FONCTION BLUETOOTH
BLUETOOTH FUNCTION
FUNÇÃO DE BLUETOOTH
BEDIENUNG
MISE EN PLACE DES PILES
Insérez 2 piles AAA/UM4 dans la télécommande avant toute utilisation. Veillez à
respecter les indications de polarité (+/-) inscrites dans le compartiment pour piles.
Installing Battery
Insert 2 “AAA/ UM4” batteries to the remote control prior to use. Make sure to match
their polarities (+/-) to the markings inside the compartment. COLOCAÇÃO DAS PILHAS
Insira 2 pilhas AAA/UM4 no telecomando antes de qualquer utilização. Respeite as
indicações de polaridade (+/-) inscritas no compartimento para as pilhas.
Einlegen der Batterien
Legen Sie 2 AAA/UM4-Batterien in die Fernbedienung ein, bevor Sie diese
benutzen. Achten Sie dabei auf die Polaritätsangaben (+/-) im Batteriefach.
CONSIGNES DE SÉCURITÉ
SAFETY INSTRUCTIONS
INSTRUÇÕES DE SEGURANÇA
ATTENTION: Pour réduire le risque de choc électrique,
ne démontez pas l’appareil. L’appareil ne contient
aucune pièce réparable par l’utilisateur. Conez tout
entretien à un technicien qualié.
CAUTION: To reduce the risk of electric shock, do
not remove the cover (or back). There are no user
serviceable parts inside the unit. Refer all servicing to
qualify personnel.
ATENÇÃO: Para reduzir o risco de choque eléctrico,
não desmonte o aparelho. O aparelho não contém
qualquer peça passível de ser reparada pelo utilizador.
Cone todas as operações de manutenção a um técnico
qualicado.
Le symbole de l'éclair terminé par une èche à l'intérieur d'un triangle
avertit l'utilisateur de la présence d’une « tension dangereuse » dans
l'appareil.
The lightening ash with arrowhead symbol within the triangle is a warning
sign alerting the user of “dangerous voltage” inside the unit.
O símbolo do relâmpago com uma seta e situado no interior de um
triângulo destina-se a alertar o utilizador para a presença de uma “tensão
perigosa” no aparelho.
Le point d’exclamation à l’intérieur d’un triangle avertit l’utilisateur de
la présence d’importantes instructions dans le manuel accompagnant
l’appareil.
The exclamation point within the triangle is a warning sign alerting the
user of important instructions accompanying the product.
O ponto de exclamação no interior de um triângulo destina-se a alertar
o utilizador para a presença de instruções importantes no manual que
acompanha o aparelho.
Si vous souhaitez vous débarrasser de cet appareil, pensez à le recycler
dans une décharge pour appareils ménagers électriques. Renseignez-
vous pour connaître votre centre de recyclage le plus proche. Informez-
vous auprès des autorités locales ou de votre revendeur pour de plus
amples détails. (Directive sur les Déchets des équipements électriques
et électroniques)
If at any time in the future you should need to dispose of this product
please note that Waste electrical products should not be disposed of
with household waste. Please recycle where facilities exist. Check with
your Local Authority or retailer for recycling advice. (Waste Electrical and
Electronic Equipment Directive)
Caso pretenda descartar-se deste aparelho, proceda à sua reciclagem
num centro de recolha para electrodomésticos. Procure obter
informações sobre o centro de reciclagem mais próximo. Informe-
se junto das autoridades locais ou do seu revendedor local para a
obtenção de pormenores adicionais (Directiva sobre os Resíduos dos
Equipamentos Eléctricos e Electrónicos).
REMARQUES:
- Ne chargez jamais des piles non rechargeables. Ne chauez pas les piles et ne
les démontez pas.
- En cas de non-utilisation prolongée de la télécommande, retirez les piles an
d’éviter tout dommage provoqué par une corrosion due à un écoulement de
celles-ci.
- Veillez au respect de l’environnement lorsque vous vous débarrassez des piles
usagées.
- Ne jetez pas les piles dans le feu !
- N’exposez pas les piles à une chaleur excessive, comme les rayons du soleil, le
feu ou d’autres sources de chaleur similaires.
ATTENTION: Risque d’explosion si les piles n’ont pas été insérées correctement.
Remplacez-les uniquement par des piles identiques ou de type équivalent.
NOTES:
- Never recharge the batteries, apply heat to them or take them apart.
- If the remote control is not going to be used for a long time, remove the battery to
avoid damage caused by battery leakage corrosion.
- Attention should be drawn to the environmental aspects of battery disposal.
- Do not throw batteries in re!
- Battery shall not be exposed to excessive heat such as sunshine, re or the like.
CAUTION: Danger of explosion if battery is incorrectly replaced. Replace only with
the same or equivalent type.
OBSERVAÇÕES:
- Nunca carregue pilhas não recarregáveis. Não aqueça as pilhas e não as
desmonte.
- No caso de não utilização prolongada do telecomando, retire a pilha de modo a
evitar quaisquer danos causados pela corrosão originada pelo líquido vertido da
referida pilha.
- Certique-se de que respeita o ambiente quando eliminar pilhs gastas.
- Não deite as pilhas no fogo!
- Não exponha as pilhas a calor excessivo, como raios do sol, fogo ou outras fontes
de calor semelhantes.
ATENÇÃO: Risco de explosão se a pilha não for inserida correctamente.
Substitua-a apenas por uma pilha idêntica ou de tipo equivalente.
HINWEISE:
- Versuchen Sie nicht, nicht auadbareBatterien aufzuladen. Erhitzen Sie Batterien
nicht, demontieren Sie sie nicht.
- Wenn Sie die Fernbedienung während längerer Zeit nicht verwenden, entfernen
Sie die Batterien, um Schäden durch Ausießen der Batterie zu vermeiden.
- Entsorgen Sie leere Batterien umweltgerecht.- Werfen Sie Batterien nicht ins
Feuer!
- Batterien dürfen keiner übermäßigen Hitze ausgesetzt werden (wie zum Beispiel
praller Sonne, Feuer oder anderen ähnlichen Hitzequellen).
ACHTUNG: Wenn die Batterie nicht richtig eingelegt wird, besteht die Gefahr, dass
die Batterie explodiert. Ersetzen Sie eine leere Batterie nur mit einer identischen
oder gleichwertigen Batterie.
AVERTISSEMENT: POUR PRÉVENIR TOUT RISQUE D’INCENDIE OU DE
CHOC ÉLECTRIQUE, N’EXPOSEZ PAS CET APPAREIL À LA PLUIE OU À
L’HUMIDITÉ.
La plaque de précaution est située à l’arrière de l’appareil.
IMPORTANT
- Utilisez cet appareil sous un climat tempéré.
- La plaque signalétique se trouve à l’arrière de cet appareil.
- Veiller à avoir une distance minimale de 5 cm autour de l'appareil pour une
aération susante et que la ventilation ne soit pas gênée en recouvrant les orices
d'aération de l'appareil avec des objets tels que journaux, nappes, rideaux…..
- Ne placez pas de sources de ammes nues, telles que des bougies allumées
sur l'appareil.
- Ne pas exposer l'appareil à des gouttes d'eau ou éclaboussures.
- Ne placez pas d'objets remplis de liquides, tels que verre, vase ou objets
similaires sur l'appareil.
- Ne pas jeter les piles dans le feu! Respectez l'environnement lors de la disposition
des piles usagées.
- Les piles ne doivent pas être exposées à une chaleur excessive comme le soleil,
le feu ou autre source de chaleur similaire.
- L’adaptateur secteur permet de débrancher l’appareil. Il doit rester facilement
accessible durant l’utilisation. Pour couper complètement l’alimentation de
l’appareil, débranchez l’adaptateur de la prise secteur.
- Sous l'inuence du phénomène transitoire rapide et / ou phénomène
électrostatique électrique, le produit pourrait présenter des dysfonctionnements
et l'utilisateur devra faire une réinitialisation de l'appareil.
- Le fonctionnement normal du produit peut être perturbé par de fortes interférences
électromagnétiques. Si tel est le cas, il sut de réinitialiser le produit pour qu'il
reprenne son fonctionnement normal en suivant le manuel d'instructions. Si le
fonctionnement ne revient toujours pas à la normale, veuillez déplacer et utiliser
le produit dans un endroit orant une meilleure réception.
WARNING: TO PREVENT FIRE OR SHOCK HAZARD, DO NOT EXPOSE THIS
APPLIANCE TO RAIN OR MOISTURE.
The Caution mark is located at the back of the device.
IMPORTANT!
- The use of apparatus in moderate climates.
- The Marking plate is located at the back of the device.
- Make sure to have a minimum distance of 5 cm around the unit for sucient
ventilation.
- Ensure that the ventilation openings is not covered with items such as newspapers,
tablecloths, curtains, etc.
- Do not place naked ame sources, such as lighted candles on the apparatus.
- Do not expose this appliance to dripping or splashing water.
- Do not place objects lled with liquids, such as glass, vase on the device.
- Do not throw batteries into re! Respect the environment when disposing of used
batteries.
- Batteries should not be exposed to excessive heat such as sunshine, re or other
similar heat source.
- AC adaptor is used as the disconnect device. It shall remain readily operable and
should not be obstructed during intended use. To be completely disconnected
the apparatus from supply mains, the AC adaptor of the apparatus shall be
disconnected from the mains socket outlet completely.
- Under the inuence of fast transient and / or electrostatic electric phenomenon,
the product may malfunction and the user must perform a power reset of the
device.
- The normal function of the product may be disturbed by strong Electro-Magnetic
Interference. If so, simply reset the product to resume normal operation by
following the instruction manual. In case the function could not resume, please
use the product in other location.
ADVERTÊNCIA: PARA PREVENIR O RISCO DE INCÊNDIO OU DE CHOQUE
ELÉCTRICO, NÃO EXPONHA ESTE APARELHO A CHUVA OU HUMIDADE.
O símbolo de Cuidado é encontrado na parte de trás do dispositivo.
ATENÇÃO
- Utilize este aparelho num clima temperado.
- A placa de características situa-se na parte de trás deste aparelho.
- Certique-se de que respeita uma distância mínima de 5 cm à volta do aparelho
de modo a permitir uma ventilação suciente.
- Certique-se de que garante uma ventilação correcta do aparelho e que não
tapa os orifícios de ventilação com objectos como jornais, toalhas, cortinas, etc.
- Não coloque qualquer fonte de calor, como uma vela acesa, sobre ou na
proximidade do aparelho.
- Não exponha o aparelho a salpicos ou a humidade.
- Não coloque objectos que contenham líquido, como uma jarra, sobre ou na
proximidade do aparelho.
- O adaptador de corrente permite desligar o aparelho. Deve ser mantido facilmente
acessível durante a utilização. Para cortar completamente a alimentação do
aparelho, desligue efectivamente o adaptador da tomada de corrente.
- Sob o efeito de fenómenos electrostáticos e/ou eléctricos transitórios, o produto
pode apresentar anomalias e pode acabar por ser necessário proceder-se a uma
reinicialização.
- A função normal do produto pode ser interrompida por fortes interferências
eletromagnéticas. Nesse caso, basta reiniciar o produto para retomar a operação
normal seguindo o manual de instruções. Caso a função não possa ser retomada,
utilize o produto noutro local.
Nos emballages peuvent faire l’objet d’une consigne de tri, pour en
savoir plus: www.quefairedemesdechets.fr
NEW ONE S.A.S
10, Rue de la Mission, 25480 Ecole Valentin, France
NEW ONE S.A.S
10, Rue de la Mission, 25480 Ecole Valentin, France
NEW ONE S.A.S
10, Rue de la Mission, 25480 Ecole Valentin, France
ENCEINTES BIBLIOTHEQUE AVEC BLUETOOTH SHELF SPEAKER WITH BLUETOOTH COLUNAS DE PRATELEIRA COM BLUETOOTH REGALLAUTSPRECHER MIT BLUETOOTH FR GB PT DE
FR Manuel de l’utilisateur
GB User Manual
PT Manual do Utilizador
Benutzerhandbuch
DE
ES Manual de instrucciones
Manuale
IT
NL Handleiding
FR Lire attentivement les instructions avant de faire
fonctionner l’appareil.
GB Read the instructions carefully before operating the unit.
PT Leia este manual com atenção antes de qualquer
utilização.
Bitte lesen sie dieses handbuch vor dem gebrauch des
gerätes sorgfältig durch.
DE
ES Antes de utilizar este aparato, lea atentamente las
siguientes instrucciones
Leggete attentamente il manuale prima dell’uso.
IT
NL Lees deze handleiding aandachtig voor u het toestel
gebruikt.
1. Récepteur pour télécommande
2. Indicateur de fonction LED
3. : Veille/ Marche
4. : Pour sélectionner le mode de
fonction souhaité: Bluetooth, Optique,
Coaxial, AUX ou USB.
5. EQ : Pour sélectionner les eets
sonores souhaités: musique, lm,
dialogue.
6. Entrée Optique (OPT)
7. Prise coaxiale (COAX)
1. Remote sensor
2. Function LED indicator
3. : To turn unit on/o.
4. : To select desired function mode:
Bluetooth, Optical, coaxial, AUX or
USB.
5. EQ : To select desired sound eects:
music, movie, dialog.
6. Optical in jack (OPT)
7. Coaxial jack (COAX)
1. Sensor para o telecomando
2. Indicador de Função LED
3. : Para ligar e desligar o aparelho
4. : Para selecionar o modo de
função desejado: Bluetooth, Ótico,
Coaxial, AUX ou USB.
5. EQ : Para selecionar os efeitos
sonoros desejados: música, lme,
diálogo.
6. Entrada ótica (OPT)
7. Tomada coaxial (COAX)
8. Fichas de Entrada de linha E/D
(LINE IN L/R)
1. Infrarotsensor für die
Fernbedienung
2. LED-Funktionsanzeige
3. : Gerät ein-/ ausschalten
4. : Zur Auswahl des
Funktionsmodus: Bluetooth,
Optisch, Koaxial, AUX oder USB.
5. EQ : Zur Auswahl des gewünschten
Soundeekts: Musik, Film, Dialog.
6. Optischer eingang (OPT)
7. Koaxialanschluss (COAX)
8. LINE IN L/R RCA-Eingänge
8. Prises RCA LINE IN L/R
9. Bouton VOLUME : Réglage du
volume
10. Bouton TREBLE : pour régler le
niveau des aigus.
11. Bouton BASS : pour régler le
niveau des basses.
12. Port USB pour la lecture MP3
13. Prise de sortie SPEAKER OUT
14. Prise d’alimentation CC (DC IN)
15. Prise d’entrée SPEAKER IN
8. LINE IN L/R jacks
9. VOLUME control: To adjust volume.
10. TREBLE control: To adjust the
treble level.
11. BASS control: To adjust the bass
level.
12. USB port allowing MP3 playback
13. SPEAKER OUT jack
14. DC IN jack
15. SPEAKER IN jack
9. Botão rotativo VOLUME :
Regulação do volume
10. Controlo TREBLE : Para ajustar os
níveis dos agudos
11. Controlo BASS : Para ajustar os
níveis dos graves
12. Conexão USB para reprodução
de MP3
13. Ficha de coluna de saída
(SPEAKER OUT)
14. Entrada de alimentação (DC IN)
15. Ficha de coluna de entrada
(SPEAKER IN)
9. VOLUME Knopf : Einstellen der
Lautstärke
10. TREBLE-Taste: Zum Einstellen der
Hochtöne.
11. BASS-Taste: Zum Einstellen der
Tieftöne.
12. USB-Port für MP3-Wiedergabe
13. Lautsprecherausgang
SPEAKER OUT
14. Stromversorgungseingang
Gleichstrom (DC IN )
15. Lautsprechereingang SPEAKER IN

M-620SH/IB/V0
Verwenden eines Bluetooth-Geräts
1. Bei bestehender Verbindung (siehe voriger Abschnitt), können Sie das Bluetooth-
Gerät bedienen und den Ton über das M-620 SH wiedergeben.
2. Betätigen Sie die Taste der Fernbedienung, um die Wiedergabe
vorübergehend anzuhalten. Betätigen Sie die Taste ein weiteres Mal, um mit der
Wiedergabe fortzufahren.
3. Wählen Sie den gewünschten Titel mit / auf der Fernbedienung.
4. Stellen Sie die Lautstärke mithilfe der Lautstärketasten ein. Sie können die
Lautstärke auch direkt auf dem Gerät, mit dem die Verbindung hergestellt wurde,
einstellen.
Hinweis: Während der Wiedergabe leuchtet die LED-Funktionsanzeige stetig.
NEW ONE S.A.S erklärt hiermit, dass dieser „MUSE M-620 SH“ den wesentlichen
Anforderungen und anderen geltenden Vorgaben der Richtlinie 2014/53/EU
entspricht. Die Konformitätserklärung lässt sich unter www.muse-europe.com
herunterladen.
3. Seleccione la pista que desee con / del mando a distancia.
4. Ajuste el volumen con los botones de Volumen. También puede ajustar el volumen
en el dispositivo con el cual está emparejado.
Nota: El indicador LED de función permanecerá encendido durante la reproducción.
Por la presente, NEW ONE S.A.S declara que el «MUSE M-620 SH» cumple con los
requerimientos esenciales y otras provisiones aplicables de la Directiva 2014/53/EU.
La declaración de conformidad podrá consultarse en www.muse-europe.com.
Nota: l’indicatore LED di funzione resterà acceso durante la riproduzione.
Con la presente, NEW ONE S.A.S dichiara che « MUSE M-620 SH » è conforme ai
requisiti essenziali e alle altre disposizioni fondamentali della direttiva 2014/53/EU.
La dichiarazione di conformità è consultabile alla pagina www.muse-europe.com
R1. : Para encender/ apagar la unidad
R2. MUTE : Activación/ desactivación de la función de supresión del sonido.
R3. VOL +/- : Ajuste del volumen.
R4. : Para saltar a la pista anterior
R5. : Para saltar a la pista siguiente
R6. : Reproducir/ Pausar;
R7. OPT : Para seleccionar el modo óptico.
R8. USB : Para seleccionar el modo USB.
R9. COAX : Para seleccionar el modo coaxial.
R10. BT : Para seleccionar el modo Bluetooth.
R11. LINE : Para seleccionar el modo auxiliar.
R12. MUSIC/ MOVIE/ DIALOG : Para seleccionar los efectos de sonido
deseados: música, película, diálogo.
R1. : Attivazione e disattivazione dell’apparecchio
R2. MUTE : Attiva/ disattiva l’audio.
R3. VOL +/- : Regolazione del volume
R4. : Passa al brano precedente
R5. : Passa al brano successivo
R6. : Riproduzione/pausa
R7. OPT : Per selezionare la funzione ottica.
R8. USB : Per selezionare la funzione USB.
R9. COAX : Per selezionare la funzione coassiale.
R10. BT : Per selezionare la funzione Bluetooth mode.
R11. LINE : Per selezionare la funzione Aux-In.
R12. MUSIC/ MOVIE/ DIALOG : Per selezionare l’eetto audio desiderato:
musica, lm, dialogo.
R1. : Om het apparaat aan/ uit te zetten
R2. MUTE : Activeren/ deactiveren van het geluid.
R3. VOL +/- : Instelling van het volume.
R4. : Om naar de vorige track te gaan
R5. : Om naar de volgende track te gaan
R6. : Spelen/ pauze
R7. OPT : Voor het selecteren van de optische modus.
R8. USB : Voor het selecteren van de USB modus.
R9. COAX : Voor het selecteren van de coaxiale modus.
R10. BT : Voor het selecteren van de Bluetooth modus.
R11. LINE : Voor het selecteren van de aux-in modus.
R12. MUSIC/ MOVIE/ DIALOG : Voor het selecteren van de gewenste
geluidseecten: muziek, lm, dialoog.
DESCRIPCIÓN DEL APARATO DESCRIZIONE DEL PRODOTTO BESCHRIJVING VAN HET TOESTEL
Mando a distancia Telecomando Afstandsbediening
Antes de tirar las pilas, consulte a su proveedor: puede entregárselas
para reciclarlas.
Prima di gettare le pile, rivolgetevi al vostro rivenditore di duciaqualora
metta a disposizione un servizio di raccolta e riciclaggio di pile usate. Raadpleeg uw dealer alvorens de batterijen weg te werpen omdat hij ze
zou kunnen terugnemen om te recycleren.
Mando a distancia x1
Adaptador de red x1
Cable RCA (Cable de conexión de altavoz izquierdo/ derecho) x1
Telecomando x 1
Adattatore di rete x1
Cavo RCA (Cavo di collegamento altoparlante L/R) x1 Afstandsbediening x1
Netadapter x1
RCA-kabel (Kabel voor aansluiten L/R-luidspreker ) x1
Utilice el cable RCA suministrado para conectar los dos altavoces.
Utilizzare il cavo RCA in dotazione per collegare i due altoparlanti.
Gebruik de meegeleverde RCA-kabel om de twee luidsprekers op elkaar aan te
sluiten.
1. Schließen Sie ein USB-Gerät an den USB -Port dieses Geräts an. Das Gerät
schaltet automatisch in den USB-Modus und startet die Wiedergabe. Die LED-
Funktionsanzeige leuchtet dann lila.
2. Wählen Sie den gewünschten Titel mit / auf der Fernbedienung.
Anmerkungen:
- Den USB-Modus können Sie durch Drücken der Taste am Gerät oder der
Taste USB auf der Fernbedienung einstellen, allerdings nur dann, wenn ein USB-
Gerät mit dem Radio verbunden ist.
- Auf dem USB-Gerät dürfen nicht mehr als 999 MP3-Dateien gespeichert sein.
- Das USB-Gerät darf nicht mehr als 99 Verzeichnisse enthalten.
- Je nach Anzahl der MP3-Dateien und Ordner auf dem USB-Gerät benötigt der
Lautsprecher einige Sekunden oder länger zum Lesen der Dateien.
- Stecken Sie nur ein USB-Gerät in den dazu vorgesehenen USB-Port. Sie könnten
das Gerät ansonsten beschädigen.
- Der USB-Port darf nicht direkt an einen PC angeschlossen werden: Dadurch
könnte das Gerät beschädigt werden.
- Auf dem Markt sind zahlreiche USB-Sticks und MP3-Player erhältlich. Die
Kompatibilität mit allen Formaten kann daher nicht gewährleistet werden.
Benutzen Sie bitte einen anderen USB-Stick, falls der Ihre nicht funktionieren
sollte.
1. Conecte un dispositivo USB al puerto USB de la unidad. Cambiará al modo
USB e iniciará la reproducción automáticamente. El indicador LED se volverá
morado.
2. Seleccione la pista que desee con / del mando a distancia.
Notas:
- El modo USB se puede seleccionar con el botón de la unidad o el botón USB
del control remoto solo cuando el dispositivo USB está conectado a la unidad.
- El número total de archivps MP3 en el dispositivo USB no deberá exceder los 999.
- El dispositivo USB no podrá contener más de 99 directorios.
- El tiempo de lectura llevará unos segundos o más, dependiendo de la cantidad de
archivos MP3 y carpetas en el dispositivo USB.
- Introduzca sólo dispositivos USB en el puerto USB. En caso contrario, podría
dañar el aparato.
- No conecte el puerto USB directamente a un ordenador: podría dañar el aparato.
- En el mercado pueden encontrarse numerosos modelos de dispositivos USB. No
podemos garantizarle que este aparato sea compatible con todos los formatos.
En caso de que su dispositivo USB no funcione, utilice otro.
1. Collegare un dispositivo USB alla porta USB sull'unità. Passa alla modalità USB
e la riproduzione si avvierà automaticamente. L'indicatore LED della funzione
diventerà viola.
2. Utilizzare i tasti / sul telecomando per selezionare la traccia desiderata.
Nota bene:
- Per selezionare la funzione USB, premi il tasto sull’apparecchio o il tasto USB
del telecomando, ma solo dopo ave collegato un dispositivo USB all’apparecchio.
- Il numero totale di le MP3 contenuti nel dispositivo USB non deve essere
superiore a 999.
- Il numero di directory contenute nel dispositivo USB non deve essere superiore
a 99.
- Il tempo di lettura può variare a seconda del numero di le MP3 o di cartelle
contenuti nel dispositivo USB.
- Inserire esclusivamente periferiche USB nello slot corrispondente. L'inserimento
di oggetti potrebbe danneggiare l’apparecchio.
- La porta USB non deve essere direttamente collegata ad un PC, in quanto ciò
potrebbe danneggiare l’apparecchio.
- Sul mercato esistono numerosi modelli di periferiche USB e di lettori MP3. Non
è possibile garantire la compatibilità con tutti i formati. Qualora un modello di
periferica USB non sia compatibile, provare con un’altro.
1. Sluit een USB-apparaat aan op de USB -poort van de luidspreker. Het apparaat
schakelt over naar de USB-modus en start het afspelen automatisch. Het
Functie LED-lampje zal paars worden.
2. Selecteer de gewenste track met / op de afstandsbediening.
Opmerkingen:
- De USB modus kan worden geselecteerd door op de knop op de eenheid zelf
te drukken of, maar alleen als het USB-apparaat op de eenheid is aangesloten,
met een druk op de USB knop op de afstandsbediening.
- Het totaal aantal MP3-bestanden op het USB-apparaat mag niet groter zijn dan
999.
- Het USB-apparaat mag niet meer dan 99 mappen bevatten.
- Het inlezen van de bestanden duurt een paar seconden of langer, afhankelijk van
het aantal MP3-bestanden en mappen op het USB-apparaat.
- Steek niets anders dan USB-randapparatuur in de hiertoe voorziene poort. U
riskeert het toestel te beschadigen.
- De USB-poort mag niet rechtstreeks aangesloten worden op een computer: dit
kan het toestel beschadigen.
- Er bestaan verschillende USB-sleutels en MP3-spelers op de markt. Wij kunnen
niet garanderen dat het toestel compatibel is met alle formaten. Gebruik daarom
een andere USB-drager indien uw USB-drager niet werkt.
Zum optischen Eingang
Schließen Sie Ihr Audiogerät an den OPT-EINGANG mithilfe eines digitalen
optischen Audiokabels (nicht im Lieferumfang enthalten) am Gerät an.
1. Drücken Sie wiederholt die Taste am Gerät oder die Taste OPT auf
der Fernbedienung, um den optischen Modus einzustellen. Die LED-
Funktionsanzeige leuchtet weiß.
2. Starten Sie die Wiedergabe auf dem externen Audiogerät.
3. Stellen Sie die Lautstδrke auf den gewόnschten Lautstδrkepegel.
4. Um die Wiedergabe zu stoppen, trennen Sie das externe Audiogerät einfach ab.
HINWEISE: OPTICAL ist nur für das PCM-Format geeignet.
Koaxial-Buchse
Verwenden Sie ein Koaxial-Kabel (nicht enthalten), um die Soundbar mit dem
Koaxial-Eingang an Ihrem Fernseher oder Verstärker zu verbinden. Drücken
Sie dann wiederholt die Taste am Gerät, bis die LED-Funktionsanzeige grün
leuchtet, oder drücken Sie die Taste COAX auf der Fernbedienung, um den
koaxialen Modus direkt einzustellen.
Anschluss an LINE IN RCA-Eingänge
1. Schließen Sie ein externes Gerät (z.B. DVD-Player) unter Verwendung eines
RCA-Audiokabels (nicht enthalten) an die LINE IN L/R Eingänge an der
Rückseite des Geräts an.
2. Drücken Sie wiederholt die Taste am Gerät, bis die LED-Funktionsanzeige
gelb leuchtet, oder drücken Sie die Taste LINE auf der Fernbedienung, um den
AUX-Modus direkt einzustellen.
3. Beginnen Sie mit dem Playback Ihrer Zusatzquelle.
4. Stellen Sie die Lautstärke auf den gewünschten Pegel ein.
5. Um die Wiedergabe zu beenden, trennen Sie das externe Gerät von den
LINE IN L/R Eingängen.
A la toma OPTICAL
Conecte su fuente de audio a la toma OPT de la unidad con un cable de audio
óptico digital (no suministrado).
1. Presione el botón en la unidad repetidamente o presione el botón OPT en
el control remoto para seleccionar el modo óptico. El indicador LED de función
se volverá blanco.
2. Inicie la reproducción desde su fuente de audio.
3. Ajuste el volumen al nivel deseado.
4. Para detener la reproducción, desconecte su fuente de audio de esta unidad.
Nota: OPTICAL solo es válida para el formato PCM.
A conector coaxial
Utilice el cable coaxial (no incluido) para conectar la barra de sonido al conector de
entrada coaxial de su televisor o amplicador. Presione el botón en la unidad
repetidamente hasta que el indicador LED de función se vuelva verde, o presione
el botón COAX en el control remoto para seleccionar el modo coaxial directamente.
A las tomas LINE IN RCA
1. Conecte su fuente auxiliar (un reproductor de DVD, por ejemplo) a las tomas
LINE IN L/R de la parte posterior de la unidad con un cable de audio RCA (cable
no incluido).
2. Presione el botón en la unidad repetidamente hasta que el indicador LED de
función se vuelva amarillo, o presione el botón LINE en el control remoto para
seleccionar el modo AUX directamente.
3. Empiece el playback desde la fuente AUX.
4. Ajuste el volumen hasta el nivel deseado.
5. Para detener la reproducción, desconecte su fuente de audio auxiliar de las
tomas LINE IN L/R.
Mediante ingresso OPTICAL IN
Collegate l’origine audio all’ingresso OPT sull’apparecchio mediante cavo audio
ottico digitale (non fornito).
1. Premi più volte il tasto o premi il tasto OPT del telecomando per scegliere la
funzione ottica. l’indicatore LED di funzione diventerà bianco.
2. Avviate la riproduzione sull’origine audio.
3. Regolate il volume sul livello desiderato.
4. Per arrestare la riproduzione, scollegate l’origine audio dall’apparecchio.
Nota: OPTICAL IN è valido solo per il formato PCM.
Collegamento coassiale
Usa un cavo coassiale (non incluso) per collegare la barra audio alla presa
coassiale dell'amplicatore o della TV. Premi più volte il tasto sull’apparecchio
no a quando l’indicatore LED di funzione diventi verde, oppure premi il tasto
COAX del telecomando per selezionare direttamente la modalità coassiale.
Alle prese LINE IN RCA
1. Collegare la sorgente ausiliaria (ad es. lettore DVD) ai jack LINE IN L/R sul retro
dell'apparecchio utilizzando un cavo audio RCA (non incluso).
2. Premi ripetutamente il tasto sull’apparecchio no a quando l'indicatore LED
della funzione diventa giallo, oppure premere il tasto LINE sul telecomando per
selezionare direttamente la modalità AUX.
3. Avviare la riproduzione dalla sorgente ausiliaria.
4. Regolare il volume al livello desiderato.
5. Per arrestare la riproduzione scollegare la sorgente ausiliaria dalla presa
LINE IN L/R.
Op OPTISCHE INGANG
Sluit uw audiobron met behulp van een optische audiokabel (niet meegeleverd) aan
op de OPT INGANG op het apparaat.
1. Druk een aantal keren op de knop op de eenheid zelf of druk op de OPT
knop op de afstandsbediening om de optische modus te selecteren. Het Functie
LED-lampje zal wit worden.
2. Start het afspelen van uw audiobron.
3. Stel het volume naar wens in.
4. Verbreek de verbinding tussen de audiobron en dit apparaat om het afspelen
te stoppen.
OPGEPAST: De OPTISCHE INGANG is alleen voor PCM-formaat.
Voor het tot stand brengen van een coaxiale aansluiting
Gebruik de coaxiale kabel (niet meegeleverd) om de geluidsbalk aan te sluiten op
de coaxiale ingang op uw tv of versterker. Druk een aantal keren op de knop op
de eenheid zelf tot het Functie LED-lampje groen wordt, of druk op de COAX knop
op de afstandsbediening om de coaxiale modus direct te selecteren.
Voor het tot stand brengen van RCA-aansluitingen
1. Sluit uw hulpapparaat (bijv. DVD-speler) met een RCA-audiokabel (kabel niet
meegeleverd) aan op de LINE IN L/R-aansluitingen op de achterkant van de
luidspreker.
2. Druk herhaalde malen op de knop op de eenheid zelf tot het Functie LED-
lampje geel wordt, of druk op de LINE knop op de afstandsbediening om de AUX
modus direct te selecteren.
3. Start het afspelen van uw hulpbron.
4. Stel het geluidsvolume in op het gewenste niveau.
5. Als u het afspelen wilt stoppen, koppel uw hulpapparaat dan los van de
LINE IN L/R-aansluitingen.
Este adaptador funciona con una alimentación CA de entre 100V- 240V 50/60Hz.
El adaptador de red que se suministra con el aparato no se puede utilizar en ningún
caso con otro tipo de alimentación.
Atención:
• El adaptador de red que se suministra ha sido diseñado para utilizarse
exclusivamente con este aparato. No lo utilice con ningún otro aparato.
• Apague el aparato antes de desenchufar el adaptador de red. De lo contrario, el
aparato podría estropearse.
• Cuando no vaya a utilizar el aparato durante un período de tiempo prolongado,
desenchufe el adaptador de red de la toma de corriente.
• Asegúrese de que la toma de corriente está cerca y de que es fácil acceder a ella.
En caso de fallo en el funcionamiento del aparato, desenchufe inmediatamente el
adaptador de red de la toma de corriente.
• El adaptador de red permite enchufar y desenchufar el aparato. El acceso al
mismo debe permanecer despejado en todo momento. Para cortar por completo
la alimentación del aparato, ha de desenchufar el adaptador de red de la toma
de corriente.
• No utilice el adaptador de red si está estropeado. Coloque los cables de forma
segura y compruebe que no quedan aplastados, doblados ni tensados. Si el cable
de alimentación está estropeado, acuda a un técnico cualicado.
Con el objetivo de ahorrar energía, cuando la reproducción haya alcanzado el
nalo el volumen se encuentre a un nivel muy bajo y no se use ningún control en
el dispositivo por un periodo de 15 minutos, la unidad pasará al modo de espera
automáticamente.
L’adattatore di rete funziona tramite un’alimentazione AC compresa tra 100V
e 240V .
L’adattatore di rete fornito in dotazione non può in alcun caso essere utilizzato con
un altro tipo di alimentazione.
Attenzione:
• L’adattatore di rete fornito in dotazione è destinato ad essere utilizzato
esclusivamente con questo apparecchio. Non utilizzatelo dunque con altri
apparecchi.
• Per evitare di rovinare l’apparecchio, spegnetelo prima di scollegare l’adattatore
di rete dall’apparecchio.
• In caso di un prolungato periodo di non utilizzo, scollegate l’adattatore di rete
dalla presa a muro.
• Fate in modo che la presa di rete sia vicina e che resti facilmente accessibile. In
caso di malfunzionamento, scollegate immediatamente la spina di alimentazione
dalla presa di rete.
• L’adattatore di rete permette di scollegare l’apparecchio. Deve pertanto restare
facilmente accessibile durante l’uso. Per mettere del tutto l’apparecchio fuori
tensione, scollegate il cavo di alimentazione.
• Non utilizzate l’adattatore di rete se è danneggiato. Posizionate i cavi in modo
sicuro facendo attenzione che non vengano incastrati o schiacciati. Se il cavo di
alimentazione è danneggiato, rivolgetevi a un tecnico qualicato.
Per risparmiare energia, al termine della riproduzione oppure quando il volume
è impostato al minimo e nell'arco di 15 minuti non viene eseguita nessuna
operazione, l'apparecchio passa in automatico alla modalità di Standby.
De netstroomadapter gebruikt een netstroom van AC 100V-240V 50/60Hz. De
meegeleverde netstroomadapter mag nooit gebruikt worden op een ander type
voeding.
Opmerkingen:
• De AC adapter inbegrepen in dit toestel mag alleen met dit toestel gebruikt
worden. Nooit gebruiken voor een ander toestel.
• Schakel het toestel uit voor de AC adapter los te maken om schade aan het
toestel te voorkomen.
• Als het toestel lange tijd niet gebruikt wordt, verwijdert u de AC adapter uit het
stopcontact.
• Gebruik het in de buurt van een makkelijk bereikbaar stopcontact. Doet zich een
storing voor, verwijder het contact dan onmiddellijk uit het stopcontact.
• Het moet makkelijk te bedienen blijven en mag tijdens het gebruik niet verstoord
worden. Om volledig losgekoppeld te zijn van stroomtoevoer, moet het toestel via
de AC adapter volledig uit het stopcontact worden verwijderd.
• Gebruik nooit een beschadigde AC adapter, leg de kabels op een veilige manier
vrij van druk of knijpen. Wend u tot een erkende dienstverlener als de kabel
beschadigd is.
Om energie te besparen zal het apparaat automatisch naar de standbymodus
schakelen wanneer het afspelen het eindpunt heeft bereikt of het volume is
ingesteld op een zeer laag niveau en het apparaat niet wordt gebruikt voor een
periode van 15 minuten.
En el modo de espera, pulse el botón para encender la unidad. Presione
de nuevo en el mando a distancia o mantenga presionado en la unidad para
apagarla.
In modalità di standby, premete il tasto per accendere l’unità. Premi ancora
sul telecomando o tieni premuto sull’unità per spegnere l’apparecchio.
Druk in de standbymodus op om het apparaat in te schakelen. Druk opnieuw op
op de afstandsbediening of houd op het toestel langere tijd ingedrukt om het
toestel af te zetten.
El modo de función se selecciona presionando el botón en la unidad
repetidamente, o presionando el botón BT, OPT, COAX, LINE o USB en el control
remoto, respectivamente.
Observe el color del indicador LED de función para diferentes modos:
Rojo: En espera
Azul: Bluetooth
Blanco: Óptico
Verde: Coaxial
Amarillo: AUX (entrada de línea)
Púrpura: USB
Notas:
- Una vez que inserte el dispositivo USB en el puerto USB de la unidad, esta
cambiará automáticamente al modo USB.
- El modo USB se puede seleccionar con el botón de la unidad o el botón USB
del control remoto solo cuando el dispositivo USB está conectado a la unidad.
Seleziona la funzione premendo ripetutamente il tasto sull’apparecchio, o
premendo il relativo tasto BT, OPT, COAX, LINE o USB sul telecomando.
Osserva il colore dell’indicatore LED per le rispettive funzioni:
Rosso: Standby
Blu: Bluetooth
Banco: Ottico
Verde: Coassiale
Giallo: AUX (Line in)
Viola: USB
Notas:
- Una volta collegato il dispositivo USB alla porta USB dell'unità, la modalità USB
si attiverà automaticamente.
- Per selezionare la funzione USB, premi il tasto sull’apparecchio o il tasto USB
del telecomando, ma solo dopo ave collegato un dispositivo USB all’apparecchio.
De functiemodus wordt geselecteerd door een aantal keren op de knop op de
eenheid zelf te drukken of door het indrukken van respectievelijk de knop BT, OPT,
COAX, LINE of USB op de afstandsbediening.
Kijk naar de kleur van het Functie LED-lampje om te zien welke modus is
ingeschakeld:
Rood: Standby
Blauw: Bluetooth
Wit: Optisch
Groen: Coaxiaal
Geel: AUX (Lijn in)
Paars: USB
Opmerking:
- Zodra u het USB-apparaat in de USB-poort van het apparaat hebt geplaatst,
schakelt het automatisch over naar de USB-modus.
- De USB modus kan worden geselecteerd door op de knop op de eenheid zelf
te drukken of, maar alleen als het USB-apparaat op de eenheid is aangesloten,
met een druk op de USB knop op de afstandsbediening.
ALLGEMEIN
Netzstromadapter
Eingang: 100-240V 50/60Hz
Ausgang: DC 19.0V 1.89A 35.91W
BLUETOOTH
Bluetooth-Version: V5.0
Bluetooth: 2.402-2.480GHz
RF-Ausgangsleistung (Radiofrequenz-Augangsleistung): 5.34 dBm
Betriebsreichweite: Bis zu 10 Meter in oenen Räumen (Wände und Hindernisse
können die Reichweite des Geräts beeinträchtigen)
Reichweite Fernbedienung: Bis zu 8 Meter, +/- 30 Grad im oenenGelände.
Gestaltung und Ausführung bleiben Änderungen vorbehalten.
ALIMENTACION:
Adaptador de red:
Entrada: 100-240V 50/60Hz
Salida: CC 19.0V 1.89A 35.91W
BLUETOOTH
Versión Bluetooth: V5.0
Bluetooth: 2.402-2.480GHz
Salida de corriente RF (radiofrecuencia): 5.34 dBm
Distancia de rendimiento: Hasta 10 m medidos en espacio abierto (la pared y las
estructuras pueden afectar el rango del dispositivo)
Reichweite Fernbedienung: Bis zu 8 Meter, +/- 30 Grad im oenenGelände.
Las especicaciones están sujetas a cambios sin previo aviso.
ALIMENTAZIONE
Adattatore di rete:
Ingresso: 100-240V 50/60Hz
Uscita: CC 19.0V 1.89A 35.91W
BLUETOOTH
Versione del Bluetooth: V5.0
Bluetooth: 2.402-2.480GHz
Potenza RF (radiofrequenza) irradiata: 5.34 dBm
Raggio d’azione: Fino a 10 metri in spazi aperti (pareti e altre strutture possono
inuire sul raggio d’azione del dispositivo).
Distanza di lavoro: Fino a 8 metri, +/- 30 gradi
Il modello e le caratteristiche tecniche possono subire variazioni senza preavviso.
NETSTROOM
Netadapter:
Ingang: AC 100-240V 50/60Hz
Uitgang: DC 19.0V 1.89A 35.91W
BLUETOOTH
Bluetooth-versie: V5.0
Bluetooth: 2.402-2.480GHz
RF-vermogen (radiofrequentievermogen): 5.34 dBm
Werkafstand: Tot 10 meter gemeten in een open ruimte (muren en bouwwerken
kunnen invloed hebben op het bereik van de luidspreker)
Werkafstand afstandsbediening: Tot 8 meter, +/- 30 graden.
Ontwerp en specicaties zijn onderhevig aan verandering zonder kennisgeving.
Los logos y nombres Bluetooth® son marcas registradas que pertenecen a Bluetooth
SIG, Inc. y cualquier uso de dichas marcas por parte de New One S.A.S tiene sus
respectivas licencias. Otras marcas comerciales y registradas son propiedad de sus
respectivos propietarios.
Emparejar un dispositivo Bluetooth
1. Cuando la unidad esté encendida, presione el botón en la unidad repetidamente
hasta que el indicador LED de función se vuelva azul, o presione el botón BT en
el control remoto para seleccionar el modo Bluetooth directamente. El indicador
LED de función parpadeará rápidamente indicando que está en modo de
emparejamiento.
2. En el dispositivo Bluetooth, habilite Bluetooth y seleccione “MUSE M-620 SH” de
la lista de dispositivos. (Para obtener el detalle de operaciones para conectarse,
consulte el manual de usuario del dispositivo). Si el dispositivo Bluetooth le
solicita una contraseña de acceso, utilice “0000”. Algunos dispositivos Bluetooth le
indicarán que acepte la conexión. Si la unidad resultara emparejada correctamente,
se oirá un sonido de voz. El indicador LED de función parpadeará lentamente.
Sugerencia: Si desea conectar su altavoz Bluetooth a otro dispositivo de audio
Bluetooth, mantenga pulsado el botón BT para desconectar el dispositivo, y a
continuación, siga los pasos anteriores para establecer una nueva conexión.
• En algunos dispositivos como computadoras, una vez realizado el emparejamiento,
debe seleccionar la unidad del menú Bluetooth y elegir "Use as Audio Device
(stereo) or similar" (utilizar como dispositivo de audio (estéreo) o similar).
• El emparejamiento permanece intacto cuando la unidad y/o su dispositivo Bluetooth
sale del rango de comunicación. Se restablecerá una conexión activa cuando su
dispositivo Bluetooth vuelva dentro del rango.
• Cuando vuelva a encender la unidad, se intentará la reconexión automática con el
dispositivo Bluetooth al que se haya emparejado más recientemente.
Utilizar un dispositivo Bluetooth
1. Con alguna unidad emparejada (ver la sección anterior), haga funcionar su
dispositivo Bluetooth. El sonido se escuchará a través de los altavoces M-620 SH.
2. Oprima el botón del mando a distancia para pausar la reproducción. Presione
nuevamente para retomar la reproducción.
Il marchio denominativo Bluetooth® e i relativi loghi sono marchi registrati di
Bluetooth SIG, Inc., utilizzati da New One S.A.S su licenza. Altri marchi e nomi
commerciali sono di proprietà dei rispettivi titolari.
Associazione di un dispositivo Bluetooth
1. Con l’apparecchio attivo (ON), per selezionare la funzione Bluetooth premi più
volte il tasto sull’apparecchio o premi direttamente il tasto BT del telecomando,
nché l’indicatore LED di funzione diventa blu. L’indicatore LED di funzione
lampeggerà velocemente a confermare che la modalità di abbinamento è attiva.
2. Attivare la funzione Bluetooth sul proprio dispositivo Bluetooth e selezionare
“MUSE M-620 SH” dall’elenco dei dispositivi rilevati (consultare il manuale
di istruzioni del dispositivo per informazioni dettagliate su come connettere il
dispositivo). Se il dispositivo Bluetooth richiede la digitazione di una password,
inserire “0000”. Alcuni dispositivi Bluetooth richiedono di accettare la connessione.
Una volta riuscita l'associazione, l'unità emette un segnale acustico. L’indicatore
LED di funzione lampeggerà lentamente.
Suggerimento: Se si desidera connettere l’altoparlante Bluetooth a un altro
dispositivo Bluetooth è necessario prima disconnettere il dispositivo corrente.
Tenere premuto il tasto BT per scollegare il dispositivo e quindi seguire i passaggi
precedenti per stabilire una nuova connessione.
• Su alcuni dispositivi, come ad esempio computer, una volta associato il dispositivo
è necessario selezionare l’unità dal menu Bluetooth, quindi selezionare l’opzione
“Utilizza come dispositivo audio (stereo)” o similare.
• L’associazione rimane attiva quando l’unità e/o il dispositivo Bluetooth escono dal
raggio d’azione del Bluetooth. Una connessione attiva viene ristabilita quando il
dispositivo rientra nel raggio d’azione del Bluetooth.
• Una volta riaccesa, l’unità tenta in automatico di riconnettersi all’ultimo dispositivo
Bluetooth associato.
Utilizzo di un dispositivo Bluetooth
1. Una volta associata l’unità a un dispositivo (vedi sezione precedente) l’audio del
dispositivo Bluetooth viene riprodotto mediante l’altoparlante.
2. Premere il tasto sul telecomando per sospendere la riproduzione. Premerlo di
nuovo per riprendere la riproduzione.
3. Utilizzare i tasti / sul telecomando per selezionare la traccia desiderata.
4. Regolare il volume utilizzando i tasti volume. È possibile regolare il volume anche
dal dispositivo a cui l’unità è associata.
2. Druk op op de afstandsbediening om het afspelen te pauzeren. Druk
nogmaals om het afspelen te hervatten.
3. Selecteer de gewenste track met / op de afstandsbediening.
4. Stel het volume in met behulp van +/-. U kunt het volume ook instellen op het
apparaat dat is verbonden met de luidspreker.
Let op: Het Functie LED-lampje zal tijdens het afspelen blijven branden.
Hierbij verklaart NEW ONE S.A.S dat deze “MUSE M-620 SH” voldoet aan de
essentiële eisen en andere relevante bepalingen uit richtlijn 2014/53/EU. De
verklaring van conformiteit kan worden geraadpleegd op www.muse-europe.com
De Bluetooth® markering en de logo’s zijn geregistreerde handelsmerken die
eigendom zijn van Bluetooth SIG, Inc. en het gebruik van deze markeringen door
New One S.A.S is onder licentie. Andere handelsmerken en handelsnemen zijn van
hun respectieve eigenaars.
Een Bluetooth-apparaat koppelen
1. Druk terwijl de eenheid op AAN staat een aantal keren op de knop op de
eenheid zelf tot het Functie LED-lampje blauw wordt, of druk op de BT knop op
de afstandsbediening om de Bluetooth modus direct in te schakelen. Het Functie
LED-lampje zal snel beginnen te knipperen om aan te duiden dat de paarmodus
is ingeschakeld.
2. Schakel Bluetooth in op het Bluetooth-apparaat en selecteer “MUSE M-620 SH”
uit de lijst met apparaten. (Kijk in de handleiding van het apparaat waarmee
u verbinding wilt maken voor gedetailleerde instructies.) Als het Bluetooth-
apparaat vraagt om een wachtwoord, voer dan “0000” in. Sommige Bluetooth-
apparaten zullen u vragen de verbinding te accepteren. U hoort een indicatietoon
als het koppelen is gelukt. Het Functie LED-lampje zal langzaam knipperen.
Tip: Als u uw Bluetooth-luidspreker wilt verbinden met een andere Bluetooth-
audioapparaat, houd BT ingedrukt om de verbinding met het apparaat te verbreken,
en volg daarna de bovenstaande stappen om een nieuwe verbinding tot stand te
brengen.
• Op bepaalde apparaten, zoals computers, moet u, zodra er is gekoppeld, het
apparaat selecteren in het Bluetooth-menu en de optie “Gebruik als audioapparaat
(stereo)” (of een soortgelijke optie) gebruiken.
• De verbinding blijft intact wanneer de luidspreker en/of uw Bluetooth-apparaat
buiten het communicatiebereik wordt verplaatst. Er wordt opnieuw een actieve
verbinding gemaakt wanneer uw Bluetooth-apparaat terugkeert binnen het bereik.
• Als het apparaat weer wordt ingeschakeld, dan zal het automatisch proberen
opnieuw verbinding te maken met het Bluetooth-apparaat waarmee het laatst
werd gekoppeld.
Een Bluetooth-apparaat gebruiken
1. Als u verbinding heeft gemaakt met een apparaat (zie voorgaande paragraaf),
gebruik dan de bediening op uw Bluetooth-apparaat en wanneer het afspelen
wordt gestart, dan zal het geluid uit de luidsprekers van de M-620 SH klinken.
ACCESORIOS:
ACCESSORI
ACCESSOIRES
CONEXIÓN DE LOS ALTAVOCES
COLLEGAMENTO ALTOPARLANTE
AANSLUITING LUIDSPREKER
USB-WIEDERGABE
REPRODUCIÓN DE UN DISPOSITIVO USB
RIPRODUZIONE MEDIANTE PORTA USB
WEERGAVE VAN EEN USB-APPARAAT
ANSCHLUSS AN EXTERNE GERÄTE
CONEXIÓN DE DISPOSITIVOS EXTERNOS
COLLEGAMENTO CON DISPOSITIVI ESTERNI
AANSLUITEN OP EXTERNE APPARATEN
ALIMENTACIÓN
ALIMENTAZIONE
VOEDING
ENCENDIDO/ APAGADO DE LA UNIDAD ACCENSIONE/ SPEGNIMENTO DELL’APPARECCHIO HET APPARAAT IN-/ UITSCHAKELEN
SELECCIÓN DE FUNCIÓN
SELEZIONE DELL’ORIGINE FUNCTIE SELECTEREN
TECHNISCHE EIGENSCHAFTEN
FICHA TÉCNICA
SPECIFICHE
TECHNISCHE KENMERKEN
FUNCIÓN BLUETOOTH
FUNZIONALITÀ BLUETOOTH
BLUETOOTH-FUNCTIE
Colocación de las pilas
Introduzca 2 pilas de tipo AAA/UM4 en el mando a distancia antes de usar
el aparato. Respete las indicaciones de polaridad (+/-) que guran en el
compartimento de las pilas.
Inserimento delle pile
Prima dell’utilizzo, inserite 2 pile AAA/UM4 nel telecomando. Rispettate le
indicazioni di polarità (+/-) riportate nel vano pile.
Plaatsen van batterijen
Plaats 2 AAA/UM4-batterijen in de afstandsbediening voor elk gebruik. Respecteer
hierbij de polariteit die op het batterijcompartiment (+/-) vermeld staat.
SICHERHEITSANWEISUNGEN
INSTRUCCIONES DE SEGURIDAD
AVVERTENZE DI SICUREZZA
VEILIGHEIDSINSTRUCTIES
ACHTUNG: Um Elektroschockgefahr zu vermeiden,
dürfen Sie dieses Gerät nicht demontieren. Das Gerät
enthält keine Teile, die der Benutzer selbst reparieren
kann. Vertrauen Sie die Instandhaltung des Geräts
einem Fachmann an.
ATENCIÓN: Para reducir el riesgo de descarga eléctrica,
no desmonte el aparato. En el interior de este aparato
no existe ninguna pieza que pueda ser reparada por el
usuario. Para cualquier operación de mantenimiento y
reparación, póngase en contacto con personal técnico
cualicado.
ATTENZIONE: Per ridurre il rischio di scossa elettrica,
non smontate l’apparecchio. Questo apparecchio non
contiene pezzi riparabili dall’utente. Per ogni riparazione
rivolgetevi esclusivamente a tecnici qualicati.
OPGEPAST: Om het risico op elektrische schokken
te vermijden, mag u het toestel niet demonteren. Het
toestel bevat geen enkel onderdeel dat door de gebruiker
zelf kan gerepareerd worden. Contacteer altijd een
gekwaliceerde technieker indien een reparatie nodig is.
Das in einem Pfeil endende Blitzsymbol innerhalb eines Dreiecks weist
den Benutzer auf die Gegenwart einer „gefährlichen Spannung“ im
Gerät hin.
El símbolo del rayo con una echa dentro de un triángulo equilátero
advierte al usuario de la presencia de voltaje peligroso en el interior
del aparato.
Il simbolo del fulmine con una freccia all’estremità all’interno di un
triangolo equilatero avverte l’utente della presenza di una “tensione
pericolosa” nell’apparecchio.
Het symbool van een zwarte driehoek met daarin een witte
bliksemschicht eindigend in een driehoek, waarschuwt de gebruiker dat
er een gevaarlijke spanning aanwezig is in het toestel.
Das Ausrufezeichen im Inneren eines Dreiecks weist den Benutzer
auf wichtige Anweisungen hin, die sich in dem das Gerät begleitenden
Handbuch benden.
El signo de exclamación dentro de un triángulo equilátero advierte al
usuario de la presencia de importantes instrucciones de funcionamiento y
mantenimiento en el manual que acompaña al producto.
Il punto esclamativo inscritto nel triangolo equilatero indica all'utente che
nel manuale di istruzioni si trovano importanti avvertenze per l'uso e la
manutenzione dell'apparecchio.
Het bovenstaande symbool (zwarte driehoek met daarin een wit
uitroepingsteken) waarschuwt de gebruiker dat er belangrijke
gebruiksaanwijzingen in verband met het gebruik en het onderhoud ter
beschikking zijn in de bijgeleverde handleiding.
Wenn Sie dieses Gerät entsorgen möchten, denken Sie daran, es
bei einer Sammelstelle für elektrische Haushaltsgeräte zu entsorgen.
Erkundigen Sie sich nach Ihrer nächstgelegenen Wertstosammelstelle.
Für detaillierte Informationen wenden Sie sich an die örtlichen Behörden
oder an Ihren Händler. (Richtlinie über elektrische und elektronische
Abfallgeräte).
Si desea deshacerse de este aparato, recuerde que ha de depositarlo
en un lugar destinado al reciclado de electrodomésticos. Infórmese
acerca del centro de reciclaje más cercano. Consulte a las autoridades
locales o a su proveedor para obtener más información al respecto.
(Directiva de Residuos de Aparatos Eléctricos y Electrónicos)
Se in futuro volete sbarazzarvi di questo apparecchio, ricordate che le
apparecchiature elettroniche non devono essere gettate insieme ai riuti
domestici. Informatevi per sapere dove si trova il centro di riciclaggio
più vicino. Per ulteriori dettagli, rivolgetevi alle autorità locali o al vostro
rivenditore. (Direttiva sui riuti delle apparecchiature elettriche ed
elettroniche)
Indien u dit toestel in de toekomst wilt weggooien, denk er dan aan om het
te recycleren via een inzamelpunt voor elektrische huishoudapparaten.
Informeer naar het dichtstbijzijnde recyclagecentrum. Voor meer
informatie wendt u zich tot de lokale overheden of uw verdeler (richtlijn
met betrekking tot Afval afkomstig van elektrische en elektronische
apparaten).
NOTAS:
- Nunca cargue pilas que no son recargables. No caliente las pilas ni las desmonte.
- Si no va a utilizar el mando a distancia durante un periodo de tiempo prolongado,
retire las pilas para evitar que se produzcan daños causados por la corrosión
debida a una pérdida de líquido.
- Respete el medio ambiente cuando se deshaga de las pilas usadas.
- No tire las pilas al fuego.
- No exponga las pilas a temperaturas demasiado altas, como las producidas por la
exposición directa a los rayos del sol, al fuego o a otras fuentes de calor.
ATENCIÓN: Puede producirse una explosión si la pila no se ha introducido
correctamente. Cámbiela únicamente por otra del mismo tipo o uno equivalente.
NOTA BENE:
- Non caricate mai pile non ricaricabili. Non scaldate le pile e non apritele.
- In caso di un prolungato periodo di inutilizzo del telecomando, rimuovete la pila
per evitare eventuali danni dovuti a fuoriuscite di liquido corrosivo.
- Abbiate cura di rispettare l’ambiente quando gettate le pile.
- Non gettate le pile nel fuoco!
- Non esponete le pile ad un calore eccessivo, come raggi solari, fuoco o fonti di
calore analoghe.
ATTENZIONE: Se la pila non è correttamente inserita c’è il rischio di esplosione.
Sostituitela unicamente con una pila identica o di tipo equivalente.
OPMERKINGEN:
- Zorg ervoor dat u nooit niet-oplaadbare batterijen oplaadt. Verwarm de batterijen
nooit en probeer ze nooit te openen.
- Als de afstandsbediening lange tijd niet gebruikt wordt, haalt u de batterijen beter
uit het toestel om aantasting door uitlopen van de batterijen te vermijden.
- Respecteer het milieu als u gebruikte batterijen wegwerpt.
- Gooi de batterijen niet in het vuur.
- Stel de batterijen niet bloot aan overdreven hitte zoals zonnestralen, vuur of
gelijkaardige warmtebronnen.
OPGEPAST: Ontplongsgevaaals de batterij niet juist ingevoegd wordt. Vervang
de batterij enkel door een identieke batterij of door een batterij van hetzelfde type.
WARNUNG: UM BRAND- UND ELEKTROSCHOCKGEFAHR VORZUBEUGEN,
DÜRFEN SIE DIESES GERÄT WEDER REGEN NOCH FEUCHTIGKEIT
AUSSETZEN.
Der Sicherheitshinweis bendet sich an der Rückseite des Geräts.
ACHTUNG
- Verwenden Sie dieses Gerät in klimatisch gemäßigter Umgebung.
- Das Typenschild bendet sich auf der Rückseite des Geräts.
- Achten Sie auf einen Mindestabstand von 5 cm zu Ihrem Gerät, um eine
ausreichende Belüftung zu gewährleisten.
- Stellen Sie eine ausreichende Belüftung des Geräts sicher und behindern Sie die
Belüftungsönungen nicht mit Gegenständen wie z. B. Zeitungen, Tischdecken,
Vorhängen, usw.
- Stellen Sie keine Wärmequelle wie eine angezündete Kerze auf oder in der Nähe
des Geräts ab.
- Setzen Sie das Gerät niemals Wasserspritzern oder Feuchtigkeit aus.
- Stellen Sie kein mit Wasser gefülltes Gefäß, wie z. B. Vasen, in der Nähe des
Geräts ab.
- Verwenden Sie auf keinen Fall einen beschädigten Netzstromadapter. Verlegen
Sie das Netzkabel so, dass es weder eingeklemmt noch gequetscht wird. Ein
beschädigtes Netzkabel muss bei einer Reparaturstelle repariert werden.
- Unter der Einwirkung von elektrostatischen und/oder elektrischen Phänomen
kann das Produkt Fehlfunktionen aufweisen. Ein Zurücksetzen auf die
Werkseinstellungen kann sich als notwendig erweisen.
- Der ordnungsgemäße Betrieb des Geräts kann durch starke elektromagnetische
Störungen beeinträchtigt werden. Setzen Sie das Gerät in solch einem Fall
gemäß den Angaben in der Bedienungsanleitung zurück, um den normalen
Betrieb wieder herzustellen. Falls der ordnungsgemäße Betrieb nicht fortgesetzt
werden kann, versuchen Sie das Gerät an einem anderen Ort zu verwenden.
ADVERTENCIA: PARA PREVENIR EL RIESGO DE INCENDIO O DE DESCARGA
ELÉCTRICA, NO EXPONGA ESTE APARATO A LA LLUVIA O A LA HUMEDAD.
La marca de precaución se encuentra en la parte posterior del dispositivo.
ATENCIÓN
- Utilice este aparato en lugares con climas templados.
- La placa de datos técnicos está situada en la parte posterior del dispositivo.
- Deje libre alrededor del aparato una distancia mínima de 5 cm para garantizar una
correcta ventilación del mismo.
- Para asegurar una ventilación correcta del aparato, no cubra los oricios de
ventilación con objetos tales como periódicos, manteles, cortinas, etc.
- No coloque ninguna fuente de calor, como por ejemplo una vela encendida, sobre
el aparato o cerca de él.
- No exponga el aparato a salpicaduras o a la humedad.
- No coloque objetos que contengan líquido, como un jarrón, encima del aparato.
- No tire las pilas al fuego. Respete el medio ambiente cuando se deshaga de las
pilas usadas.
- No exponga las pilas a temperaturas demasiado altas, como las producidas por la
exposición directa a los rayos del sol, al fuego o a otras fuentes de calor.
- El adaptador de red permite enchufar y desenchufar el aparato. El acceso al
mismo debe permanecer despejado en todo momento. Para cortar por completo
la alimentación del aparato, ha de desenchufar el adaptador de red de la toma
de corriente.
- Como resultado de fenómenos electroestáticos y/o eléctricos transitorios, pueden
producirse fallos en el funcionamiento del producto. En estos casos, el usuario
deberá reiniciar el aparato desenchufándolo y volviéndolo a enchufar.
- El funcionamiento normal del producto podría verse alterado por fuertes
interferencias electromagnéticas. En caso de ocurrir, simplemente reinicie el
producto y continúe utilizándolo con normalidad siguiendo las indicaciones del
manual de instrucciones. En el caso de que no volviera a funcionar, utilícelo en
una ubicación diferente.
AVVERTENZA: PER EVITARE IL RISCHIO DI INCENDIO O SCOSSA ELETTRICA,
NON ESPONETE L’APPARECCHIO ALLA PIOGGIA O ALL’UMIDITÀ.
Il simbolo di allerta è posto sul retro del dispositivo.
ATTENZIONE
- Utilizzare l’apparecchio in ambienti temperati.
- La targhetta segnaletica si trova nella parte posteriore dell'apparecchio.
- Lasciare uno spazio minimo di 5 cm intorno all’apparecchio per permettere una
ventilazione suciente.
- Garantire sempre una ventilazione corretta dell’apparecchio e non ostruire i fori di
ventilazione con oggetti come giornali, tovaglie, tende, ecc.
- Non collocare nessuna fonte di calore, come una candela accesa, sopra o nei
pressi dell’apparecchio.
- Non esporre l’apparecchio all'acqua o all’umidità.
- Non collocare nessun recipiente contenente liquidi, come ad esempio un vaso,
nelle vicinanze dell’apparecchio.
- Non gettare le pile nel fuoco! Gettare le pile nel rispetto dell'ambiente.
- Non esporre le pile a fonti di calore eccessivo, come raggi solari, fuoco o fonti di
calore analoghe.
- L’adattatore di rete permette di scollegare l’apparecchio. Deve pertanto restare
facilmente accessibile durante l’uso. Per mettere del tutto l’apparecchio fuori
tensione, scollegate il cavo di alimentazione.
- Per eetto di fenomeni transitori elettrostatici e/o elettrici, è possibile che il prodotto
non funzioni correttamente. In tal caso è opportuno reinizializzare l’apparecchio.
- Il normale funzionamento del prodotto può essere compromesso da forti
interferenze elettromagnetiche. In tal caso, segui le istruzioni nel manuale per
reimpostare il prodotto per riprendere il normale funzionamento. Nel caso in cui il
funzionamento non venga ripristinato, utilizzare il prodotto in altro luogo.
WAARSCHUWING Stel het toestel niet bloot aan vocht of regen om het risico
op brand of elektrische schokken te vermijden.
De waarschuwingsmarketing zit op de achterkant van het apparaat.
OPGELET
- Gebruik dit toestel bij een gematigd klimaat.
- Het kenmerkenplaatje bevindt zich aan de achterkant van het toestel.
- Zorg voor een afstand van minimum 5 cm rondom uw toestel voor voldoende
ventilatie.
- Zorg voor een juiste ventilatie van het toestel en bedek de ventilatie-openingen
niet met voorwerpen zoals dagbladen, tafellakens, gordijnen, enz.
- Plaats geen warmtebron, zoals een brandende kaars, op of in de buurt van het
toestel.
- Stel het toestel niet bloot aan waterspatten of vochtigheid.
- Plaats geen voorwerpen met vloeistof, zoals een vaas, op of in de buurt van het
toestel.
- De netstroomadapter maakt het mogelijk om de stroomvoorziening naar het
toestel te onderbeken. Zorg ervoor dat deze altijd makkelijk bereikbaar blijft
tijdens het gebruik. Om de voeding van het toestel volledig te onderbreken, dient
u de stekker van de netstroomadapter uit het stopcontact te trekken.
- Onder invloed van tijdelijke elektrostatische en/of elektrische verschijnselen kan
het product storingen ondervinden en kan een heropstart nodig blijken.
- De normale functie van het product kan worden verstoord door sterke
elektromagnetische storing. Als dit het geval is, reset het product dan gewoon
door de handleiding te volgen. Als het normale gebruik daarna niet kan worden
hervat, probeer het product dan op een andere locatie te gebruiken.
NEW ONE S.A.S
10, Rue de la Mission, 25480 Ecole Valentin, France
NEW ONE S.A.S
10, Rue de la Mission, 25480 Ecole Valentin, France
NEW ONE S.A.S
10, Rue de la Mission, 25480 Ecole Valentin, France
NEW ONE S.A.S
10, Rue de la Mission, 25480 Ecole Valentin, France
ALTAVOCES DE ESTANTERÍA CON BLUETOOTH ALTOPARLANTI DA MENSOLA CON BLUETOOTH BOEKENPLANKLUIDSPREKERS MET BLUETOOTHES IT NL
1. Sensor de infrarrojos del mando
a distancia
2. Indicador de función LED
3. : Para encender/ apagar la
unidad
4. : Para seleccionar el modo
de función deseado: Bluetooth,
Óptico, Coaxial, AUX o USB.
5. EQ : Para seleccionar los efectos
de sonido deseados: música,
película, diálogo.
6. Toma ÓPTICA (OPT)
7. Toma coaxial (COAX)
1. Sensore del telecomando
2. Spia LED di funzione
3. : Attivazione e disattivazione
dell’apparecchio
4. : Per selezionare la funzione
desiderata: Bluetooth, Ottica,
Coassiale, AUX o USB.
5. EQ : Per selezionare l’eetto audio
desiderato: musica, lm, dialogo.
6. Ingresso ottico (OPT)
7. Presa coassiale (COAX)
8. Prese LINE IN L/R
(sinistro/ destro)
1. Infraroodontvanger voor de
afstandsbediening
2. Functie-indicator
3. : Om het apparaat aan/ uit te
zetten
4. : Voor het selecteren van de
gewenste functiemodus: Bluetooth,
Optical, Coaxial, AUX or USB.
5. EQ : Voor het selecteren van de
gewenste geluidseecten: muziek,
lm, dialoog.
6. Optische ingang (OPT)
7. Coaxiale aansluiting (COAX)
8. Tomas LINE IN L/R RCA
9. Botón giratorio VOLUME (volumen):
Ajuste del volumen
10. Control de TREBLE : Para ajustar el
nivel de agudos.
11. Control de BASS : Para ajustar el
nivel de los graves.
12. Puerto USB para la reproducción MP3
13. Toma de salida de altavoces
(SPEAKER OUT )
14. Entrada de alimentación (DC IN)
15. Toma de entrada de altavoces
(SPEAKER IN)
9. Manopola VOLUME : Regolazione
del volume
10. Controllo TREBLE : Per regolare il
livello dei suoni alti.
11. Controllo BASS : Per regolare il
livello dei suoni bassi.
12. Porta USB per la riproduzione di
le MP3
13. Presa uscita altoparlante
(SPEAKER OUT )
14. Ingresso alimentazione (DC IN)
15. Presa entrata altoparlante
(SPEAKER IN)
8. LINE IN L/R RCA-aansluitingen
9. VOLUME-draaiknop:
Volumeregeling.
10. Regelaar TREBLE : Om het hoge-
tonen niveau in te stellen.
11. Regelaar BASS : Om het lage-
tonen niveau in te stellen.
12. USB-poort voor afspelen MP3’s
13. SPEAKER OUT aansluiting
(LUIDSPREKER UIT)
14. Ingang voor DC (voeding)
15. SPEAKER IN aansluiting
(LUIDSPREKER IN)
HAUPTGERÄT (AKTIVER LAUTSPRECHER)
UNIDAD PRINCIPAL (ALTAVOZ ACTIVO)
UNITÀ PRINCIPALE (ALTOPARLANTE ATTIVO)
HOOFDEENHEID (ACTIEVE LUIDSPREKER)
PASSIVER LAUTSPRECHER
ALTAVOZ PASIVO
ALTOPARLANTE PASSIVO
PASSIEVE LUIDSPREKER
FERNBEDIENUNG
MANDO A DISTANCIA
TELECOMANDO
AFSTANDSBEDIENING
-
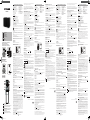 1
1
-
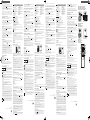 2
2


Muse M-620 SH Manual do usuário
- Categoria
- Alto-falantes portáteis
- Tipo
- Manual do usuário
em outras línguas
- español: Muse M-620 SH Manual de usuario
- français: Muse M-620 SH Manuel utilisateur
- italiano: Muse M-620 SH Manuale utente
- Nederlands: Muse M-620 SH Handleiding
- Deutsch: Muse M-620 SH Benutzerhandbuch