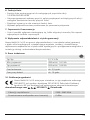
Hama 186075 Manual do usuário
- Categoria
- Controles de jogo
- Tipo
- Manual do usuário

00
186075
SRB
DK
N
E
F
D
GB
NL
PL
RO
CZ
SK
P
S
RUS
BG
GR
TR
FIN
I
H
Operating Instructions
Bedienungsanleitung
Mode d‘emploi
Instrucciones de uso
Gebruiksaanwijzing
Istruzioni per l‘uso
Instrukcja obsługi
Használati útmutató
Manual de utilizare
Návod k použití
Návod na použitie
Manual de instruções
Bruksanvisning
Руководство по эксплуатации
Работна инструкция
Οδηγίες χρήσης
Kullanma kılavuzu
Käyttöohje
Betjeningsvejledning
Bruksanvisning
Uputstvo za upotrebu
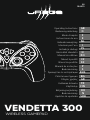
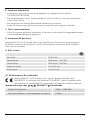
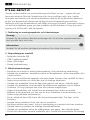
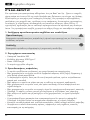
VENDETTA 300
WIRELESS GAMEPAD

XInput
DInput
DOWNLOADS
Further information are available on:
Weitere Informationen nden Sie hier:
download.urage.com/186075


2
GOperating Instructions
IT'S ALL ABOUT U!
Whether it be sports simulations or beat-em-ups, experience your game even more
intensively: with our Vendetta series, you really are in the centre of the action right
from the get-go. Equipped with motors and vibration functions, they offer you
situation-dependent reactions you can feel to your game play. Assign your additional
keys as you wish with individual functions or entire combos. An ergonomic design and
ideal grip make our products especially comfortable. They allow you to enjoy complete
and precise control at any speed.
1. Explanation of warning symbols and notes
Warning
This symbol is used to indicate safety instructions or to draw your attention to
specic hazards and risks.
Note
This symbol is used to indicate additional information or important notes.
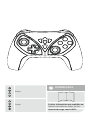
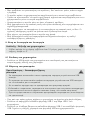
2. Package contents
•Vendetta 300 game pad
•USB-C charging cable
•Nano USB dongle
•These operating instructions
3. Safety instructions
•The product is intended for private, non-commercial use only.
•Do not use the product in the immediate vicinity of heaters, other heat sources or in
direct sunlight.
•As with all electrical products, this device should be kept out of the reach of
children.
•Do not drop the product and do not expose it to any major shocks.
•Do not operate the product outside the power limits specied in the technical data.
•Do not use the product in areas in which electronic products are not permitted.
•Be considerate. High volumes can disturb or interfere with your surroundings.
•Do not open the device or continue to operate it if it becomes damaged.
•The battery is permanently installed and cannot be removed; dispose of the product
as a whole in accordance with the statutory regulations.
•Keep the packaging material out of the reach of children due to the risk of
suffocation.
•Dispose of packaging material immediately in accordance with the locally applicable
regulations.
•Do not modify the product in any way. Doing so voids the warranty.

3
•Dispose of packaging material immediately in accordance with the locally applicable
regulations.
•Do not modify the product in any way. Doing so voids the warranty.
•Use the product for its intended purpose only.
•Protect the product from dirt, moisture and overheating, and only use it in a dry
environment.
•Use the item only in moderate climatic conditions.
•Do not operate the product outside the power limits given in the specications.
•Do not attempt to service or repair the product yourself. Leave any and all service
work to qualied experts.
•Do not throw the battery or the product into re.
•Do not tamper with or damage/heat/disassemble the batteries/rechargeable
batteries.
4. Start-up and operation
Note – Pairing the controller
•Note that the maximum range is 10 metres without obstacles such as walls,
people, etc.
4.1 Connecting the controller
•Connect the USB dongle of the controller to your PC and press the Home button on
the controller.
4.2 Charging the battery
Warning – rechargeable battery
•Only use suitable charging devices or USB connections for charging.
•As a rule, do not charge devices or USB connections that are defective and do not
try to repair them yourself.
•Do not overcharge the product or allow the battery to completely discharge.
•Avoid storing, charging or using the device in extreme temperatures and extremely
low atmospheric pressure (for example, at high altitudes).
•When stored over a long period of time, batteries should be charged regularly (at
least every three months).
•Fully charge the controller once before using it for the rst time.
•Connect the supplied USB-C charging cable to the USB-C port on the controller.
•Connect the free plug on the USB-C charging cable to a suitable USB charger. To do
this, consult the operating instructions for the USB charger you are using.
•During the charging procedure, the respective LEDs light up red.
•If the controller is not connected to the PC, all 4 LEDs will ash.

4
Note – charging procedure
•A complete charging cycle takes about 2.5 hours
•The controller's rechargeable battery can be charged both when it is connected
and when on standby.
•If the battery capacity is too low, the player LED will ash and the vibration
function will start
•Please use the enclosed USB-C cable only for charging the controller.
•The actual battery life will vary depending on how you use the device, the settings
and the environmental conditions (batteries have a limited life).4.3 Additional keys
4.3. Additional keys
•The following action keys can be assigned to the additional keys:
1/2/3/4/L/R/L2/R2/L3/R3/ D-PAD
•Individual functions or key combinations can be programmed.
•Your settings remain active after an interruption to the connection.
•Programming mode is aborted after 30 seconds.
•Programming mode is ended after 25 keys.
4.4 Programming the additional keys
•Press and hold the respective M button and Start briey.
•The four LEDs will now ash alternately.
•Now enter the individual key or key combination.
•To nish, press the relevant M key again.
•To delete the M keys, hold "Start" and an M key pressed.
•Now press the M key for which you wish to delete the setting.
5. Turbo function
•The following action keys can be assigned a Turbo function: 1/2/3/4/L/R/L2/R2/L3/R3
•To assign the relevant key, press and hold the action key and Turbo key at the same
time.
•To remove the Turbo function, repeat the procedure.
•Your settings will be reset after an interruption to the connection.
6. Auto function
•The following action keys can be assigned the Auto function:
1/2/3/4/L/R/L2/R2/L3/R3
•To assign the relevant key, press and hold the action key and then press the Turbo
key twice.
•To remove the Auto function, repeat the procedure.
•Your settings will be reset after an interruption to the connection.

5
7. Care and maintenance
•Only clean this product with a slightly damp, lint-free cloth and do not use
aggressive cleaning agents.
8. Warranty disclaimer
Hama GmbH & Co KG assumes no liability and provides no warranty for damage
resulting from improper installation/mounting, improper use of the product or from
failure to observe the operating instructions and/or safety notes.
9. Technical data
Batt. type 3.7 V Li-Po
Min. capacity 490 mAh / 1.81 Wh
Type capacity 500 mAh / 1.85 Wh
Charging time Approx. 2.5 hours
Operating time Approx. 15 hours
10. Declaration of Conformity
Hama GmbH & Co KG hereby declares that the radio equipment type
[00186075] is in compliance with Directive 2014/53/EU. The full text of the
EU declaration of conformity can be found on the following website:
download.urage.com 00186075 Downloads
Frequency band(s) 2400 - 2483 MHz
Maximum radio-frequency power transmitted 0 dBm

6
DBedienungsanleitung
IT'S ALL ABOUT U!
Ob Sportsimulationen oder Beat ‘em Ups - erlebe dein Spiel jetzt noch intensiver: Mit
unserer Vendetta Serie bist du ab sofort wirklich mittendrin. Ausgestattet mit Motoren
und Vibrationsfunktionen bieten sie dir je nach Situation spürbare Reaktionen auf dein
Gameplay. Belege die Zusatztasten frei nach deinen Wünschen mit Einzelfunktionen
oder ganzen Combos. Ergonomisches Design und bester Grip machen unsere Produkte
besonders komfortabel. Sie ermöglichen dir präzise Steuerung und volle Kontrolle bei
jeder Geschwindigkeit.
1. Erklärung von Warnsymbolen und Hinweisen
Warnung
Wird verwendet, um Sicherheitshinweise zu kennzeichnen oder um Aufmerksamkeit
auf besondere Gefahren und Risiken zu lenken.
Hinweis
Wird verwendet, um zusätzlich Informationen oder wichtige Hinweise zu
kennzeichnen.
2. Packungsinhalt
•Gamepad Vendetta 300
•USB-C Ladekabel
•Nano-USB-Dongle
•Diese Bedienungsanleitung
3. Sicherheitshinweise
•Das Produkt ist für den privaten, nicht-gewerblichen Haushaltsgebrauch vorgesehen.
•Betreiben Sie das Produkt nicht in unmittelbarer Nähe der Heizung, anderer
Hitzequellen oder in direkter Sonneneinstrahlung.
•Dieses Produkt gehört, wie alle elektrischen Produkte, nicht in Kinderhände!
•Lassen Sie das Produkt nicht fallen und setzen Sie es keinen heftigen
Erschütterungen aus.
•Betreiben Sie das Produkt nicht außerhalb seiner in den technischen Daten
angegebenen Leistungsgrenzen.
•Benutzen Sie das Produkt nicht in Bereichen, in denen elektronische Produkte nicht
erlaubt sind.
•Nehmen Sie Rücksicht. Hohe Lautstärken können ihre Umgebung stören oder
beeinträchtigen.
•Öffnen Sie das Produkt nicht und betreiben Sie es bei Beschädigungen nicht weiter.
•Der Akku ist fest eingebaut und kann nicht entfernt werden, entsorgen Sie das
Produkt als Ganzes gemäß den gesetzlichen Bestimmungen.
•Halten Sie Kinder unbedingt von dem Verpackungsmaterial fern, es besteht
Erstickungsgefahr.

7
•Entsorgen Sie das Verpackungsmaterial sofort gemäß den örtlich gültigen
Entsorgungsvorschriften.
•Nehmen Sie keine Veränderungen am Produkt vor. Dadurch verlieren Sie jegliche
Gewährleistungsansprüche.
•Verwenden Sie das Produkt ausschließlich für den dazu vorgesehenen Zweck.
•Schützen Sie das Produkt vor Schmutz, Feuchtigkeit und Überhitzung und verwenden
Sie es nur in trockenen Umgebungen.
•Verwenden Sie den Artikel nur unter moderaten klimatischen Bedingungen.
•Betreiben Sie das Produkt nicht außerhalb seiner in den technischen Daten
angegebenen Leistungsgrenzen.
•Versuchen Sie nicht, das Produkt selbst zu warten oder zu reparieren. Überlassen Sie
jegliche Wartungsarbeit dem zuständigen Fachpersonal.
•Werfen Sie den Akku bzw. das Produkt nicht ins Feuer.
•Verändern und/oder deformieren/erhitzen/zerlegen Sie Akkus/Batterien nicht.
4. Inbetriebnahme und Betrieb
Hinweis – Pairing des Controllers
•Beachten Sie, dass die Reichweite max. 10 Meter beträgt, ohne Hindernisse wie
Wände, Personen etc.
4.1 Verbinden des Controllers
•Schließen Sie den USB-Dongle des Controllers an Ihrem PC an und drücken Sie die
Home-Taste am Controller.
4.2 Aufladen des Akkus
Warnung – Akku
•Verwenden Sie nur geeignete Ladegeräte oder USB-Anschlüsse zum Auaden.
•Verwenden Sie defekte Ladegeräte oder USB-Anschlüsse generell nicht mehr und
versuchen Sie nicht, diese zu reparieren.
•Überladen oder tiefentladen Sie das Produkt nicht.
•Vermeiden Sie Lagerung, Laden und Benutzung bei extremen Temperaturen und
extrem niedrigem Luftdruck (wie z.B. in großen Höhen).
•Laden Sie bei längerer Lagerung regelmäßig (mind. vierteljährig) nach.
•Laden Sie vor dem ersten Gebrauch den Controller einmal vollständig auf.
•Schließen Sie das mitgelieferte USB-C Ladekabel an USB-C Anschluss des Controllers
an.
•Schließen Sie den freien Stecker des USB-C Ladekabels an einem geeigneten USB
Ladegerät an. Beachten Sie hierzu die Bedienungsanleitung des verwendeten USB
Ladegeräts.
•Während des Ladevorgangs, blinken die jeweiligen LEDs rot auf.
•Sollte der Controller nicht mit dem PC verbunden sein blinken alle 4 LEDs auf.

8
Hinweis – Ladevorgang
•Ein kompletter Ladevorgang dauert ca. 2,5 Stunden
•Der Akku des Controllers kann sowohl im gekoppelten als auch im Standby
Zustand geladen werden.
•Ist die Akkukapazität zu gering blinkt die Spieler LED auf und die Vibrations-
Funktion setzt aus
•Bitte verwenden Sie das beiliegende USB-C Kabel nur zum Laden des Controllers.
•Die tatsächliche Akkulaufzeit variiert je nach Nutzung des Gerätes, den Einstellungen
und Umgebungsbedingungen (Akkus haben eine begrenzte Lebensdauer).
4.3 Zusatztasten
•Es können folgende Aktionstasten auf die Zusatztasten gelegt werden:
1/2/3/4/L/R/L2/R2/L3/R3/ D-PAD
•Es können Einzelfunktionen oder Tastenkombinationen programmiert werden.
•Ihre Einstellungen bleiben nach einer Verbindungsunterbrechung weiterhin aktiv.
•Der Programmier-Modus wird nach 30 Sekunden abgebrochen.
•Der Programmier-Modus wird nach 25 Tasten beendet.
4.4 Programmieren der Zusatztasten
•Halten Sie die jeweilige M-Taste und Start kurz gedrückt.
•Die vier LEDs werden nun abwechselnd blinken.
•Geben Sie nun die Einzeltaste oder Tastenkombination ein.
•Drücken Sie zum Abschluss die jeweilige M-Taste erneut.
•Zum Löschen der M-Tasten halten Sie "Start" und eine M-Taste gedrückt.
•Drücken Sie nun die M-Taste, welcher Sie die Einstellung entfernen wollen.
5. Turbo-Funktion
•Es können folgende Aktionstasten mit der Turbo-Funktion belegt werden:
1/2/3/4/L/R/L2/R2/L3/R3
•Um die jeweilige Taste belegen zu können, halten Sie die Aktionstaste und Turbo-
Taste gleichzeitig gedrückt.
•Zum entfernen der Turbo-Funktion, wiederholen Sie den Vorgang.
•Ihre Einstellungen werden nach einer Verbindungsunterbrechung zurückgesetzt.
6. Auto-Funktion
•Es können folgende Aktionstasten mit der Auto-Funktion belegt werden:
1/2/3/4/L/R/L2/R2/L3/R3
•Um die jeweilige Taste belegen zu können, halten sie die Aktionstaste gedrückt und
drücken die Turbo-Taste zwei mal.
•Zum entfernen der Auto-Funktion, wiederholen Sie den Vorgang.
•Ihre Einstellungen werden nach einer Verbindungsunterbrechung zurückgesetzt.

9
7. Wartung und Pflege
•Reinigen Sie dieses Produkt nur mit einem fusselfreien, leicht feuchten Tuch und
verwenden Sie keine aggressiven Reiniger.
8. Haftungsausschluss
Die Hama GmbH & Co KG übernimmt keinerlei Haftung oder Gewährleistung für
Schäden, die aus unsachgemäßer Installation, Montage und unsachgemäßem
Gebrauch des Produktes oder einer Nichtbeachtung der Bedienungsanleitung und/oder
der Sicherheitshinweise resultieren.
9. Technische Daten
Batt. Typ 3.7V Li-Po
Min. Kapazität 490 mAh / 1.81 Wh
Typ Kapazität 500 mAh / 1.85 Wh
Auadezeit ca. 2,5 Stunden
Laufzeit ca. 15 Stunden
10. Konformitätserklärung
Hiermit erklärt die Hama GmbH & Co KG, dass der Funkanlagentyp
[00186075] der Richtlinie 2014/53/EU entspricht. Der vollständige Text der
EU-Konformitätserklärung ist unter der folgenden Internetadresse verfügbar:
download.urage.com 00186075 Downloads
Frequenzband/Frequenzbänder 2400 - 2483 MHz
Abgestrahlte maximale Sendeleistung 0 dBm

10
FMode d’emploi
IT'S ALL ABOUT U!
Fais une expérience encore plus intense du jeu, que ce soit avec des simulations de
sport ou avec le beat ‘em up : Avec notre série Vendetta, tu es au centre de l'action.
Avec l’équipement de moteurs et de fonctions de vibration, tu perçois en fonction
des situations des réactions sensibles dans ton gameplay. Tu peux librement attribuer
aux touches supplémentaires des fonctions individuelles ou des combos. Le design
ergonomique et la tenue optimisée rendent notre produit particulièrement confortable.
Ils te permettent un pilotage précis et un contrôle intégral pour toutes les vitesses.
1. Explication des symboles d’avertissement et des remarques
Avertissement
Ce symbole est utilisé pour indiquer des consignes de sécurité ou pour attirer votre
attention sur des dangers et risques particuliers.
Remarque
Ce symbole est utilisé pour indiquer des informations supplémentaires ou des
remarques importantes.
2. Contenu de l’emballage
•Gamepad Vendetta 300
•Câble de chargement USB-C
•Dongle nano-USB
•Le présent mode d’emploi
3. Consignes de sécurité
•Ce produit est destiné à une utilisation domestique non commerciale.
•N’utilisez pas le produit à proximité immédiate d’un chauffage, d’autres sources de
chaleur ou à la lumière directe du soleil.
•Cet appareil, comme tout appareil électrique, doit être gardé hors de portée des
enfants !
•Protégez le produit des secousses violentes et évitez tout choc ou toute chute.
•N’utilisez pas le produit en dehors des limites de puissance indiquées dans les
caractéristiques techniques.
•N’utilisez pas le produit dans des zones où les produits électroniques ne sont pas
autorisés.
•Faites attention. Un volume excessif est susceptible de déranger les personnes de
votre environnement ou de leur porter atteinte.
•Ne tentez pas d’ouvrir le produit en cas de détérioration et cessez de l’utiliser.
•La batterie est installée de manière permanente et ne peut pas être retirée ; éliminer
l’ensemble du produit conformément aux dispositions légales.
•Tenez les emballages d’appareils hors de portée des enfants, risque d’étouffement.

11
•Recyclez les matériaux d’emballage conformément aux prescriptions locales en
vigueur.
•N’apportez aucune modication au produit. Des modications vous feraient perdre
vos droits de garantie.
•Utilisez le produit exclusivement conformément à sa destination.
•Protégez le produit de toute saleté, humidité, surchauffe et utilisez-le uniquement
dans des environnements secs.
•Utilisez l’article uniquement dans des conditions climatiques modérées.
•N‘utilisez pas le produit en dehors des limites de puissance indiquées dans les
caractéristiques techniques.
•Ne tentez pas de réparer l’appareil vous-même ni d’effectuer des travaux d’entretien.
Déléguez tous travaux d‘entretien à des techniciens qualiés.
•Ne jetez pas le produit ni aucune batterie dans un feu.
•Ne modiez pas et/ou ne déformez/chauffez/désassemblez pas les batteries/piles.
4. Mise en service et fonctionnement
Remarque – Couplage de la manette
•Veuillez noter que la portée maximale est de 10 mètres sans obstacles tels que
cloisons, personnes, etc.
4.1 Raccordement de la manette
•Raccordez le dongle USB de la manette à votre PC et appuyez sur la touche home
sur la manette.
4.2 Recharge de la batterie
Avertissement - Batterie
•Utilisez exclusivement un chargeur approprié ou une connexion USB pour la
recharge.
•Cessez d‘utiliser tout chargeur ou toute connexion USB défectueux et ne tentez
pas de réparer ces derniers.
•Ne surchargez ou ne déchargez pas totalement le produit.
•Évitez de stocker, charger et utiliser le produit à des températures extrêmes et à
une pression atmosphérique extrêmement basse (à haute altitude, par exemple).
•Rechargez régulièrement le produit (au moins une fois par trimestre) en cas de
stockage prolongé.
•Chargez complètement la manette une fois avant la première utilisation.
•Connectez le câble de chargement USB-C fourni au port USB-C de la manette.
•Branchez la che libre du câble de chargement USB-C à un chargeur USB approprié.
Reportez-vous au mode d’emploi du chargeur USB que vous utilisez.
•Pendant la charge, les voyants LED correspondants clignotent.
•Si la manette ne devait pas être connectée au PC, tous les 4 voyants LED clignotent.

12
Remarque - processus de charge
•Un processus de charge complet prend environ 2,5 heures
•La batterie de la manette peut être chargée lorsqu'elle est couplée mais aussi
lorsqu’elle est en veille.
•Si la capacité de la batterie est trop faible, le voyant LED du joueur clignote et la
fonction de vibration s’interrompt
•Veuillez n’utiliser le cable USB-C fourni uniquement pour la charge de la manette.
•La durée de vie réelle de la batterie varie en fonction de l’utilisation de l’appareil,
des réglages et des conditions environnementales (les batteries ont une durée de
vie limitée).
4.3 Touches supplémentaires
•Les touches d’action suivantes peuvent être attribuées aux touches supplémentaires:
1/2/3/4/L/R/L2/R2/L3/R3/ D-PAD
•Il est possible de programmer des fonctions individuelles ou des raccourcis.
•Vos réglages restent actifs après une interruption de la connexion.
•Le mode de programmation est annulé après 30 secondes.
•Le mode de programmation s'arrête après 25 touches.
4.4 Programmation des touches supplémentaires
•Maintenez appuyé la touche M correspondante et de démarrage pendant un court
instant.
•Les quatre voyants LED s’allument à présent de manière alternée.
•Saisissez à présent la touche individuelle ou le raccourci.
•Pour nir, appuyez de nouveau sur la touche M correspondante.
•Pour supprimer la touche M, maintenez enfoncée la touche de démarrage et la
touche M.
•Appuyez maintenant sur la touche M de laquelle vous souhaitez retirer des réglages.
5. Fonction turbo
•Les touches d’action suivantes peuvent inclure la fonction turbo : 1/2/3/4/L/R/L2/
R2/L3/R3
•An d’attribuer la fonction à la touche correspondante, maintenez enfoncée la
touche d’action et la touche turbo simultanément.
•Pour retirer la fonction turbo, répétez la procédure.
•Vos réglages sont réinitialisés après une interruption de la connexion.
6. Fonction auto
•Les touches d’action suivantes peuvent inclure la fonction auto :
1/2/3/4/L/R/L2/R2/L3/R3

13
•An d’attribuer la fonction à la touche correspondante, maintenez enfoncée la
touche d’action et appuyez deux fois sur la touche turbo.
•Pour retirer la fonction auto, répétez la procédure.
•Vos réglages sont réinitialisés après une interruption de la connexion.
7. Soins et entretien
•Nettoyez le produit uniquement à l’aide d’un chiffon non pelucheux légèrement
humide ; évitez tout détergent agressif.
8. Exclusion de garantie
La société Hama GmbH & Co KG décline toute responsabilité en cas de dommages
provoqués par une installation, un montage ou une utilisation non conformes du
produit ou encore provoqués par le non-respect des consignes du mode d’emploi et/ou
des consignes de sécurité.
9. Caractéristiques techniques
Type de Type 3.7V Li-Po
Capacité min. 490 mAh / 1.81 Wh
Capacité type 500 mAh / 1.85 Wh
Durée de chargement Environ 2,5 heure
Autonomie Environ 15 heure
10. Déclaration de conformité
Le soussigné, Hama GmbH & Co KG, déclare que l’équipement
radioélectrique du type [00186075] est conforme à la directive 2014/53/UE.
Le texte complet de la déclaration UE de conformité est disponible à
l’adresse internet suivante : download.urage.com 00186075
Downloads
Bandes de fréquences 2400 - 2483 MHz
Puissance d’émission émise maximale 0 dBm

14
EManual de instrucciones
IT'S ALL ABOUT U!
Ya se trate de deportes o de beat 'em ups, ahora podrá experimentar el juego con
mayor intensidad: Con nuestra serie Vendetta estará verdaderamente en el centro
de la escena. Equipados con motores y funciones de vibración, reacciona de forma
sorprendente en cada situación. Permite asignar funciones individuales o combos
completos a los botones adicionales según se preera. El diseño ergonómico y el
mejor agarre garantizan la comodidad de nuestros productos. Proporcionan un control
preciso y total en cualquier velocidad.
1. Explicación de los símbolos de aviso y de las indicaciones
Aviso
Se utiliza para identicar indicaciones de seguridad o para llamar la atención sobre
peligros y riesgos especiales.
Nota
Se utiliza para indicar información adicional o indicaciones importantes.
2. Contenido del paquete
•Gamepad Vendetta 300
•Cable de carga USB-C
•Dongle nano USB
•Este manual de instrucciones
3. Indicaciones de seguridad
•Este producto está previsto para usarlo en el ámbito privado y no comercial del
hogar.
•No utilice el producto junto a sistemas de calefacción, otras fuentes de calor ni
expuesto a la luz solar directa.
•Este producto, como todos los productos eléctricos, no debe estar en manos de los
niños.
•No deje caer el producto ni lo someta a sacudidas fuertes.
•No utilice el producto fuera de los límites de potencia indicados en los datos
técnicos.
•No utilice el producto en áreas donde no se permitan aparatos electrónicos.
•Precaución. Los volúmenes altos pueden molestar o afectar a su entorno.
•No abra el producto ni siga utilizándolo en caso de presentar daños.
•La batería está instalada de manera permanente y no puede retirarse; deseche el
producto de manera íntegra de conformidad con las disposiciones legales vigentes.
•Mantenga el material de embalaje fuera del alcance de los niños, ya que existe
peligro de asxia.

15
•Deseche el material de embalaje de conformidad con las normativas locales vigentes
en materia de eliminación de desechos.
•No realice cambios en el producto. Esto conllevaría la pérdida de todos los derechos
de la garantía.
•Emplee el producto exclusivamente para la función para la que fue diseñado.
•Proteja el producto de la suciedad, la humedad y el calor excesivo y utilícelo solo en
ambientes secos.
•Utilice el artículo exclusivamente con condiciones climáticas moderadas.
•No opere el producto fuera de los límites de potencia indicados en los datos
técnicos.
•No intente mantener o reparar el aparato por cuenta propia. Encomiende cualquier
trabajo de mantenimiento al personal especializado competente.
•No arroje la batería o el producto al fuego.
•No modique ni deforme/caliente/desensamble las pilas recargables/baterías.
4. Puesta en marcha y funcionamiento
Nota – Emparejamiento del mando
•Tenga en cuenta que el alcance es de un máximo de 10 metros, sin obstáculos
como paredes, personas, etc.
4.1 Conexión del mando
•Conecte el dongle USB del mando al PC y pulsa el botón Home del mando
4.2 Carga de la batería
Aviso: batería
•Utilice solo cargadores adecuados o conexiones USB para efectuar la carga.
•No siga utilizando cargadores o conexiones USB defectuosos y no intente
repararlos.
•No sobrecargue ni descargue el producto en profundidad.
•Evite almacenar, cargar y utilizar el despertador a temperaturas extremas y con
presiones de aire exageradamente bajas (p. ej. bajas temperaturas).
•En caso de almacenamiento prolongado, realice una recarga regularmente (mín.
trimestralmente).
•Cargue completamente el mando antes de utilizarlo por primera vez.
•Conecte el cable de carga USB-C suministrado al puerto USB-C del mando.
•Conecte el conector libre del cable de carga USB a un cargador con USB adecuado.
Consulte el manual de instrucciones del cargador USB utilizado.
•Durante el proceso de carga, los LED respectivos parpadean en rojo.
•Si el controlador no está conectado al PC, los 4 LED parpadean.

16
Nota: proceso de carga
•Un proceso completo de carga dura aproximadamente 2,5 horas
•La batería del mando se puede cargar tanto en modo emparejado como en modo
de espera.
•Si la capacidad de la batería es demasiado baja, el LED del mando parpadea y la
función de vibración se detiene.
•Por favor, utilice únicamente el cable USB-C suministrado para cargar el mando.
•La duración real de la batería varía en función del uso del aparato, así como de los
ajustes y las condiciones ambientales (las baterías tienen una vida útil limitada).
4.3 Botones adicionales
•Los siguientes botones de acción pueden asignarse a los botones adicionales:
1/2/3/4/L/R/L2/R2/L3/R3/ D-PAD
•Se pueden programar funciones individuales o combinaciones de botones
•Los ajustes permanecen activos después de una interrupción de la conexión.
•El modo de programación se cancela tras 30 segundos
•El modo de programación naliza después de 25 pulsaciones
4.4 Programación de los botones adicionales
•Mantenga pulsado brevemente el botón M respectivo y el de Start.
•Los cuatro LED parpadearán ahora alternativamente.
•Ahora introduzca el botón o combinación de botones
•Pulse de nuevo el botón M correspondiente para nalizar
•Para eliminar los botones M, mantenga pulsado "Start" y una tecla M.
•Ahora pulse el botón M cuyo ajuste desea eliminar.
5. Función turbo
•Los siguientes botones de acción pueden ser asignados a la función turbo:
1/2/3/4/L/R/L2/R2/L3/R3
•Para poder asignar el botón correspondiente, mantenga pulsadas el botón de acción
y el botón turbo al mismo tiempo.
•Para eliminar la función turbo, repita el procedimiento.
•Su conguración se restablecerá tras una interrupción de la conexión.
6. Función auto
•Puede asignar la función automática a los siguientes botones:
1/2/3/4/L/R/L2/R2/L3/R3
•Para asignar el botón correspondiente, mantenga pulsado el botón de acción y pulse
dos veces el botón turbo.
•Para eliminar la función auto, repita el procedimiento.
•Su conguración se restablecerá tras una interrupción de la conexión.

17
7. Mantenimiento y cuidado
•Limpie este producto solo con un paño ligeramente humedecido que no deje pelusas
y no utilice detergentes agresivos.
8. Exclusión de responsabilidad
La empresa Hama GmbH & Co KG no se responsabiliza ni concede garantía alguna
por los daños que se deriven de una instalación, montaje o manejo incorrectos del
producto o por la inobservancia de las instrucciones de uso o de las indicaciones de
seguridad.
9. Datos técnicos
Batería Tipo 3.7 V Li-Po
Capacidad mínima 490 mAh / 1.81 Wh
Capacidad normal 500 mAh / 1.85 Wh
Tiempo de carga aprox. 2,5 horas
Duración aprox. 15 horas
10. Declaración de conformidad
Por la presente, Hama GmbH & Co KG declara que el tipo de equipo
radioeléctrico [00186075] es conforme con la Directiva 2014/53/UE. El texto
completo de la Declaración de Conformidad UE puede consultarse en la
siguiente dirección de Internet: download.urage.com 00186075
Downloads
Banda o bandas de frecuencia 2400 - 2483 MHz
Potencia máxima de radiofrecuencia 0 dBm

18
NGebruiksaanwijzing
IT'S ALL ABOUT U!
Of het nu gaat om sportsimulaties of beat 'em ups - beleef je spel nu nog intenser: met
onze Vendetta-serie zit je er nu echt middenin. Met motoren en vibratiefuncties bieden
ze je afhankelk van de situatie merkbare reacties op je gameplay. Ws naar wens
individuele functies of complete combo's toe aan de extra knoppen. Het ergonomisch
ontwerp en de beste grip maken onze producten bzonder comfortabel. Ze bieden je
nauwkeurige besturing en volledige controle belke snelheid.
1. Verklaring van waarschuwingssymbolen en instructies
Waarschuwing
Wordt gebruikt om veiligheidsinstructies te markeren of om op bzondere gevaren
en risico’s te attenderen.
Aanwijzing
Wordt gebruikt om extra informatie of belangrke aanwzingen te markeren.
2. Inhoud van de verpakking
•Gamepad Vendetta 300
•USB-C-oplaadkabel
•Nano-USB-dongle
•Deze gebruiksaanwzing
3. Veiligheidsinstructies
•Het product is bedoeld voor huishoudelk, niet-commercieel gebruik.
•Gebruik het product niet in de onmiddellke nabheid van de verwarming, andere
warmtebronnen of in direct zonlicht.
•Dit product dient, zoals alle elektrische producten, buiten het bereik van kinderen te
worden gehouden!
•Laat het product niet vallen en stel het niet bloot aan zware schokken of stoten.
•Gebruik het product niet buiten de in de technische gegevens vermelde
vermogensgrenzen.
•Gebruik het product niet op plaatsen waar elektronische producten niet zn
toegestaan.
•Houd rekening met anderen. Grote geluidsvolumes kunnen uw omgeving storen of
benadelen.
•Open het product niet en gebruik het niet meer bbeschadigingen.
•De accu is vast geïnstalleerd en kan niet worden verwderd, gooi het product als
geheel weg in overeenstemming met de wettelke bepalingen.
•Het verpakkingsmateriaal mag absoluut niet in handen van kinderen komen in
verband met verstikkingsgevaar.
•Voer het verpakkingsmateriaal direct en overeenkomstig de lokaal geldende
afvoervoorschriften af.
A página está carregando...
A página está carregando...
A página está carregando...
A página está carregando...
A página está carregando...
A página está carregando...
A página está carregando...
A página está carregando...
A página está carregando...
A página está carregando...
A página está carregando...
A página está carregando...
A página está carregando...
A página está carregando...
A página está carregando...
A página está carregando...
A página está carregando...
A página está carregando...
A página está carregando...
A página está carregando...
A página está carregando...
A página está carregando...
A página está carregando...
A página está carregando...
A página está carregando...
A página está carregando...
A página está carregando...
A página está carregando...
A página está carregando...
A página está carregando...
A página está carregando...
A página está carregando...
A página está carregando...
A página está carregando...
A página está carregando...
A página está carregando...
A página está carregando...
A página está carregando...
A página está carregando...
A página está carregando...
A página está carregando...
A página está carregando...
A página está carregando...
A página está carregando...
A página está carregando...
A página está carregando...
A página está carregando...
A página está carregando...
A página está carregando...
A página está carregando...
A página está carregando...
A página está carregando...
A página está carregando...
A página está carregando...
A página está carregando...
A página está carregando...
A página está carregando...
A página está carregando...
A página está carregando...
A página está carregando...
A página está carregando...
A página está carregando...
A página está carregando...
A página está carregando...
A página está carregando...
A página está carregando...
A página está carregando...
A página está carregando...
-
 1
1
-
 2
2
-
 3
3
-
 4
4
-
 5
5
-
 6
6
-
 7
7
-
 8
8
-
 9
9
-
 10
10
-
 11
11
-
 12
12
-
 13
13
-
 14
14
-
 15
15
-
 16
16
-
 17
17
-
 18
18
-
 19
19
-
 20
20
-
 21
21
-
 22
22
-
 23
23
-
 24
24
-
 25
25
-
 26
26
-
 27
27
-
 28
28
-
 29
29
-
 30
30
-
 31
31
-
 32
32
-
 33
33
-
 34
34
-
 35
35
-
 36
36
-
 37
37
-
 38
38
-
 39
39
-
 40
40
-
 41
41
-
 42
42
-
 43
43
-
 44
44
-
 45
45
-
 46
46
-
 47
47
-
 48
48
-
 49
49
-
 50
50
-
 51
51
-
 52
52
-
 53
53
-
 54
54
-
 55
55
-
 56
56
-
 57
57
-
 58
58
-
 59
59
-
 60
60
-
 61
61
-
 62
62
-
 63
63
-
 64
64
-
 65
65
-
 66
66
-
 67
67
-
 68
68
-
 69
69
-
 70
70
-
 71
71
-
 72
72
-
 73
73
-
 74
74
-
 75
75
-
 76
76
-
 77
77
-
 78
78
-
 79
79
-
 80
80
-
 81
81
-
 82
82
-
 83
83
-
 84
84
-
 85
85
-
 86
86
-
 87
87
-
 88
88


Hama 186075 Manual do usuário
- Categoria
- Controles de jogo
- Tipo
- Manual do usuário
em outras línguas
- slovenčina: Hama 186075 Používateľská príručka
- dansk: Hama 186075 Brugermanual
- română: Hama 186075 Manual de utilizare