
5019 618 33015
HOO 050 - 051 - 054
HOO A00 - A10 - A40
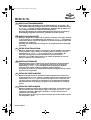
INSTALLATIONSANGABEN
Mindestabstand zur Kochfläche: 60 cm (Elektroplatten), 70 cm (Gas-, Öl-
oder Kohlekochmulde). Befolgen Sie bei der Installation die Nummerierung
(1
Ö
2
Ö
3
Ö
.....) und die jeweiligen Anleitungen. Schließen Sie das Gerät erst
nach erfolgter Installation an die Stromversorgung an.
Achtung! Das Auslassrohr und die Befestigungsmanschetten sind nicht im
Lieferumfang inbegriffen und müssen gesondert erworben werden.
INSTALLATION SHEET
Minimum height above cooker: 60 cm (electric cookers), 70 cm (gas, oil-fired
or coal cookers). To assemble follow the numbers (1
Ö
2
Ö
3
Ö
.....) and relative
instructions. Do not connect the appliance to the electrical power supply until
installation is completed.
Warning! The exhaust pipe and clamps are not supplied and must be bought
separately.
FICHE D'INSTALLATION
Distance minimale par rapport à la cuisinière : 60 cm (cuisinière électrique),
70 cm (cuisinière à gaz, mazout ou charbon). Pour le montage, suivez la
numérotation (1
Ö
2
Ö
3
Ö
.....) et les instructions correspondantes. Ne
branchez pas l'appareil tant que l'installation n'est pas terminée.
Attention ! Le conduit d'évacuation et les colliers de fixation ne sont pas
fournis et doivent être achetés à part.
INSTALLATIEKAART
Minimumafstand tot het kooktoestel: 60 cm (elektrische kooktoestellen),
70 cm (kooktoestellen op gas, olie of kolen). Volg voor de montage de
nummering (1
Ö
2
Ö
3
Ö
.....) en de bijbehorende aanwijzingen. Geef het
apparaat geen stroom totdat de installatie geheel voltooid is.
Let op! De afvoerbuis en de klembanden worden niet bijgeleverd en moeten
apart worden aangeschaft.
FICHA DE INSTALACIÓN
Distancia mínima desde los quemadores: 60 cm (quemadores eléctricos),
70 cm (quemadores a gas, gasóleo o carbón). Para efectuar el montaje siga la
numeración (1
Ö
2
Ö
3
Ö
.....) y las instrucciones. No conecte el aparato a la
corriente eléctrica hasta que la instalación esté completamente finalizada.
¡Atención! El tubo de descarga y las guías no están incluidas y se compran
aparte.
FICHA DE INSTALAÇÃO
Distância mínima dos fogões: 60 cm (fogões eléctricos), 70 cm (fogões a gás,
óleo ou carbono). Para a montagem, siga a numeração (1
Ö
2
Ö
3
Ö
.....) e as
respectivas instruções. Não ligue o aparelho à corrente eléctrica até a
instalação estar concluída.
Atenção! O tubo de descarga e as tiras de fixação não são fornecidas e devem
ser compradas à parte.
D
GB
F
NL
E
P
61833015.fm Page 1 Friday, March 28, 2003 2:29 PM

5019 618 33015
HOO 050 - 051 - 054
HOO A00 - A10 - A40
SCHEDA INSTALLAZIONE
Distanza minima dai fuochi: 60 cm (fuochi elettrici), 70 cm (fuochi a gas,
gasolio o carbone). Per il montaggio seguire la numerazione (1
Ö
2
Ö
3
Ö
.....) e
le istruzioni relative. Non dare corrente allapparecchio finché linstallazione
non è totalmente completata.
Attenzione! Il tubo di scarico e le fascette di fissaggio non sono fornite e vanno
acquistate a parte.
ùüùü+ùùùþ
ü$12.)12.1.)2"0120"FP02!"0120"FP0120"
.0! #02!0. #0! # +.22 21. #1202
.!1
Ö
Ö
Ö
.2"1$02" /0"2! 3 / 2020002!)
!0*.21#10#!2 !&12"0.212.1"
! 1 $1&."..&".2. !.120!&1"/0/.202..
!0.. 2 *$&!12
INSTALLATIONSBLAD
Minsta tillåtna avstånd från olika typer av spisar: 60 cm (elektrisk spis), 70 cm
(gasspis, gasolspis eller koleldad spis). Följ givna anvisningar och
nummerordningen (1
Ö
2
Ö
3
Ö
.....) när fläktkåpan skall monteras. Slå inte på
strömmen till fläktkåpan förrän installationen är helt avslutad.
Utsläppsröret och rörklämmorna som krävs för installationen levereras inte
tillsammans med fläktkåpan, utan måste köpas separat.
INSTALLASJONSVEILEDNING
Minimumsavstand til komfyrtopp: 60 cm (elektriske kokeplater), 70 cm
(gass-, parafin- eller kullkomfyr). Følg nummereringen ved montering
(1
Ö
2
Ö
3
Ö
.....), samt monteringsanvisningene. Apparatet må ikke tilkobles
strømnettet før installasjonen er helt avsluttet.
Advarsel! Avtrekksrøret og klemmene følger ikke med og må kjøpes separat.
INSTALLATIONSVEJLEDNING
Minimumafstand fra kogezoner: 60 cm (elkogezoner), 70 cm (gas-, olie- eller
kulfyrede kogezoner). Ved montering skal man følge vejledningens
nummerrækkefølge (1
Ö
2
Ö
3
Ö
.....) og de tilhørende instruktioner. Apparatet
må ikke tilsluttes elforsyningen, før installationen er fuldført.
Advarsel! Aftræksrøret og spændebåndene leveres ikke med emhætten og
skal købes separat.
ASENNUSOHJEET
Vähimmäisetäisyys liedestä: 60 cm (sähköliesi), 70 cm (kaasu-, öljy- tai
hiililiedet). Suorita asennus numerojärjestyksessä (1
Ö
2
Ö
3
Ö
.....) ohjeiden
mukaisesti. Älä kytke liesituuletinta sähköverkkoon ennen kuin kaikki
asennusvaiheet on suoritettu.
Huomaa! Poistoputkea ja kiinnittimiä ei toimiteta laitteen mukana, ne on
hankittava erikseen.
I
GR
S
N
DK
FIN
61833015.fm Page 2 Friday, March 28, 2003 2:29 PM

5019 618 33015
HOO 050 - 051 - 054
HOO A00 - A10 - A40
A - Dunstabzugsversion
A - Extractor version
A - Version aspirante
A - Model met luchtafvoer
naar buiten
A - Versión aspirante
A - Versão aspirante
A - Versione aspirante
$ 2 0..&2 #
.!.
A - Utblåsningsfläkt
A - Utblåsningsversjon
A - Model med aftræk
A - Imevä malli
B - Ausführung mit
Luftumwälzung
B - Filter version
B - Version filtrante
B - Model met
luchtcirculatie
B - Versión filtrante
B - Versão Filtrante
B - Versione filtrante
% 2 0..*&1
B - Filterfläkt
B - Filterversjon
B - Model med kulfilter
B - Suodattava malli
Bauen Sie den Kohlfilter ein
Fit the carbon filter
Installez la filtre à charbon
Installeer het koolstoffilter
Instale el filtro de carbón
Instalar o filtro de carbono
Installare il filtro al carbone
021202 32! 00! *
!..
Montera kolfiltret
Installering av kullfilteret
Monter kulfilteret
Asenna hiilisuodatin
61833015.fm Page 3 Friday, March 28, 2003 2:29 PM

5019 618 33015
HOO 050 - 051 - 054
HOO A00 - A10 - A40
PRODUCT SHEET
1.
Control panel.
2.
Self-supporting grease filters
(depending on model).
3.
Extractor grille with internal grease filter
(depending on model).
4.
Lighting unit.
Bulb maintenance
1.
Disconnect the electrical power supply.
2.
Open the extractor grille or remove the self-
supporting grease filter (depending on model).
Fig. 1 (a-b)
.
3.
Remove the burnt-out bulb.
Replace using 40 W max E14 bulbs only.
4.
Refit the extractor grille or grease filter.
Fitting or renewing the carbon filter:
1.
Disconnect the electrical power supply.
2.
Open the extractor grille or remove the self-
supporting grease filter (depending on model).
Fig. 1 (a-b)
.
3.
To access the carbon filter seat, rotate the knobs
90° and open the lid.
Fig. 2 (c)
.
4.
Fit the shaped carbon filter in its default location.
Fig. 2 (d)
.
5.
Turn the carbon filter locking knob 90° (check
that the filter is secured, otherwise rotate it
further).
Fig. 2 (e)
.
6.
Close the carbon filter compartment
7.
Refit the extractor grille or grease filter.
To remove the carbon filter, proceed in reverse
order.
Grease filter maintenance:
1.
Disconnect the electrical power supply.
2.
Open the extractor grille or remove the self-
supporting grease filter (in this last case wash the
filter immediately).
Fig. 1 (a-b).
3.
Remove the device securing the grease filter.
Fig. 3 (e)
.
4.
Remove the dirty grease filter.
5.
After the grease filter has been replaced or
cleaned (depending on model), refit the parts in
reverse order, making sure the entire extraction
surface is covered.
CONTROL PANEL
Light switch.
The switch has two positions
(lights OFF - lights ON).
To switch on the lights: move the switch to the
right.
Extraction speed selection switch.
The extraction speed switch has different settings,
depending on the amount of steam and fumes.
To increase the extraction speed: move the
switch to the right.
Fig. 1
Fig. 2
e
Fig. 3
D F NL E
GB
P I GR
S
N DK FIN
61833015.fm Page 6 Friday, March 28, 2003 2:29 PM
-
 1
1
-
 2
2
-
 3
3
-
 4
4


IKEA HOO 050 S Program Chart
- Categoria
- Exaustores
- Tipo
- Program Chart
em outras línguas
- italiano: IKEA HOO 050 S
- English: IKEA HOO 050 S
- Deutsch: IKEA HOO 050 S
- svenska: IKEA HOO 050 S