
Classic1, Classic2
Portable grill
Operating manual . . . . . . . . . . . . . . . . . . . . .5
Koffergrill
Bedienungsanleitung . . . . . . . . . . . . . . . . . 19
Barbecue portable
Notice d’utilisation . . . . . . . . . . . . . . . . . . .34
Barbacoa con maletín
Instrucciones de uso . . . . . . . . . . . . . . . . . .50
Grelhador de mala
Manual de instruções . . . . . . . . . . . . . . . . .66
Barbecue portatile
Istruzioni per l’uso . . . . . . . . . . . . . . . . . . . . 81
Koffergrill
Gebruiksaanwijzing. . . . . . . . . . . . . . . . . . .97
Kuffertgrill
Betjeningsvejledning . . . . . . . . . . . . . . . . 112
Koffertgrill
Bruksanvisning. . . . . . . . . . . . . . . . . . . . . .126
Koffertgrill
Bruksanvisning . . . . . . . . . . . . . . . . . . . . . 140
Laukkugrilli
Käyttöohje . . . . . . . . . . . . . . . . . . . . . . . . . 154
Портативный гриль
Инструкция по эксплуатации . . . . . . . . . 168
Grill walizkowy
Instrukcja obsługi . . . . . . . . . . . . . . . . . . . 183
Kufríkový gril
Návod na obsluhu. . . . . . . . . . . . . . . . . . . 199
Kufříkový gril
Návod k obsluze . . . . . . . . . . . . . . . . . . . . 213
Hordozható grill
Használati utasítás. . . . . . . . . . . . . . . . . . . 227
EN
DE
FR
ES
PT
IT
NL
DA
SV
NO
FI
RU
PL
SK
CS
HU
COOKING
GRILLS & BBQ
Classic-O-16s.book Seite 1 Freitag, 18. November 2016 11:17 11

Classic-O-16s.book Seite 2 Freitag, 18. November 2016 11:17 11

Classic
3
11
9
10
1
5
6
7
8
3
4
2
1
2.
1.
6
3
5
2
3
1
4
7
A
B
2
Classic-O-16s.book Seite 3 Freitag, 18. November 2016 11:17 11

Classic
4
1
32
3
1
2
4
Classic-O-16s.book Seite 4 Freitag, 18. November 2016 11:17 11

EN
Classic
5
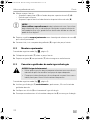
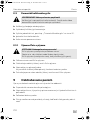
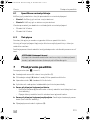
Please read this manual carefully before installation and starting up the
device. Keep it in a safe place for future reference. If you pass on the device
to another person, hand over this instruction manual along with it.
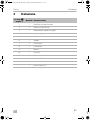
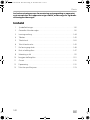
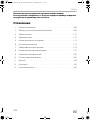
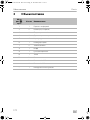
Contents
1 Explanation of symbols. . . . . . . . . . . . . . . . . . . . . . . . . . . . . . . . . . . . . . . . . . .6
2 General safety instructions . . . . . . . . . . . . . . . . . . . . . . . . . . . . . . . . . . . . . . . .6
3 Scope of delivery . . . . . . . . . . . . . . . . . . . . . . . . . . . . . . . . . . . . . . . . . . . . . . .9
4 Optional extras . . . . . . . . . . . . . . . . . . . . . . . . . . . . . . . . . . . . . . . . . . . . . . . .10
5 Intended use . . . . . . . . . . . . . . . . . . . . . . . . . . . . . . . . . . . . . . . . . . . . . . . . . .10
6 Technical description . . . . . . . . . . . . . . . . . . . . . . . . . . . . . . . . . . . . . . . . . . .10
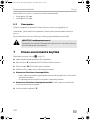
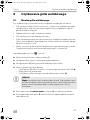
7 Before initial use . . . . . . . . . . . . . . . . . . . . . . . . . . . . . . . . . . . . . . . . . . . . . . . 11
8 Using the portable grill . . . . . . . . . . . . . . . . . . . . . . . . . . . . . . . . . . . . . . . . . .12
9 Troubleshooting . . . . . . . . . . . . . . . . . . . . . . . . . . . . . . . . . . . . . . . . . . . . . . .16
10 Cleaning the portable grill . . . . . . . . . . . . . . . . . . . . . . . . . . . . . . . . . . . . . . .17
11 Guarantee . . . . . . . . . . . . . . . . . . . . . . . . . . . . . . . . . . . . . . . . . . . . . . . . . . . .17
12 Disposal . . . . . . . . . . . . . . . . . . . . . . . . . . . . . . . . . . . . . . . . . . . . . . . . . . . . . .17
13 Technical data . . . . . . . . . . . . . . . . . . . . . . . . . . . . . . . . . . . . . . . . . . . . . . . . .18
Classic-O-16s.book Seite 5 Freitag, 18. November 2016 11:17 11

EN
Explanation of symbols Classic
6
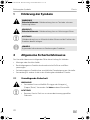
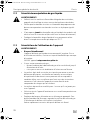
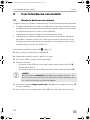
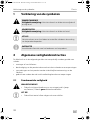
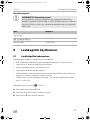
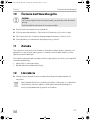
1 Explanation of symbols
!
!
A
I
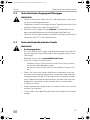
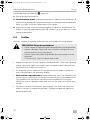
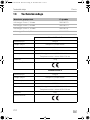
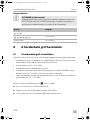
2 General safety instructions
The manufacturer accepts no liability for damage in the following cases:
• Faulty assembly or connection
• Damage to the product resulting from mechanical influences and excess voltage
• Alterations to the product without express permission from the manufacturer
• Use for purposes other than those described in the operating manual
2.1 General safety
!
WARNING!
• Only use category l
3
liquid gas (propane/butane). Do not use any
other fuel sources.
A
NOTICE!
• Use the device only as intended.
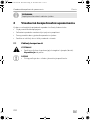
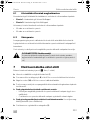
WARNING!
Safety instruction: Failure to observe this instruction can cause fatal or
serious injury.
CAUTION!
Safety instruction: Failure to observe this instruction can lead to injury.
NOTICE!
Failure to observe this instruction can cause material damage and impair
the function of the product.
NOTE
Supplementary information for operating the product.
Classic-O-16s.book Seite 6 Freitag, 18. November 2016 11:17 11

EN
Classic General safety instructions
7
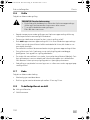
2.2 Safety precautions when handling liquid gas
!
WARNING!
• Keep combustible materials away from heating or cooking devices
and other light or heat sources.
• Compare the pressure information on the type plate with the pressure
information on the propane or butane gas cylinder.
• Never store liquid gas cylinders in unventilated areas or below
ground level (funnel shaped holes in the ground).
• Keep liquid gas cylinders away from direct sunlight. The temperature
may not exceed 50 °C.
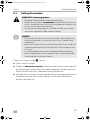
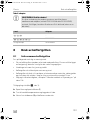
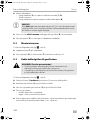
2.3 Operating the device safely
!
WARNING!
• Beware of suffocation.
While burning liquid gas, the device also consumes oxygen. When
used indoors, there is a risk of suffocation due to insufficient oxygen.
Only use the device outdoors.
• If you smell gas:
– Close the valve on the gas cylinder and keep it closed until the
error is rectified.
– Never attempt to find a gas leak with a naked flame.
• This device can be used by children aged 8 years or over, as well as by
persons with diminished physical, sensory or mental capacities or a
lack of experience and knowledge, providing they are supervised, or
have been taught how to use the device safely and are aware of the
resulting risks.
• Children must be supervised to ensure that they do not play with the
device.
• Never leave the device unattended when in use for prolonged peri-
ods of time.
• Use long matches or a suitable lighter. Check the gas outlets when
you ignite the burners. Do not ignite the burners if you cannot see
them directly.
Take your hand away quickly once the burner is ignited.
• Wear appropriate clothing when using the portable grill.
Do not wear loose-fitting clothing which could easily catch fire.
Classic-O-16s.book Seite 7 Freitag, 18. November 2016 11:17 11

EN
General safety instructions Classic
8
• Leave the portable grill to cool down properly before you touch it with
bare hands.
• Replace porous or damaged hoses immediately.
• Never change the nozzles, injector or burners.
A
NOTICE!
• Never use the rack without the drip tray.
• Hot parts should not be allowed to come into contact with oil, water
or any other liquids.
• Never move the device when it is still hot.
• Only use pots and pans with a level base and a diameter of 10 to
20 cm.
• Ensure that pots and pans are stable when cooking.
• Never allow pot or pan handles to protrude over the edge of the port-
able grill. Turn all the handles inwards. This reduces the risk of spillage,
the ignition of flammable materials and serious scolding.
• Proceed with caution when heating oil or fat, as they can ignite under
excessive heat.
• Only use dry pot holders to avoid steam build-up. Do not use towels
or cloths as these can catch fire.
• Never leave the portable grill unattended while in use. Pots which boil
over can cause smoke and fires.
Classic-O-16s.book Seite 8 Freitag, 18. November 2016 11:17 11

EN
Classic Scope of delivery
9
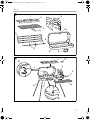
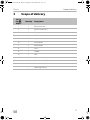
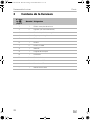
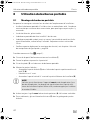
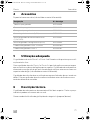
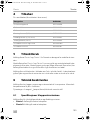
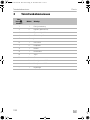
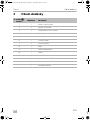
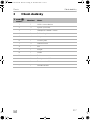
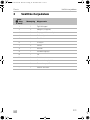
3Scope of delivery
No. in
fig. 1,
page 3
Quantity Designation
1 1 Burner with hob
2 2 Injector (on burner)
3 1 Drip tray with rack
4 1 Grill rack holder
54Legs
6 1 Roasting spit
7 2 Meat clamps
81Case
91Handle
10 1 Lock
11 2 Side panel
– 2 Screws and nuts M3
– 1 Screw and nut M4
– 1 Operating manual
Classic-O-16s.book Seite 9 Freitag, 18. November 2016 11:17 11

EN
Optional extras Classic
10
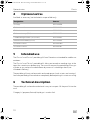
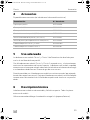
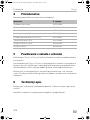
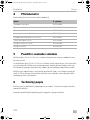
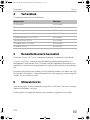
4Optional extras
Available as accessory (not included in scope of delivery):
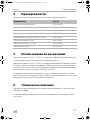
5 Intended use
The Classic 1 and Classic 2 portable grills from Dometic are intended for mobile use
outdoors.
The Classic 1 and Classic 2 portable grills allow you to cook on cooking rings at the
top at the same time as barbecuing. You can also connect the portable grill to a gas
cylinder or gas socket of a mobile home by means of a suitable gas hose (not
included in delivery).
The portable grill must not be used in enclosed spaces (such as tents and awnings).
Leave the portable grill to cool down completely before putting it in a tent or awning.
6 Technical description
The portable grill can be dismantled and is easy to transport. All the parts fit into the
case.
Category I
3
(propane/butane) liquid gas is used as fuel.
Designation Item no.
Grill trays 9103300804
Grill basket midi 9103300800
Grill basket maxi 9103300801
Grill motor battery (1.5 V) 9103300802
Combination grill motor (1.5 V/230 V) 9103300807
Network motor battery (230 V) 9103300803
Grill cover Classic 1 9103500360
Grill cover Classic 2 9103500361
Classic-O-16s.book Seite 10 Freitag, 18. November 2016 11:17 11

EN
Classic Before initial use
11
6.1 Specifications for the portable grill models
The portable grill is available in different models and with different connections:
• Classic 1: portable grill with three cooking rings
• Classic 2: portable grill with two cooking rings
All models are available with the following connections:
• Connection pressure 30 mbar
• Connection pressure 50 mbar
6.2 Gas pressure
The permitted gas pressure can be found on the type plate in the bottom of the case.
Models with a gas cylinder connection must be used with a pressure reducing valve.
Only use pressure reducing valves that have been specified and approved in your
country.
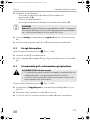
!
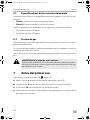
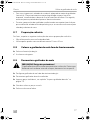
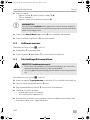
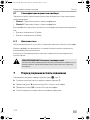
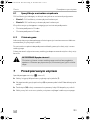
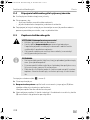
7 Before initial use
Proceed as follows (fig. 1, page 3):
➤ Remove the protective film from the top of the burner (1).
➤ Screw the handle (9) into the lower part of the case with both the screws M3.
➤ Attach the lock (10) to the lid of the case with the screw M4.
➤ Clean the rack and the drip tray with a standard cleaning agent.
➤ Only when connecting to gas cylinders:
– Use a suitable gas hose and a pressure reduction valve (both not included in
delivery).
– Connect the pressure reduction valve to the free end of the gas hose.
➤ Only when connecting to gas sockets: Use a suitable gas hose (not included
in delivery).
➤ Connect the gas hose to the injector (2).
WARNING! Beware of injury
The outlet pressure of the valve must always match the connection pres-
sure (gas pressure) of the portable grill.
Classic-O-16s.book Seite 11 Freitag, 18. November 2016 11:17 11

EN
Using the portable grill Classic
12
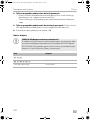
Table of adapters
A
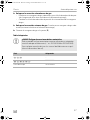
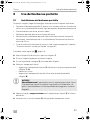
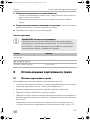
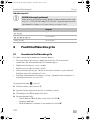
8 Using the portable grill
8.1 Mounting the portable grill
When selecting the location for barbecuing, observe the following instructions:
• Set up the portable grill outside in a well-ventilated place. Do not place it in a dip
to prevent any gases from accumulating there.
• The ground must be firm, level and stabile.
• Keep the portable grill protected from the wind.
• Never place the portable grill near flammable materials, even when cooling
down. Keep a distance of at least 20 cm.
• Observe the safety instructions, see chapter “Safety precautions when handling
liquid gas” on page 7.
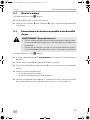
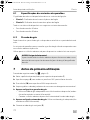
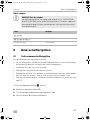
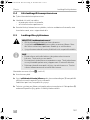
Proceed as follows (fig. 2, page 3):
➤ Screw the stands (1) onto the base.
➤ Gather all the individual parts and put them to one side.
➤ Turn the stand (2) by hand in the fastening plates.
NOTICE! Beware of damage
To ensure proper operation, an adapter supplied by the manufacturer
(item no. 9103300168 or 9103300169) must be used. If you have any
questions, please contact the manufacturer's branch in your country
(see the back for the addresses).
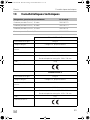
Country Adapter
k a h
–
l m q L T U
9103300168
Rest of Europe 9103300169
Classic-O-16s.book Seite 12 Freitag, 18. November 2016 11:17 11

EN
Classic Using the portable grill
13
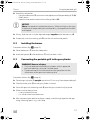
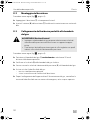
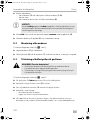
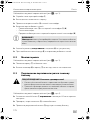
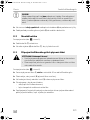
➤ Attach the side panels:
–Hang the side panel (3) in the slot in the upper part of the portable grill (1)(A).
– Fold it down.
– Hook the side panel onto the front of the grill base (B).
A
➤ Always slide the rack in at the required height together with the drip tray (4).
➤ If required, insert the roasting spit (5) into the rails on the side panels.
8.2 Installing the burner
Proceed as follows (fig. 2, page 3):
➤ Place the burners (7) onto the side panels.
➤ Insert the injector (6) into the burner (7) until you hear it click.
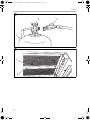
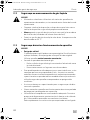
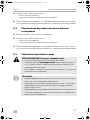
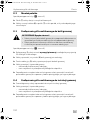
8.3 Connecting the portable grill to the gas cylinder
!
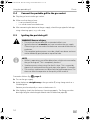
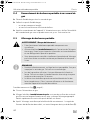
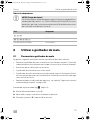
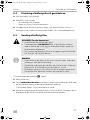
Proceed as follows (fig. 3, page 4):
➤ Place the gas cylinder (1) upright and at least 50 cm away from the portable grill.
➤ Check that the valve (2) on the gas cylinder is closed.
➤ Screw the pressure reducing valve (3) onto the gas cylinder firmly by hand.
➤ Make sure that the gas hose
– is not crushed or kinked
– is a safe distance from the burner
➤ After connecting the device to the gas supply, check the gas pipe for leakage
using a foaming agent, e. g. with soap.
NOTICE!
Never use the device without the drip tray. Without a drip tray the signs
in the base of the portable grill could get dirty, damaged from the heat
and illegible.
WARNING! Beware of injury
• Only use propane or butane gas cylinders with an approved
pressure reducing valve and a suitable head.
• Compare the pressure information on the type plate with the
information on the pressure reducing valve.
Classic-O-16s.book Seite 13 Freitag, 18. November 2016 11:17 11

EN
Using the portable grill Classic
14
8.4 Connect the portable grill to the gas socket
➤ Plug the gas hose into the gas socket.
➤ Make sure that the gas hose
– is not crushed or kinked
– is a safe distance from the burner
➤ After connecting the device to the gas supply, check the gas pipe for leakage
using a foaming agent, e. g. with soap.
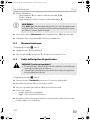
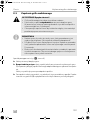
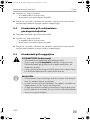
8.5 Igniting the portable grill
!
I
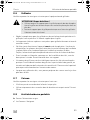
Proceed as follows (fig. 4, page 4):
➤ Turn on the gas supply.
➤ Ignite the burner straight away at the gas outlet (1) using a long match or a
suitable lighter.
Remove your hand quickly as soon as the burner is lit.
➤ After lighting, check that the burner is burning properly. The flames must be
burning along the whole length of both sides of the burner pipe (2).
WARNING! Beware of injury
• Do not leave the portable grill unattended while in use.
• Ignite the burners as soon as you have turned on the gas supply.
Otherwise gas can accumulate in the burner area and could cause an
explosion.
• The complete ignition process must be visible from above and must
not be hidden by pots placed on top of the hob.
NOTE
• While it is operating, you will be able to hear a slight noise caused by
the gas flowing out. This is completely harmless.
• Smoke can occur when using it for the first time. This is caused by
deposits of machine oil burning and stops after approx. 10 minutes.
• The stainless steel burners turn blue from the high temperature. This
does not affect the operation or the quality of the material.
Classic-O-16s.book Seite 14 Freitag, 18. November 2016 11:17 11

EN
Classic Using the portable grill
15
8.6 Barbecuing
Please observe the following instructions when barbecuing:
!
• When barbecuing, control the temperature by raising or lowering the drip tray
and rack using the holder.
• The very top recesses at the sides are intended for barbecuing steaks quickly with
intense heat.
• Never use the device without the drip tray. Without a drip tray the signs in the
base of the portable grill could get dirty, damaged from the heat and illegible.
Using the drip tray also allows the heat from the burners to be used more effi-
ciently.
• Attach the food, such as poultry or a joint for roasting, with the two meat clamps
on the spit. Place the spit in the holders on the portable grill.
• A grill motor (optional extra) is ideal here for turning the joint. First attach the grill
motor to the left side panel by putting the fastener into the keyhole. Then plug in
the head of the roasting spit into the motor.
• When barbecuing with the roasting spit, the meat juices in the drip tray can be
used for making sauces according to taste.
8.7 Cooking
Please observe the following instructions when cooking:
• Do not use any pots with curved bases.
• Only use pots with a diameter between 10 cm and 20 cm.
8.8 Switching off the portable grill
➤ Turn off the gas supply.
✓ The flames go out.
CAUTION! Danger of burns
• Always use the grill rack holder when you want to raise or lower the
drip tray and spit while hot.
• Remove the grill rack holder while you are barbecuing.
Otherwise it gets very hot.
Classic-O-16s.book Seite 15 Freitag, 18. November 2016 11:17 11

EN
Troubleshooting Classic
16
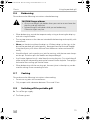
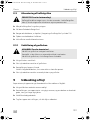
8.9 Dismantling the portable grill
!
➤ Disconnect the portable grill from the gas supply.
➤ Dismantle the portable grill once it has cooled down.
➤ Clean the individual parts (see chapter “Cleaning the portable grill” on page 17).
➤ Store the individual parts in the case.
➤ Close the case with the zip.
8.10 Replacing the gas cylinder
!
➤ Completely close the valve on the gas cylinder.
➤ Unscrew the pressure reducing valve from the cylinder.
➤ Check the condition of the gas hose.
Replace the hose line if the material is brittle or porous.
➤ Tightly screw the pressure reducing valve by hand onto the new cylinder.
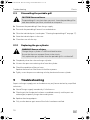
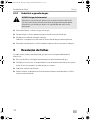
9 Troubleshooting
Repairs to the gas supply parts on the device may only be carried out by a qualified
technician.
➤ Shut off the gas supply immediately if a fault occurs.
➤ Check again that the device has been assembled correctly and the parts are
undamaged, especially the gas hose and injector.
➤ Replace the damaged parts.
➤ Only use the device again once all the faults have been rectified.
CAUTION! Beware of burns
The portable grill is very hot when you use it. Leave the portable grill to
cool down before you clean, dismantle or transport it.
WARNING! Beware of injury
Change the gas cylinder in a well-ventilated location.
Ensure that there are no open flames in the vicinity.
Only replace the gas cylinder when the portable grill is switched off.
Classic-O-16s.book Seite 16 Freitag, 18. November 2016 11:17 11

EN
Classic Cleaning the portable grill
17
10 Cleaning the portable grill
A
➤ Allow the device to cool down properly before cleaning it.
➤ Clean the surfaces. Pay special attention to removing sticky fat and oil residue.
➤ Do not use a steam cleaner to clean the device under any circumstances.
➤ Allow the device to dry before packing and storing.
11 Guarantee
The statutory warranty period applies. If the product is defective, please contact the
manufacturer's branch in your country (see the back of the instruction manual for the
addresses) or your retailer.
For repair and guarantee processing, please include the following documents when
you send in the device:
• A copy of the receipt with purchasing date
• A reason for the claim or description of the fault
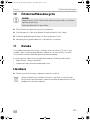
12 Disposal
➤ Place the packaging material in the appropriate recycling waste bins wherever
possible.
M
If you wish to finally dispose of the product, ask your local recycling centre
or specialist dealer for details about how to do this in accordance with the
applicable disposal regulations.
NOTICE!
Do not use any sharp or hard objects for cleaning since they may dam-
age the device.
Only use standard cleaning agents.
Classic-O-16s.book Seite 17 Freitag, 18. November 2016 11:17 11

EN
Technical data Classic
18
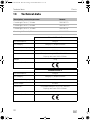
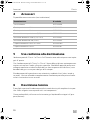
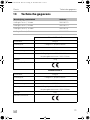
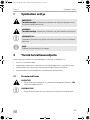
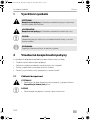
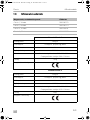
13 Technical data
Description, connection pressure Item no.
Portable grill Classic 1, 30 mbar 9103300172
Portable grill Classic 1, 50 mbar 9103300173
Portable grill Classic 2, 30 mbar 9103300174
Portable grill Classic 2, 50 mbar 9103300175
Dometic Classic 1
Gas consumption: 385 g/h
Gas category: Category I
3
, propane/butane
Number of cooking rings: 3
Burner output: 5300 W
Dimensions: Closed portable grill: 620 x 128 x 288 mm
Drip tray with rack: 544 x 238 mm
Weight: 10 kg
Inspection/certification:
Dometic Classic 2
Gas consumption: 320 g/h
Gas category: Category I
3
, propane/butane
Number of cooking rings: 2
Burner output: 4300 W
Dimensions: Closed portable grill: 510 x 128 x 288 mm
Drip tray with rack: 435 x 238 mm
Weight: 8 kg
Inspection/certification:
Classic-O-16s.book Seite 18 Freitag, 18. November 2016 11:17 11

DE
Classic
19
Bitte lesen Sie diese Anleitung vor dem Einbau und der Inbetriebnahme
sorgfältig durch und bewahren Sie sie auf. Geben Sie sie im Fall einer Wei-
tergabe des Geräts an den Nutzer weiter.
Inhalt
1 Erklärung der Symbole . . . . . . . . . . . . . . . . . . . . . . . . . . . . . . . . . . . . . . . . . 20
2 Allgemeine Sicherheitshinweise . . . . . . . . . . . . . . . . . . . . . . . . . . . . . . . . . 20
3 Lieferumfang . . . . . . . . . . . . . . . . . . . . . . . . . . . . . . . . . . . . . . . . . . . . . . . . . 23
4 Zubehör. . . . . . . . . . . . . . . . . . . . . . . . . . . . . . . . . . . . . . . . . . . . . . . . . . . . . 24
5 Bestimmungsgemäßer Gebrauch . . . . . . . . . . . . . . . . . . . . . . . . . . . . . . . . 24
6 Technische Beschreibung . . . . . . . . . . . . . . . . . . . . . . . . . . . . . . . . . . . . . . 24
7 Vor dem ersten Gebrauch . . . . . . . . . . . . . . . . . . . . . . . . . . . . . . . . . . . . . . 25
8 Koffergrill benutzen. . . . . . . . . . . . . . . . . . . . . . . . . . . . . . . . . . . . . . . . . . . . 27
9 Störungsbeseitigung . . . . . . . . . . . . . . . . . . . . . . . . . . . . . . . . . . . . . . . . . . .31
10 Koffergrill reinigen. . . . . . . . . . . . . . . . . . . . . . . . . . . . . . . . . . . . . . . . . . . . . 32
11 Gewährleistung. . . . . . . . . . . . . . . . . . . . . . . . . . . . . . . . . . . . . . . . . . . . . . . 32
12 Entsorgung . . . . . . . . . . . . . . . . . . . . . . . . . . . . . . . . . . . . . . . . . . . . . . . . . . 32
13 Technische Daten . . . . . . . . . . . . . . . . . . . . . . . . . . . . . . . . . . . . . . . . . . . . . 33
Classic-O-16s.book Seite 19 Freitag, 18. November 2016 11:17 11

DE
Erklärung der Symbole Classic
20
1 Erklärung der Symbole
!
!
A
I
2 Allgemeine Sicherheitshinweise
Der Hersteller übernimmt in folgenden Fällen keine Haftung für Schäden:
• Montage- oder Anschlussfehler
• Beschädigungen am Produkt durch mechanische Einflüsse und Über-
spannungen
• Veränderungen am Produkt ohne ausdrückliche Genehmigung vom Hersteller
• Verwendung für andere als die in der Anleitung beschriebenen Zwecke
2.1 Grundlegende Sicherheit
!
WARNUNG!
• Verwenden Sie ausschließlich Flüssiggas der Kategorie I
3
(Propan/Butan). Verwenden Sie keine anderen Brennstoffe.
A
ACHTUNG!
• Benutzen Sie das Gerät nur zu seinem bestimmungsgemäßen
Gebrauch.
WARNUNG!
Sicherheitshinweis: Nichtbeachtung kann zu Tod oder schwerer
Verletzung führen.
VORSICHT!
Sicherheitshinweis: Nichtbeachtung kann zu Verletzungen führen.
ACHTUNG!
Nichtbeachtung kann zu Materialschäden führen und die Funktion des
Produktes beeinträchtigen.
HINWEIS
Ergänzende Informationen zur Bedienung des Produktes.
Classic-O-16s.book Seite 20 Freitag, 18. November 2016 11:17 11
A página está carregando...
A página está carregando...
A página está carregando...
A página está carregando...
A página está carregando...
A página está carregando...
A página está carregando...
A página está carregando...
A página está carregando...
A página está carregando...
A página está carregando...
A página está carregando...
A página está carregando...
A página está carregando...
A página está carregando...
A página está carregando...
A página está carregando...
A página está carregando...
A página está carregando...
A página está carregando...
A página está carregando...
A página está carregando...
A página está carregando...
A página está carregando...
A página está carregando...
A página está carregando...
A página está carregando...
A página está carregando...
A página está carregando...
A página está carregando...
A página está carregando...
A página está carregando...
A página está carregando...
A página está carregando...
A página está carregando...
A página está carregando...
A página está carregando...
A página está carregando...
A página está carregando...
A página está carregando...
A página está carregando...
A página está carregando...
A página está carregando...
A página está carregando...
A página está carregando...
A página está carregando...
A página está carregando...
A página está carregando...
A página está carregando...
A página está carregando...
A página está carregando...
A página está carregando...
A página está carregando...
A página está carregando...
A página está carregando...
A página está carregando...
A página está carregando...
A página está carregando...
A página está carregando...
A página está carregando...
A página está carregando...
A página está carregando...
A página está carregando...
A página está carregando...
A página está carregando...
A página está carregando...
A página está carregando...
A página está carregando...
A página está carregando...
A página está carregando...
A página está carregando...
A página está carregando...
A página está carregando...
A página está carregando...
A página está carregando...
A página está carregando...
A página está carregando...
A página está carregando...
A página está carregando...
A página está carregando...
A página está carregando...
A página está carregando...
A página está carregando...
A página está carregando...
A página está carregando...
A página está carregando...
A página está carregando...
A página está carregando...
A página está carregando...
A página está carregando...
A página está carregando...
A página está carregando...
A página está carregando...
A página está carregando...
A página está carregando...
A página está carregando...
A página está carregando...
A página está carregando...
A página está carregando...
A página está carregando...
A página está carregando...
A página está carregando...
A página está carregando...
A página está carregando...
A página está carregando...
A página está carregando...
A página está carregando...
A página está carregando...
A página está carregando...
A página está carregando...
A página está carregando...
A página está carregando...
A página está carregando...
A página está carregando...
A página está carregando...
A página está carregando...
A página está carregando...
A página está carregando...
A página está carregando...
A página está carregando...
A página está carregando...
A página está carregando...
A página está carregando...
A página está carregando...
A página está carregando...
A página está carregando...
A página está carregando...
A página está carregando...
A página está carregando...
A página está carregando...
A página está carregando...
A página está carregando...
A página está carregando...
A página está carregando...
A página está carregando...
A página está carregando...
A página está carregando...
A página está carregando...
A página está carregando...
A página está carregando...
A página está carregando...
A página está carregando...
A página está carregando...
A página está carregando...
A página está carregando...
A página está carregando...
A página está carregando...
A página está carregando...
A página está carregando...
A página está carregando...
A página está carregando...
A página está carregando...
A página está carregando...
A página está carregando...
A página está carregando...
A página está carregando...
A página está carregando...
A página está carregando...
A página está carregando...
A página está carregando...
A página está carregando...
A página está carregando...
A página está carregando...
A página está carregando...
A página está carregando...
A página está carregando...
A página está carregando...
A página está carregando...
A página está carregando...
A página está carregando...
A página está carregando...
A página está carregando...
A página está carregando...
A página está carregando...
A página está carregando...
A página está carregando...
A página está carregando...
A página está carregando...
A página está carregando...
A página está carregando...
A página está carregando...
A página está carregando...
A página está carregando...
A página está carregando...
A página está carregando...
A página está carregando...
A página está carregando...
A página está carregando...
A página está carregando...
A página está carregando...
A página está carregando...
A página está carregando...
A página está carregando...
A página está carregando...
A página está carregando...
A página está carregando...
A página está carregando...
A página está carregando...
A página está carregando...
A página está carregando...
A página está carregando...
A página está carregando...
A página está carregando...
A página está carregando...
A página está carregando...
A página está carregando...
A página está carregando...
A página está carregando...
A página está carregando...
A página está carregando...
A página está carregando...
A página está carregando...
A página está carregando...
A página está carregando...
A página está carregando...
A página está carregando...
A página está carregando...
A página está carregando...
A página está carregando...
A página está carregando...
A página está carregando...
A página está carregando...
A página está carregando...
A página está carregando...
-
 1
1
-
 2
2
-
 3
3
-
 4
4
-
 5
5
-
 6
6
-
 7
7
-
 8
8
-
 9
9
-
 10
10
-
 11
11
-
 12
12
-
 13
13
-
 14
14
-
 15
15
-
 16
16
-
 17
17
-
 18
18
-
 19
19
-
 20
20
-
 21
21
-
 22
22
-
 23
23
-
 24
24
-
 25
25
-
 26
26
-
 27
27
-
 28
28
-
 29
29
-
 30
30
-
 31
31
-
 32
32
-
 33
33
-
 34
34
-
 35
35
-
 36
36
-
 37
37
-
 38
38
-
 39
39
-
 40
40
-
 41
41
-
 42
42
-
 43
43
-
 44
44
-
 45
45
-
 46
46
-
 47
47
-
 48
48
-
 49
49
-
 50
50
-
 51
51
-
 52
52
-
 53
53
-
 54
54
-
 55
55
-
 56
56
-
 57
57
-
 58
58
-
 59
59
-
 60
60
-
 61
61
-
 62
62
-
 63
63
-
 64
64
-
 65
65
-
 66
66
-
 67
67
-
 68
68
-
 69
69
-
 70
70
-
 71
71
-
 72
72
-
 73
73
-
 74
74
-
 75
75
-
 76
76
-
 77
77
-
 78
78
-
 79
79
-
 80
80
-
 81
81
-
 82
82
-
 83
83
-
 84
84
-
 85
85
-
 86
86
-
 87
87
-
 88
88
-
 89
89
-
 90
90
-
 91
91
-
 92
92
-
 93
93
-
 94
94
-
 95
95
-
 96
96
-
 97
97
-
 98
98
-
 99
99
-
 100
100
-
 101
101
-
 102
102
-
 103
103
-
 104
104
-
 105
105
-
 106
106
-
 107
107
-
 108
108
-
 109
109
-
 110
110
-
 111
111
-
 112
112
-
 113
113
-
 114
114
-
 115
115
-
 116
116
-
 117
117
-
 118
118
-
 119
119
-
 120
120
-
 121
121
-
 122
122
-
 123
123
-
 124
124
-
 125
125
-
 126
126
-
 127
127
-
 128
128
-
 129
129
-
 130
130
-
 131
131
-
 132
132
-
 133
133
-
 134
134
-
 135
135
-
 136
136
-
 137
137
-
 138
138
-
 139
139
-
 140
140
-
 141
141
-
 142
142
-
 143
143
-
 144
144
-
 145
145
-
 146
146
-
 147
147
-
 148
148
-
 149
149
-
 150
150
-
 151
151
-
 152
152
-
 153
153
-
 154
154
-
 155
155
-
 156
156
-
 157
157
-
 158
158
-
 159
159
-
 160
160
-
 161
161
-
 162
162
-
 163
163
-
 164
164
-
 165
165
-
 166
166
-
 167
167
-
 168
168
-
 169
169
-
 170
170
-
 171
171
-
 172
172
-
 173
173
-
 174
174
-
 175
175
-
 176
176
-
 177
177
-
 178
178
-
 179
179
-
 180
180
-
 181
181
-
 182
182
-
 183
183
-
 184
184
-
 185
185
-
 186
186
-
 187
187
-
 188
188
-
 189
189
-
 190
190
-
 191
191
-
 192
192
-
 193
193
-
 194
194
-
 195
195
-
 196
196
-
 197
197
-
 198
198
-
 199
199
-
 200
200
-
 201
201
-
 202
202
-
 203
203
-
 204
204
-
 205
205
-
 206
206
-
 207
207
-
 208
208
-
 209
209
-
 210
210
-
 211
211
-
 212
212
-
 213
213
-
 214
214
-
 215
215
-
 216
216
-
 217
217
-
 218
218
-
 219
219
-
 220
220
-
 221
221
-
 222
222
-
 223
223
-
 224
224
-
 225
225
-
 226
226
-
 227
227
-
 228
228
-
 229
229
-
 230
230
-
 231
231
-
 232
232
-
 233
233
-
 234
234
-
 235
235
-
 236
236
-
 237
237
-
 238
238
-
 239
239
-
 240
240
-
 241
241
-
 242
242
-
 243
243
-
 244
244


Dometic Classic1, Classic2 Instruções de operação
- Tipo
- Instruções de operação
em outras línguas
- français: Dometic Classic1, Classic2 Mode d'emploi
- italiano: Dometic Classic1, Classic2 Istruzioni per l'uso
- Nederlands: Dometic Classic1, Classic2 Handleiding
- slovenčina: Dometic Classic1, Classic2 Návod na používanie
- Deutsch: Dometic Classic1, Classic2 Bedienungsanleitung
- dansk: Dometic Classic1, Classic2 Betjeningsvejledning
Artigos relacionados
-
Dometic Grillmotor Battery 1,5 V/230 V Instruções de operação
-
-
-
-
-
-
-
-
-
Outros documentos
-
Firefriend BQ 6850 Manual do proprietário
-
Firefriend BQ-6870 Manual do proprietário
-
Campingaz Barbecue gaz 2 SERIES Classic Manual do proprietário
-
Campingaz 3 Series Classic LD Plus Manual do proprietário
-
IKEA 50182272 Guia de usuario
-
Campingaz 2 Series Classic LX Operation And Maintenance
-
Bodum FYRKAT Manual do usuário