Batavia Brushless Combi Drill 60 Nm Manual do usuário
- Categoria
- Exercícios de força
- Tipo
- Manual do usuário

Model: BT-CBCD002
Item-No.: 7064545
www.www.bataviapower.com
Cordless combi drill
Akku Schlagbohrmaschine
Perceuse visseuse à percussion sans fil
Accu klopboor
Trapano combinato senza li
Taladro combinado inalámbrico
Berbequim combinado sem os
Bezprzewodowa wiertarko-wkrętarka
Operating instructions
Bedienungsanleitung (Original)
Mode d'emploi
Gebruiksaanwijzing
Istruzioni di Funzionamento
Manual de usuario
Instruções de funcionamento
Instrukcja


9
14
13
10
6
7
8
1
2
3
45
11
12

2
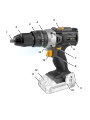
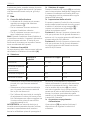
Overview
1. Chuck Jaws
2. Chuck Collar
3. Torque Selector
4. Mode Selector
5. Gear Switch
6. Motor Vents
7. Forward/Reverse Switch
8. Hand Grip
9. Battery Charge Indicator
(On the Back Side)
10. Belt Clip
11. Battery
12. Battery Release Button
13. Trigger Switch
14. Work Light
Übersicht
1. Bohrfutterbacken
2. Bohrfutterring
3. Drehmomentregler
4. Funktionswahlschalter
5. Gangwahlschalter
6. Lüftungsschlitze
7. Rechts-/Linkslauf-Umschalter
8. Handgriff
9. Akku-Ladestandsanzeige
(Auf der Rückseite)
10. Gürtelklammer
11. Akku
12. Akku-Lösetaste
13. Ein-/Ausschalter
14. Arbeitsleuchte
Aperçu
1. Mâchoires du mandrin
2. Bague du mandrin
3. Sélecteur de couple
4. Sélecteur du mode
5. Commutateur de vitesse
6. Orices de ventilation
7. Bouton d’inversion du sens de rotation
8. Préhension isolées
9. Témoin de charge de la batterie
10. Clip de ceinture
11. Batterie
12. Bouton de déverrouillage de batterie
13. Interrupteur marche/arrêt
14. Lampe DEL
Overzicht
1. Boorkop kaken
2. Boorkop hals
3. Koppelstelring
4. Koppelstandenring
5. Schakelaar
6. Ventilatiegaten
7. Rotatierichting schakelaar
8. Geïsoleerde greepvlakken
9. Accu laadindicator
10. Riemclip
11. Accu
12. Accu ontgrendelingsknop
13. Aan / Uit-schakelaar
14. LED-licht

3
Panoramica
1. Mandrino per punte
2. Collare del mandrino
3. Selettore di coppia
4. Selettore di modalità
5. Selettore a ingranaggio
6. Prese di aerazione del motore
7. Selettore Avanti/Indietro
8. Impugnatura
9. Indicatore di carica della batteria
(sul lato posteriore)
10. Clip per cinghia
11. Batteria
12. Pulsante per la rimozione della batteria
13. Grilletto
14. Luce da lavoro
Resumen
1. Portabrocas
2. Anillo del portabrocas
3. Selector de par
4. Selector de modo
5. Selector de marchas
6. Rendijas de ventilación del motor
7. Interruptor de avance/retroceso
8. Empuñadura
9. Piloto de carga de la batería
(en la parte posterior)
10. Pinza para cinturón
11. Batería
12. Botón para soltar la batería
13. Interruptor de gatillo
14. Luz de trabajo
Visão geral
1. Garras do mandril
2. Gola do mandril
3. Seletor de aperto
4. Seletor de modo
5. Interruptor de engrenagem
6. Orifícios de ventilação
7. Interruptor de reversibilidade
8. Punho
9. Indicador da carga da bateria
(no lado traseiro)
10. Presilha para cinto
11. Bateria
12. Botão de libertação da bateria
13. Gatilho
14. Luz de trabalho
Przegląd
1. Uchwyt zaciskowy
2. Pierścień uchwytu
3. Wybierak momentu
4. Wybierak trybu pracy
5. Przełącznik przełożenia
6. Otwory wentylacyjne silnika
7. Przełącznik kierunku obrotów
8. Uchwyt ręczny
9. Wskaźnik naładowania akumulatora
(z tyłu)
10. Uchwyt na pasek
11. Akumulator
12. Przycisk zwalniania akumulatora
13. Przełącznik wyzwalający
14. Światło robocze

4
Contents
Safety Instructions . . . . . . . . .6
Before use . . . . . . . . . . . .7
During use . . . . . . . . . . . .7
Before rst use . . . . . . . . . .7
Intended use . . . . . . . . . . .7
Operation . . . . . . . . . . . .7
Accessories . . . . . . . . . . .8
Maintenance and Cleaning . . . . . .8
Technical data. . . . . . . . . . .9
Disposal . . . . . . . . . . . . .9
EC-Declaration of conformity . . . . .9
UK Declaration of Conformity . . . . .9
Inhaltsverzeichnis
Sicherheitshinweise. . . . . . . . 10
Vor der Anwendung . . . . . . . . 11
Während der Anwendung . . . . . . 11
Vor der ersten Benutzung. . . . . . 11
Bestimmungsgemäße Verwendung . . 11
Betrieb . . . . . . . . . . . . 12
Zubehör . . . . . . . . . . . . 13
Wartung und Reinigung . . . . . . 13
Technische Daten . . . . . . . . 13
Entsorgung . . . . . . . . . . . 13
EG–Konformitätserklärung . . . . . 14
Table des matières
Consignes de sécurité . . . . . . . 15
Avant l’usage . . . . . . . . . . 16
Pendant l’usage . . . . . . . . . 16
Avant la première utilisation . . . . . 16
Utilisation normale . . . . . . . . 17
Instructions d’utilisation . . . . . . 17
Accessoires . . . . . . . . . . 18
Nettoyage et maintenance . . . . . 18
Fiche technique . . . . . . . . . 18
Élimination et recyclage . . . . . . 18
CE-Déclaration de conformité . . . . 19
Inhoudsopgave
Safety Instructions . . . . . . . . 20
Vóór gebruik . . . . . . . . . . 21
Tijdens gebruik . . . . . . . . . 21
Voor het eerste gebruik . . . . . . 21
Beoogd gebruik . . . . . . . . . 21
Gebruik . . . . . . . . . . . . 21
Accessoires . . . . . . . . . . 22
Reiniging en onderhoud . . . . . . 22
Technische gegevens: . . . . . . . 23
Afvalverwerking en hergebruik . . . . 23
EG-Conformiteitsverklaring . . . . . 23
Contenuto
Istruzioni di sicurezza . . . . . . . 24
Prima dell'uso . . . . . . . . . . 25
Durante l'uso . . . . . . . . . . 25
Operazioni preliminari al primo uso del
prodotto . . . . . . . . . . . . 25
Destinazione d'uso . . . . . . . . 25
Uso . . . . . . . . . . . . . 26
Accessori . . . . . . . . . . . 27
Manutenzione e pulizia. . . . . . . 27
Dati tecnici . . . . . . . . . . . 27
Smaltimento . . . . . . . . . . 27
Dichiarazione di conformità CE . . . . 28
Índice
Instrucciones de seguridad . . . . . 29
Antes de usar . . . . . . . . . . 30
Durante el uso . . . . . . . . . . 30
Antes de usar por primera vez . . . . 30
Uso previsto . . . . . . . . . . 31
Utilización . . . . . . . . . . . 31
Accesorios . . . . . . . . . . . 32
Mantenimiento y limpieza. . . . . . 32
Datos técnicos . . . . . . . . . 32
Eliminación . . . . . . . . . . . 32
Declaración CE de conformidad . . . 33

5
Índice
Instruções de segurança . . . . . . 34
Antes da utilização . . . . . . . . 35
Durante a utilização . . . . . . . . 35
Antes da primeira utilização . . . . . 35
Utilização prevista . . . . . . . . 36
Operação . . . . . . . . . . . 36
Acessórios . . . . . . . . . . . 37
Manutenção e limpeza. . . . . . . 37
Dados técnicos . . . . . . . . . 37
Eliminação . . . . . . . . . . . 37
Declaração de conformidade CE . . . 38
Spis treści
Instrukcje dotyczące bezpieczeństwa . 39
Przed użyciem. . . . . . . . . . 40
Podczas użytkowania . . . . . . . 40
Przed pierwszym użyciem . . . . . 40
Przeznaczenie. . . . . . . . . . 41
Obsługa . . . . . . . . . . . . 41
Akcesoria . . . . . . . . . . . 42
Konserwacja i czyszczenie . . . . . 42
Dane techniczne . . . . . . . . . 42
Utylizacja . . . . . . . . . . . 42
Deklaracja zgodności z wymogami UE . 43

English
6
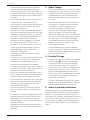
Dear customer
Please familiarize yourself with the proper
usage of the device by reading and follow-
ing each chapter of this manual, in the order
presented. Keep these operating instruc-
tions for further reference.
Please read the enclosed “General safety
instructions for power tools” and all
additional safety instructions in this
operating instructions!
This manual contains important informa-
tion on operating and handling the device.
Keep these operating instructions for fur-
ther reference. Please pass it on along with
the unit if it is handed over to a third party.
Battery and charger not included!
The Maxxpack batteries and chargers are
available online and in participating stores.
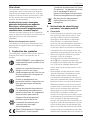
1. Explanation of the symbols
The following symbols are used in the user
manual or on the product:
Warning! To reduce the risk of
injury, the user must read the
instruction manual.
Denotes risk of personal injury,
loss of life or damage to the tool in
case of non-observance of the
instructions in this manual.
Always wear hearing protection.
The effects of noise can cause
hearing loss.
Wear safety glasses. When
working with electric power tools,
sparks, splinters, chips and dust
particles may be generated and
these can cause loss of sight.
Variable speed control.
CE stands for “Conformité
Européenne”, which means “In
accordance with EU Regulations”.
With the CE marking, the
manufacturer conrms that this
Electric tool complies with the
applicable European directives.
UKCA stands for: “UK Conformity
Assessment”. This means
“Compliant with UK regulations”.
With the UKCA mark manufacturer
conrms that this unit complies
with the applicable UK regulations.
Do not dispose of electric power
tools with domestic refuse.
2. Safety instructions for cordless
drill/drivers
2.1 General
• Do not work materials containing
asbestos. Asbestos is considered
carcinogenic.
• The tool/charger is not intended for use
by persons (including children) with
reduced physical, sensory or mental
capabilities, or lack of experience and
knowledge, unless they have been given
supervision or instruction concerning
use of the tool/charger by a person
responsible for their safety.
• Ensure that children do not play with the
tool/charger.
• Ensure that the Forward/Reverse
switch (7) is in the middle (locking)
position before making any adjust-
ments or changing accessories as well
as when carrying or storing the tool.
• Do not work materials containing
asbestos (asbestos is considered
carcinogenic).
• Dust from material such as paint con-
taining lead, some wood species, min-
erals and metal may be harmful (con-
tact with or inhalation of the dust may
cause allergic reactions and/or respira-
tory diseases to the operator or
bystanders); wear a dust mask and
work with a dust extraction device
when connectable.
• Certain kinds of dust are classied as
carcinogenic (such as oak and beech
dust) especially in conjunction with
additives for wood conditioning; wear a
dust mask and work with a dust extrac-
tion device when connectable.
• Follow the dust-related national require-
ments for the materials you want to
work with.

7
English
• When using the drill, use safety equipment
including safety glasses or shield, ear
defenders, and protective clothing includ-
ing safety gloves. Wear respiratory protec-
tion suitable for the work being under-
taken. A minimum rating of FFP2 is rec-
ommended. If operating the tool causes
discomfort in any way, stop immediately
and review your method of use.
• Battery chargers are for indoors use
only. Ensure that the power supply and
charger are protected against moisture
at all times.
• Ensure that the lighting is adequate.
• Ensure that the drill bit is securely xed
in the chuck. Insecure drill bits can be
ejected from the machine causing a
hazard.
• Ensure that the drill bit is not in contact
with the workpiece prior to starting up
the tool.
• Before drilling, check that there is suf-
cient clearance for the drill bit under the
workpiece.
• Drill bits get hot during operation, allow
to cool prior to handling them.
• NEVER use your hands to remove saw-
dust, chips or waste close by the bit.
• Examine the chuck regularly for signs of
wear or damage. Have damaged parts
repaired by a qualied service centre.
• ALWAYS wait until the drill has come to
a complete stop before putting it down.
3. Before use
• Avoid damage that can be caused by
screws, nails and other elements in your
workpiece; remove them before you
start working.
• Use suitable detectors to nd hidden
utility lines or call the local utility com-
pany for assistance (contact with elec-
tric lines can lead to re or electrical
shock; damaging a gas line can result in
an explosion; penetrating a water pipe
will cause property damage or an elec-
trical shock).
• Secure the workpiece (a workpiece
clamped with clamping devices or in a
vice is held more securely than by
hand).
4. During use
• Hold power tool by insulated gripping
surfaces (8), when performing an oper-
ation where the cutting accessory or
fastener may contact hidden wiring
(cutting accessory and fasteners con-
tacting a “live” wire may make exposed
metal parts of the power tool “live” and
could give the operator an electric
shock).
• In case of electrical or mechanical mal-
function, immediately switch off the
tool or unplug charger from power
source.
5. Before rst use
Remove the machine and the accessories
from the packaging. Check the machine for
transport damage and do not use the
machine in case of damages. Keep the
packing materials away from children, risk
of suffocation!
6. Intended use
The cordless hammer drill/screwdriver is
designed for tightening and undoing screws,
for drilling in wood, metal and plastic, and
for hammer drilling in stone, in each case
when using the appropriate bits. The equip-
ment is to be used only for its prescribed
purpose.
7. Operation
7.1 Direction control
• The direction of rotation can be set
using the Forward/Reverse Switch (7).
• For anti-clockwise rotation, push the
switch to the right.
• For clockwise rotation, push the switch
to the left.
Note: When the Forward/Reverse Switch is
in the central position, the drill is locked and
cannot be switched on. Use this setting as a
safety feature to prevent the drill from being
switched on accidentally.
7.2 Mode selector
The clutch settings are indicated by the
symbols on the Mode Selector (4).
7.3 Torque Selector
Rotate the Torque Selector (3) to select the
desired setting: the higher the number dis-

English
8
played on the torque ring, the higher the
torque produced by the tool.
7.4 Speed setting
The machine has 2 drill speeds, which can
be adjusted by sliding the gear switch (5)
forward or backwards. The number on the
gear switch (5) shows which position is
chosen.
Position 1: For slow drilling, large drilling
diameter or screw driving. The machine has
higher torque at a low speed.
Position 2: For fast drilling or small drilling
diameter. The machine has lower torque at
a high speed.
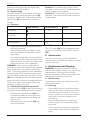
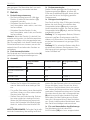
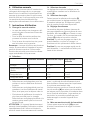
7.5 Selection:
Mode selector Torque selector Speed
Screwing 1 – 16 * 1
Drilling Masonry /
Concrete
N/A 2
Drilling Wood N/A 1 or 2
Drilling Metal N/A 1 or 2
*• Select a low setting for small screws or
soft work material.
• Select a high setting for large screws,
hard work materials and when remov-
ing screws.
• You should preferably choose a setting
as low as possible when driving screws.
Select a higher setting if the motor slips
before the screw is fully tightened.
WARNING: If the power tool gets exces-
sively hot in use, stop using the tool immedi-
ately and allow to cool before continuing
work. The cooling period can be reduced by
operating the drill at maximum speed with
no load. Always make sure the Motor Vents
(6) are not blocked and do not allow dust to
enter the body of the tool through the Motor
Vents; dust, especially metallic dust, may
damage or destroy the tool.
7.6 Switching the machine on and off
The on/off switch (13) is used for activating
the machine and adjusting rotation speed.
• Pressing the on/off switch (13) will
activate the machine, the further the
switch is being pushed, the faster the
drill will turn.
• Releasing the on/off switch (13) will
stop the machine.
7.7 LED lamp
The LED lamp (14) will be lit automatically
as soon as you press the ON/OFF switch
(13).
8. Accessories
Use only accessories with an allowable
speed matching at least the highest no-load
speed of the tool.
9. Maintenance and Cleaning
WARNING: Always disconnect from the
mains power supply, before carrying out any
maintenance/ cleaning of the charger.
Remove the battery before carrying out any
maintenance/cleaning of the tool.
9.1 Maintenance
There are no inner parts of the tool which
need maintenance.
9.2 Cleaning
• Keep safety devices, ventilation open-
ings and the motor housing as free as
possible from dirt and dust. Rub the
electric power tool with a clean cloth or
blow over it with low pressure com-
pressed air.
• We recommend that you clean your
electric power tool immediately after
each use.
• Clean the electric power tool regularly
with a damp cloth and somewhat soft
soap.

9
English
Do not use any cleaning or solvent materi-
als; these can attack the device’s plastic
components. Make sure that no water can
get inside the electric power tool.
10. Technical data
Speed . . . . . . . . . . 0 – 500 / 1800 min-1
Impacts per Minute . . . . . 0– 28 800 min-1
Chuck . . . . . . . . . . . . . . . . 2 – 13 mm
Max. Torque . . . . . . . . . . . . . . .60 Nm
Dimensions. . . . . . . . . .23 × 10 × 21 cm
Weight. . . . . . . . . . . . . . . . . . 1.28 kg
Sound Pressure Level LpA . . . .74.60 dB(A)
Uncertainty KpA. . . . . . . . . . . . . . .3 dB
Sound Power Level LWA . . . . . 85.60 dB(A)
Uncertainty KWA . . . . . . . . . . . . . . 3 dB
Hand Arm Vibration
(No Load) . . . . . . . . . . . . . .0.887 m/s2
(In Metal) . . . . . . . . . . . . . . 1.892 m/s2
(In Masonry) . . . . . . . . . . . . 10.12 m/s2
Uncertainty K. . . . . . . . . . . . . .1.5m/s2
11. Disposal
Do not dispose of electric power
tools with domestic refuse.
The electric power tool is shipped in
packaging to reduce transport damage.
This packaging is a raw material and as
such can either be reused or can be fed
back into the raw material cycle. The elec-
tric power tool and its accessories are
made from various materials such as met-
als and plastics. Take defective compo-
nents to a special refuse collection point.
Ask about these at your specialist shop or
local council. The product and the user
manual may be subject to changes. Techni-
cal data may be changed without prior
notice.
11.1 Batteries
Think of the environment when disposing of
batteries. Contact your local authorities to
nd out where your nearest disposal area is.
Do not dispose of batteries with domestic
refuse.
Do not dispose of by burning, risk of
explosion.
12. EC-Declaration of conformity
We, the Batavia B.V., Weth. Wassebali-
estraat 6d, NL-7951 SN Staphorst, declare
by our own responsibility that the product
Cordless Combi Drill, Model BT-CBCD002,
Item-No 7064545 is according to the basic
requirements, which are dened in the Euro-
pean Directives Electromagnetic Compati-
bility 2014/30/EU (EMC), 2006/42/EC
(Machinery), 2011/65/EU (RoHS) and their
amendments. For the evaluation of con-
formity, the following harmonized standards
were consulted:
EN 55014-1:2017,
EN 55014-2:2015,
EN62841-1:2015;
EN62841-2-1:2018;
AfPS GS 2019:01
Staphorst, 3 April 2023
Jin Min, QA Representative
Batavia B.V., Weth. Wassebaliestraat 6d,
7951 SN Staphorst, Netherlands
13. UK Declaration of Conformity
We, the Batavia B.V., Weth. Wassebali-
estraat 6d, NL-7951 SN Staphorst, Nether-
lands declare by our own responsibility that
the product Cordless Combi Drill, Model
BT-CBCD002, Item-No 7064545 is accord-
ing to the basic requirements, which are
dened in the UK Regulations Supply of
Machinery (Safety) Regulations 2008,
Electromagnetic Compatibility Regula-
tions 2016, Restriction of the Use of Cer-
tain Hazardous Substances in Electrical
and Electronic Equipment Regulations
2012 and their amendments.
Staphorst, 3 April 2023
Jin Min, QA Representative
Batavia B.V., Weth. Wassebaliestraat 6d,
7951 SN Staphorst, Netherlands
The product and the user manual may be
subject to changes. Technical data may be
changed without prior notice.

Deutsch
10
Sehr geehrte Damen und Herren
Bitte machen Sie sich in der Reihenfolge der
Kapitel mit dem Gerät vertraut und bewah-
ren Sie diese Bedienungsanleitung für spä-
tere Zwecke gut auf.
Lesen Sie bitte die beigefügten “Allge-
meine Sicherheitshinweise für Elektro-
werkzeuge” und alle weiteren Sicher-
heitshinweise in dieser Betriebsanleitung!
Diese Bedienungsanleitung enthält wichtige
Hinweise zur Inbetriebnahme und Handha-
bung. Legen Sie die Anleitung dem Produkt
bei, wenn Sie es an Dritte weitergeben.
Akku und Ladegerät sind nicht im Liefer-
umfang enthalten!
Die Maxxpack Akkus und Ladegeräte sind
online und in teilnehmenden Geschäften
verfügbar.
1. Erläuterung der Symbole
Folgende Symbole werden im Benutzer-
handbuch oder auf dem Produkt verwendet:
WARNUNG - Zur Verringerung des
Verletzungsrisikos
Bedienungsanleitung lesen.
Allgemeines Warnzeichen – Seien
Sie aufmerksam und beachten Sie
allgemeine Gefahren.
Tragen Sie immer einen
Gehörschutz. Die Einwirkung von
Lärm kann Gehörverlust bewirken.
Tragen Sie eine Schutzbrille.
Während der Arbeit entstehende
Funken oder aus dem
Elektrowerkzeug heraustretende
Splitter, Späne und Stäube können
Sichtverlust bewirken.
Die Drehzahl der Maschine kann
elektronisch eingestellt werden.
CE steht für ,,Conformité
Européenne“, dies
bedeutet,,Übereinstimmung mit EU
Richtlinien“. Mit der CE
Kennzeichnung bestätigt der
Hersteller, dass dieses
Elektrowerkzeug den geltenden
europäischen Richtlinien
entspricht.
Nicht in den Hausmüll entsorgen!
2. Sicherheitshinweise
für Akkubohrschrauber
2.1 Allgemeines
• Das Werkzeug/Ladegerät ist nicht dafür
bestimmt durch Personen (einschließ-
lich Kinder) mit eingeschränkten physi-
schen, sensorischen oder geistigen
Fähigkeiten, oder mangelnder Erfah-
rung und Wissen, benutzt zu werden; es
sei denn, sie werden durch eine für ihre
Sicherheit zuständige Person beauf-
sichtigt oder erhielten von ihr Anweisun-
gen, wie das Werkzeug/Ladegerät zu
benutzen ist.
• Stellen Sie sicher, dass Kinder nicht mit
dem Werkzeug/ Ladegerät spielen.
• Stellen Sie sicher dass Rechts-/Links-
lauf-Umschalter (7) sich in der mittel-
(Schluss-) Position bendet, bevor Sie
Werkzeugeinstellungen vornehmen
oder Zubehör wechseln, sowie beim
Tragen oder Weglegen des
Werkzeuges.
• Bearbeiten Sie kein asbesthaltiges
Material (Asbest gilt als krebserregend).
• Staub von Materialien wie Farbe, die
Blei enthält, einigen Holzarten, Minera-
lien und Metall kann schädlich sein
(Kontakt mit oder Einatmen des Staubs
kann zu allergischen Reaktionen und/
oder Atemwegskrankheiten beim Bedie-
ner oder Umstehenden führen); tragen
Sie eine Staubmaske und arbeiten Sie
mit einem Staubabsaugungssystem,
wenn ein solches angeschlossen wer-
den kann.
• Bestimmte Arten von Staub sind als
karzinogen klassiziert (beispielsweise
Eichen- und Buchenholzstaub), insbe-
sondere in Verbindung mit Zusätzen für
die Holzvorbehandlung; tragen Sie eine
Staubmaske und arbeiten Sie mit einem
Staubabsaugungssystem, wenn ein
solches angeschlossen werden kann.
• Beachten Sie die für Ihr verwendetes
Verbrauchsmaterial gültigen nationalen
Staubschutzvorgaben.

11
Deutsch
• Verwenden Sie beim Betrieb des Gerä-
tes Schutzausrüstung einschließlich
Schutzbrille oder Geschichtsschutz,
Gehörschutz und Schutzkleidung ein-
schließlich Schutzhandschuhen. Tragen
Sie je nach auszuführender Aufgabe
einen Atemschutz. Dieser muss min-
destens der Klasse FFP-2 entsprechen.
Falls der Betrieb des Gerätes Beschwer-
den oder Unbehagen auslöst, unterbre-
chen Sie die Arbeit umgehend und
gehen Sie der Ursache auf den Grund.
• Sorgen Sie für ausreichende Beleuch-
tung des Arbeitsbereiches.
• Vergewissern Sie sich, dass der Bohrer
sicher im Bohrfutter befestigt ist.
Locker sitzende Einsatzwerkzeuge
können aus dem Gerät geschleudert
werden und eine Sicherheitsgefahr
darstellen.
• Setzen Sie das Einsatzwerkzeug, der
Bohrer, niemals vor dem Einschalten
des Gerätes auf das Werkstück.
• Prüfen Sie vor Beginn der Arbeit, dass
unter dem Werkstück ausreichend Frei-
raum für das Einsatzwerkzeug besteht.
• Einsatzwerkzeuge werden während des
Betriebs heiß. Lassen Sie sie vor dem
Berühren abkühlen.
• Entfernen Sie Sägemehl, Sägespäne
oder Ausschussmaterial nahe dem
Einsatzwerkzeug niemals mit den
Händen.
• Verwenden Sie nach Möglichkeit
Spannvorrichtungen oder einen
Schraubstock zur sicheren Befestigung
des Werkstücks.
• Untersuchen Sie das Bohrfutter regel-
mäßig auf Verschleißerscheinungen
und Schäden. Lassen Sie defekte Teile
von einer zugelassenen Vertragswerk-
statt reparieren bzw. ersetzen.
• Warten Sie stets, bis das Einsatzwerk-
zeug zum völligen Stillstand gekommen
ist, bevor Sie das Gerät ablegen.
3. Vor der Anwendung
• Beschädigungen durch Schrauben,
Nägel und ähnliches an Ihrem Werk-
stück vermelden; diese vor Arbeitsbe-
ginn Entfernen.
• Verwenden Sie geeignete Suchgeräte,
um verborgene Versorgungsleitungen
aufzuspüren, oder ziehen Sie die örtli-
che Versorgungsgesellschaft hinzu
(Kontakt mit Elektroleitungen kann zu
Feuer und elektrischem Schlag führen;
Beschädigung einer Gasleitung kann
zur Explosion führen; Eindringen in eine
Wasserleitung verursacht Sachbeschä-
digung oder kann einen elektrischen
Schlag verursachen).
• Sichern Sie das Werkstück (ein mit
Spannvorrichtungen oder Schraubstock
festgehaltenes Werkstück ist sicherer
gehalten als mit der Hand).
4. Während der Anwendung
• Halten Sie das Elektrowerkzeug an den
isolierten Griffächen (8), wenn Sie
Arbeiten ausführen, bei denen das Ein-
satzwerkzeug oder die Schraube ver-
borgene Stromleitungen treffen kann
(der Kontakt mit einer spannungsfüh-
renden Leitung kann auch Metallteile
des Elektrowerkzeuges unter Spannung
setzen und zu einem elektrischen
Schlag führen).
• Im Falle von atypischem Verhalten oder
Fremdgeräuschen schalten Sie das
Werkzeug sofort aus oder ziehen Sie
den Netzstecker des Ladegeräts aus
der Steckdose.
5. Vor der ersten Benutzung
Nehmen Sie die Maschine und das Zubehör
aus der Verpackung. Überprüfen Sie die
Maschine auf Transportschäden und ver-
wenden Sie diese nicht, wenn sie beschä-
digt ist. Halten Sie Verpackungsmaterialien
von Kindern fern. Es besteht
Erstickungsgefahr!
6. Bestimmungsgemäße
Verwendung
Der Akku-Schlagbohrschrauber ist zum
Eindrehen und Lösen von Schrauben, zum
Bohren in Holz, Metall und Kunststoff und
zum Schlagbohren in Gestein unter Verwen-
dung des entsprechenden Einsatzwerkzeu-

Deutsch
12
ges geeignet. Die Maschine darf nur nach
ihrer Bestimmung verwendet werden.
7. Betrieb
7.1 Drehrichtungssteuerung
• Die Drehrichtung kann mit Hilfe des
Rechts-/Linkslauf-Umschalters (7)
eingestellt werden.
• Schieben Sie den Rechts-/Links-
lauf-Umschalter nach rechts, um Links-
lauf zu wählen.
• Schieben Sie den Rechts-/Links-
lauf-Umschalter nach links, um Rechts-
lauf zu wählen.
Hinweis: Wenn der Rechts-/Linkslauf-Um-
schalter mittig steht, ist die Bohrmaschine
gesperrt und kann nicht eingeschaltet wer-
den. Es empehlt sich, diese Einstellung als
Sicherheitsfunktion zu nutzen, um ein ver-
sehentliches Einschalten des Gerätes zu
verhindern.
7.2 Funktionswahlschalter
Die Symbole am Funktionswahlschalter (4)
geben die Kupplungseinstellungen an.
7.3 Drehmomentregler
Stellen Sie die gewünschte Einstellung am
Drehmomentregler (3) ein: je höher die
Ziffer am Drehmomentregler, desto höher
das vom Gerät zur Verfügung gestellte
Drehmoment.
7.4 Bohrgeschwindigkeiten
Das Gerät verfügt über 2 Bohrgeschwindig-
keiten, die sich durch Verschieben des
Gangwahlschalters (5) nach vorne oder
hinten einstellen lassen. Die Zahl auf dem
Gangwahlschalter (5) zeigt, welche Stellung
ausgewählt wurde.
Stellung 1: Für langsames Bohren, Bohrein-
sätze mit großem Durchmesser oder Ein-
drehen von Schrauben. Das Werkzeug gibt
ein hohes Drehmoment bei geringer Dreh-
zahl ab.
Stellung 2: Für schnelles Bohren oder Boh-
reinsätze mit kleinem Durchmesser. Das
Werkzeug gibt ein geringer Drehmoment bei
hoher Drehzahl ab.
7.5 Auswahl:
Funktionswahl-
schalter
Drehmomentregler Bohrgeschwindig-
keit
Schraubfunktion 1 – 16* 1
Bohren Mauerwerk /
Beton
N/A 2
Bohren Holz N/A 1 oder 2
Bohren Metall N/A 1 oder 2
*• Stellen Sie für kleine Schrauben oder
weiche Werkstoffe eine niedrige Zahl
ein.
• Für große Schrauben, harte Werkstoffe
und zum Lösen von Schrauben stellen
Sie eine hohe Zahl ein.
• Stellen Sie zum Eindrehen der Schrau-
ben eine möglichst niedrige Zahl ein.
Wenn die Rutschkupplung anspricht,
bevor die Schraube vollständig einge-
dreht ist, stellen Sie eine höhere Zahl
ein.
WICHTIGER HINWEIS: Falls das Gerät wäh-
rend der Anwendung übermäßig heiß läuft,
stellen Sie den Betrieb sofort ein und lassen
Sie es abkühlen, bevor Sie mit der Arbeit
fortfahren. Die Abkühlzeit lässt sich verkür-
zen, indem die Bohrmaschine ohne Last bei
maximaler Drehzahl betrieben wird. Achten
Sie stets darauf, dass die Lüftungsschlitze
(6) nicht verstopft oder bedeckt sind und
verhindern Sie das Eindringen von Staub
über die Lüftungsschlitze in den Gerätekör-
per. Staub, insbesondere Metallstaub, kann
das Gerät beschädigen oder zerstören.
7.6 Ein- und Ausschalten des Werkzeugs
Das Werkzeug wird mit dem EIN/
AUS-Schalter (13) ein- bzw. ausgeschaltet.

13
Deutsch
Mit diesem Schalter wird außerdem die
Drehzahl abgeglichen.
• Das Werkzeug wird durch Drücken des
EIN/ AUS-Schalters (13) eingeschaltet.
Je weiter der Schalter gedrückt wird,
umso höher ist die Drehzahl.
• Bei Loslassen des EIN/AUS-Schalters
(13) hält das Werkzeug an.
7.7 LED-Licht
Das LED-Licht (14) leuchtet automatisch,
sobald Sie den Ein-/Ausschalter (13)
drücken.
8. Zubehör
Nur Zubehör verwenden, dessen zulässige
Drehzahl mindestens so hoch ist wie die
höchste Leerlaufdrehzahl des Werkzeuges.
9. Wartung und Reinigung
WARNUNG: Trennen Sie das Ladegerät
stets vom Stromnetz, bevor Sie Wartungs-
oder Reinigungsarbeiten daran vornehmen.
Entnehmen Sie den Akku, bevor Sie War-
tungs- oder Reinigungsarbeiten an dem
Gerät durchführen.
9.1 Wartung
Im Geräteinneren benden sich keine weite-
ren zu wartenden Teile.
9.2 Reinigung
• Halten Sie Schutzvorrichtungen, Lüf-
tungsöffnungen und Motorengehäuse
so staub- und schmutzfrei wie möglich.
Reiben Sie das Elektrowerkzeug mit
einem sauberen Tuch ab oder blasen
Sie es mit Druckluft bei niedrigem
Druck aus.
• Wir empfehlen, dass Sie das Elektro-
werkzeug direkt nach jeder Benutzung
reinigen.
• Reinigen Sie das Elektrowerkzeug regel-
mäßig mit einem feuchten Tuch und
etwas Schmierseife.
Verwenden Sie keine Reinigungs- oder
Lösungsmittel; diese könnten die Kunst-
stoffteile des Elektrowerkzeuges angreifen.
Achten Sie darauf, dass kein Wasser in das
Innere des Elektrowerkzeuges gelangen
kann.
10. Technische Daten
Drehzahl . . . . . . . . 0 – 500 / 1800 min-1
Schlage pro Minute . . . . . 0– 28 800 min-1
Bohrfutter. . . . . . . . . . . . . . 2 – 13 mm
Max. Drehmoment . . . . . . . . . . .60 Nm
Abmessungen . . . . . . . . 23 × 10 × 21 cm
Gewicht . . . . . . . . . . . . . . . . . 1,28 kg
Schalldruckpegel LpA . . . . . . .74,60 dB(A)
Unsicherheit KpA . . . . . . . . . . . . . . 3 dB
Schallleistungspegel LWA . . . . 85,60 dB(A)
Unsicherheit KWA . . . . . . . . . . . . . .3 dB
Hand-Arm-Vibration
(Ohne Last) . . . . . . . . . . . . .0,887 m/s2
(In Metall) . . . . . . . . . . . . . .1,892 m/s2
(In Mauerwerk). . . . . . . . . . . 10,12 m/s2
Unsicherheit K . . . . . . . . . . . . . 1,5m/s2
11. Entsorgung
Entsorgen Sie Elektrowerkzeuge
nicht über den Hausmüll.
Das Elektrowerkzeug bendet sich in
einer Verpackung, um Transportschäden zu
verhindern. Diese Verpackung ist Rohstoff
und ist somit wieder verwendbar oder kann
dem Rohstoffkreislauf zurückgeführt wer-
den. Das Elektrowerkzeug und dessen
Zubehör bestehen aus verschiedenen Mate-
rialien, wie z.B. Metall und Kunststoffe.
Führen Sie defekte Bauteile der Sondermül-
lentsorgung zu. Fragen Sie im Fachgeschäft
oder in der Gemeindeverwaltung nach!
Das Produkt und das Benutzerhandbuch
können geändert werden. Die technischen
Daten können ohne Vorankündigung geän-
dert werden.
11.1 Batterien
Denken Sie bei der Entsorgung von Batte-
rien an den Umweltschutz. Wenden Sie sich
zwecks einer umweltfreundlichen Entsor-
gung an die lokalen Behörden.

Deutsch
14
12. EG–Konformitätserklärung
Wir, die Batavia B.V., Weth. Wassebalie-
straat 6d, NL-7951 SN Staphorst, erklären
in alleiniger Verantwortung, dass das Pro-
dukt Akku Schlagbohrmaschine, Typ BT–
CBCD002, Artikel Nr. 7064545 den wesent-
lichen Schutzanforderungen genügt, die in
den Europäischen Richtlinien 2014/30/EU
Elektromagnetische Verträglichkeit (EMV),
2006/42/EG (Maschinen), 2011/65/EU
(RoHS) und deren Änderungen festgelegt
sind. Für die Konformitätsbewertung wur-
den folgende harmonisierte Normen
herangezogen:
EN 55014-1:2017,
EN 55014-2:2015,
EN62841-1:2015;
EN62841-2-1:2018;
AfPS GS 2019:01
Staphorst, den 3. April 2023
Jin Min, Qualitätsbeauftragter
Batavia B.V., Weth. Wassebaliestraat 6d,
7951 SN Staphorst, Niederlande
Das Produkt und das Benutzerhandbuch
können geändert werden. Die technischen
Daten können ohne Vorankündigung geän-
dert werden.

15
Français
Cher client
Les manuels d’utilisation contiennent des
consignes importantes pour la manipula-
tion de votre nouveau produit. Ils vous per-
mettent d’utiliser toutes les fonctions, d’évi-
ter des erreurs de compréhension et de
prévenir les dommages.
générales de sécurité pour appareils
consignes de sécurité supplémentaires
Veuillez prendre le temps de lire tranquille-
ment ce manuel d’utilisation et conservez-le
jalousement pour une consultation
ultérieure.
Batterie et chargeur non inclus!
Les batteries et chargeurs Maxxpack sont
disponibles en ligne et dans les magasins
participants.
1. Explication des symboles
Les symboles suivants sont utilisés dans le
manuel d’utilisation ou apposés sur le
produit:
AVERTISSEMENT : pour réduire les
risques de blessures, veuillez lire le
mode d‘emploi.
Indique un risque de blessures, un
danger mortel ou un risqué
d’endommagement de l’outil en cas
du non-respect des consignes de
ce mode d’emploi.
Portez en permanence une
protection auditive. L’exposition au
bruit peut provoquer des pertes
d’audition.
Portez des lunettes de protection.
Les étincelles provoquées par le
travail ou les éclats, les copeaux et
les poussières provenant de
l’appareil électrique peuvent
entraîner la perte de la vue.
Le nombre de rotations de la
machine peut être réglé
électroniquement.
CE est l’abréviation de “Conformité
Européenne”, ce qui signifie
“conforme aux directives de l’Union
Européenne”. Le fabricant confirme
par le marquage CE que cet
appareil électrique correspond aux
directives européennes en vigueur.
Ne jetez pas les équipements
électriques avec les ordures
ménagères.
2. Instructions de sécurité pour
perceuse/ visseuses sans fil
2.1 Généralités
• L’outil/chargeur n’a pas été conçu pour
être utilisé par des personnes (y com-
pris des enfants) dont les capacités
physiques, sensorielles ou mentales
sont réduites, ou manquant d’expé-
rience ou de connaissances, excepté si
elles ont fait l’objet d’une surveillance
ou ont reçu des instructions concernant
l’utilisation de l’outil/chargeur par une
personne responsable de leur sécurité.
• Veillez à ce que les enfants ne jouent
pas avec l’outil/le chargeur.
• Vérifiez que le bouton d’inversion du
sens (7) est en position moyen (de
blocage) avant d’effectuer des réglages
sur l’outil ou de changer des acces-
soires, ainsi qu’en transportant ou ran-
gant l’outil.
• Ne travaillez pas de matériaux conte-
nant de l’amiante (l’amiante est consi-
dérée comme étant cancérigène).
• La poussière de matériaux, tels que la
peinture contenant du plomb, certaines
espèces de bois, certains minéraux et
différents métaux, peut être nocive (le
contact avec la poussière ou son inha-
lation peut provoquer des réactions
allergiques et/ou des maladies respira-
toires chez l’opérateur ou des per-
sonnes se trouvant à proximité); portez
un masque anti poussières et travaillez
avec un appareil de dépoussiérage
lorsqu’il est possible d’en connecter un.
• Certains types de poussières sont clas-
sifiés comme étant cancérigènes (tels
que la poussière de chêne ou de hêtre),
en particulier en combinaison avec des
additifs de traitement du bois; portez un

Français
16
masque anti poussières et travaillez
avec un appareil de dépoussiérage
lorsqu’il est possible d’en connecter un.
• Suivez les directives nationales relatives
au dépoussiérage pour les matériaux à
travailler.
• Les chargeurs de batterie sont pour un
usage intérieur seulement. Assu-
rez-vous que la source d’alimentation et
le chargeur soient protégés de l’humi-
dité en permanence.
• L’utilisation d’une perceuse demande le
port d’équipements de sécurité tels que
lunettes ou visière de sécurité, casque
anti-bruit et habillement protecteur tel
que gants de sécurité. Portez un
masque protecteur adapté à la tâche.
Un indice minimal FFP2 est recom-
mandé. Si l’utilisation de cet outil vous
cause une gêne quelconque, arrêtez
immédiatement et revoyez votre
méthode d’utilisation.
• Assurez-vous de disposer d’un éclai-
rage suffisant.
• Assurez-vous que les forets soient bien
fixés dans le mandrin. Les forets mal
insérés peuvent être éjectés de la
machine et représentent un danger.
• Assurez-vous que le foret ne soit pas en
contact avec la pièce de travail avant de
mettre la perceuse en marche.
• Avant de commencer le perçage, assu-
rez-vous de disposer de suffisamment
d’espace libre sous la pièce à percer.
• Les accessoires (mèches, etc.) pourront
avoir atteint des températures élevées
lors du perçage, laissez-les refroidir
avant de les manipuler.
• Ne retirez jamais la sciure ou la pous-
sière avec les mains à proximité de la
mèche.
• Examinez le mandrin régulièrement à la
recherche de tout signe d’usure ou de
dommage. Faites réparer les pièces
endommagées par un centre de répara-
tion homologué.
• Attendez toujours que la machine soit
parvenue à un arrêt complet avant de la
déposer.
3. Avant l’usage
• Faites attention aux vis, clous ou autres
éléments qui pourraient se trouver dans
la pièce à travailler et qui risqueraient
d’endommager très fortement votre
outil; enlevez-les avant de commencer
le travail.
• Utilisez des détecteurs appropriés afin
de localiser la présence de conduites
électriques ou bien s’adresser à la
société locale de distribution (un
contact avec des lignes électriques
peut provoquer un incendie et une
décharge électrique; le fait d’endomma-
ger une conduite de gaz peut entraîner
une explosion; le fait d’endommager
une conduite d’eau peut entraîner des
dégâts matériels ou causer une
décharge électrique).
• Fixez solidement la pièce à travailler
(une pièce fixée à l’aide de dispositifs de
fixation est davantage assure que si elle
était tenue à la main).
4. Pendant l’usage
• Tenez l’outil par les surfaces de préhen-
sion isolées (8), lors de la réalisation
d’une opération au cours de laquelle
l’accessoire de coupe ou la vis peut
entrer en contact avec un câblage non
apparent (le contact avec un fil sous
tension peut également mettre sous
tension les parties métalliques de l’outil
électrique et provoquer un choc élec-
trique sur l’opérateur).
• En cas d’anomalie électrique ou méca-
nique, coupez immédiatement l’outil ou
débranchez le chargeur du secteur.
5. Avant la première utilisation
Retirez la perceuse visseuse à percussion
sans fil let les accessoires de l’emballage.
Vérifiez si la perceuse visseuse à percus-
sion sans fil a subi des dommages durant le
transport et ne l’utilisez pas dans ce cas.
Conservez les matériaux d’emballage hors
de la portée des enfants, risque d’étouffe-
ment !

17
Français
6. Utilisation normale
La perceuse visseuse sans fil convient au
vissage et dévissage de vis, au perçage
dans le bois, le métal et le plastique et au
perçage à percussion dans la pierre sous
réserve d‘utiliser l‘outil approprié pour cela.
La machine doit exclusivement être
employée conformément à son affectation.
7. Instructions d’utilisation
7.1 Changer le sens de rotation
• Le sens de rotation se change en utili-
sant le bouton d’inversion du sens de
rotation (7).
• Pour le sens de rotation antihoraire,
poussez le bouton vers la droite.
• Pour le sens de rotation horaire, pous-
sez le bouton vers la gauche.
Remarque : Lorsque le bouton est placé au
centre, la perceuse est bloquée et ne peut
pas être mise en marche. Utilisez cette
fonction de sécurité pour éviter les démar-
rages accidentels de la perceuse.
7.2 Sélecteur de mode
Le réglage du couple est indiqué par les
symboles se trouvant sur le sélecteur du
mode (4).
7.3 Sélecteur de couple
Faites tourner le sélecteur de couple (3)
pour sélectionner le réglage souhaité : plus
le nombre indiqué sur la bague est grand,
plus le couple produit sera important.
7.4 Réglage des vitesses
La machine dispose de deux vitesses de
perçage réglables en faisant glisser le com-
mutateur de vitesse (5) vers l’avant ou vers
l’arrière. Le numéro sur le commutateur de
vitesse (5) indique la position choisie.
Position 1: pour un perçage au ralenti, de
grand diamètre, ou pour le vissage. La
machine est très puissante à faible vitesse.
Position 2: pour un perçage rapide ou de
petit diamètre. La machine est faible puis-
sante à très vitesse.
7.5 Sélection :
Sélecteur de mode Sélecteur de couple Réglage des
vitesses
Vissage 1 – 16* 1
Forage Maçonnerie
/ Béton
n / a 2
Forage de bois n / a 1 ou 2
Forage de métal n / a 1 ou 2
*• Sélectionnez un réglage bas pour les
petites vis ou les matériaux de travail
souples.
• Sélectionnez un réglage élevé pour les
grandes vis et les matériaux de travail
durs, ainsi que pour la dépose des vis.
• Choisissez de préférence le couple le
plus bas possible pour le vissage.
Sélectionnez un réglage plus élevé si le
moteur patine avant que la vis ne soit
serrée à fond.
ATTENTION : Si l’appareil devient excessi-
vement chaud pendant l’utilisation, arrêtez
immédiatement de l’utiliser et laissez-le
refroidir avant de recommencez à travailler
avec. La période de refroidissement peut
être réduite en faisant marcher la perceuse
à sa vitesse maximale à vide.
Vérifiez toujours que les orifices de ventila-
tion du moteur (6) ne soient pas bouchés et
ne laissez pas la poussière s’introduire dans
les orifices de ventilation : la poussière, en
particulier la poussière métallique peut
endommager ou rendre l’appareil hors
service.
7.6 Mise en marche et arrêt de la machine
L’interrupteur marche/arrêt (13) permet
d’activer la machine et de régler la vitesse
de rotation.

Français
18
• Appuyez sur l’interrupteur marche/arrêt
(13) pour activer la machine ; plus vous
poussez le commutateur, plus rapide
sera la rotation du foret.
• Relâchez l’interrupteur marche/arrêt
(13) pour arrêter la machine.
7.7 Voyant DEL
La lampe DEL (14) s’allume automatique-
ment, dès que vous appuyez sur l’interrup-
teur marche/arrêt (13).
8. Accessoires
La vitesse admissible des accessoires utili-
sées doit être au moins aussi élevée que la
vitesse à vide maximale de l’outil.
9. Nettoyage et maintenance
9.1 Maintenance
Il n’y a aucune autre pièce nécessitant un
entretien à l’intérieur de l’appareil.
9.2 Nettoyage
• Les équipements de protection, les
fentes de ventilation et le carter du
moteur doivent rester aussi propres que
possible, sans poussière ni salissures.
Nettoyez l’appareil électrique avec un
chiffon propre ou en soufflant de l’air
comprimé à faible pression.
• Nous conseillons de nettoyer l’appareil
électrique immédiatement après
chaque utilisation.
• Nettoyez régulièrement l’appareil élec-
trique avec un chiffon humide et un peu
de savon noir.
N’utilisez ni détergents ni solvants ; ceux-ci
pourraient attaquer les parties en plastique
de l’appareil. Veillez à empêcher la pénétra-
tion d’eau à l’intérieur de l’appareil
électrique.
10. Fiche technique
Vitesse de rotation . . 0 – 500 / 1800 min-1
Impacts par minute . . . . . 0– 28 800 min-1
Capacité du mandrin . . . . . . . 2 – 13 mm
Couple max. . . . . . . . . . . . . . . .60 Nm
Dimensions. . . . . . . . . .23 × 10 × 21 cm
Poids . . . . . . . . . . . . . . . . . . 1,28 kg
Niveau de
pression acoustique LpA . . . . .74,60 dB(A)
Incertitude KpA . . . . . . . . . . . . . . . 3 dB
Niveau de
puissance acoustique LWA . . . 85,60 dB(A)
Incertitude KWA . . . . . . . . . . . . . . .3 dB
Niveau des vibrations
(Aucune charge) . . . . . . . . . . 0,887 m/s2
(Perçage de métal) . . . . . . . . 1,892 m/s2
(Maçonnerie) . . . . . . . . . . . . 10,12 m/s2
Incertitude K . . . . . . . . . . . . . . 1,5m/s2
11. Élimination et recyclage
N’éliminez pas les appareils
électriques via les ordures
ménagères.
L’appareil électrique se trouve dans un
emballage afin d’éviter tout dommage pen-
dant le transport. Cet emballage est une
matière première et peut donc être réutilisé
ultérieurement ou être réintroduit dans le
circuit des matières premières.
L’appareil électrique et ses accessoires sont
composés de plusieurs matériaux, par
exemple des métaux et des matières plas-
tiques. Éliminez les composants défectueux
via les systèmes d’élimination des déchets
spéciaux. Renseignez-vous dans un maga-
sin spécialisé ou auprès de l’administration
de votre commune!
Le produit et le manuel utilisateur peuvent
être modifiés. Les caractéristiques tech-
niques peuvent être modifiées sans préavis.
11.1 Batteries
Lors de l’élimination des batteries, pensez à
la protection de l’environnement. Pour une
élimination écologique, adressez-vous aux
autorités locales.
A página está carregando ...
A página está carregando ...
A página está carregando ...
A página está carregando ...
A página está carregando ...
A página está carregando ...
A página está carregando ...
A página está carregando ...
A página está carregando ...
A página está carregando ...
A página está carregando ...
A página está carregando ...
A página está carregando ...
A página está carregando ...
A página está carregando ...
A página está carregando ...
A página está carregando ...
A página está carregando ...
A página está carregando ...
A página está carregando ...
A página está carregando ...
A página está carregando ...
A página está carregando ...
A página está carregando ...
A página está carregando ...
A página está carregando ...
A página está carregando ...
A página está carregando ...
A página está carregando ...
A página está carregando ...
-
 1
1
-
 2
2
-
 3
3
-
 4
4
-
 5
5
-
 6
6
-
 7
7
-
 8
8
-
 9
9
-
 10
10
-
 11
11
-
 12
12
-
 13
13
-
 14
14
-
 15
15
-
 16
16
-
 17
17
-
 18
18
-
 19
19
-
 20
20
-
 21
21
-
 22
22
-
 23
23
-
 24
24
-
 25
25
-
 26
26
-
 27
27
-
 28
28
-
 29
29
-
 30
30
-
 31
31
-
 32
32
-
 33
33
-
 34
34
-
 35
35
-
 36
36
-
 37
37
-
 38
38
-
 39
39
-
 40
40
-
 41
41
-
 42
42
-
 43
43
-
 44
44
-
 45
45
-
 46
46
-
 47
47
-
 48
48
-
 49
49
-
 50
50


Batavia Brushless Combi Drill 60 Nm Manual do usuário
- Categoria
- Exercícios de força
- Tipo
- Manual do usuário
em outros idiomas
- español: Batavia Brushless Combi Drill 60 Nm Manual de usuario
- français: Batavia Brushless Combi Drill 60 Nm Manuel utilisateur
- italiano: Batavia Brushless Combi Drill 60 Nm Manuale utente
- Nederlands: Batavia Brushless Combi Drill 60 Nm Handleiding
- Deutsch: Batavia Brushless Combi Drill 60 Nm Benutzerhandbuch
- polski: Batavia Brushless Combi Drill 60 Nm Instrukcja obsługi