
X-Micro Digital Photo Frame 100
User’s Manual
V1.0

1
INFORMATION TO USER
Product Name: X-Micro Digital Photo Frame 100
Model Name: XPFA-STD, XPFA-128, XPFA-256, XPFA-512,
This device complies with Part 15 of the FCC Rules.
Operation is subject to the following two conditions:(1)this
device may not cause harmful interference,and (2) this
device must accpt any interference received, including
interference that may cause undesired operation.
Conforms to the following EMC Product Testing Specifications FCC part
15.109, Class B-Residential Emissions at 3 meters. Testing was
performed in a FCC Listed 3 meter semi-anechoic chamber. FCC Part
15.107, Class B-Residential Emissions at shield Room. Testing was
performed in a FCC Listed shield room.
The referred test report(s) show that the product
complies with standard(s) recognized as giving
presumption of compliance with the essential
requirement in the above listed EU Directive(s). Other
relevant Directives have to be observed.
This device complies with the specifications listed below:
EN55022:1998+A2:2003
EN55024:1998+A2 2003

2
Copyright
Copyright 2006 by X-Micro Technology Corp., All rights reserved. No part
of this publication may be reproduced, transmitted, transcribed, stored in
a retrieval system, or translated into any language or computer language,
in any form or by any means, electronic, mechanical, magnetic, optical,
chemical, manual or otherwise, without the prior written permission of X-
Micro Technology Corp.
Disclaimer
X-Micro Technology Corp. makes no representations or warranties, either
expressed or implied, with respect to the contents hereof and specifically
disclaims any warranties, merchantability or fitness for any particular
purpose. Any software described in this manual is sold or licensed "as is".
Should the programs prove defective following their purchase, the buyer
(and not this company, its distributor, or its dealer) assumes the entire
cost of all necessary servicing, repair, and any incidental or
consequential damages resulting from any defect in the software. Further,
X-Micro Technology Corp., reserves the right to revise this publication
and to make changes from time to time in the contents hereof without
obligation to notify any person of such revision or change.
All brand and product names mentioned in this manual are trademarks
and/or registered trademarks of their respective holders.

3
Index
English………………………………………………………………………4
German………………………………………………………………………12
French…………………………………………………….…………………21
Dutch……………………………….…………..……………………………29
Spanish………………………………………………………………………37
Italian………………………………………………………………………….46
Portugese……………………………………………………………………55
Russian………………………………………………………………………64

4
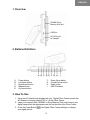
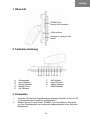
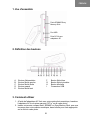
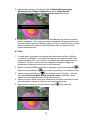
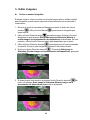
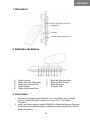
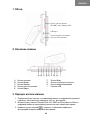
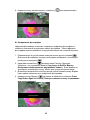
1. Overview
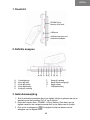
2. Buttons Definition
A. Power button
B. Left Arrow button
C. Right Arrow button
D. Manual button
E. Up Arrow button
F. Down Arrow button
G. Circular Arrow button
H. Scale button
I. USB Connector
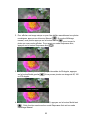
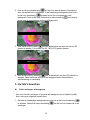
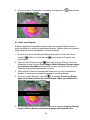
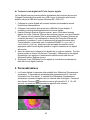
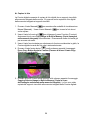
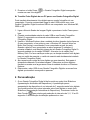
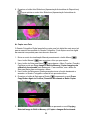
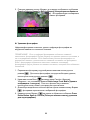
3. How To Use
1. Using the AC Adapter that shipped with your Digital Photo Frame connect the
AC Adapter to the plug labeled “DC In” on the Photo Frame.
2. Insert your compact flash, SD/MMC or Sony Memory Stick card found in your
digital camera into the appropriate card slot on the side of the Photo Frame.
3. Press the Power Button
, the Digital Photo Frame will begin to display
your digital photos.
SD/MMC/Sony
Memory Stick Slot
USB Port
DC IN Plug for
AC Adapter
ENGLISH

5
Transfer Digital Photos from your PC to the Digital Photo Frame
You can transfer digital photos directly to the photo frame from your computer.
Connect the wide end of the USB cable enclosed with your Digital Photo Frame to
your Windows ME, 2000 or XP computer’s USB slot.
1. Plug in the Digital Picture Frame and press power to turn it on.
2. Connect the narrow end of the USB cable to your Digital Photo Frame. The
computer will automatically recognize your Digital Photo Frame.
3. Using Windows Explorer open the disk drive by either double clicking on My
Computer, or if you are using Windows XP, clicking on the Start Button and
choosing My Computer from the menu. Once the My Computer window opens,
there will be 3 drives that appear. The first drive is for the Internal Memory on
your Digital Photo Frame. The second drive is for SD/MMC card. The third is
for Sony Memory Stick card. Please make sure that if you want to transfer
digital photos to a memory card that the card is properly installed in the Digital
Photo Frame.
4. Open the folder that contains the digital photos you want to transfer. This
folder is typically called “My Pictures” Select the digital photos to transfer and
drag and drop them onto the disc drive in Windows Explorer.
5. Disconnect the USB cable from your Digital Photo Frame and the new digital
photos you have transferred will begin to display.
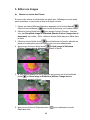
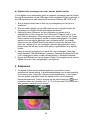
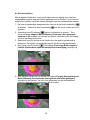
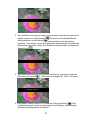
4 Customize
1. Your Digital Photo Frame comes to you in Auto-Slideshow mode. The default
setting for the slideshow is a 3 second interval between digital photos. You
can choose three other intervals between digital photos in Auto-Slideshow
mode. Press the Circular Arrow button
to toggle through the selection of
3, 6, 15 or 60 second intervals. Your setting selection will appear on the
display.
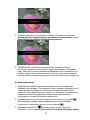
2. To display a single image or to manually step through your digital photos,
press the Manual button . In Manual display mode you can press the
Six Second Dela
y

6
Manual button to find the photo you wish to display. To go back to Auto-
Slideshow mode press the Auto-Slideshow button .
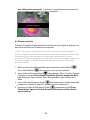
3. To rotate a digital photo by 90 degree intervals push the Left Arrow
button . You may rotate an image by 90, 180 or 270 degrees.
4. To change the LCD screen brightness press the Up Arrow button . This
function will work in either Auto-Slideshow or Manual display mode.
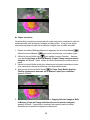
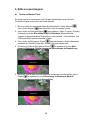
5 Edit Your Images
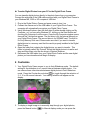
Hide or Show Photos
If you want to hide or re-introduce a photo for display on your Digital Photo Frame
you can do so in the following manner.
1. Enter Manual display mode by pressing the Manual button . Use the
Manual button to find the photo you wish to hide.
2. Use the Down Arrow button
to call up the Function Menu. Make sure
that Show/Hide Image in Slideshow is checked. If not use the Down Arrow
to scroll through the Menu.
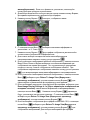
3. Use the Right Arrow button to select the function highlighted in yellow
and the Photo Frame will return to the photo you have selected.
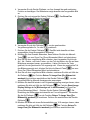
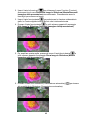
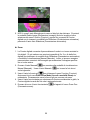
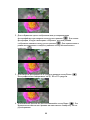
Rotation: 90 De
g
rees …
A
p
licando zoom 2 X a PICT0025.JPG

7
4. Press the Right Arrow button and Hide Image in Slideshow will appear
on the display.
5. If you want to reverse this choice press the Right Arrow button again and
Show Image in Slideshow will appear on the screen.
6. Press the Auto-Slideshow button to restart the Auto-Slideshow mode.
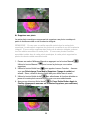
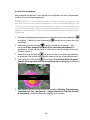
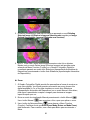
Copy a Photo
The Digital Photo Frame allows you to copy a digital photo from removable media
to the built-in memory in the Photo Frame. You are able to copy a digital photo
from the built-in memory onto removable media.
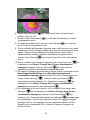
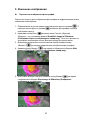
Startin
g
Slideshow …
Show Ima
g
e In Slidesho
w
Hide Ima
g
e In Slidesho
w

8
1. Enter Manual display mode by pressing the Manual button . Use the
Manual button to find the photo you want to copy.
2. Use the Down Arrow button to call up the Function Menu. Make sure
that Copy Image to Built-in Memory is highlighted. If not use the Down
Arrow to scroll through the Menu.
3. Use the Right Arrow button to select the function highlighted in yellow and the
Photo Frame will return to the photo you have selected.
4. Press the Right Arrow button and Press Copy Button Again to Confirm
will appear on the screen.
5. Press the Right Arrow again and Copying Selected Image to Built-in
Memory will appear on the screen. Your photo has now been copied from the
removable memory to the built-in memory on the Photo Frame.
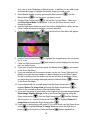
Delete a Photo
The Digital Photo Frame allows you to delete a digital photo from either removable
media or the built-in memory.
NOTE: If you have removable media inserted into the Digital Photo Frame, the
Photo Frame will delete photos from that media and not from the built-in memory.
If you want to delete photos from the built-in memory, remove all removable media
from the Photo Frame. If you have multiple removable media inserted into the
Co
py
in
g
Selected Ima
g
e to Built-In Memor
y
Press Co
py
Button A
g
ain to Confirm …

9
Photo Frame, the Photo Frame will delete photos from the last-inserted removable
media.
1. Enter Manual display mode by pressing the Manual button . Use the
Manual button to find the photo you want to delete.
2. Use the Down Arrow button to call up the Function Menu. Make sure
that Delete Image From Media is highlighted. If not use the Down Arrow to
scroll through the Menu.
3. Use the Right Arrow button to select the function highlighted in yellow
and the Photo Frame will return to the photo you have selected.
4. Press the Right Arrow button and Press Delete Button Again to
Confirm will appear on the screen.
5. Press the Right Arrow again and Deleting Selected Image followed by Image
Deleted Successfully will appear on the screen.
6. NOTE: You are able to use the Manual button to find another photo to delete.
You will remain in Delete Image mode until you either choose another
selection from the Function Menu or the Digital Photo Frame is put back in
Auto-Slideshow mode by pressing the Auto-Slideshow button.
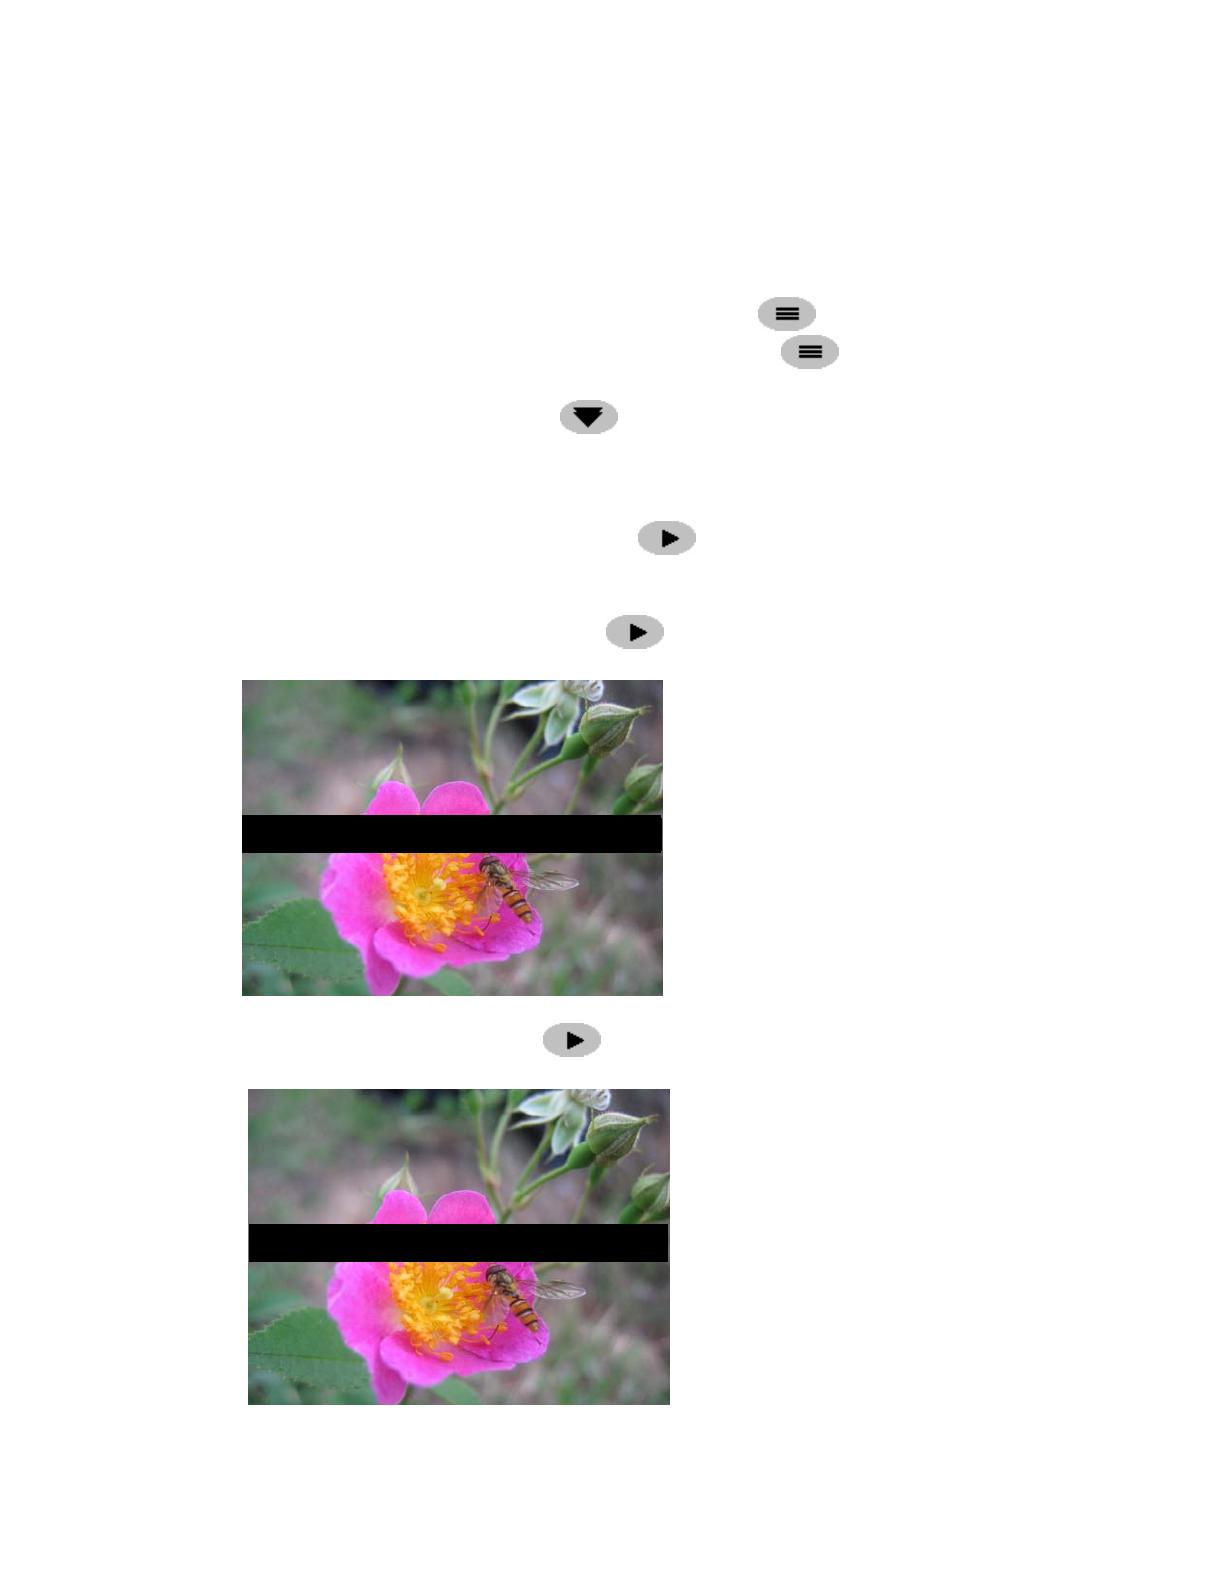
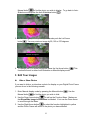
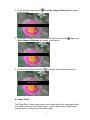
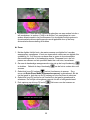
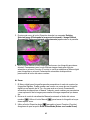
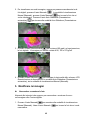
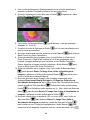
Zoom
1. The Digital Photo Frame allows you to customize how you can show your
digital photos. You can save a zoomed version of a digital photo at 2x, 3x, or
Deletin
g
Selected Ima
g
e …
Press Delete Button A
g
ain to Confirm …

10
4x to view in Auto-Slideshow or Manual mode. In addition you are able to pan
and scan the image to highlight the specific image you want to see.
2. Enter Manual display mode by pressing the Manual button . Use the
Manual button to find the photo you want to zoom.
3. Use the Down Arrow button to call up the Function Menu. Make sure
that Enter Zoom Mode is highlighted. If not use the Down Arrow to scroll
through the Menu.
4. Use the Right Arrow button to select the function highlighted in yellow and the
Photo Frame will return to the photo you have selected.
5. Press the Right Arrow button again and the Zoom Pan Menu will appear.
6. Use the Down Arrow button to highlight the magnification ratio you prefer,
2x, 3x or 4x.
7. Press the Right Arrow button and the photo will be displayed in the zoom
ratio you have chosen.
8. If you want to reverse this choice press the Manual button to return back
to the Zoom Pan Menu.
9. If you are satisfied with the zoomed image, use the Up, Down, Right and Left
Buttons to locate the exact image you want to display on your Photo Frame.
Do this by holding down the button until the correct area is displayed. When
you have the correct image displayed press the Manual Button
to return
to the Zoom Pan Menu.
10. If are satisfied with the zoomed image Use the Down Arrow button to
highlight Return To Image View and press the Right Arrow Button
to
return to the zoomed-in photo in Manual display mode.
11. If you want the image to revert back to the original non-zoomed image highlight
Reset Image Display Settings to 1x on the Zoom Pan Menu by using the
Down Arrow button
. Push the Right Arrow button and the Settings
will be reset to 1x. Use the Down Arrow button
to highlight Return To
Image View and press the Right Arrow button .
12. If you want to show photos with scale 16:9,in zoom mode, use the Down Arrow
button to highlight Return To Image View and press the Right Arrow
button
to show photos. Press the Manual button repeatedly to
Zoomin
g
PICT0025.JPG at 2
X

11
select the desired photo. Press the scale 16:9 button once to crop photo
by 5 percent. The max crop is 35 percent ,if the photo is cropped by 35
percent , the scale of length and width is 16:9.
13. Press the Auto-Slideshow button to return to the Auto-Slideshow mode.

12
1. Übersicht
2. Tastenbeschreibung
A. Stromschalter
B. Links-Pfeiltaste
C. Rechts-Pfeiltaste
D. Manuell-Taste
E. Auf-Pfeiltaste
F. Ab-Pfeiltaste
G. Kreis-Pfeiltaste
H. Skalierungstaste
I. USB-Anschluss
3. Verwenden
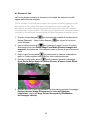
i. Verbinden Sie das dem Digitalbildrahmen beigelegte Netzteil mit dem als "DC
In" gekennzeichneten Anschluss am Bildrahmen.
ii. Stecken Sie Ihre CompactFlash-, SD/MMC- oder Sony Memory Stick-Karte
von Ihrer Digitalkamera in den passenden Kartensteckplatz an der Seite des
Bildrahmens.
SD/MMC/Sony
Memory Stick-Steckplatz
USB-Anschluss
Gleichstrom-eingang für das
Netzteil
GERMAN

13
iii. Drücken Sie den Stromschalter . Der Digitalbildrahmen zeigt daraufhin
Ihre Digitalbilder an.
Übertragen von Digitalbildern von Ihrem PC zu dem Digitalbildrahmen
Sie können Digitalbilder direkt von Ihrem Computer zu dem Bildrahmen
übertragen. Verbinden Sie das größere Ende des dem Digitalbildrahmen
beigelegten USB-Kabels mit einem USB-Anschluss an Ihrem Windows ME-,
2000- oder XP-Computer.
1. Drücken Sie den Stromschalter am Digitalbildrahmen, um ihn einzuschalten.
2. Verbinden Sie das kleinere Ende des USB-Kabels mit dem Digitalbildrahmen.
Der Computer erkennt automatisch Ihren Digitalbildrahmen.
3. Um das entsprechende Laufwerk zu öffnen, klicken Sie bitte doppelt auf
"Arbeitsplatz" im Windows-Explorer oder klicken Sie zuerst auf die Start-
Schaltfläche unter Windows XP und wählen dann "Arbeitsplatz". In dem
"Arbeitsplatz"-Fenster werden drei zusätzliche Laufwerke angezeigt. Das erste
Laufwerk steht für den internen Speicher des Digitalbildrahmens. Das zweite
Laufwerk steht für die SD/MMC-Karte. Das dritte steht für die Sony Memory
Stick-Karte. Möchten Sie Digitalbilder zu einer Speicherkarte übertragen, dann
stellen Sie bitte sicher, dass sich die Karte in dem Digitalbildrahmen befindet.
4. Öffnen Sie den Ordner, der die zu übertragenden Digitalbilder enthält.
Normalerweise sind Bilder in dem Ordner "Eigene Bilder" abgelegt. Wählen
Sie im Windows-Explorer die zu übertragenden Digitalbilder aus und ziehen
sie zu dem entsprechenden Laufwerk.
5. Trennen Sie nach dem Übertragen das USB-Kabel von dem Digitalbildrahmen.
Die neuen Bilder, die übertragen wurden, werden angezeigt.
4 Anpassen
1. In der Standardeinstellung ist der Auto-Diashowmodus in Ihrem
Digitalbildrahmen aktiviert. Das Zeitintervall zwischen den Digitalbildern in der
Diashow ist standarmäßig 3 Sekunden. Es stehen Ihnen drei weitere
Zeitintervalle für den Auto-Diashowmodus zur Auswahl. Drücken Sie die
Kreis-Pfeiltaste , um zwischen den Zeitintervallen 3, 6, 15 oder 60
Sekunden umzuschalten. Ihre Auswahl wird auf dem Bildschirm angezeigt.

14
2. Um ein einziges Bild anzuzeigen oder die Digitalbilder manuell zu wechseln,
drücken Sie bitte die Manuell-Taste . Im Manuell-Anzeigemodus
können Sie durch Drücken der Manuell-Taste das gewünschte Bild
suchen. Drücken Sie die Auto-Diashow-Taste , um in den Auto-
Diashowmodus zu wechseln.
3. Durch Drücken auf die Links-Pfeiltaste können Sie ein Digitalbild jeweils
um 90 Grad drehen. Sie können ein Bild um 90, 180 oder 270 Grad drehen.
4. Um die Helligkeit des LCD-Bildschirms zu ändern, drücken Sie bitte die Auf-
Pfeiltaste
. Diese Funktion ist sowohl im Auto-Diashow- als auch
Manuell-Anzeigemodus verfügbar.
Sechs Sekunden Verzö
g
erun
g
Die Diashow wird
g
estartet…
Drehun
g
: 90 Grad...
15
5. Bearbeiten Ihrer Bilder
Aus- oder Einblenden der Bilder
Sie können folgendermaßen ein Foto auf dem Digitalbildrahmen verstecken oder
wieder anzeigen lassen.
1. Wechseln Sie durch Drücken der Manuell-Taste in den Manuell-
Anzeigemodus. Verwenden Sie die Manuell-Taste , um das zu
versteckende Bild zu suchen.
2. Drücken Sie die Ab-Pfeiltaste , um das Funktionsmenü aufzurufen.
Stellen Sie sicher, dass die Funktion Show/Hide Image in Slideshow [In der
Diashow einblenden/ausblenden] aktiviert ist. Verwenden Sie
gegebenenfalls die Ab-Pfeiltaste, um das Menü zu rollen.
3. Verwenden Sie die Rechts-Pfeiltaste
, um Ihre Auswahl der gelb
markierten Funktion zu bestätigen. Der Bildrahmen zeigt daraufhin das
ausgewählte Bild an.
4. Drücken Sie die Rechts-Pfeiltaste
. Der Text Hide Image in Slideshow
[In der Diashow ausblenden] wird auf dem Bildschirm angezeigt.
5. Möchten Sie die umgekehrte Funktion auswählen, dann drücken Sie bitte
erneut die Rechts-Pfeiltaste
. Der Text Show Image in Slideshow [In
der Diashow einblenden] wird auf dem Bildschirm angezeigt.
In der Diashow einblenden
In der Diashow ausblenden

16
6. Drücken Sie die Auto-Diashow-Taste , um den Auto-Diashowmodus neu
zu starten.
Kopieren eines Bildes
Der Digitalbildrahmen erlaubt Ihnen ein Digitalbild von einem Wechseldatenträger
in den integrierten Speicher des Bildrahmens zu kopieren. Sie können ebenfalls
ein Digitalbild von dem integrierten Speicher in den Wechseldatenträger kopieren.
1. Wechseln Sie durch Drücken der Manuell-Taste in den Manuell-
Anzeigemodus. Verwenden Sie die Manuell-Taste , um das zu
kopierende Bild zu suchen.
2. Drücken Sie die Ab-Pfeiltaste , um das Funktionsmenü aufzurufen.
Stellen Sie sicher, dass die Funktion Copy Image to Built-in Memory [In den
integrierten Speicher kopieren] markiert ist. Verwenden Sie gegebenenfalls
die Ab-Pfeiltaste, um das Menü zu rollen.
3. Verwenden Sie die Rechts-Pfeiltaste, um Ihre Auswahl der gelb markierten
Funktion zu bestätigen. Der Bildrahmen zeigt daraufhin das ausgewählte Bild
an.
4. Drücken Sie die Rechts-Pfeiltaste . Der Text Press Copy Button Again
to Confirm [Kopiertaste zur Bestätigung drücken] wird auf dem Bildschirm
angezeigt.
Ko
p
iertaste zur Bestäti
g
un
g
drücken...
Die Diashow wird
g
estartet…

17
5. Drücken Sie die Rechts-Pfeiltaste. Der Text Copying Selected Image to
Built-in Memory [Ausgewähltes Bild in den integrierten Speicher
kopieren] wird auf dem Bildschirm angezeigt. Ihr Bild wird von dem
Wechseldatenträger in den integrierten Speicher des Bildrahmens kopiert.
Löschen eines Bildes
Der Digitalbildrahmen erlaubt Ihnen ein Digitalbild von einem Wechseldatenträger
oder dem integrierten Speicher des Bildrahmens zu entfernen.
HINWEIS: Befindet sich ein Wechseldatenträger in dem Digitalbildrahmen, dann
entfernt der Bildrahmen nur Bilder von dem Wechseldatenträger und nicht von
dem integrierten Speicher. Möchten Sie Bilder im integrierten Speicher löschen,
dann entfernen Sie bitte alle Wechseldatenträger von dem Bildrahmen. Befinden
sich mehrere Wechseldatenträger in dem Digitalbildrahmen, dann entfernt der
Bildrahmen Bilder von dem zuletzt eingesteckten Wechseldatenträger.
1. Wechseln Sie durch Drücken der Manuell-Taste in den Manuell-
Anzeigemodus. Verwenden Sie die Manuell-Taste
, um das zu
löschende Bild zu suchen.
2. Drücken Sie die Ab-Pfeiltaste , um das Funktionsmenü aufzurufen.
Stellen Sie sicher, dass die Funktion Delete Image From Media [Von dem
Medium entfernen] markiert ist. Verwenden Sie gegebenenfalls die Ab-
Pfeiltaste, um das Menü zu rollen.
3. Verwenden Sie die Rechts-Pfeiltaste , um Ihre Auswahl der gelb
markierten Funktion zu bestätigen. Der Bildrahmen zeigt daraufhin das
ausgewählte Bild an.
4. Drücken Sie die Rechts-Pfeiltaste
. Der Text Press Copy Button Again
to Confirm [Löschtaste zur Bestätigung drücken] wird auf dem Bildschirm
angezeigt.
Aus
g
ewähltes Bild in den inte
g
rierten S
p
eicher

18
5. Drücken Sie die Rechts-Pfeiltaste. Der Text Deleting Selected Image
[Ausgewähltes Bild löschen] und anschließend die Meldung Image Deleted
Successfully [Bild erfolgreich gelöscht] wird auf dem Bildschirm angezeigt.
6. HINWEIS: Sie können mit Hilfe der Manuell-Taste ein weiteres zu löschendes
Bild suchen. Sie bleiben im Bildlöschmodus, bis Sie eine andere Funktion aus
dem Funktionsmenü auswählen oder den Digitalbildrahmen durch Drücken der
Auto-Diashow-Taste in den Auto-Diashowmodus wechseln.
Zoomen
1. Der Digitalbildrahmen erlaubt Ihnen zu bestimmen, wie Ihre Digitalbilder
angezeigt werden. Sie können eine 2fach, 3fach oder 4fach vergrößerte
Version eines Digitalbildes speichern, um sie im Auto-Diashow- oder Manuell-
Modus anzuzeigen. Zudem können Sie das Bild schwenken, um einen
bestimmen Teil des Bildes anzeigen zu lassen.
2. Wechseln Sie durch Drücken der Manuell-Taste
in den Manuell-
Anzeigemodus. Verwenden Sie die Manuell-Taste , um das zu
vergrößernde Bild zu suchen.
3. Drücken Sie die Ab-Pfeiltaste , um das Funktionsmenü aufzurufen.
Stellen Sie sicher, dass die Funktion Enter Zoom Mode [In den Zoommodus
wechseln] aktiviert ist. Verwenden Sie gegebenenfalls die Ab-Pfeiltaste, um
das Menü zu rollen.
Löschtaste zur Bestäti
g
un
g
drücken...
Aus
g
ewähltes Bild löschen …

19
4. Verwenden Sie die Rechts-Pfeiltaste, um Ihre Auswahl der gelb markierten
Funktion zu bestätigen. Der Bildrahmen zeigt daraufhin das ausgewählte Bild
an.
5. Drücken Sie noch einmal die Rechts-Pfeiltaste . Das Zoom Pan
[Zoom/Schwenken]-Menü wird geöffnet.
6. Verwenden Sie die Ab-Pfeiltaste , um den gewünschten
Vergrößerungsfaktor 2x, 3x oder 4x zu markieren.
7. Drücken Sie die Rechts-Pfeiltaste . Das Bild wird daraufhin mit dem
ausgewählten Vergrößerungsfaktor angezeigt.
8. Möchten Sie Ihre Auswahl abbrechen, dann drücken Sie bitte die Manuell-
Taste , um zum Zoom Pan [Zoom/Schwenken]-Menü zurückzukehren.
9. Sind Sie mit dem vergrößerten Bild zufrieden, dann verwenden Sie bitte die
Auf-, Ab-, Rechts- und Links-Tasten, um den Teil des Bildes, den Sie auf dem
Bildrahmen anzeigen lassen, auszuwählen. Halten Sie hierzu die Taste
gedrückt, bis der gewünschte Teil angezeigt wird. Wenn der gewünschte Teil
des Bildes angezeigt wird, drücken Sie bitte die Manuell-Taste , um zum
Zoom Pan [Zoom/Schwenken]-Menü zurückzukehren.
10. Sind Sie mit dem vergrößerten Bild zufrieden, markieren Sie bitte mit Hilfe der
Ab-Pfeiltaste die Funktion Return To Image View [Zur Bildansicht
wechseln] und drücken anschließend die Rechts-Pfeiltaste
, um das
vergrößerte Bild im Manuell-Anzeigemodus anzuzeigen.
11. Möchten Sie das Bild wieder in der Originalerscheinung anzeigen lassen, dann
markieren Sie bitte mit Hilfe der Ab-Pfeiltaste
die Funktion Reset Image
Display Settings to 1x [Bildanzeige auf 1x zurücksetzen] im Zoom Pan
[Zoom/Schwenken]-Menü. Drücken Sie die Rechts-Pfeiltaste . Die
Einstellung der Bildanzeige wird daraufhin auf 1x zurückgesetzt. Verwenden
Sie die Ab-Pfeiltaste
, um die Funktion Return To Image View [Zur
Bildansicht wechseln] zu markieren. Drücken Sie anschließend die Rechts-
Pfeiltaste
.
12. Möchten Sie Bilder mit einem Seitenverhältnis von 16:9 anzeigen lassen, dann
markieren Sie bitte mit Hilfe der Ab-Pfeiltaste die Funktion Return To
Image View [Zur Bildansicht wechseln] und drücken anschließend die
PICT0025.JPG mit 2X zoomen
A página está carregando...
A página está carregando...
A página está carregando...
A página está carregando...
A página está carregando...
A página está carregando...
A página está carregando...
A página está carregando...
A página está carregando...
A página está carregando...
A página está carregando...
A página está carregando...
A página está carregando...
A página está carregando...
A página está carregando...
A página está carregando...
A página está carregando...
A página está carregando...
A página está carregando...
A página está carregando...
A página está carregando...
A página está carregando...
A página está carregando...
A página está carregando...
A página está carregando...
A página está carregando...
A página está carregando...
A página está carregando...
A página está carregando...
A página está carregando...
A página está carregando...
A página está carregando...
A página está carregando...
A página está carregando...
A página está carregando...
A página está carregando...
A página está carregando...
A página está carregando...
A página está carregando...
A página está carregando...
A página está carregando...
A página está carregando...
A página está carregando...
A página está carregando...
A página está carregando...
A página está carregando...
A página está carregando...
A página está carregando...
A página está carregando...
A página está carregando...
A página está carregando...
A página está carregando...
A página está carregando...
A página está carregando...
-
 1
1
-
 2
2
-
 3
3
-
 4
4
-
 5
5
-
 6
6
-
 7
7
-
 8
8
-
 9
9
-
 10
10
-
 11
11
-
 12
12
-
 13
13
-
 14
14
-
 15
15
-
 16
16
-
 17
17
-
 18
18
-
 19
19
-
 20
20
-
 21
21
-
 22
22
-
 23
23
-
 24
24
-
 25
25
-
 26
26
-
 27
27
-
 28
28
-
 29
29
-
 30
30
-
 31
31
-
 32
32
-
 33
33
-
 34
34
-
 35
35
-
 36
36
-
 37
37
-
 38
38
-
 39
39
-
 40
40
-
 41
41
-
 42
42
-
 43
43
-
 44
44
-
 45
45
-
 46
46
-
 47
47
-
 48
48
-
 49
49
-
 50
50
-
 51
51
-
 52
52
-
 53
53
-
 54
54
-
 55
55
-
 56
56
-
 57
57
-
 58
58
-
 59
59
-
 60
60
-
 61
61
-
 62
62
-
 63
63
-
 64
64
-
 65
65
-
 66
66
-
 67
67
-
 68
68
-
 69
69
-
 70
70
-
 71
71
-
 72
72
-
 73
73
-
 74
74


X-Micro XPFA-256 Manual do usuário
- Categoria
- Porta-retratos digitais
- Tipo
- Manual do usuário
em outras línguas
- español: X-Micro XPFA-256 Manual de usuario
- français: X-Micro XPFA-256 Manuel utilisateur
- italiano: X-Micro XPFA-256 Manuale utente
- Nederlands: X-Micro XPFA-256 Handleiding
Artigos relacionados
Outros documentos
-
Philips 7FF1M4/00 Manual do usuário
-
Pandigital PAN8000DWPCF1 Guia rápido
-
Intenso 12" MediaStylist Manual do usuário
-
Hama 00090921 Manual do proprietário
-
-
-
Braun Photo Technik DigiFrame 1560 Manual do usuário
-
-