HAEGER CM-10B.010A Manual do usuário
- Categoria
- Cafeteiras
- Tipo
- Manual do usuário

Coffee Machine / Máquina de Café
Cafetera / Cafetière
User instructions
Instruções de uso
Instrucciones de uso
Mode d’emploi
Perfect Drip * CM-10B.010A
RoHS
Please read carefully these instructions.
Por favor leia cuidadosamente estas instruções.
Por favor, lea atentamente estas instrucciones.
S’il vous plaît lire attentivement ces instructions

GB
Instructions for use 1
Dear customer
Thank you for having chosen a HÆGER product.
The HÆGER products have been produced to think about the welfare of the
consumer privileging the most raised standards of quality, functionality and
assign. We are sure you will be happy with this appliance.
We assume that the user is familiar with the common procedures of handling
household appliances.
Before using the appliance for the first time please read carefully and
thoroughly through these operating instructions and the safety advice,
completely familiarising yourself with the appliance. Retain these instructions for
future reference and pass them on to whoever might acquire the appliance at
a future date.
Intended use
The coffee maker is intended exclusively for brewing coffee. This coffee maker is
intended exclusively for use in private households. Pay heed to all the
information in this operating manual, especially the safety instructions. All other
uses are deemed to be improper and may result in property damage or even in
personal injury. We shall not accept liability for damages caused due to
improper use of the appliance.
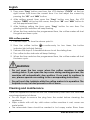
General Safety Instructions
Please read this manual since it contains important information on the
safety, use and maintenance of your appliance. Keep it in a safe place
for future reference.
After removing the packaging, make sure the appliance is
undamaged. If in doubt, do not use, please contact an authorized
service centre.
• Before plugging the coffee maker into the mains supply, check
that the voltage corresponds with that stated on the characteristics
plate. It is compulsory an earthed socket.
• Place the coffee maker on a level surface and away from the
edge of the work surface to prevent it from falling accidentally.
• The glass jug is designed to be used with this coffee maker. It must
not be used on cooker hobs or in micro-wave ovens. Never place
the hot jug on a cold or damp surface. Never pour cold water into

English
2 Instructions for use
the jug while it is still hot. Do not use the jug if it is cracked or if the
handle has come loose.
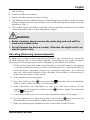
• This appliance can be used by children aged from 8
years and above and persons with reduced physical,
sensory or mental capabilities or lack of experience
and knowledge if they have been given supervision or
instruction concerning use of the appliance in a safe
way and understand the hazards involved.
• Cleaning and user maintenance shall not be made by
children unless they are older 8 years and supervised.
• Keep the appliance and its cord out of reach of children
less than 8 years.
• Children should be supervised to ensure that they do not
play with the appliance.
• Never touch the hot parts of the appliance. Only touch the plastic
parts and the cup by the handle.
• Be careful not to get burned by the steam evaporating form the
coffee filter.
• Never use the appliance if the glass shows any signs of cracks. Only
use the cup with this appliance. Handle with care as the ceramic is
very fragile.
• Never use your coffee machine without water in it.
• Do not forget that the temperature of the coffee prepared is high.
Handle with care your coffeepot to avoid any risk of splashes.
• Do not operate the appliance with the cable still coiled.
• Always remove the plug from the socket whenever the device is
not in use, when attaching accessory parts, cleaning the device or
whenever a disturbance occurs. Leave it to cool down before
putting it away or removing pieces and before cleaning the
appliance.
• Do not use outdoors. This appliance is only to be used for
household purposes and only for the purpose it is made for.
• This appliance is intended to be used in household and similar
applications as:

English
Instructions for use 3
– staff kitchen areas in shops, offices and other working
environments,
– farm houses,
– by clients in hotels, motels and other residential type
environments,
– bed and breakfast type environments.
• Do not let the cable hang over the edge of the table or worktop,
nor let met into contact with hot surfaces.
• Do not switch the appliance on if the cable or the plug is
damaged or if it can be detected that the appliance is not
working correctly.
WARNING: Risk of fire or electric shock!
• To reduce the risk of fire or electric shock, never remove any
of the covers. There are no user serviceable parts on the
inside.
• If the supply cord is damaged, it must be replaced by the
manufacturer, its service agent or similarly qualified persons to
avoid hazard.
• To protect yourself against an electric shock, do not immerse
the cord, plug or appliance in the water or any other liquid.
WARNING: Risk of burns!
• The hotplate and the pot get very hot. Only grab the glass pot
by the handle.
• Never open the lid of the water tank while the coffee maker is
in operation.

English
4 Instructions for use
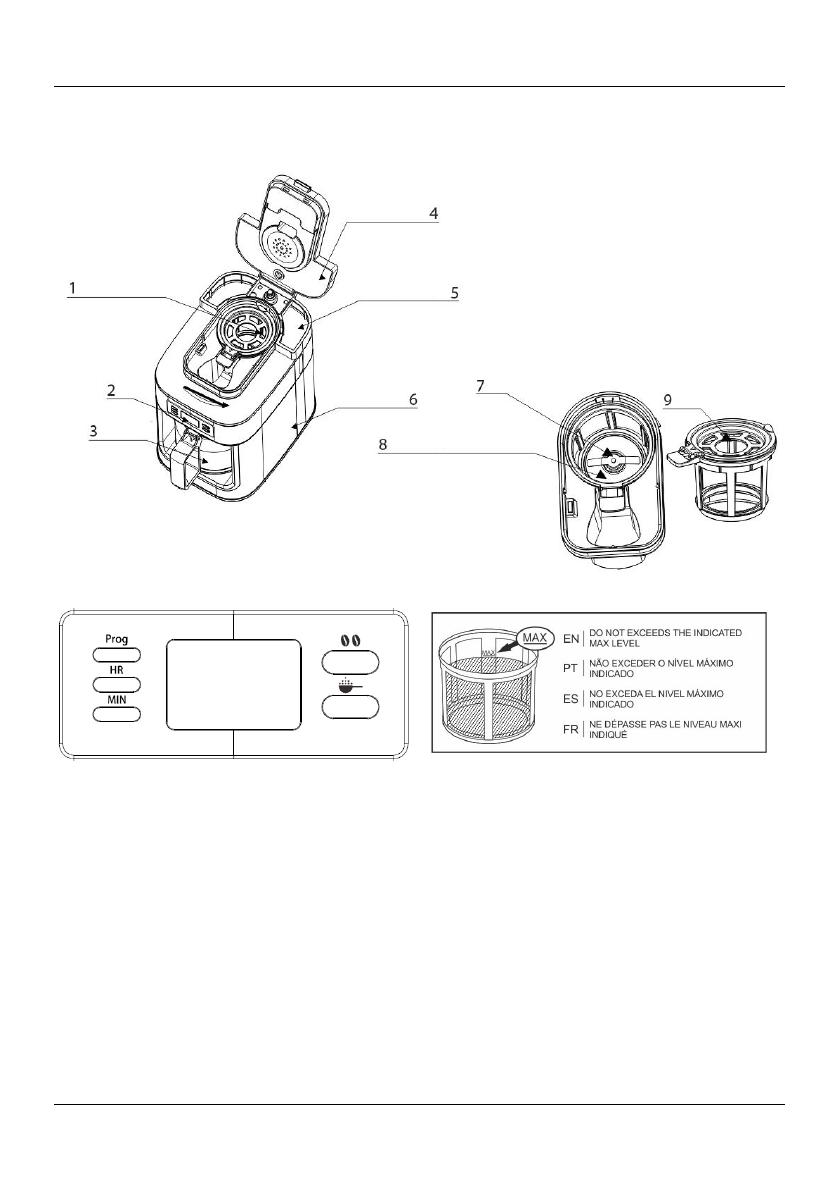
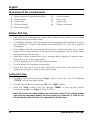
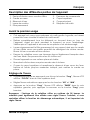
Overview of the components
1. Brew basket with grinder and filter
2. Control panel
3. Glass carafe
4. Top cover
5. Water tank
6. Main body
7. Grinder blade
8. Coffee container
9. Permanent filter
Before First Use
• This appliance is designed to brew drip coffee by the effect of hot water
passing through ground coffee.
• Completely remove all the transport and packaging items inside or outside
the appliance. Check that neither the appliance nor any of its parts is
damaged.
• Thoroughly wash the permanent filter and its holder and the jar in warm
water with a small amount of neutral kitchen detergent. Rinse under clean
running water and dry well.
• Wipe the coffee maker with a soft sponge lightly dipped in warm water.
Then wipe with a dry wiping cloth.
• Put the appliance on a flat and stable surface.
• Put the plug in an earthed wall socket.
• Open the top cover and fill the water tank with fresh, cold water to the
maximum indication and put the jug in place.
Setting the time
• Program the time by pressing “Prog” button one time, the LCD displays
“CLOCK” at the top right corner.
• Set the current time by pressing “HR” and “MIN” button.
• Press the “Prog” button, the LCD displays “TIMER” on the top left corner,
then press again the “Prog” button to finish.
Note: The clock of coffee maker uses a 24-hours system. The coffee maker
can also be operated without the time being set, however, if, wish to use
the automatic start function, it is important to set the time.
English
Instructions for use 5
Using your coffee maker
A. How to brew coffee with coffee bean
1. Plug in power cable, then uncover the top cover and fill clean water to
required level into the water tank.
2. Fill adequate coffee bean into the coffee bean container, then close the
top cover.
3. Press the grinding button for one time to grind coffee beans into
powder. After grinding, the coffee maker will brew coffee with the powder
automatically.
Note: It takes about 55s to grind the coffee bean
4. After brewing, the machine will keep the coffee warm for about
30minutes.
B. How to brew coffee with coffee powder
1. Performs steps 1-2 from the above point A.
2. Press the coffee button for one time, the coffee button indicator light
will keep on and start brewing coffee.
3. After brewing, the machine will keep the coffee warm for about
30minutes.
Notes:
– Do not exceed the water tank “MAX” level.
– The max capacity of the container is about 60g. Do not fill in coffee bean or
coffee powder that exceeds the “MAX” level.
– The coffee maker will be switched off automatically if brewing exceeds 40
minutes.
C. Automatic start
The coffee maker is equipped with an automatic start function. Thanks to this
function, you will be able to start the machine at a time of your choosing.
Before start this function check that you have properly set the time.
With grinding the coffee bean
1. Performs steps 1-2 from the above point A.
2. Press the grinding button continuously for two times, the button
indicator light will start flashing.

English
6 Instructions for use
3. Then press “Prog” button one time, the LCD displays “CLOCK” at the top
right corner, that shows the current time. You can adjust the current by
pressing the “HR” and ‘MIN” button.
4. After setting current time, press the “Prog” button one time, the LCD
displays “TIMER” at the top left corner, then press “HR” and “MIN” button to
set the appointment time.
5. After finishing setting the time, press “Prog” button for one time. The
grinding button indicator will keep flashing.
6. When the time matches the programmed time, the coffee maker will start
the grind and brew cycle.
With coffee powder
1. Performs steps 1-2 from the above point A.
2. Press the coffee button continuously for two times, the button
indicator light will start flashing.
3. Performs the steps 3-5 described above to set the stating time.
4. The coffee button indicator will keep flashing.
5. When the time matches the programmed time, the coffee maker will start
the brew cycle.
WARNING:
– Do not open the top cover when the coffee machine is under
running status. If you open the top cover during working process, the
machine will automatically stop working. If you want to continue to
use, please operate according to the corresponding instructions.
– Do not touch the hotplate while the coffee maker is in operation. The
hotplate is very hot and presents a risk of burns.
Cleaning and maintenance
Clean the appliance before the first use, immediately after each use and after
a prolonged period of disuse.
• Do not forget to remove the plug from the socket before cleaning the
appliance.
• Wipe outside with soft dry cloth when coffee machine is wet, never use
metal polish.
• The removable items should be washed in hot soapy water. Rinse them

English
Instructions for use 7
before fixing.
• Wash the filter and carafe.
• Never use dishwasher to clean the jug.
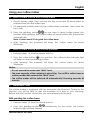
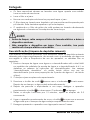
• The filter should be washed without transferring the powder in order to avoid
being blocked for the wet powder. Also avoid strewing the powder into the
machine. (Fig-1)
• The coffee bean container and filter can be directly washed in the water
under the water tap or in the dishwasher. (Fig-2)
WARNING:
• Before cleaning, always remove the mains plug and wait until the
device has cooled down.
• Do not immerse the device in water. Otherwise this might result in an
electric shock or fire.
Descaling (Removing mineral deposits)
To keep your coffee maker operating efficiently, you should clean away the
mineral deposits left by the water regularly according to the water quality in
your area and the frequency use the appliance, the detail is as follows:
1. Fill the water tank with water and descaler to the MAX level in the gauge
of coffee maker (the scale of water and descaler is 4:1, the detail refers to
the instruction of descaler. Please use “household descaler”, you can use
also the citric acid instead of the descaler (the relation is three parts of
water and one part of citric acid).
2. Push carafe on warming plate.
3. Press the coffee button once and the indicator will be illuminated.
After a while, water will drop out automatically.
4. After percolate the equivalent of one cup and then switch off the
appliance by pressing the coffee button twice again. The indicator
of CUP will go out.
5. Leave the solution work for 15 minutes, repeat the steps of 3-5 again.
6. Turn the appliance on by pressing the coffee button once and run off
the remaining water until the water tank is completely empty.
7. Rinse by operating the appliance with cold water at least 3 times.

English
8 Instructions for use
Hints for great-tasting coffee
1. A clean coffee maker is essential for making great-tasting coffee. Regularly
clean the coffee maker as specified in the “Cleaning and maintenance”
section. Always use fresh, cold water in the coffee maker.
2. Store unused coffee powder in a cool, dry place. After opening a package
of coffee powder, reseal it tightly and store it in a refrigerator to maintain its
freshness.
3. For an optimum coffee taste, buy whole coffee beans and finely grind
them just before brewing.
4. Do not reuse coffee powder since this will greatly reduce the coffee’s
flavour. Reheating coffee is not recommended as coffee is at its peak
flavour immediately after brewing.
5. Clean the coffee maker when over-extraction causes oiliness. Small oil
droplets on the surface of brewed, black coffee are due to the extraction
of oil from the coffee powder.
6. Oiliness may occur more frequently if heavily roasted coffees are used.
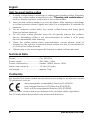
Technical Data
Model:............................................ CM-10B.010A
Power supply: ................................ 220 -240V~, 50Hz
Power consumption: .................... Heater: 1050W, Motor: 150W
Water tank capacity: ................... 1.2 Litre (10 cups)
Net weight: .................................... approx. 3 kg
Conformity
This product has been tested and produced according to all relevant current
CE guidelines, such as:
- electromagnetic compatibility Directive 2014/30/EU,
- Low voltage Directive (LVD) Directive 2014/35/EU,
- RoHS with its amendments Directive (EU) 2015/863,
and has been constructed in accordance with the latest safety regulations.
The CE mark attests this product with all relevant directives.

English
Instructions for use 9
Environment
Please consider our environment
Do not dispose of the appliance in your normal domestic waste. This
product is subject to the European guideline 2012/19/EU.
Dispose of the appliance through an approved disposal centre or at your
community waste facility. Observe the currently applicable regulations. In case
of doubt, please contact your waste disposal centre.
Dispose of all packaging materials in an environmentally responsible manner.
When you wish to dispose of the appliance, remove the cable and dispose it in
an environmentally friendly way (e.g. recycling plant).
Guarantee
This unit is covered by a 24 months (*) warranty, from the purchase date, and
covers the repair free of charges of the damaged due to the manufacturer
fault or defected components. The distributor reserves the right to change the
unit for an equivalent model.
The warranty does not cover any damaged caused by incorrect use, lightning,
incorrect installation, external factors or any intentional damaged. The warranty
does not cover damage thus attributable to falls, blows, spill, exposure to
extreme environmental conditions or deterioration caused by normal use of
plastic parts or keyboards, as well as by the use of batteries other than those
specified in this manual.
For the repairing, during the warranty period, the unit shall be sent to the
distributor or reseller, or to the address indicated by them, and must be jointed
the warranty certificated and the respective original invoice or selling ticket,
where the buying date is expressed indicated.
The consumer is protected by the guarantee provided by Directive 1999/44/CE
of European Parliament and Council of 25 May.
(*) Only for European Union countries

PT
10 Manual de Instruções
Estimado Cliente
Obrigado por ter escolhido um produto HÆGER.
Os produtos HÆGER foram concebidos a pensar no bem-estar do consumidor,
privilegiando os mais elevados padrões de qualidade, funcionalidade e
designe. Estamos certos da sua satisfação pela aquisição deste produto.
Partimos do princípio que o utilizador possui conhecimentos gerais sobre o
manuseamento com eletrodomésticos.
Antes da primeira utilização, leia cuidadosa e totalmente estas instruções de
utilização e de segurança e familiarize-se com as funções do aparelho.
Guarde estas instruções e, se necessário, entregue-as a terceiros.
Uso adequado
A máquina de café serve exclusivamente para a preparação de café. Esta
destina-se apenas ao uso privado. Tenha em atenção todas as informações
deste manual de instruções, com especial ênfase para as indicações de
segurança. Qualquer outro tipo de utilização é considerado incorreto e pode
conduzir a danos materiais ou até mesmo pessoais. Não são assumidas
quaisquer garantias relativamente a danos causados pela utilização incorreta.
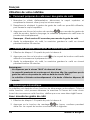
Instruções gerais de segurança
Por favor leia este manual pois contém importantes informações sobre
segurança, utilização e manutenção do aparelho. Guarde-o em lugar
seguro para futuras consultas.
Depois de retirar todo o material de embalagem, verifique se o
aparelho não sofreu danos durante o transporte. Em caso de dúvida,
não o utilize, contacte primeiro o seu vendedor ou leve-o ao local de
compra.
• Antes de ligar o aparelho à eletricidade, assegure-se de que a
tensão elétrica corresponde à indicada na placa de
características. É obrigatório dispor de uma tomada de terra.
• Coloque a cafeteira sobre uma superfície plana, distanciada da
beira da mesa ou do tampo, para evitar que possa cair por
acidente.
• O jarro de vidro foi concebido para a sua utilização com esta
cafeteira. Não a utilize nas placas de cozinha ou em fornos micro-
ondas. Não coloque o jarro quente sobre uma superfície fria ou

Português
Manual de Instruções 11
húmida. Não deite água fria na jarra quente. Não utilize o jarro se
tiver fissuras ou a pega solta.
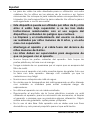
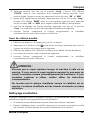
• Este aparelho pode ser utilizado por crianças a partir
dos 8 anos sob supervisão ou se tiverem recebido
instruções relativas à utilização segura do aparelho e
compreendam os perigos envolvidos.
• A limpeza e manutenção pelo utilizador não devem ser
realizadas por crianças com idade inferior a 8 anos e
sem supervisão.
• Mantenha o aparelho e o cabo fora do alcance de
crianças com idade inferior a 8 anos.
• As crianças devem ser supervisionadas para garantir
que não brincam com o aparelho.
• Nunca toque em superfícies quentes do aparelho. Toque apenas
as partes plásticas e o copo pela pega.
• Tenha cuidado para não se queimar pelo vapor emanado do filtro
de café.
• Nunca utilize o aparelho se o jarro de vidro apresenta sinais de
quebra. Apenas use o jarro com este aparelho. Manuseia com
cuidado porque a cerâmica é muito frágil.
• Nunca utilize a sua máquina de café sem água no depósito.
• Não se esqueça de que a temperatura do café preparado é alta.
Manuseie com cuidado a sua máquina de café para evitar riscos
de salpicos.
• Não utilize o aparelho com o cabo enrolado.
• Não introduza o aparelho, a ficha ou o cabo em água.
• Desligue sempre a ficha da tomada elétrica quando o aparelho
não está em uso, quando colocar acessórios, ao limpar ou sempre
que houver alguma alteração. Deixe o aparelho arrefecer antes
de guardar, retirar peças e de limpar.
• Não utilize este aparelho no exterior. Este aparelho destina-se
apenas a utilização doméstica e para os fins para os quais foi
concebido.

Português
12 Manual de Instruções
• Este aparelho destina-se a ser usado em aplicações domésticas e
semelhantes tais como:
– Zonas de cozinha em lojas, escritórios e outros ambientes de
trabalho.
– Quintas
– Por clientes de hotéis, motéis e outros ambientes de tipo
residencial.
– Ambientes de dormida e pequeno almoço.
• Não deixe o cabo pendurado na beira da mesa ou no tampo,
nem o ponha em contacto com superfícies quentes.
• Não ponha o aparelho a funcionar se o cabo elétrico e/ou a ficha
estiverem danificados ou se observar que o aparelho não
funciona corretamente.
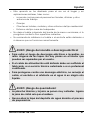
AVISO: Risco de incêndio ou choque elétrico.
• Para reduzir o risco de incêndio ou de choque elétrico, não
retire nenhuma das tampas. No seu interior não existem peças
que possam ser manuseadas pelo utilizador.
• Se o cabo de alimentação estiver danificado, deverá ser
substituído pelo fabricante, por um serviço técnico autorizado
ou por um profissional qualificado, para evitar possíveis
perigos.
• Para se proteger contra choques elétricos, não mergulhe o
cabo, a ficha nem o aparelho em água ou qualquer outro
líquido.
AVISO: Risco de queimadura!
• A placa de aquecimento e o jarro ficam muito quentes.
Apenas pegue o jarro pela pega.
• Nunca abra a tampa do reservatório de água enquanto a
cafeteira estiver em funcionamento.

Português
Manual de Instruções 13
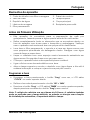
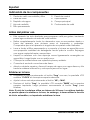
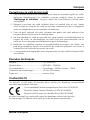
Elementos do aparelho
1. Cesto de infusão com filtro e moagem
2. Painel de controlo
3. Jarro de vidro
4. Tampa superior
5. Depósito de água
6. Corpo principal
7. Lâmina de moagem
8. Recipiente para café
9. Filtro permanente
Antes da Primeira Utilização
• Este aparelho foi concebido para a preparação de café por
gotejamento, fazendo passar a água quente através do café moído.
• Retire completamente todos os elementos que se encontram dentro ou
fora do aparelho que sirvam para o transporte e embalagem. Verifique
nem o aparelho nem nenhuma das suas peças estão danificadas.
• Lave bem o filtro permanente, o suporte e a jarra em água morna com
uma pequena quantidade de detergente neutro. Enxague com água
corrente limpa e seque bem.
• Limpe a cafeteira com uma esponja macia levemente embebida em
água morna. Em seguida, limpe com um pano seco.
• Coloque o aparelho sobre uma superfície plana e estável.
• Ligue a ficha a uma tomada elétrica com terra.
• Abra a tampa superior e encha o depósito com água limpa e fria até à
máxima indicação e coloque a jarra na sua posição correta.
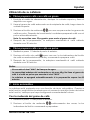
Programar a hora
• Programe a hora pressionando o botão “Prog” uma vez, o LCD exibe
“CLOCK” no canto superior direito.
• Defina a hora atual pressionando o botão "HR" e "MIN".
• Pressione o botão "Prog", o LCD exibirá "TIMER" no canto superior esquerdo,
depois pressione novamente o botão "Prog" para concluir.
Nota: O relógio da cafeteira usa um sistema de 24 horas. A cafeteira também
pode ser operada sem o tempo definido, no entanto, se desejar usar a função
de inicialização automática, é importante definir o tempo.

Português
14 Manual de Instruções
Utilizar a máquina de café
A. Como preparar café com grãos de café
1. Ligue o cabo de alimentação e, em seguida, abra a tampa superior e
encha o depósito de água com água limpa até o nível necessário.
2. Coloque o grão de café adequado no recipiente e feche a tampa
superior.
3. Pressione o botão de moagem por uma vez para moer os grãos de
café em pó. Após a moagem, a cafeteira prepara o café com o pó
automaticamente.
Nota: A moagem dos grãos de café demora cerca de 55s.
4. Após a infusão, a máquina manterá o café quente por cerca de 30
minutos.
B. Como preparar café com café em pó
1. Execute os passos do ponto A acima.
2. Pressione o botão de café por uma vez, a luz indicadora do botão
café continuará acesa e começará a fazer café.
3. Após a infusão, a máquina manterá o café quente por cerca de 30
minutos.
Notas:
– Não exceda o nível "MAX" do tanque de água.
– A capacidade máxima do recipiente é de cerca de 60g. Não preencha o
grão de café ou de café moído que exceda o nível "MAX".
– A cafeteira desliga-se automaticamente se a infusão exceder 40 minutos.
C. Início automático
A cafeteira está equipada com uma função de início automático. Graças a
esta função, poderá iniciar a máquina na hora que desejar. Antes de iniciar
esta função, verifique se ajustou corretamente a hora.
Com moagem dos grãos de café
1. Executa as etapas 1-2 do ponto A. acima
2. Pressione o botão de moagem continuamente por duas vezes, a luz
indicadora do botão começará a piscar.

Português
Manual de Instruções 15
3. Em seguida, pressione o botão “Prog” uma vez, o LCD exibirá “CLOCK” no
canto superior direito, que mostra a hora atual. Pode ajustar a hora
corrente pressionando o botão “HR” e ‘MIN”.
4. Após definir a hora atual, pressione o botão “Prog” uma vez, o LCD exibirá
“TIMER” no canto superior esquerdo e, em seguida, pressione o botão
“HR” e “MIN” para definir a hora do início.
5. Depois de terminar de definir a hora, pressione o botão "Prog" por uma vez.
O indicador do botão de moagem continuará piscando.
6. Quando a hora coincide com a hora programada, a cafeteira inicia o
ciclo de moagem e infusão.
Com café em pó
1. Executa as etapas 1-2 do ponto A. acima
2. Pressione o botão café continuamente por duas vezes, a luz
indicadora do botão começará a piscar.
3. Execute as etapas 3-5 descritas acima para definir a hora do início.
4. O indicador do botão de café continuará piscando.
5. Quando a hora coincide com a hora programada, a cafeteira inicia o
ciclo de infusão.
AVISO:
– Não abra a tampa superior quando a máquina de café estiver em
funcionamento. Se abrir a tampa superior durante este processo, a
máquina parará de funcionar automaticamente. Se quiser continuar a
usar, opere de acordo com as instruções correspondentes.
– Não toque na placa de aquecimento enquanto a cafeteira estiver em
funcionamento. A placa de aquecimento está muito quente e
apresenta risco de queimaduras.
Limpeza e Manutenção
Limpe o aparelho antes do primeiro uso, imediatamente após cada uso e após
um período prolongado de desuso.
• Não se esqueça de remover a ficha da tomada antes de limpar o
aparelho.
• Limpe a parte externa com um pano seco e macio quando a máquina
de café estiver molhada, nunca use polidores de metal.

Português
16 Manual de Instruções
• Os itens removíveis devem ser lavados com água quente com sabão.
Lave-os antes de recolocar.
• Lave o filtro e a jarra.
• Nunca use a máquina de lavar louça para limpar o jarro.
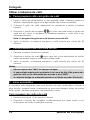
• O filtro deve ser lavado sem transferir o pó para evitar ser bloqueado pelo
pó húmido. Evite também espalhar o pó na máquina.
• O recipiente e o filtro de grãos de café podem ser lavados diretamente
na água sob a torneira ou na máquina de lavar louça.
AVISO:
• Antes de limpar, retire sempre a ficha da tomada elétrica e deixe o
dispositivo arrefecer.
• Não mergulhe o dispositivo em água. Caso contrário, isso pode
resultar em choque elétrico ou incêndio.
Descalcificação (Limpeza de depósitos minerais)
Para manter a cafeteira operando com eficiência, limpe os depósitos minerais
deixados pela água regularmente, de acordo com a qualidade da água na
sua região e com a frequência de uso do aparelho, os detalhes são os
seguintes:
1. Encha o tanque de água com água e o descalcificador até o nível MAX
no medidor da cafeteira (a escala de água e o descalcificador é 4:1, os
detalhes se referem às instruções do descalcificador. Use sempre
“descalcificador doméstico” ou então ácido cítrico em vez do
descalcificante (com uma proporção de 3 partes de água e 1 de ácido
cítrico).
2. Coloque a jarra na placa de aquecimento.
3. Pressione o botão de café uma vez e o indicador ficará aceso.
Depois de um tempo, a água cairá automaticamente.
4. Depois de percolar o equivalente a um copo, desligue o aparelho
pressionando o botão duas vezes. O indicador se apaga.
5. Deixe a solução funcionar por 15 minutos, repita as etapas de 3-5
novamente.
6. Ligue o aparelho pressionando de novo o botão uma vez e escorra
a água até que o tanque de água esteja completamente vazio.
7. Enxague operando o aparelho com água pelo menos 3 vezes.

Português
Manual de Instruções 17
Dicas para um café saboroso
1. Uma cafeteira limpa é essencial para fazer um café de excelente sabor.
Limpe regularmente a cafeteira conforme especificado na seção
"Limpeza e Manutenção". Use sempre água fresca e fria na cafeteira.
2. Armazene o café em pó não utilizado em local fresco e seco. Depois de
abrir uma embalagem de café em pó, feche bem e guarde no
refrigerador para manter a frescura.
3. Para obter um ótimo sabor do café, compre grãos de café inteiros e moa-
os finamente antes de preparar.
4. Não reutilize o café em pó, pois isso reduzirá bastante o sabor do café. O
reaquecimento do café não é recomendado, pois o café atinge seu
sabor máximo imediatamente depois de preparado.
5. Limpe a cafeteira quando a extração excessiva causar oleosidade.
Pequenas gotículas de óleo na superfície do café preto elaborado são
devidas à extração de óleo do café em pó.
6. A oleosidade pode ocorrer com mais frequência se forem utilizados cafés
muito torrados.
Características técnicas
Modelo: .............................................. CM-10B.010A
Alimentação da corrente: ............... 220-240V~, 50/60Hz
Consumo de energia: ....................... Aquecedor: 1050W, Motor: 150W
Capacidade de enchimento: ......... 1,2 Litros (10 chávenas)
Peso neto: .......................................... aprox. 3 kg
Conformidade CE
Este aparelho foi testado e produzido de acordo com todas as atuais diretivas
relevantes da UE, tais como:
– Diretiva de Compatibilidade eletromagnética 2014/30/EU,
– Diretiva de Baixa tensão LVD 2014/35/EU,
– Diretiva RoHS e respetivas alterações (EU) 2015/863
e foi fabricado de acordo com as mais recentes normas de segurança.
A marcação CE atesta este produto com todas as diretivas relevantes.

Português
18 Manual de Instruções
Meio Ambiente
Tenha sempre presente o nosso meio ambiente
Nunca deite o aparelho no lixo doméstico normal.
Este produto está em conformidade com a diretiva europeia
2012/19/EU.
Elimine o aparelho através de um serviço de eliminação autorizado ou das
entidades de eliminação locais.
Preste atenção às prescrições atuais válidas. Em caso de dúvida entre em
contacto com a entidade de eliminação de resíduos.
Elimine todos os materiais de embalagem de forma ecológica.
Quando for se desfazer do aparelho, remova o cabo e elimina-lo de uma
forma ambientalmente amigável (por exemplo, centro de reciclagem).
Garantia
O importador garante este produto por um período de 24 meses (*) a partir da
data de compra, e cobre a reparação sem encargos com mão-de-obra e
materiais, avarias devidas a defeitos de fabricação ou componentes
defeituosos, reservando-se o responsável pela garantia, segundo o seu próprio
critério, o direito de substituição por aparelho igual ou equivalente.
A garantia não cobre as avarias provocadas por uso indevido, instalação
incorreta, descargas elétricas, dano intencional do aparelho ou por causas
estranhas ao mesmo. A garantia não cobre assim danos atribuíveis a quedas,
pancadas, derrame de líquidos, exposição a condições extremas do meio
ambiente ou deterioração provocada pelo uso normal das partes plásticas ou
teclados, bem como pelo uso de baterias diferentes das especificadas neste
manual.
Se o aparelho avariar durante o período da garantia, deverá entrar em
contacto com o estabelecimento vendedor e remeter o aparelho para o local
por este indicado, fazendo-o acompanhar do certificado de garantia e
respetiva prova de compra.
O consumidor goza de todas as garantias previstas na Diretiva 1999/44/CE do
Parlamento Europeu e do Conselho, de 25 de maio.
(*) apenas para países da União Europeia
A página está carregando...
A página está carregando...
A página está carregando...
A página está carregando...
A página está carregando...
A página está carregando...
A página está carregando...
A página está carregando...
A página está carregando...
A página está carregando...
A página está carregando...
A página está carregando...
A página está carregando...
A página está carregando...
A página está carregando...
A página está carregando...
A página está carregando...
A página está carregando...
A página está carregando...
A página está carregando...
-
 1
1
-
 2
2
-
 3
3
-
 4
4
-
 5
5
-
 6
6
-
 7
7
-
 8
8
-
 9
9
-
 10
10
-
 11
11
-
 12
12
-
 13
13
-
 14
14
-
 15
15
-
 16
16
-
 17
17
-
 18
18
-
 19
19
-
 20
20
-
 21
21
-
 22
22
-
 23
23
-
 24
24
-
 25
25
-
 26
26
-
 27
27
-
 28
28
-
 29
29
-
 30
30
-
 31
31
-
 32
32
-
 33
33
-
 34
34
-
 35
35
-
 36
36
-
 37
37
-
 38
38
-
 39
39
-
 40
40


HAEGER CM-10B.010A Manual do usuário
- Categoria
- Cafeteiras
- Tipo
- Manual do usuário
em outras línguas
- español: HAEGER CM-10B.010A Manual de usuario
- français: HAEGER CM-10B.010A Manuel utilisateur
- English: HAEGER CM-10B.010A User manual
Artigos relacionados
Outros documentos
-
Becken maquina de cafe com filtro BDCM 2179 Manual do proprietário
-
Platinum 7096653 Manual do usuário
-
Krups ET352010 Manual do proprietário
-
SEVERIN KV 8011 Manual do usuário
-
Krups KM 8005 Manual do proprietário
-
-
Tristar KZ-1228 Manual do usuário
-
Gaggia 10002008 Use and Maintenance Manual
-
Silvercrest SKAT 1000 A1 Operating Instructions Manual
-
Cloer 5340 Manual do usuário