Parkside KH 3115 BELT SANDER Manual do usuário
- Categoria
- Lixadeiras elétricas
- Tipo
- Manual do usuário
Este manual também é adequado para

PEBS 900
2003
manual PEBS 900 07.11.2003 11:38 Uhr Seite 1

Kompernaß Handelsgesellschaft mbH
Burgstraße 21 · D-44867 Bochum (Germany)
Stand der Informationen 10/2003 · Ident.-No.: PEBS900-102003-1
D Bedienungs- und Sicherheitshinweise Seite 4- 9
GB Operating and safety instructions Page 10-15
F Mode d'emploi et instructions de sécurité Page 16-21
I Informazioni di sicurezza e istruzioni per l‘uso Pagina 22-27
E Instrucciones para el manejo y la seguridad Página 28-33
P Instruções de utilização e de segurança Página 34-39
NL Bedienings- en veiligheidsaanwijzingen Pagina 40-45
GR Àԉ›ÍÂȘ ¯ÂÈÚÈÛÌÔ‡ Î·È ·ÛÊ·Ï›·˜ ™ÂÏ›‰· 46-51
PL Wskazówki dotyczàce obs∏ugi i bezpieczeƒstwa Strona 52-57
CZ Pokyny k ovládání Strana 58-63
FIN Käyttö- ja turvaohjeet Sivu 64-69
S Användar- och Säkerhetsanvisning Sidan 70-74
manual PEBS 900 07.11.2003 11:38 Uhr Seite 2

3
manual PEBS 900 07.11.2003 11:38 Uhr Seite 3

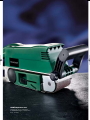
BANDSCHLEIFER PEBS 900
Schleifen von großen Flächen. Für Holz, Kunststoff und Metall
Bitte lesen Sie die folgenden Informationen für Sicherheit und sachgemäßen Gebrauch aufmerksam
durch. Klappen Sie vor dem Lesen die Seite mit den Abbildungen aus und machen Sie sich ansch
ließend mit allen Funktionen des Gerätes vertraut. Lesen Sie bitte hierzu sorgfältig die nachfolgende
Bedienungsanleitung sowie die beiliegenden Sicherheitshinweise . Benutzen Sie das Gerät
nur wie beschrieben und für die angegebenen Einsatzbereiche. So arbeiten Sie gefahrlos und erzielen
bei Ihren Arbeiten bessere Ergebnisse. Bewahren Sie diese Hinweise sorgfältig auf und geben Sie sie
ggf. an Dritte weiter.
BESTIMMUNGSGEMÄSSER GEBRAUCH
Der Bandschleifer ist zum trockenen Schleifen und Polieren von Holz, Metall und Lacken geeignet.
Beachten Sie bitte, dass Sie zur Bearbeitung der verschiedenen Materialien entsprechende Schleif-
blätter mit unterschiedlicher Körnung einsetzen und die Drehzahl ebenfalls dem Material anpassen.
Jede andere Verwendung oder Veränderung der Maschine gilt als nicht bestimmungsgemäß und birgt
erhebliche Unfallgefahren. Für aus bestimmungswidriger Verwendung entstandene Schäden über
nimmt der Hersteller keine Haftung.
AUSSTATTUNG PEBS 900
Zusatz-Handgriff Schutzabdeckung
Lüftungsschlitze Absaugstutzen
Stellrad Bandgeschwindigkeit Justierschraube für Bandlauf
Feststellknopf Spannhebel
EIN- /AUS-Schalter Staubsack
TECHNISCHE DATEN
Nennaufnahme: 900 W Schutzklasse: II/
Nennspannung: 230 V ~ 50 Hz Gewicht: 3,8 kg
Schleifband/ Schalldruckpegel: Lp = 87 dB (A)
Leerlaufdrehzahl: n
0
650 min
-1
Schalleistungspegel: Lw = 100 dB (pw)
Band-/Schleifgeschwindigkeit Schwingungswert: < 2,5 m/s
2
bei maximaler Drehzahl: 350 m/min (Hand-Arm-Vibration)
Schleiffläche: 75 x 150 mm
Schleifband: 75 x 533 mm
www.kompernass.com +++ www.kompernass.com +++ www.kompernass.com +++ w
4
k
manual PEBS 900 07.11.2003 11:38 Uhr Seite 4

Der Bandschleifer PEBS 900 verfügt über Vollwellenelektronik mit zusätzlicher Regelelektronik,
Überlastkontrolle, Softstart und Leistungsnachregelung.
Sanftanlauf mit Einschaltstrombegrenzung.
WICHTIGE SICHERHEITSHINWEISE
· Lesen Sie vor der ersten Inbetriebnahme zusätzlich die Hinweise im beiliegenden Heft
»Sicherheitshinweise«.
· Der Bandschleifer PEBS 900 ist für trockenes Flächenschleifen von Holz, Kunststoff, Metall
und – bei hoher Abtragsleistung – Spachtelmasse sowie lackierten Oberflächen ausgelegt.
Der Bandschleifer darf nur für Trockenschliff verwendet werden.
· Wird bei Arbeiten das Netzkabel beschädigt oder gar durchtrennt, niemals das Kabel berühren –
ziehen Sie sofort den Netzstecker. Benutzen Sie niemals Elektrogeräte mit beschädigtem Kabel.
· Führen Sie das Kabel immer nach hinten vom Gerät weg.
· Bei längerem Bearbeiten von Holz und insbesondere wenn Materialien bearbeitet werden,
bei denen gesundheitsgefährdende Staube entstehen, ist der Bandschleifer an eine geeignete
externe Absaugvorrichtung anzuschliessen. Tragen Sie einen Atemschutz, einen Gehörschutz und
eine Schutzbrille.
· Es darf kein asbesthaltiges Material bearbeitet werden.
· Spannen Sie das zu bearbeitende Werkstück fest, sofern es nicht durch sein Eigengewicht sicher
aufliegt.
· Achten Sie immer darauf, dass das Gerät ausgeschaltet ist, bevor Sie den Stecker in die Steckdose
stecken.
· Den Bandschleifer nur eingeschaltet gegen das Werkstück führen und erst dann ausschalten,
wenn er vom Werkstück abgehoben wurde.
· Verwenden Sie keine Schleifbänder mehr, die stark verschlissen oder eingerissen sind.
· Vermeiden Sie Kontakt mit dem laufenden Schleifband – Verletzungsgefahr.
· Das Gerät immer ausschalten und das Schleifband auslaufen lassen, bevor Sie den Bandschleifer
ablegen.
· Funkenflug – Brandgefahr! Wenn Sie Metalle schleifen entsteht Funkenflug. Achten Sie
deshalb unbedingt darauf, dass keine Personen gefährdet werden und sich keine brennbaren
Materialien in der Nähe der Arbeitsbereiches befinden.
· Einwandfreie Funktionen können nur zugesichert werden, wenn das Original-Zubehör verwendet wird.
INBETRIEBNAHME
Beachten Sie die Netzspannung. Die Netzspannung der Stromquelle muss mit den Angaben auf
dem Typenschild des Gerätes übereinstimmen.
Geräte, die mit 230 V bezeichnet sind, können auch mit 220 V betrieben werden.
+ www.kompernass.com +++ www.kompernass.com +++ www.kompernass.com +++
5
k
manual PEBS 900 07.11.2003 11:39 Uhr Seite 5

EIN- UND AUSSCHALTEN
Sie können beim Betrieb des Bandschleifers zwischen Moment- und Dauerbetrieb auswählen.
Benutzen Sie für kurze Arbeiten den Momentbetrieb. Für normale oder länger andauernde Arbeiten
empfehlen wir den Dauerbetrieb. Die Bedienung Ihrer gewünschten Einstellung funktioniert wie folgt:
MOMENTBETRIEB EINSCHALTEN: Schalter EIN/AUS drücken
MOMENTBETRIEB AUSSCHALTEN: Schalter EIN/AUS
loslassen
DAUERBETRIEB EINSCHALTEN: Schalter EIN/AUS
drücken und im gedrückten Zustand
mit dem Feststellknopf
feststellen
DAUERBETRIEB AUSSCHALTEN: Schalter EIN/AUS
drücken und wieder loslassen
SCHLEIFBLATT EINSPANNEN /WECHSELN
ACHTUNG: Bevor Sie Arbeiten am Bandschleifer durchführen immer den Stecker aus
der Steckdose ziehen.
1) Lösen Sie zunächst die Spannvorrichtung für das Schleifband indem Sie den Spannhebel ganz
herausschwenken (siehe Abbildung
). Die Spannvorrichtung ist nun geöffnet und das Schleifband
lässt sich entnehmen.
2) Legen Sie nun ein neues Schleifband auf bzw. wechseln Sie es aus, um anderes Material zu
beabeiten oder die Kornstärke zu wechseln.
WICHTIG: Die Pfeilrichtungen auf der Innenseite des Schleifbandes und am Gerätegehäuse müssen
übereinstimmen (siehe auch Abb.
).
3) Spannen Sie das Schleifband fest – bringen Sie den Spannhebel
wieder in die Ausgangsposition.
4) Nehmen Sie das Gerät hoch und schalten Sie es ein. Justieren Sie nun den Bandlauf indem Sie die
Justierschraube
so drehen, bis die Kante des Schleifbandes bündig und parallel mit dem Gleitblech
verläuft.
Achten Sie unbedingt darauf, dass sich das Schleifband nicht am Gehäuse einschleift. Prüfen Sie
regelmäßig den Bandlauf und regeln Sie ihn wenn nötig mit der Justierschraube
nach.
ARBEITSHINWEISE
Schalten Sie den Bandschleifer immer vor Materialkontakt ein und führen Sie das Gerät erst dann
auf das Werkstück.
GERINGER SCHLEIFDRUCK GENÜGT
Arbeiten Sie mit möglichst geringem Schleifdruck. Das Eigengewicht des Bandschleifers reicht
für gute Schleifleistungen absolut aus.
www.kompernass.com +++ www.kompernass.com +++ www.kompernass.com +++ w
6
k
manual PEBS 900 07.11.2003 11:39 Uhr Seite 6

Zusätzlich schonen Sie durch diese Abeitsweise den Verschleiß des Schleifbandes, die Oberfläche
des Werkstückes wird glatter und der Energieverbrauch verringert.
ABTRAG UND OBERFLÄCHE
Die Abtragsleistung und die Oberflächengüte werden von der Bandgeschwindigkeit und
der Kornstärke des Schleifbandes bestimmt (siehe auch Abschnitt »Drehlzahl und Schleifblatt
wählen«). Grundsätzlich gilt: je höher die Drehzahl/Bandgeschwindigkeit, desto höher ist
der Abtrag und desto feiner ist die Schleifoberfläche.
SCHLEIFVORGANG
Das Gerät eingeschaltet auf das Werkstück platzieren und mit mäßigem Vorschub arbeiten.
Führen Sie den Schleifvorgang parallel und überlappend zu den Schleifbahnen durch. Zur Vermeidung
von störenden, querlaufenden Schleifspuren nur in Faserrichtung schleifen.
STAUBABSAUGUNG
Tragen Sie eine Staubschutzmaske! Die Staubabsaugung erleichtert die Entsorgung und verhindert
größere Verschmutzungen und eine hohe Staubbelastung in der Atemluft. Zusätzlich wird vermieden,
dass herumliegender Schleifstaub während des Arbeitsvorgangs erfasst wird und dadurch Schmier-
oder Brandflecke auf dem Werkstück verursacht.
Ziehen Sie den Staubsack
über den mitgelieferten Adapter und befestigen Sie ihn am
Absaugstutzen
. Der bügelförmige Adapter sorgt dafür, dass der Staubsack innen ausreichend
geöffnet ist, damit der Schleifstaub aufgenommen werden kann (siehe auch Abb.
). Den Staubsack
regelmäßig leeren.
An den Absaugstutzen
können Sie auch einen Haushalts-Staubsauger anschließen (siehe auch
Abb.
). Verwenden Sie einen Haushalts-Staubsauger jedoch nicht zum Absaugen von explosivem
Staub/Luftgemisch.
WARNUNG! Bei explosivem Staub/Luftgemisch müssen Sie einen dazu speziell geeigneten
Absauger verwenden.
BRANDGEFAHR! Beim Schleifen von Metallen (Funkenflug) keine Staubabsaugung
(Staubsack oder Staubsauger) verwenden.
HINWEISE
• Führen Sie den Bandschleifer stets mit beiden Händen und gleichmäßigem Vorschub über die
zu bearbeitende Fläche.
• Der Zusatz-Handgriff
läßt sich verstellen bzw. abschrauben. Sie können dann auch an eventuell
schwer zugängliche Stellen gelangen.
+ www.kompernass.com +++ www.kompernass.com +++ www.kompernass.com +++
7
k
manual PEBS 900 07.11.2003 11:39 Uhr Seite 7

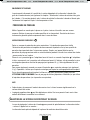
DREHZAHL UND SCHLEIFBLATT WÄHLEN
Mit dem Stellrad Bandgeschwindigkeit können Sie Drehzahl – auch bei laufendem Gerät –
vorwählen. Die optimale Bandgeschwindigkeit ist abhängig von dem zu bearbeitenden Werkstück
bzw. Material. Ermitteln Sie die jeweils beste Drehzahl immer selbst in einem praktischen
Versuch. In der nachfolgenden Tabelle finden Sie unverbindliche Werte, die Ihnen die Ermittlung
erleichtern.
WARTUNG UND PFLEGE
ACHTUNG: Bevor Sie Arbeiten am Bandschleifer durchführen immer den Stecker aus der Steckdose
ziehen.
1) Reinigen Sie den Bandschleifer regelmässig, am besten immer direkt nach Abschluss der Arbeit.
2) Keine scharfen Gegenstände zur Reinigung des Bandschleifers verwenden. Es dürfen keine
Flüssigkeiten in das innere des Bandschleifers gelangen. Zum Reinigen des Gehäuses ein weiches
Tuch verwenden – auf keinen Fall Benzin, Lösungsmittel oder Reiniger, die Kunststoff angreifen.
3) Lüftungsöffnungen müssen immer frei sein.
4) Entfernen Sie anhaftenden Schleifstaub mit einem Pinsel. Zur Erhaltung der optimalen Saugleistung
von Zeit zu Zeit die Schutzabdeckung
abschrauben und den Staubgang vorsichtig säubern.
ENTSORGUNG
Die Verpackung besteht zu 100% aus umweltfreundlichen Materialen, die Sie über die örtlichen
Recyclingstellen entsorgen können.
Über Entsorgungsmöglichkeiten für ausgediente Elektrowerkzeuge informieren Sie sich bitte bei Ihrer
Gemeinde- oder Stadtverwaltung.
TIPPS UND TRICKS
• Niemals mit dem selben Schleifband Holz und Metall bearbeiten.
• Verschlissene oder eingerissene Schleifbänder können das Werkstück beschädigen. Wechseln Sie
die Schleifbänder deshalb rechtzeitig aus.
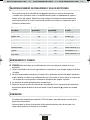
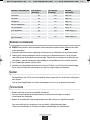
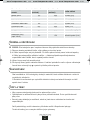
Werkstoff / Arbeitsbereich Grobschliff (Körnung) Feinschliff (Körnung) Drehzahlvorwahl
Weichholz 060 240 hoch (5-6)
Hartholz 060 180 hoch (5-6)
Spannplatten 060 150 hoch (5-6)
Farbe/Lacke entfernen 060 –– hoch (5-6)
Lacke anschleifen 150 320 niedrig (1-2)
Stahl entrosten 040 120 mittel/hoch (3-4)
Kunststoffe 120 240 niedrig/mittel (2-3)
Nichteisen-Metalle (z.B. Alu) 080 150 mittel/hoch (3-4)
www.kompernass.com +++ www.kompernass.com +++ www.kompernass.com +++ w
8
k
manual PEBS 900 07.11.2003 11:39 Uhr Seite 8

• Bewahren Sie Schleifbänder nur hängend auf, da sie durch Knicke etc. unbrauchbar werden.
Weitere praktische Tipps finden Sie ebenfalls im beiliegenden Heft »Sicherheitshinweise«.
Technische Änderungen im Sinne der Weiterentwicklung sind vorbehalten.
KONFORMITÄTSERKLÄRUNG
Wir, Kompernaß Handelsgesellschaft mbH, Burgstr. 21, D-44867 Bochum, erklären hiermit für
dieses Produkt die Übereinstimmung mit folgenden EG-Richtlinien:
Maschinenrichtlinie: 98/37 EEG
EG-Niederspannungsrichtlinie: 73/23 EEG
Elektromagnetische Verträglichkeit: 89/336 EEG
Angewandte harmonisierte Normen: EN 55014-1, EN 61000-3-2, EN 61000-3-3, EN 55014-2
Maschinentyp/Type: PARKSIDE BANDSCHLEIFMASCHINE PEBS 900
Bochum, 31.10.2003
Hans Kompernaß
- Geschäftsführer -
9
k
+ www.kompernass.com +++ www.kompernass.com +++ www.kompernass.com +++
manual PEBS 900 07.11.2003 11:39 Uhr Seite 9

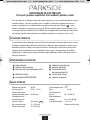
PEBS 900 BELT SANDER
For sanding large areas. For wood, plastic and metal
Please read carefully through the following information concerning safety and proper use. Before
reading, fold out the page with the illustrations and make yourself familiar with all the functions of
the equipment. Please read the operating instructions below and the accompanying safety
advice carefully. Use the equipment only as described and for the indicated purposes. By doing
this you will be able to work in complete safety and produce better results. Be careful to keep these
advice notes and if necessary pass them on to a third party.
PROPER USE
The belt sander is intended for dry-sanding and polishing wood, metal and paint. Always use a
sanding belt and grade of grit suitable for the particular surface you are sanding. The speed selected
should also be appropriate for the material. Any other use or modification to the belt sander shall be
considered as improper use and could give rise to considerable dangers. The manufacturer will not
accept liability for loss or damage arising from improper use.
FEATURES OF THE PEBS 900
Auxiliary handle Protective cover
Ventilation slots Dust extraction spout
Belt speed selector wheel Belt adjuster screw
Locking knob Tensioning lever
ON / OFF switch Dust collection bag
TECHNICAL INFORMATION
Rated consumption: 900 W Protection class: II/
Nominal voltage: 230 V ~ 50 Hz Weight: 3.8 kg
Belt no load speed: n
0
650 rpm Sound pressure level: Lp = 87 dB (A)
Belt /sanding speed Sound output level: Lw = 100 dB (pw)
at maximum speed: 350 m/min Vibration: < 2.5 m/s
2
(Hand-
Abrasive surface: 75 x 150 mm arm vibration)
Belt: 75 x 533 mm
The PEBS 900 belt sander has full-wave electronics with additional control electronics, overload
control, soft start and power control.
Soft start with inrush current limiting.
www.kompernass.com +++ www.kompernass.com +++ www.kompernass.com +++ w
10
t
10
manual PEBS 900 07.11.2003 11:39 Uhr Seite 10

11
t
+ www.kompernass.com +++ www.kompernass.com +++ www.kompernass.com +++
IMPORTANT SAFETY ADVICE
· In addition, please read the advice in the accompanying booklet called "Safety advice" before using
the equipment for the first time.
· The PEBS 900 belt sander is designed for dry sanding of large surfaces of wood, plastic, metal and –
with increased removal rate – plaster and painted surfaces. The belt sander is only to be used for dry
sanding.
· If the mains cable becomes damaged or cut through whilst you are working, never touch the cable –
pull the plug out of the mains socket immediately. Never use electrical equipment with a damaged
mains cable.
· When working always keep the cable running away from the back of the machine.
· The belt sander should be connected to a suitable external vacuum suction device when sanding
wood for long periods and in particular when sanding materials that give rise to dusts that may be
hazardous to health. Wear a breathing mask, ear protectors and protective glasses.
· The sander is not to be used on materials containing asbestos.
· Secure the workpiece to be sanded if it is not stable under its own weight.
· Always make sure that the machine is switched off before you pull the socket out of the mains
socket.
· Switch on the belt sander first before you bring it into contact with the workpiece and lift the sander
off the workpiece before you switch it off.
· Do not continue to use a sanding belt if it is worn out or ripped.
· Avoid touching the moving sanding belt - danger of injury.
· Switch off the machine and let the belt come to a standstill before you place the sander down.
· Attention: sparks may be generated during use - danger of fire. Sparks may be generated when
metals are being sanded. You should therefore always be careful to ensure that no one is placed in
danger and no inflammable materials are kept near the working area.
· Use original spare parts and accessories to ensure the best performance from your sander.
USING THE SANDER FOR THE FIRST TIME
Note the mains voltage. The mains voltage must correspond with that shown on the sander rating
plate.
Equipment labelled as 230 V may also be used with 220 V.
SWITCHING ON AND OFF
You can select intermittent or continuous operation mode. For short busts of sanding use the
intermittent setting. For normal or longer periods of sanding we recommend the continuous setting.
Operation in your selected mode is as follows:
SWITCH ON INTERMITTENT MODE: Press the ON/OFF switch
SWITCH OFF INTERMITTENT MODE: Release the ON/OFF switch
11
manual PEBS 900 07.11.2003 11:39 Uhr Seite 11

SWITCH ON CONTINUOUS MODE: Press the ON/OFF switch and secure it in the pressed
position with the locking knob
SWITCH OFF CONTINUOUS MODE: Press the ON/OFF switch and then release it
TENSIONING/CHANGING THE SANDING BELT
ATTENTION: Before you carry out any work on the belt sander always pull the plug out of the
mains socket.
1) Release the tensioner for the sanding belt by turning the tensioning lever fully outwards
(see figure
). The belt holder is now open and sanding belt can be removed.
2) Next insert a new sanding belt or change the belt for one suitable for a different material or one
with a different grit.
IMPORTANT: The direction of the arrow on the inside of the sanding belt must agree with that on
sander housing (see Fig.
).
3) Fully tension the sanding belt – turn the tensioning lever I back into its initial position.
4) Lift up the sander and switch it on. Adjust the belt tracking by turning the adjuster screw
until
the edge of the sanding belt is flush with and runs parallel to the slider plate.
Always make sure that the sanding belt does not cut into the housing. Check the sanding belt
regularly and re-adjust if necessary using the adjuster screw
.
ADVICE ON SANDING
Always switch on the belt sander before making contact with the material and only then guide
the sander on to the workpiece.
USE LIGHT SANDING PRESSURE ONLY
Use the lightest possible pressure when sanding. The self-weight of the belt sander alone is quite
sufficient for good sanding performance.
In addition, by working this way you will achieve a smoother surface and use less energy.
MATERIAL REMOVED AND SURFACE FINISH
The amount of material removed by sanding and the quality of the surface finish achieved depend
on the belt speed and the grit size of the sanding belt (see section on “Belt speed and sanding
sheet”). The following basic rules apply: the higher the rpm/belt speed you use, the more material is
removed and the finer is the sanded surface.
www.kompernass.com +++ www.kompernass.com +++ www.kompernass.com +++ w
12
t
12
manual PEBS 900 07.11.2003 11:39 Uhr Seite 12

13
t
+ www.kompernass.com +++ www.kompernass.com +++ www.kompernass.com +++
SANDING PROCEDURE
With the sander switched on, bring it into contact with the workpiece and move it forward carefully.
Continue sanding using overlapping strokes parallel to the belt track. Always work in the direction of
the grain to avoid undesirable transverse sanding marks.
VACUUM EXTRACTION OF DUST
Wear a dust mask! Vacuum extraction of dust makes disposal easier, prevents the build up of
stubborn dust deposits and keeps dust out of the air you are breathing. It will also prevent sanding
debris from getting on to the workpiece surface and leaving grease or burn marks.
Pull the dust collection bag
over the supplied adapter and attach it to the dust extraction spout .
The stirrup-shaped adapter ensures that the dust collection bag is fully opened out to accept the
sanding dust (see Fig.
). Empty the dust collection bag regularly.
You can also attach a domestic vacuum cleaner to the dust extraction spout
(see Fig. ). Do not
use the domestic vacuum cylinder to extract an explosive mixture of dust and air
.
If there is an explosive mixture of dust and air you must use a vacuum device especially intended for
that purpose.
ATTENTION - DANGER OF FIRE: Do not use vacuum dust extraction (dust bag or vacuum cleaner)
when sanding metals (flying sparks).
NOTE
• Always move the belt sander over the workpiece surface with both hands using even movements.
• The auxiliary handle
can be adjusted or removed to allow you to sand those difficult-to-reach
places.
SELECTING BELT SPEED AND SANDING SHEET
You can select the belt speed using the belt speed selector wheel , even whilst the sander is
running. The optimum belt speed depends on the workpiece and the workpiece material. Always
confirm the best speed by carrying out a small test. The following table lists some recommended
values to help you determine the optimum speed.
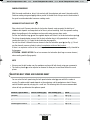
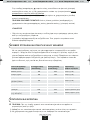
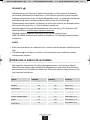
Material / type of work Coarse sanding (grit) Fine sanding (grit) Speed
Softwood 060 240 high (5-6)
Hardwood 060 180 high (5-6)
Plywood 060 150 high (5-6)
Removing paint/varnish 060 –– high (5-6)
13
manual PEBS 900 07.11.2003 11:39 Uhr Seite 13

www.kompernass.com +++ www.kompernass.com +++ www.kompernass.com +++ w
14
t
CARE AND MAINTENANCE
ATTENTION: Before you carry out any work on the belt sander always pull the plug out of the
mains socket.
1) Clean the belt sander regularly. The best time is immediately after you have finished working with it.
2) Do not use any sharp objects to clean the belt sander. Do not allow any liquids to enter the belt
sander. Use a moist cloth to clean the housing - never use petrol, solvents or cleaners that attack
plastic.
3) Always keep the ventilation slots clear.
4) Remove any adhered sanding dust using a narrow paint brush. Unscrew the protective cover
from time to time and carefully clean out the dust channels to ensure optimum dust extraction.
DISPOSAL
The packaging is wholly composed of environmentally-friendly materials that can be disposed of at
a local recycling centre.
Please contact your local council office to find out about disposal facilities for your worn-out
electrical tools.
TIPS AND TRICKS
• Never use the same sanding belt to sand wood and metal.
• Worn or ripped sanding belts can damage the workpiece. Make sure you change the sanding belt at
the appropriate time.
• Keep the sanding belt properly tensioned so that it does not hang down too much and become
unusable due to knicks, creases etc.
You can find further practical tips in the accompanying booklet "Safety Advice".
We reserve the right to make technical modifications in the course of further development.
14
Material / type of work Coarse sanding (grit) Fine sanding (grit) Speed
Smoothing varnish 150 320 low (1-2)
Removing rust 040 120 medium/high (3-4)
Plastic 120 240 low/medium (2-3)
Non-ferrous metals
(e.g. aluminium)
080 150 medium/high (3-4)
manual PEBS 900 07.11.2003 11:39 Uhr Seite 14

15
t
+ www.kompernass.com +++ www.kompernass.com +++ www.kompernass.com +++
DECLARATION OF CONFORMITY
We, Kompernaß Handelsgesellschaft mbH, Burgstr. 21, D-44867 Bochum, hereby declare that this
product complies with the following EU directives:
Machinery directive: 98/37 EC
Low voltage directive: 73/23 EEC
Electromagnetic compatibility: 89/336 EEC
Applicable harmonised standards: EN 55014-1, EN 61000-3-2, EN 61000-3-3, EN 55014-2
Brand, description of the machine: PARKSIDE PEBS 900 BELT SANDER
Bochum, 31.10.2003
Hans Kompernaß
- Managing Director -
15
manual PEBS 900 07.11.2003 11:39 Uhr Seite 15

PONCEUSE A BANDE PEBS 900
Ponçage de surfaces de grandes dimensions.
Pour bois, plastiques, métaux.
Lisez attentivement les informations suivantes relatives à la sécurité et à une utilisation correcte
de l'appareil. Avant la lecture, ouvrez la page comportant les illustrations et familiarisez-vous ensuite
avec l'ensemble des fonctions de l'appareil. Pour ce faire, lisez attentivement les instructions de
service ci-dessous et les instructions de sécurité ci-joint .
N'utilisez l'appareil que comme il l'est décrit et dans les domaines d'utilisation mentionnés. Ceci vous
permettra de travailler sans danger et d'obtenir de meilleurs résultats pour vos travaux.
Conservez soigneusement ces instructions et remettez-les le cas échéant à des tiers.
UTILISATION CONFORME A L’USAGE PREVU
La ponceuse à bande est conçue pour le ponçage à sec et le polissage de bois, de métaux et de
peintures. Veillez à utiliser pour le traitement des différents matériaux des bandes correspondantes
de grains différents, et à adapter également la vitesse en fonction du matériau. Toute utilisation autre
ou modification de la machine est considérée comme non-conforme à l’usage prévu et implique des
risques d’accident importants. Le fabricant n’assume aucune garantie ni responsabilité pour les
dommages résultant d’une utilisation non-conforme à l’usage prévu.
EQUIPEMENT PEBS 900
Poignée supplémentaire Capot de protection
Fentes d'aération Raccord aspiration
Roue de réglage vitesse Vis d'ajustage pour
de la bande le fonctionnement de la bande
Bouton de blocage Levier de tension
Commutateur MARCHE/ARRET Sac à poussière
DONNEES TECHNIQUES
Puissance absorbée nominale: 900 W Classe de protection: II/
Tension nominale: 230 V ~ 50 Hz Poids: 3,8 kg
Bande abrasive/vitesse Niveau de
de rotation à vide: n
0
650 tr./mn. pression acoustique: Lp = 87 dB (A)
Vitesse de la bande/de ponçage Niveau de
à la vitesse de rotation maximale: 350 m/mn. puissance acoustique: Lw = 100 dB (pw)
Surface de ponçage: 75 x 150 mm Facteur de vibration: < 2,5 m/s
2
Bande abrasive: 75 x 533 mm (vibration main-bras)
www.kompernass.com +++ www.kompernass.com +++ www.kompernass.com +++ w
16
p
manual PEBS 900 07.11.2003 11:39 Uhr Seite 16

La ponceuse à bande PEBS 900 dispose d'un système électronique à ondes pleines avec dispositif
électronique de réglage supplémentaire, contrôle de surcharge, démarrage en douceur et ajustage
de la puissance.
démarrage en douceur avec limitation du courant de mise en route.
INSTRUCTIONS DE SECURITE IMPORTANTES
· Avant la première mise en service, lisez également les indications du carnet » Instructions de
sécurité«
· La ponceuse à bande PEBS 900 est conçue pour le ponçage à sec de surfaces en bois, plastique
et métal, et – à un haut niveau d'enlèvement – de mastic et de surfaces peintes. N'utiliser la
ponceuse à bande que pour le ponçage à sec.
· Si, lors des travaux, le cordon est endommagé ou coupé, ne jamais toucher le cordon, – débranchez
immédiatement la prise. N'utilisez jamais des appareils électriques dont le cordon est endommagé.
· Faites toujours passer le cordon vers l'arrière en l'éloignant de l'appareil.
· En cas de travail prolongé sur du bois et, en particulier, si les matériaux usinés renferment
des poussières toxiques, raccorder la ponceuse à bande à un dispositif d'aspiration externe
adapté. Portez un masque de protection des voies respiratoires, un casque et des lunettes de
protection.
· Ne pas travailler sur un matériau renfermant de l'amiante.
· Si la pièce à usiner n'a pas une assise sûre suffisante de par son propre poids, bloquez-la.
· Veillez à ce que l'appareil soit toujours éteint avant de brancher la prise mâle dans une prise femelle.
· Ne placer la ponceuse à bande sur la pièce à usiner que si l'appareil est en marche et n'éteindre
l'appareil que lorsqu'on l'a retiré de la pièce à usiner.
· N'utilisez pas de bandes abrasives fortement usées ou déchirées.
· Evitez tout contact avec la bande en mouvement – danger de blessure.
· Eteindre toujours l'appareil et laisser la bande arriver à l'arrêt complet avant de déposer la ponceuse.
· Attention projection d'étincelles – risque d'incendie! Si vous poncez des métaux, il se forme des
projections d'étincelles. Veillez donc à ce que personne ne soit mis en danger et à ce qu'aucuns
matériaux inflammables ne se trouvent à proximité du domaine de travail.
· Un fonctionnement parfait ne peut être assuré que si l'on utilise des pièces de rechange d'origine.
MISE EN SERVICE
Respectez la tension du secteur. La tension de la source de courant doit correspondre à celle
mentionnée sur la plaque signalétique de l'appareil. Les appareils marqués pour 230 V peuvent
également être utilisés sur 220 V.
MISE EN MARCHE ET A L'ARRET
Pour le fonctionnement de la ponceuse à bande, vous pouvez choisir entre fonctionnement alternatif
et fonctionnement continu. Pour les petits travaux, utilisez le mode de fonctionnement alternatif.
17
p
+ www.kompernass.com +++ www.kompernass.com +++ www.kompernass.com +++
manual PEBS 900 07.11.2003 11:39 Uhr Seite 17

Pour les travaux normaux ou de plus longue durée, nous recommandons le mode de fonctionnement
continu. Pour le réglage du mode de fonctionnement voulu, procéder comme suit:
MISE EN MARCHE MODE ALTERNATIF: appuyer sur le commutateur MARCHE/ARRET
MISE A L'ARRET MODE ALTERNATIF: relâcher le commutateur MARCHE/ARRET
MISE EN MARCHE MODE CONTINU: appuyer sur le commutateur MARCHE/ARRET
et le bloquer à l'état appuyé à l'aide du bouton de blocage
MISE A L'ARRET MODE CONTINU: appuyer sur le commutateur MARCHE/ARRET et le relâcher
BANDE ABRASIVE MISE EN PLACE /REMPLACEMENT
ATTENTION: Avant de procéder à tous travaux au niveau de la ponceuse à bande, débrancher
toujours
la prise de la prise murale.
1) Desserrez tout d'abord le dispositif de serrage de la bande abrasive en faisant pivoter
complètement vers l'extérieur le levier de tension (voir illustration ). Le dispositif de serrage est
alors ouvert et la bande abrasive peut être retirée.
2) Mettez alors en place une bande abrasive neuve ou changez de bande pour pouvoir travailler sur
un autre matériau ou changer de grain.
IMPORTANT: Le sens des flèches sur le côté intérieur de la bande abrasive et sur le boîtier de
l'appareil doit correspondre (voir également ill.
).
3) Serrez fermement la bande abrasive – remettez le levier de tension
dans sa position de départ.
4) Levez l'appareil et mettez-le en marche. Ajustez la course de la bande en faisant tourner la vis
d'ajustage H jusqu'à ce que le bord de la bande abrasive soit parallèle et bord à bord avec la tôle
de glissement.
Veillez obligatoirement à ce que la bande abrasive ne frotte pas contre le boîtier. Contrôlez
régulièrement la course de la bande et réajustez-là si nécessaire à l'aide de la vis d'ajustage
.
INDICATIONS DE TRAVAIL
Mettez toujours la ponceuse à bande en marche avant de la mettre en contact avec le matériel
et ne posez l'appareil qu'ensuite sur la pièce.
UNE FAIBLE PRESSION SUFFIT
Travaillez dans la mesure du possible avec une pression faible. Le poids propre de la ponceuse
à bande suffit parfaitement pour obtenir de bons résultats. De plus, cette façon de travailler permet
de réduire l'usure de la bande abrasive, la surface de la pièce à usiner est plus lisse et la
consommation d'énergie plus faible.
www.kompernass.com +++ www.kompernass.com +++ www.kompernass.com +++ w
18
p
manual PEBS 900 07.11.2003 11:39 Uhr Seite 18

ENLEVEMENT ET SURFACE
La puissance d'enlèvement et la qualité de la surface dépendent de la vitesse de la bande et du
grain de la bande abrasive (voir également le chapitre » Sélection de la vitesse de rotation et du grain
de la bande «). De manière générale, plus la vitesse de rotation/la vitesse de la bande est élevée, plus
l'enlèvement est important et plus la surface poncée est fine.
PROCEDURE DE PONCAGE
Mettre l'appareil en marche puis le placer sur la pièce à usiner et travailler avec une avance
moyenne. Réalisez le ponçage en bandes parallèles et se chevauchant. Pour éviter des traces
transversales gênantes, poncer uniquement dans le sens des fibres.
ASPIRATION DES POUSSIERES
Portez un masque de protection des voies respiratoires ! L'aspiration des poussières facilite
l'élimination des poussières et empêche des encrassements importants ainsi qu'une quantité de
poussière trop importante dans l'air que vous respirez. De plus, ceci permet d'éviter que les
poussières de ponçage environnantes ne soient entraînées pendant le travail et ne causent des taches
grasses ou de feu sur la pièce.
Passez le sac à poussière
sur l'adaptateur fourni et fixez-le au raccord d'aspiration . L'adaptateur
à étrier assure que le sac à poussière soit suffisamment ouvert à l'intérieur, afin de permettre la prise
en charge des poussières résultant du ponçage (voir également ill.
). Vider régulièrement le sac à
poussière.
Vous pouvez également raccorder au raccord d'aspiration
un aspirateur ménager (voir également
ill.
). Cependant, n'utilisez pas d'aspirateur ménager pour aspirer un mélange poussière/air explosif.
En cas de mélange poussière/air explosif, utilisez un aspirateur spécialement adapté pour cela.
ATTENTION RISQUE D'INCENDIE: Lors du ponçage de métaux (projections d'étincelles) ne pas utiliser
d'aspiration des poussières (sac à poussière ou aspirateur).
AVIS
• Guidez toujours la ponceuse à bande à deux mains et en la faisant avancer régulièrement sur la
surface devant être usinée.
• La poignée supplémentaire
peut être déplacée ou retirée. Ceci vous permet d'avoir accès à des
endroits difficilement accessibles le cas échéant.
SELECTION DE LA VITESSE DE ROTATION ET DU GRAIN
La roue de réglage de la vitesse de la bande vous permet de présélectionner la vitesse de rotation
– même si l'appareil est en marche –.
La vitesse de bande optimale dépend de la pièce et du matériau devant être usinés.
19
p
+ www.kompernass.com +++ www.kompernass.com +++ www.kompernass.com +++
manual PEBS 900 07.11.2003 11:39 Uhr Seite 19

Déterminez toujours vous-même par un essai la vitesse de rotation respectivement optimale. Vous
trouverez dans le tableau suivant des valeurs approximatives destinées à faciliter la détermination
de la vitesse correcte.
MAINTENANCE ET ENTRETIEN
ATTENTION: Avant de procéder à tous travaux au niveau de la ponceuse à bande, débrancher
toujours
la prise de la prise murale.
1) Nettoyez régulièrement la ponceuse à bande, de préférence toujours immédiatement après le travail.
2) Ne pas utiliser d'objets aiguisés pour nettoyer la ponceuse à bande. Ne pas faire pénétrer de liquides
à l'intérieur de la ponceuse à bande.
Pour nettoyer le boîtier, utiliser un chiffon doux – n'utiliser en aucun cas de l'essence, des solvants
ou des produits nettoyants attaquant le plastique.
3) Les fentes d'aération doivent toujours être libres.
4) Eliminez les poussières résultant du ponçage et collant à l'appareil à l'aide d'un pinceau. Pour assurer
une puissance d'aspiration optimale, dévisser de temps en temps le capot de protection
et nettoyer
avec précaution le passage des poussières.
ELIMINATION
L’emballage se compose à 100% de matériaux écologiques, que vous pouvez éliminer par
l’intermédiaire des centres de recyclage locaux.
Pour les possibilités d’élimination des appareils électroménagers usagés, renseignez-vous auprès
de votre commune.
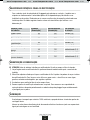
Matériau / domaine
de travail
Ponçage grossier
(grain)
Ponçage fin (grain)
Présélection de la
vitesse de rotation
Bois tendre 060 240 élevée (5-6)
Bois dur 060 180 élevée (5-6)
Contreplaqué 060 150 élevée (5-6)
Retrait de peintures/vernis 060 –– élevée (5-6)
Ponçage de laque 150 320 faible (1-2)
Elimination de rouille
sur acier
040 120 moyenne/élevée (3-4)
Plastiques 120 240 faible/moyenne (2-3)
Métaux non ferreux
(par ex. alu)
080 150 moyenne/élevée (3-4)
www.kompernass.com +++ www.kompernass.com +++ www.kompernass.com +++ w
20
p
manual PEBS 900 07.11.2003 11:39 Uhr Seite 20
A página está carregando...
A página está carregando...
A página está carregando...
A página está carregando...
A página está carregando...
A página está carregando...
A página está carregando...
A página está carregando...
A página está carregando...
A página está carregando...
A página está carregando...
A página está carregando...
A página está carregando...
A página está carregando...
A página está carregando...
A página está carregando...
A página está carregando...
A página está carregando...
A página está carregando...
A página está carregando...
A página está carregando...
A página está carregando...
A página está carregando...
A página está carregando...
A página está carregando...
A página está carregando...
A página está carregando...
A página está carregando...
A página está carregando...
A página está carregando...
A página está carregando...
A página está carregando...
A página está carregando...
A página está carregando...
A página está carregando...
A página está carregando...
A página está carregando...
A página está carregando...
A página está carregando...
A página está carregando...
A página está carregando...
A página está carregando...
A página está carregando...
A página está carregando...
A página está carregando...
A página está carregando...
A página está carregando...
A página está carregando...
A página está carregando...
A página está carregando...
A página está carregando...
A página está carregando...
A página está carregando...
A página está carregando...
A página está carregando...
A página está carregando...
A página está carregando...
A página está carregando...
A página está carregando...
-
 1
1
-
 2
2
-
 3
3
-
 4
4
-
 5
5
-
 6
6
-
 7
7
-
 8
8
-
 9
9
-
 10
10
-
 11
11
-
 12
12
-
 13
13
-
 14
14
-
 15
15
-
 16
16
-
 17
17
-
 18
18
-
 19
19
-
 20
20
-
 21
21
-
 22
22
-
 23
23
-
 24
24
-
 25
25
-
 26
26
-
 27
27
-
 28
28
-
 29
29
-
 30
30
-
 31
31
-
 32
32
-
 33
33
-
 34
34
-
 35
35
-
 36
36
-
 37
37
-
 38
38
-
 39
39
-
 40
40
-
 41
41
-
 42
42
-
 43
43
-
 44
44
-
 45
45
-
 46
46
-
 47
47
-
 48
48
-
 49
49
-
 50
50
-
 51
51
-
 52
52
-
 53
53
-
 54
54
-
 55
55
-
 56
56
-
 57
57
-
 58
58
-
 59
59
-
 60
60
-
 61
61
-
 62
62
-
 63
63
-
 64
64
-
 65
65
-
 66
66
-
 67
67
-
 68
68
-
 69
69
-
 70
70
-
 71
71
-
 72
72
-
 73
73
-
 74
74
-
 75
75
-
 76
76
-
 77
77
-
 78
78
-
 79
79


Parkside KH 3115 BELT SANDER Manual do usuário
- Categoria
- Lixadeiras elétricas
- Tipo
- Manual do usuário
- Este manual também é adequado para
em outras línguas
Artigos relacionados
-
Parkside PEBS 900 SE - 3 Manual do usuário
-
Parkside PEBS 600 - 2 Operation and Safety Notes
-
-
-
-
-
Parkside PBS 900 A1 - 5 Operation and Safety Notes
-
-
-
Outros documentos
-
Ferm BSM1021 Instruções de operação
-
Ferm BGM1022 Manual do usuário
-
Ferm BGM1003 Instruções de operação
-
Metabo BAE 75 Belt Sander Manual do usuário
-
 Bifinet KH 2500 Manual do usuário
-
 Bifinet KH 2500 Manual do usuário
-
Makita 9404 Manual do proprietário
-
-
LERVIA KH 4402 Manual do proprietário
-
Dremel DIAGRAM 285 Manual do usuário

