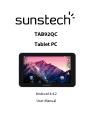
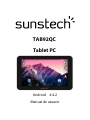
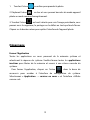
Sunstech Tab 92 QC Manual do usuário
- Categoria
- Comprimidos
- Tipo
- Manual do usuário

TAB92QC
Tablet PC
Android 4.4.2
User Manual

Tablet of Contents
Specifications............................................................................................................................1
Tablet Parts................................................................................................................................2
Getting started.........................................................................................................................3
How to use TF card................................................................................................................7
How to connect with computer.........................................................................................8
Connection to Internet.........................................................................................................8
Camera........................................................................................................................................9
Trouble Shooting..................................................................................................................10

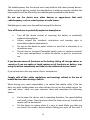
Specifications
Operating System: ANDROID 4.4.2
Display: 9 inch 800x480 Capacitive multi-touch screen
CPU: A33 Quad-Core A7 1.3GHZ
RAM: 512MB DDR III
GPU Mali-400@450Mhz
Internal Storage: 8GB,2 GB for APPS
Memory: Micro SD card up to 32GB (not supplied) Built-In
Wireless: 802.11b/g/n
Micro USB 2.0 / OTG
Front camera 0,3 Mpixels.
Battery : 5000mAh AC
Adapter: DC 5V-2A
Output headphones.
DC input jack 5V.
Built-in microphone.
Made in China
What’s Inside The box
Tablet – 1pc
Power Adapter -1pc USB
Cable -1pc
OTG Cable -1pc
Instruction manual - 1pc
Warranty card - 1pc
1

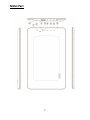
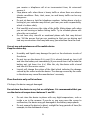
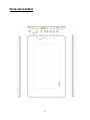
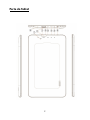
Tablet Part
2

1 ------Decrease volume Press the button to decrease the volume
2 ------Micro SD input
Insert a micro SD card (up to 32GB)
3 ------Increase volume Press the button to increase the volume
4 ------USB OTG Port
PC connection/peripheral connection through
OTG cable (for example keyboard, USB device)/
battery charge through the supplied adaptor
5 -----Earphone jack
Connect earphone to this standard 3.5mm jack.
6 -----Power
Keep pressed to turn on/off the tablet; shortly
press to activate standby mode
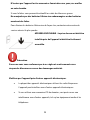
Getting Started
Battery Charging
The tablet has a built-in rechargeable Li-polymer battery.
3
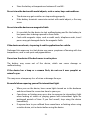
7 ----- Reset
press RESET button,Tablet will force to shutdown
Name
Function
8 ----- Power jack
Connect to 5V output adaptor.
9----Microphone
Built-in microphone

3. The tablet can be used even if the battery is being charged.
the above icons indicate the different level of power left in the battery
4.
Do not replace the battery without authorization, or the explosion
hazard might happen.
5. Recharge it for at least half hour if it has been idle for long time and fails
to start itself.
6. Regularly recharge it at least once a month
7. 40°—5° is the optimum temperature for the battery recharging or
the battery performanc
e might deteriorate slightly
Disposal
the battery might contain the polluting material, please give it to the official
recycling-station before disposing the tablet
pc, and don’t litter.
Power ON/OFF
ON:
press the button for continuous 5 seconds until the tablet turns “ON”.
OFF:
1.Press the button for continuous 5 seconds and it will appear
2.Select OK to power off the tablet
Screen Lock
This feature locks the screen, at the same time turn OFF the screen’s
backlight after a few seconds.
Screen locks when:
1. System is idle.
2. Manually activated by pressing the Power button once.
Screen unlock :
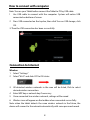
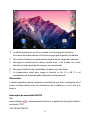
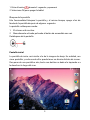
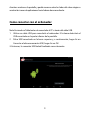
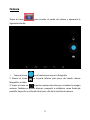
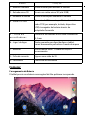
Home screen
The Home screen will look similar to the picture below. It is actually
five
4
2. The battery icon shows the battery status and charging status
1. To charge connect the AC power adapter to the micro power jack on
the right side of the tablet.

screens, each of which can have a different layout of icons. To switch between
screens, simply slide your finger left or right across the display.
The status bar and navigation buttons are always visible, no matter which
Home screen you can currently viewing.
The Desktop contains shortcuts to your most-used applications and widgets
Touch the screen icon to quickly search the World Wide Web using Google.
The
icon will launch the Application menu.
The status bar displays system information, such as current time, wireless
connectivity and battery.
Touch to Expand the status bar for more detailed information.
The
button moves back one step to the previous menu/page.
The
buttons returns immediately to the Android desktop.
The
button display a menu of recently opened applications.
5

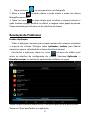
The settings menu allows you to adjust Tablet system
configuration. To change settings:
1. Touch the "Settings"
menu icon on the Application menu.The
Settings menu will open.
2. Guide your finger up or down the left side of the screen to scroll through
the list of available categories.
3. Touch a category title to view further options on the right side of the
screen.
Wi-Fi - Connect to /disconnect from wireless networks, view connection
status Data usage - Enable / disable mobile data, view current usage, set
mobile data limit (note: this function is available only on devices supplied with
3G card) Sound - Change volume, touch sound, screen lock sounds etc
Display - Change brightness, wallpaper, sleep settings, font size etc
Storage - Manage NAND and Micro SD card, view available capacity etc
Battery - See battery status and powered-on time Apps - Manage applications,
running services etc Accounts - Manage accounts etc
Apps - Manage applications, running services etc
USERS& PROFILES- TO create a new user and profiles.
Accounts & sync - Switch synchronization on /off, manage accounts etc
Location services - Change approximate location detection, improve search
results
Security - Change screen lock type, encryption, password, credential storage
etc Language & input Select language, add to the dictionary, edit on-
screen keyboard settings, vocal search, etc
Backup & reset - Backup & restore data, perform factory reset, etc
Date & time - Set date, time zone, time, clock format etc
Accessibility - Set up large text, auto-rotate screen, speak password etc
Developer options - Advanced functions for Android developers - debugging,
HDCP check etc
About tablet - Information about your Android device
6
Settings Menu

2. A prompt will be seen on the screen saying “ Preparing SD card “
Removing TF card
1. Close all applications and documents which have been opened from the TF
card.
3. Select “Setting” and find “ Storage” then click “Unmount SD card”.
4. A prompt will be seen on the screen saying “ SD card safe to remove”
5. Gently press the TF card to remove and pull out the TF card.
Note: Insert the TF card in correct position, otherwise it will damage the card
and the slot.
Software Keyboard
The tablet has a software keyboard which automatically show up when
you tap the place on screen where text or number are to be entered.
Touch Screen
The touch screen responds to finger touch.
Note: don’t place any object on the touch screen for it may damage or crush
the screen.
Single Click: single click one icon to choose the icon or option you want.
Long Press: press and hold one icon to make appear a menu related to the
executed function (if available).
Drag: drag on the screen and you can move between magic cube sides or
drag the application icons into the shortcut bar.
7
How to Use TF card
1.
Insert the TF card into the TF
card slot. Gently push TF card into slot until it
clicks into place.

2 Press USB connected on the top bar, then click Turn on USB storage, click
OK.
3. Then the USB connection has been successfully.
Connection to Internet
Wireless:
1 Select “ Settings”
2 Select “Wi-Fi” and slide OFF to ON status.
3 All detected wireless networks in the area will be listed, Click to select
desired wireless connection.
4 Enter WEP key or network key if necessary.
5 Once connected to a wireless network, settings will be saved
6 Wireless icon will appear on the taskbar when connected successfully.
Note: when the tablet detects the same wireless network in the future, the
device will connect to the network automatically with same password record.
8
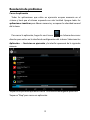
How to connect with computer
Note: Turn on your Tablet before connect the Tablet to PC by USB cable.
1 Use USB cable to connect with the computer. System will notice USB
connected on bottom of screen.

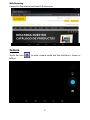
Web Browsing
Connect to the internet and launch the browser.
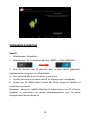
Camera
Touch the icon to enter camera mode and the interface is shown as
follows:
9

1. Touch the icon in the middle to take photo
2. Move the icon on bottom and you can switch camera mode to
camera recording mode.
3. Touch the icon on the top right to see the previous picture and you
can also delete, share, set it as the wallpaper. Click return button to exit
camera interface.
Trouble Shooting
Close Application
All running applications take up system memory and will slow down
system response. Please shut down all idle applications to release memory
and get the system speed back to normal.
To close the application, click the icon on the shortcut bar to enter
the system configuration interface. Select the Application → Running
services and the interface is shown as follows:
10

Tap the application you want to close. A pop-up window will be displayed.
Tap “Stop” to close that application.
Mandatory Power off
1. Press and hold the power button for 5 seconds and the device will be
powered off.
2. Press the reset button on the back and the device will be forced to be
powered off.
Restore Default Setting
If you want to reset the factory setting and erase all materials, please press
Settings → Backup and Reset → Factory data reset.
** Warning: Factory data reset setting will delete your data and
configuration of system and applications from downloading.
**Please use this function carefully.
Recovery Mode:
How to enter in recovery mode.
Please follow these steps.
11

1-To enter in the recovery mode first you should power off the device,
2-Then long-press the “ON-OFF” key and “VOL - ” Key at the same time
until the Recovery mode has appeared, pls try it.
3-After a new menu will appear and then you must use the touch panel
or volume keys to select “Wipe data/ factory reset” then press “Power”
and then select “Yes delete all user data”
Then press “power” again. The unit will then begin the recovery mode.
(this process may last for a few minutes).
4-When it finishes select “reboot system now” press the “power button”
and the unit will re-start itself. (this process may last for a few minutes)
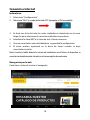
How to download the software using the unit.
IMPORTANT: When you download the software, all data will be
deleted as photos, videos and Apps that you have been installed.
Do not interrupt this process please make sure the battery is fully charged.
Please, follow these steps.
1- Open browser and search and open this link:
www.sunstech.es/download/
2- Select the model of the tablet that you have and download the
software.(This software is installed In the INTERNAL SD).
3- When it finished the download, select the App " Update " in your unit.
4-Select "Local Update", "Download".
5-Select the software / download and wait until the process is finished.
12

WARRANTY CARD
EUROPEAN WARRANTY
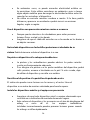
1. General
This warranty is granted without prejudice and in addition to the
recognized rights for the consumer vi
s-à-vis the
seller
provided
in the
Royal Legislative Decree of 16 November, approving the restated text of
the General Law for the Protection of Consumers and Users and other
complementary legislation. Therefore, the recognized legal rights for the
consumer are not limited or excluded according to the relevant Regional,
National or European legislation.
This warranty
shall
be
valid
in all the European Union Member States with
the limitations that legally correspond in the country in
which they
are intended to be implemented in accordance with their
implementing
legislation.
Notwithstanding the foregoing, SUNSTECH shall respect the rights and
limitations related to the product warranty that legally correspond in
each of the States listed in the Attachment in accordance with
their implementing legislation for any product provided that it is
intended for the EU market and has been purchased or used by the
consumer or user
within the EEA.
2. Legal Warranty
This SUNSTECH product has a two (2) year warranty counting from the date
of delivery and/or purchase. During the above timeframe, SUNSTECH shall
be held responsible for any lack of conformity of the product in relation to
the contract in accordance with the provisions of the Law for the Protection
of Consumers and Users, that shall entitle the consumer to request the
repair or replacement of the product, unless one of these options is
objectively impossible or disproportionate.
Accordingly, the remedy (i.e. the repair or replacement) shall be deemed
to be disproportionate if it imposes unreasonable costs on the seller. In
order to determine this, the following shall be considered: (i) the value of
the product if there were no lack of conformity; (ii) the relevance of
the lack of conformity; and (iii) if the other form of remedy could be
carried out without major inconvenience to the consumer and user.To
determine
13

whether the costs are unreasonable, the costs incurred by one form of
remedy must be significantly higher than the costs corresponding to the
other form of remedy.
In addition, the consumer may choose between requesting a reduction in
the price or terminating the contract, if he is not entitled to demand the
repair or replacement of the product and whenever these actions would
not be completed within a reasonable timeframe and would cause more
inconvenience to the consumer and user. However, the termination shall
not take place where the lack of conformity is minor.
Both the repair and the replacement of the product as result of the
product’s lack of conformity shall be free of charge for the consumer and
user, including labour and materials.
In any case, repairs under warranty shall be carried out by SUNSTECH’s
Official Technical Assistance Service or its authorized distributors.
3. Conditions for the warranty to be exercised
To exercise the legal and commercial warranty, it is necessary to submit
documentary evidence showing the delivery and/or purchase date of the
product, whether the invoice, receipt, delivery slip or sealed and dated
warranty card. Documents which have been tampered with or falsified will
not be accepted.
The consumer shall contact SUNSTECH’s Customer Service Team using the
website (under the support section) and will be informed about what
action to take. At that time, the consumer shall have to provide a clear
description of the malfunction or the lack of conformity of the product
with the contract.
In any case, repairs under the warranty shall be carried out by SUNSTECH’s
Official Technical Assistance Services or its authorized distributors so that
SUNSTECH can be held responsible under the legal and/or commercial
warranty.
14

4. Exceptions
The warranty does not foresee or include periodic maintenance or product
installation revisions.
In addition, the product will not be considered as lacking conformity in
relation to the contract and therefore, it will not be covered by the legal or
commercial warranty when:
The lack of conformity corresponds to a discrepancy with the safety
standards or the local or national techniques of a different country to
the one it was originally designed and produced in;
This product or any of its identification features (number of series,
etc.) have been partially or completely opened, assembled,
unassembled, handled and/or repaired by a person not part of
SUNSTECH’s Official Technical Assistance Services team or its
authorized distributors
The lack of conformity is a result of an incorrect installation (except if
the installation has been carried out by one of SUNSTECH’s
authorized sellers or under its responsibility, or by the consumer
following SUNSTECH’s installation instructions) or an abusive or
inadequate use of the product, including but not limited to, a usage
that is not in accordance to the normal purpose of the product or the
directions for use and maintenance, as defined by SUNSTECH;
The lack of conformity has been caused by a computer virus, an
action or a manipulation of passwords, software installation,
manipulation or reinstallation, etc.;
The lack of conformity is due to the use of accessories, chargers or
consumables that are not SUNSTECH originals and therefore are not
designed for that product;
The lack of conformity is due to the use of any third party software or
application that modifies, changes or adapts the software that was
approved and/or included by SUNSTECH in the product;
15

•
The lack of conformity is a result of downloading or using third party
multimedia services and/or contents available or accessible through
the product;
•
Damages in or through the battery, which are due to it being
overcharged, are produced;
•
Any of the box seals or battery cells have been damaged, or there is
clear evidence that shows these were handled; and/or
•
The product damages are caused by any unforeseeable or force
majeur circumstances, especially, lightning, water, fire, applying
incorrect voltage or any other cause that is not due to the product
manufacturing or design.
Under no circumstances will SUNSTECH be held responsible for the loss of any data
stored in the product. The consumer will be held responsible for any back-up copies
and the protection of any data from loss, damage or destruction.
None of the warranties included here cover the replacement of parts, due to ware or
rupture of mechanisms, rubber, boxes and/or plastic, as well as any aesthetic damage
resulting from the normal use of the product, for example, if the screen loses its shine
with the use of the product. In the same way, the warranties do not cover any type of
damage produced during the transportation of the product (including but not
limited to aesthetic damage, blows, lines, scratches, stains, dents, etc.) in which case
the applicable provisions under SUNSTECH’s general contract conditions will apply.
For further information go to www.sunstech.com
You can also contact:
AFEX SUNS, S.A.
Pallars, 189-191
08005 BARCELONA
16

17
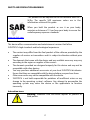
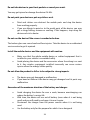
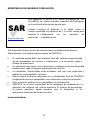
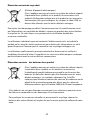
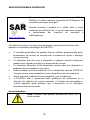
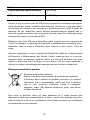
SAFETY AND PRECAUTION WARNINGS
www.sar-tick.com
This product can be adjusted to the SAR national limits of 2
W/Kg. The specific SAR maximum values are in the
information section of this guide.
When you hold the product or use it on your body,
maintain a distance of 1.5 cm from your body to ensure the
radiofrequency exposure standards.
This device offers communication and entertainment services that follow
SUNSTECH’s high standards and technological experience.
The content may differ from the final product of the software provided by the
suppliers of services or transmitters and it is subject to alteration without prior
notice.
The elements that come with the device and any available accessory may vary
according to the region or supplier of the services.
Theelementsprovidedaredesigneduniquelyforthisdeviceandmaynotbe
compatible with other devices.
You may purchase additional accessories at your local SUNSTECH distributor.
Ensure that they are compatible with the device before you purchase them.
Other accessories may not be compatible with the device.
SUNSTECH is not held responsible for problems of insufficient return or any
change to the operating system’s software. Any attempt to personalize the
operating system may cause the device or the applications to function
incorrectly.
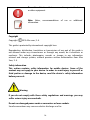
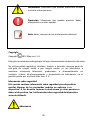
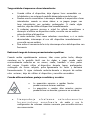
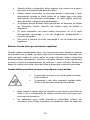
Instruction icons
Warning
: Situations that can cause injuries to yourself or
third parties.

18
Precaution
: Situations that can cause damages to the device
or other equipment.
Note:
Notes, recommendations of use or additional
information.
Copyright
Copyright 2013 Afex suns, S. A.
This guide is protected by international copyright laws.
Reproduction, distribution, translation or transmission of any part of this guide is
not allowed under any circumstances or through any means, be it electronic or
mechanic. This includes photocopies, records or storage in any information
retrieval and storage systems, without previous written authorization from Afex
Suns,S.A.
Safety information
This section contains safety information for mobile devices. Some of the
content may not apply to your device. In order to avoid injury to yourself or
third parties or damage to the device, read the device’s safety information
before you use it.
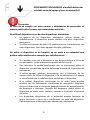
Warning
If you do not comply with these safety regulations and warnings, you may
suffer serious injury or even death.
Do not use damaged power cords or connectors or loose sockets.
Unsafe connections may cause an electric discharge or a fire.
A página está carregando...
A página está carregando...
A página está carregando...
A página está carregando...
A página está carregando...
A página está carregando...
A página está carregando...
A página está carregando...
A página está carregando...
A página está carregando...
A página está carregando...
A página está carregando...
A página está carregando...
A página está carregando...
A página está carregando...
A página está carregando...
A página está carregando...
A página está carregando...
A página está carregando...
A página está carregando...
A página está carregando...
A página está carregando...
A página está carregando...
A página está carregando...
A página está carregando...
A página está carregando...
A página está carregando...
A página está carregando...
A página está carregando...
A página está carregando...
A página está carregando...
A página está carregando...
A página está carregando...
A página está carregando...
A página está carregando...
A página está carregando...
A página está carregando...
A página está carregando...
A página está carregando...
A página está carregando...
A página está carregando...
A página está carregando...
A página está carregando...
A página está carregando...
A página está carregando...
A página está carregando...
A página está carregando...
A página está carregando...
A página está carregando...
A página está carregando...
A página está carregando...
A página está carregando...
A página está carregando...
A página está carregando...
A página está carregando...
A página está carregando...
A página está carregando...
A página está carregando...
A página está carregando...
A página está carregando...
A página está carregando...
A página está carregando...
A página está carregando...
A página está carregando...
A página está carregando...
A página está carregando...
A página está carregando...
A página está carregando...
A página está carregando...
A página está carregando...
A página está carregando...
A página está carregando...
A página está carregando...
A página está carregando...
A página está carregando...
A página está carregando...
A página está carregando...
A página está carregando...
A página está carregando...
A página está carregando...
A página está carregando...
A página está carregando...
A página está carregando...
A página está carregando...
A página está carregando...
A página está carregando...
A página está carregando...
A página está carregando...
A página está carregando...
A página está carregando...
A página está carregando...
A página está carregando...
A página está carregando...
A página está carregando...
A página está carregando...
A página está carregando...
A página está carregando...
A página está carregando...
A página está carregando...
A página está carregando...
A página está carregando...
A página está carregando...
A página está carregando...
A página está carregando...
A página está carregando...
A página está carregando...
A página está carregando...
A página está carregando...
A página está carregando...
A página está carregando...
A página está carregando...
A página está carregando...
A página está carregando...
A página está carregando...
A página está carregando...
A página está carregando...
A página está carregando...
A página está carregando...
A página está carregando...
A página está carregando...
A página está carregando...
A página está carregando...
A página está carregando...
A página está carregando...
A página está carregando...
A página está carregando...
A página está carregando...
A página está carregando...
A página está carregando...
A página está carregando...
A página está carregando...
A página está carregando...
A página está carregando...
A página está carregando...
A página está carregando...
A página está carregando...
A página está carregando...
-
 1
1
-
 2
2
-
 3
3
-
 4
4
-
 5
5
-
 6
6
-
 7
7
-
 8
8
-
 9
9
-
 10
10
-
 11
11
-
 12
12
-
 13
13
-
 14
14
-
 15
15
-
 16
16
-
 17
17
-
 18
18
-
 19
19
-
 20
20
-
 21
21
-
 22
22
-
 23
23
-
 24
24
-
 25
25
-
 26
26
-
 27
27
-
 28
28
-
 29
29
-
 30
30
-
 31
31
-
 32
32
-
 33
33
-
 34
34
-
 35
35
-
 36
36
-
 37
37
-
 38
38
-
 39
39
-
 40
40
-
 41
41
-
 42
42
-
 43
43
-
 44
44
-
 45
45
-
 46
46
-
 47
47
-
 48
48
-
 49
49
-
 50
50
-
 51
51
-
 52
52
-
 53
53
-
 54
54
-
 55
55
-
 56
56
-
 57
57
-
 58
58
-
 59
59
-
 60
60
-
 61
61
-
 62
62
-
 63
63
-
 64
64
-
 65
65
-
 66
66
-
 67
67
-
 68
68
-
 69
69
-
 70
70
-
 71
71
-
 72
72
-
 73
73
-
 74
74
-
 75
75
-
 76
76
-
 77
77
-
 78
78
-
 79
79
-
 80
80
-
 81
81
-
 82
82
-
 83
83
-
 84
84
-
 85
85
-
 86
86
-
 87
87
-
 88
88
-
 89
89
-
 90
90
-
 91
91
-
 92
92
-
 93
93
-
 94
94
-
 95
95
-
 96
96
-
 97
97
-
 98
98
-
 99
99
-
 100
100
-
 101
101
-
 102
102
-
 103
103
-
 104
104
-
 105
105
-
 106
106
-
 107
107
-
 108
108
-
 109
109
-
 110
110
-
 111
111
-
 112
112
-
 113
113
-
 114
114
-
 115
115
-
 116
116
-
 117
117
-
 118
118
-
 119
119
-
 120
120
-
 121
121
-
 122
122
-
 123
123
-
 124
124
-
 125
125
-
 126
126
-
 127
127
-
 128
128
-
 129
129
-
 130
130
-
 131
131
-
 132
132
-
 133
133
-
 134
134
-
 135
135
-
 136
136
-
 137
137
-
 138
138
-
 139
139
-
 140
140
-
 141
141
-
 142
142
-
 143
143
-
 144
144
-
 145
145
-
 146
146
-
 147
147
-
 148
148
-
 149
149
-
 150
150
-
 151
151
-
 152
152
-
 153
153
-
 154
154
-
 155
155
-
 156
156
-
 157
157


Sunstech Tab 92 QC Manual do usuário
- Categoria
- Comprimidos
- Tipo
- Manual do usuário
em outras línguas
- español: Sunstech Tab 92 QC Manual de usuario
- français: Sunstech Tab 92 QC Manuel utilisateur
- English: Sunstech Tab 92 QC User manual