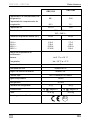
Dometic CRX1050, CRX1065, CRX1080, CRX1110, CRX1140 Instruções de operação
- Categoria
- Geladeiras
- Tipo
- Instruções de operação

Compressor refrigerator
Installation and Operating Manual. . 13
Kompressor-Kühlschrank
Montage- und Bedienungsanleitung 35
Réfrigérateur à compression
Instructions de montage
et de service . . . . . . . . . . . . . . . . . . 59
Nevera con compresor
Instrucciones de montaje y de uso . 86
Frigorífico com compressor
Instruções de montagem e manual de
instruções . . . . . . . . . . . . . . . . . . . 110
EN
DE
FR
ES
PT
CRX1050, CRX1065,
CRX1080, CRX1110,
CRX1140


CRX1050 – CRX1140
3
CRX 1050
1
2
3
5
4
6
7
1
1
2
3
5
4
6
7
CRX 1065
2

CRX1050 – CRX1140
4
1
2
3
5
4
6
7
CRX 1080
3
4
1
2
3
5
4
6
7
CRX 1110

CRX1050 – CRX1140
5
55
1
2
3
5
4
6
7
CRX 1140
1
2
3
4
6
5
7
8
6
CRX1050, CRX1065, CRX1080

CRX1050 – CRX1140
6
7
CRX1110, CRX 1140
1
2
3
4
6
5
8
7
1
4
3
2
ca. 50 mm
8

CRX1050 – CRX1140
7
2
1
9
1
2
0

CRX1050 – CRX1140
8
a
b
c

CRX1050 – CRX1140
9
∅/mm²
l/m
12 V
24 V
0 2 4 6 8 10 12 14 16 18 20 22 24 26 28
0
2
6
10
14
d
1
rt
sw
e
1
2
f

CRX1050 – CRX1140
10
1
Vent
Lock
g
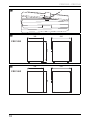
380
534
500
CRX 1050
h
CRX 1065
448
525
545
i

CRX1050 – CRX1140
11
CRX 1080
475
640
528
j
CRX 1110
520
745
558
k

CRX1050 – CRX1140
12
CRX 1140
525
812
620
l

EN
CRX1050 – CRX1140
13
Please read this instruction manual carefully before installation and
first use, and store it in a safe place. If you pass on the product to
another person, hand over this instruction manual along with it.
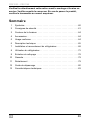
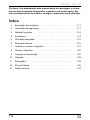
Table of contents
1 Explanation of symbols . . . . . . . . . . . . . . . . . . . . . . . . . . . . . . . . . . 14
2 Safety instructions . . . . . . . . . . . . . . . . . . . . . . . . . . . . . . . . . . . . . . 14
3 Scope of delivery . . . . . . . . . . . . . . . . . . . . . . . . . . . . . . . . . . . . . . . 17
4 Accessories . . . . . . . . . . . . . . . . . . . . . . . . . . . . . . . . . . . . . . . . . . . 17
5 Intended use . . . . . . . . . . . . . . . . . . . . . . . . . . . . . . . . . . . . . . . . . . 18
6 Technical description . . . . . . . . . . . . . . . . . . . . . . . . . . . . . . . . . . . . 18
7 Installing and connecting the refrigerator. . . . . . . . . . . . . . . . . . . . . 20
8 Using the refrigerator . . . . . . . . . . . . . . . . . . . . . . . . . . . . . . . . . . . . 23
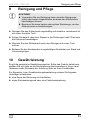
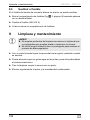
9 Cleaning and maintenance . . . . . . . . . . . . . . . . . . . . . . . . . . . . . . . 28
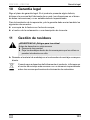
10 Warranty . . . . . . . . . . . . . . . . . . . . . . . . . . . . . . . . . . . . . . . . . . . . . 29
11 Disposal . . . . . . . . . . . . . . . . . . . . . . . . . . . . . . . . . . . . . . . . . . . . . . 29
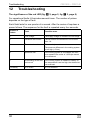
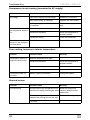
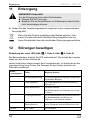
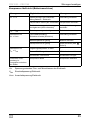
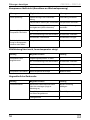
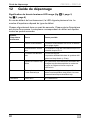
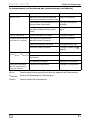
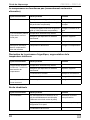
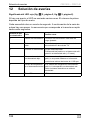
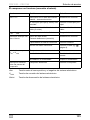
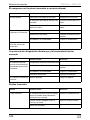
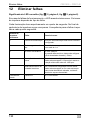
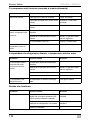
12 Troubleshooting . . . . . . . . . . . . . . . . . . . . . . . . . . . . . . . . . . . . . . . . 30
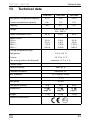
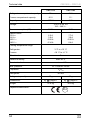
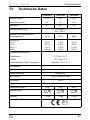
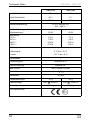
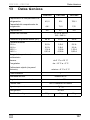
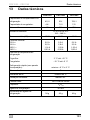
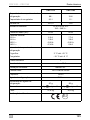
13 Technical data . . . . . . . . . . . . . . . . . . . . . . . . . . . . . . . . . . . . . . . . . 33

EN
Explanation of symbols
CRX1050 – CRX1140
14
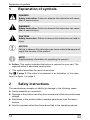
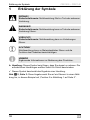
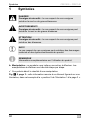
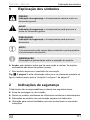
1 Explanation of symbols
D
!
!
A
I
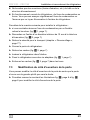
➤ Action: This symbol indicates that action is required on your part. The
required action is described step-by-step.
✓ This symbol describes the result of an action.
Fig. 1 5, page 3: This refers to an element in an illustration. In this case,
item 5 in figure 1 on page 3.
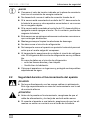
2 Safety instructions
The manufacturer accepts no liability for damage in the following cases:
Faulty assembly or connection
Damage to the product resulting from mechanical influences and excess
voltage
Alterations to the product without express permission from the manu-
facturer
Use for purposes other than those described in the operating manual
DANGER!
Safety instruction: Failure to observe this instruction will cause
fatal or serious injury.
WARNING!
Safety instruction: Failure to observe this instruction can cause
fatal or serious injury.
CAUTION!
Safety instruction: Failure to observe this instruction can lead to
injury.
NOTICE!
Failure to observe this instruction can cause material damage and
impair the function of the product.
NOTE
Supplementary information for operating the product.

EN
CRX1050 – CRX1140
Safety instructions
15
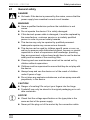
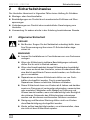
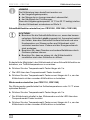
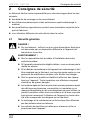
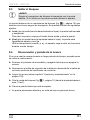
2.1 General safety
D
DANGER!
On boats: If the device is powered by the mains, ensure that the
power supply has a residual current circuit breaker.
!
WARNING!
Have a qualified technician perform the installation in wet
rooms.
Do not operate the device if it is visibly damaged.
If this device's power cable is damaged, it must be replaced by
the manufacturer, customer service or a similarly qualified
person in order to prevent safety hazards.
This device may only be repaired by qualified personnel.
Inadequate repairs may cause serious hazards.
This device can be used by children aged 8 years or over, as
well as by persons with diminished physical, sensory or mental
capacities or a lack of experience and knowledge, providing
they are supervised, or have been taught how to use the device
safely and are aware of the resulting risks.
Cleaning and user maintenance must not be carried out by
children without supervision.
Children must be supervised to ensure that they do not play with
the device.
Always keep and use the device out of the reach of children
under 8 years of age.
Do not store any explosive substances, such as spray cans with
propellants, in the device.
!
CAUTION!
Danger of crushing! Do not put your fingers into the hinge.
Foodstuff may only be stored in its original packaging or in suit-
able containers.
A
NOTICE!
Check that the voltage specification on the type plate is the
same as that of the power supply.
Never pull the plug out of the socket by the connection cable.

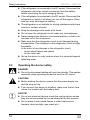
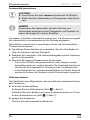
EN
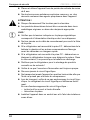
Safety instructions
CRX1050 – CRX1140
16
If the refrigerator is connected to the DC socket: Disconnect the
refrigerator and other electric consumers from the battery
before connecting the quick charging device.
If the refrigerator is connected to the DC socket: Disconnect the
refrigerator or switch it off when you turn off the engine. Other-
wise you may discharge the battery.
The refrigerator is not suitable for storing substances which are
caustic or contain solvents.
Keep the drainage outlet clean at all times.
Do not open the refrigerant circuit under any circumstances.
Never transport the device in a horizontal position, so that no oil
can leak out of the compressor.
Make sure that the refrigerator circuit is not damaged during
transportation. The refrigerant in the refrigerator circuit is highly
flammable.
In the event of any damage to the refrigerator circuit:
– Avoid naked flames and sparks.
– Air the room well.
Set up the device in a dry location where it is protected against
splashing water.
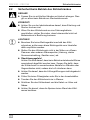
2.2 Operating the device safely
D
DANGER!
Do not touch exposed cables with your bare hands. This applies
especially when operating the device from the AC mains.
!
CAUTION!
Before starting the device, ensure that the power supply line
and the plug are dry.
If you connect the device to a battery, make sure that no food
comes into contact with the battery acid.
A
NOTICE!
Do not use electrical devices inside the cooling device unless
they are recommended by the manufacturer for that purpose.
Do not place it near naked flames or other heat sources
(heaters, direct sunlight, gas ovens etc.)

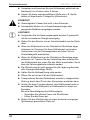
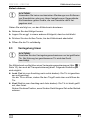
EN
CRX1050 – CRX1140
Scope of delivery
17
Danger of overheating!
Always ensure sufficient ventilation so that the heat generated
during operation can dissipate. Make sure that the device is
sufficiently far away from walls and other objects so that the air
can circulate.
Ensure that the ventilation vents are not covered.
Do not fill the inner container with ice or fluid.
Never immerse the appliance in water.
Protect the appliance and the cable against heat and moisture.
Make sure that foodstuffs do not touch the walls of the cooling
area.
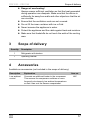
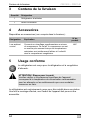
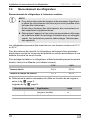
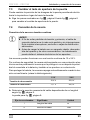
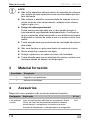
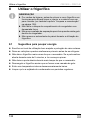
3 Scope of delivery
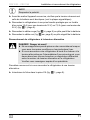
4 Accessories
Available as accessories (not included in the scope of delivery):
Quantity Description
1 Refrigerator with shelves
1 Operating manual
Description Explanation Item no.
Low ambient
control
Connects an additional heater to the compressor.
This ensures the compressor switches on more
frequently at extremely low ambient temperatures
so that it can cool the freezer compartment.
LAC

EN
Intended use
CRX1050 – CRX1140
18
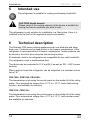
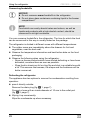
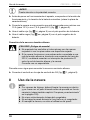
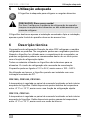
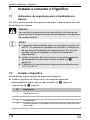
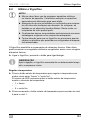
5 Intended use
The refrigerator is suitable for cooling and freezing foodstuffs.
!
The refrigerator is only suitable for installation in a fitted niche. Once it is
installed, only the front of the appliance may be accessible.
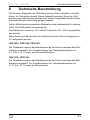
6 Technical description
The Dometic CRX series cooling appliances can cool products and keep
them cool. Products can be deep-frozen in the freezer compartment. If the
refrigerator is operated without a freezer compartment, frozen products can
be stored in the short term using the fast-cooling function.
All materials used in the refrigerator are compatible for use with foodstuffs.
The refrigerant circuit is maintenance-free.
The device can be connected to 12 V and 24 V as well as 100 – 240 V power
sources.
When used on boats the refrigerator can be subjected to a constant inclina-
tion of 30°.
CRX1050, CRX1065, CRX1080:
The temperature is set using the control panel on the inside left of the refrig-
erator. Four temperature ranges from +3 °C to +12 °C, and a fast-cooling
function, are available for selection.
CRX 1110, CRX1140:
The temperature is set using the control panel on the inside left of the refrig-
erator. Four temperature ranges from +3 °C to +12 °C, and a winter mode,
are available for selection.
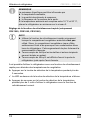
CAUTION! Health hazard!
Please check if the cooling capacity of the device is suitable for
storing the food or medicine you wish to cool.

EN
CRX1050 – CRX1140
Technical description
19
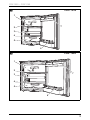
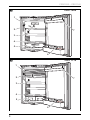
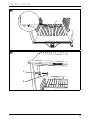
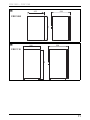
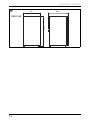
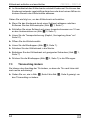
6.1 Control elements inside the fridge
The various types of refrigerators are shown in the following illustrations:
CRX1050: fig. 1, page 3
CRX1065: fig. 2, page 3
CRX1080: fig. 3, page 4
CRX1110: fig. 4, page 4
CRX1140: fig. 5, page 5
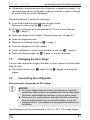
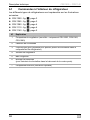
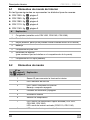
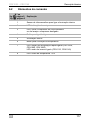
6.2 Control elements
No. Explanation
1 Freezer compartment (detachable: CRX1050, CRX1065, CRX1080 only)
2 Control panel
3 Wire shelf (folding, so that bottles can be put in the fridge)
4 Shelf
5 Fruit compartment
6 Bottle restraint
(to hold bottles in the door)
7 Compartment with lid (hinged)
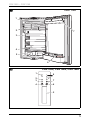
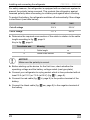
No. in
fig. 6, page 5,
fig. 7, page 6
Explanation
1 IR sensor for switching the interior light
2 LED Service display
3 LED Green: Compressor is running
Orange: Compressor is off
4 On/off button
5 Inner lighting
6 Temperature selection button
7 LED: Fast cooling function on (CRX1050, CRX1065,
CRX1080)
LED: Winter mode on (CRX1110, CRX1140)
8 LEDs: Temperature levels 1 to 4

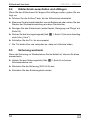
EN
Installing and connecting the refrigerator
CRX1050 – CRX1140
20
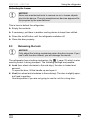
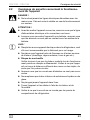
7 Installing and connecting the
refrigerator
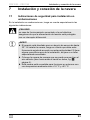
7.1 Safety instructions for installation on boats
Please note the following instructions for installation on boats:
D
A
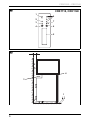
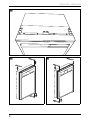
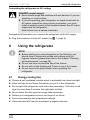
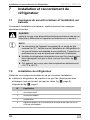
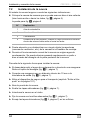
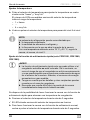
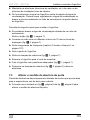
7.2 Installing the refrigerator
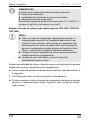
Observe the following when installing the refrigerator:
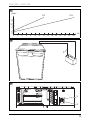
Install the refrigerator so that the warm air produced can easily flow away
(either upwards or to the sides, fig. 8, page 6).
Key for fig. 8, page 6
Keep objects clear of openings in the housing or installation structure
(such as ventilation slots, etc.).
DANGER!
If the appliance is powered by the mains, ensure that the voltage
supply has a residual current circuit breaker.
NOTICE!
The device can be tilted sideways up to 30°. When setting up
the refrigerator, note that it must be fastened to take account
of this. If you have any questions regarding installation, consult
your specialist dealer.
Install the refrigerator so that the warm air produced can easily
flow away (either upwards or to the sides, fig. 8, page 6).
The appliance is designed for ambient temperatures between
+16°C and +43°C.
No. Explanation
1 Cold intake air
2 Hot waste air
3 Condenser
4 Spacing above the refrigerator if there is not sufficient air to circu-
late above or at the side.
A página está carregando...
A página está carregando...
A página está carregando...
A página está carregando...
A página está carregando...
A página está carregando...
A página está carregando...
A página está carregando...
A página está carregando...
A página está carregando...
A página está carregando...
A página está carregando...
A página está carregando...
A página está carregando...
A página está carregando...
A página está carregando...
A página está carregando...
A página está carregando...
A página está carregando...
A página está carregando...
A página está carregando...
A página está carregando...
A página está carregando...
A página está carregando...
A página está carregando...
A página está carregando...
A página está carregando...
A página está carregando...
A página está carregando...
A página está carregando...
A página está carregando...
A página está carregando...
A página está carregando...
A página está carregando...
A página está carregando...
A página está carregando...
A página está carregando...
A página está carregando...
A página está carregando...
A página está carregando...
A página está carregando...
A página está carregando...
A página está carregando...
A página está carregando...
A página está carregando...
A página está carregando...
A página está carregando...
A página está carregando...
A página está carregando...
A página está carregando...
A página está carregando...
A página está carregando...
A página está carregando...
A página está carregando...
A página está carregando...
A página está carregando...
A página está carregando...
A página está carregando...
A página está carregando...
A página está carregando...
A página está carregando...
A página está carregando...
A página está carregando...
A página está carregando...
A página está carregando...
A página está carregando...
A página está carregando...
A página está carregando...
A página está carregando...
A página está carregando...
A página está carregando...
A página está carregando...
A página está carregando...
A página está carregando...
A página está carregando...
A página está carregando...
A página está carregando...
A página está carregando...
A página está carregando...
A página está carregando...
A página está carregando...
A página está carregando...
A página está carregando...
A página está carregando...
A página está carregando...
A página está carregando...
A página está carregando...
A página está carregando...
A página está carregando...
A página está carregando...
A página está carregando...
A página está carregando...
A página está carregando...
A página está carregando...
A página está carregando...
A página está carregando...
A página está carregando...
A página está carregando...
A página está carregando...
A página está carregando...
A página está carregando...
A página está carregando...
A página está carregando...
A página está carregando...
A página está carregando...
A página está carregando...
A página está carregando...
A página está carregando...
A página está carregando...
A página está carregando...
A página está carregando...
A página está carregando...
A página está carregando...
A página está carregando...
A página está carregando...
A página está carregando...
-
 1
1
-
 2
2
-
 3
3
-
 4
4
-
 5
5
-
 6
6
-
 7
7
-
 8
8
-
 9
9
-
 10
10
-
 11
11
-
 12
12
-
 13
13
-
 14
14
-
 15
15
-
 16
16
-
 17
17
-
 18
18
-
 19
19
-
 20
20
-
 21
21
-
 22
22
-
 23
23
-
 24
24
-
 25
25
-
 26
26
-
 27
27
-
 28
28
-
 29
29
-
 30
30
-
 31
31
-
 32
32
-
 33
33
-
 34
34
-
 35
35
-
 36
36
-
 37
37
-
 38
38
-
 39
39
-
 40
40
-
 41
41
-
 42
42
-
 43
43
-
 44
44
-
 45
45
-
 46
46
-
 47
47
-
 48
48
-
 49
49
-
 50
50
-
 51
51
-
 52
52
-
 53
53
-
 54
54
-
 55
55
-
 56
56
-
 57
57
-
 58
58
-
 59
59
-
 60
60
-
 61
61
-
 62
62
-
 63
63
-
 64
64
-
 65
65
-
 66
66
-
 67
67
-
 68
68
-
 69
69
-
 70
70
-
 71
71
-
 72
72
-
 73
73
-
 74
74
-
 75
75
-
 76
76
-
 77
77
-
 78
78
-
 79
79
-
 80
80
-
 81
81
-
 82
82
-
 83
83
-
 84
84
-
 85
85
-
 86
86
-
 87
87
-
 88
88
-
 89
89
-
 90
90
-
 91
91
-
 92
92
-
 93
93
-
 94
94
-
 95
95
-
 96
96
-
 97
97
-
 98
98
-
 99
99
-
 100
100
-
 101
101
-
 102
102
-
 103
103
-
 104
104
-
 105
105
-
 106
106
-
 107
107
-
 108
108
-
 109
109
-
 110
110
-
 111
111
-
 112
112
-
 113
113
-
 114
114
-
 115
115
-
 116
116
-
 117
117
-
 118
118
-
 119
119
-
 120
120
-
 121
121
-
 122
122
-
 123
123
-
 124
124
-
 125
125
-
 126
126
-
 127
127
-
 128
128
-
 129
129
-
 130
130
-
 131
131
-
 132
132
-
 133
133
-
 134
134
-
 135
135
-
 136
136


Dometic CRX1050, CRX1065, CRX1080, CRX1110, CRX1140 Instruções de operação
- Categoria
- Geladeiras
- Tipo
- Instruções de operação
em outras línguas
Artigos relacionados
-
Dometic RC10.4S.70, RC10.4T.70, RC10.4S.90, RC10.4T.90, RC10.4P.100, RC10.4M.90, RCS10.5S, RCS10.5T, RCS10.5XS, RCS10.5XT, RCL10.4E, RCL10.4ES, RCL10.4ET, RCD10.5S, RCD10.5T, RCD10.5XS, RCD10.5XT Instruções de operação
-
-
-
-
-
-
-
-
-
Dometic RMS 8405 Manual do proprietário