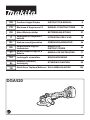
Makita DGA520 Manual do usuário
- Categoria
- Rebarbadoras
- Tipo
- Manual do usuário

DGA520
EN Cordless Angle Grinder INSTRUCTION MANUAL 6
FR Meuleuse d’Angle sans Fil MANUEL D’INSTRUCTIONS 16
DE Akku-Winkelschleifer BETRIEBSANLEITUNG 27
IT Smerigliatrice angolare a
batteria ISTRUZIONI PER L’USO 38
NL Haakse accuslijpmachine GEBRUIKSAANWIJZING 49
ES Esmeriladora Angular
Inalámbrica
MANUAL DE
INSTRUCCIONES 60
PT Esmerilhadeira Angular a
Bateria MANUAL DE INSTRUÇÕES 71
DA Ledningsfri vinkelsliber BRUGSANVISNING 82
EL
92
TR KULLANMA KILAVUZU 104

2
1
3
Fig.1
1
2
Fig.2
1
Fig.3
2
1
Fig.4
1
Fig.5
Fig.6
3
2
1
Fig.7
2

2
B
1
A
B
Fig.8
2
B
1
A
B
B
C
C
Fig.9
1
2
Fig.10
1
2
Fig.11
1
Fig.12
1
2
Fig.13
3

B
A
1
2
Fig.14
2
1
4
3
Fig.15
1
2
Fig.16
B
A
1
Fig.17
15°
Fig.18
Fig.19
Fig.20
4

Fig.21
Fig.22
2
1
Fig.23
1
Fig.24
2
6
7
4
5
2
3
1
Fig.25
5

6ENGLISH
ENGLISH (Original instructions)
SPECIFICATIONS
Model: DGA520
Wheel diameter
Max. wheel thickness 6 mm
8,500 min-1
Overall length 376 mm
Rated voltage D.C. 18 V
Net weight 2.4 - 3.0 kg
without notice.
-
Applicable battery cartridge and charger
Charger
DC18SH
residence.
WARNING: Only use the battery cartridges and chargers listed above.
Recommended cord connected power source
Intended use
The tool is intended for grinding and cutting of metal
and stone materials without the use of water.
Noise
-
Sound pressure level (L
NOTE:
another.
NOTE:
exposure.
WARNING: Wear ear protection.
WARNING: The noise emission during actual
value(s) depending on the ways in which the
tool is used especially what kind of workpiece is
processed.
WARNING: Be sure to identify safety mea-
sures to protect the operator that are based on an
estimation of exposure in the actual conditions of
use (taking account of all parts of the operating
cycle such as the times when the tool is switched
trigger time).
Vibration
-
2
2
2
2

7ENGLISH
NOTE:
measured in accordance with a standard test method
NOTE:
WARNING: The vibration emission during
declared value(s) depending on the ways in which
the tool is used especially what kind of workpiece
is processed.
WARNING: Be sure to identify safety mea-
sures to protect the operator that are based on an
estimation of exposure in the actual conditions of
use (taking account of all parts of the operating
cycle such as the times when the tool is switched
trigger time).
WARNING:
value is used for main applications of the power tool.
However if the power tool is used for other applica-
EC Declaration of Conformity
For European countries only
to this instruction manual.
SAFETY WARNINGS
General power tool safety warnings
WARNING: Read all safety warnings, instruc-
with this power tool.
Save all warnings and instruc-
tions for future reference.
Cordless grinder safety warnings
Safety Warnings Common for Grinding, Wire
1. This power tool is intended to function as a
safety warnings, instructions, illustrations and
2. Operations such as sanding or polishing are
not recommended to be performed with this
power tool. Operations for which the power tool
3. -
cally designed and recommended by the tool
manufacturer.
safe operation.
4. The rated speed of the accessory must be at
least equal to the maximum speed marked on
the power tool.
5. The outside diameter and the thickness of your
accessory must be within the capacity rating
of your power tool.
6. Threaded mounting of accessories must
match the grinder spindle thread. For acces-
mounting hardware of the power tool will run out of
of control.
7. Do not use a damaged accessory. Before each
use inspect the accessory such as abrasive
wheels for chips and cracks, backing pad for
cracks, tear or excess wear, wire brush for
loose or cracked wires. If power tool or acces-
sory is dropped, inspect for damage or install
an undamaged accessory. After inspecting and
installing an accessory, position yourself and
bystanders away from the plane of the rotating
accessory and run the power tool at maximum
no-load speed for one minute. Damaged acces-
time.
8. Wear personal protective equipment.
Depending on application, use face shield,
safety goggles or safety glasses. As appro-
priate, wear dust mask, hearing protectors,
gloves and workshop apron capable of stop-
ping small abrasive or workpiece fragments.
cause hearing loss.
9. Keep bystanders a safe distance away from
work area. Anyone entering the work area
must wear personal protective equipment.
area of operation.
10. Hold the power tool by insulated gripping
surfaces only, when performing an operation
where the cutting tool may contact hidden
wiring. Contact with a "live" wire will also make
exposed metal parts of the power tool "live" and
could give the operator an electric shock.
11. Never lay the power tool down until the acces-
sory has come to a complete stop. The spinning
12. Do not run the power tool while carrying it at
your side.

8ENGLISH
13. Regularly clean the power tool’s air vents. The
motor’s fan will draw the dust inside the housing
and excessive accumulation of powdered metal
14.
materials. Sparks could ignite these materials.
15. Do not use accessories that require liquid
coolants.
Kickback and Related Warnings
-
-
into the pinch point can dig into the surface of the material
direction of the wheel’s movement at the point of pinching.
1.
position your body and arm to allow you to
resist kickback forces. Always use auxiliary
handle, if provided, for maximum control over
kickback or torque reaction during start-up.
-
2. Never place your hand near the rotating acces-
sory.
3. Do not position your body in the area where
power tool will move if kickback occurs.
to the wheel’s movement at the point of snagging.
4. Use special care when working corners, sharp
edges etc. Avoid bouncing and snagging the
accessory.
5. Do not attach a saw chain woodcarving blade
or toothed saw blade.-
1. Use only wheel types that are recommended
designed for the selected wheel. Wheels for
2.
The grinding surface of centre depressed wheels
must be mounted below the plane of the guard lip.
3. The guard must be securely attached to the
power tool and positioned for maximum safety,
so the least amount of wheel is exposed
towards the operator. The guard helps to protect
-
dental contact with wheel and sparks that could
ignite clothing.
4. Wheels must be used only for recommended
applications. For example: do not grind with
are intended for peripheral grinding, side forces
shatter.
5.
of correct size and shape for your selected
wheel.
6. Do not use worn down wheels from larger
power tools. Wheel intended for larger power tool
1. -
sive pressure. Do not attempt to make an
excessive depth of cut. Overstressing the wheel
-
2. Do not position your body in line with and
behind the rotating wheel. When the wheel, at
-
3. When wheel is binding or when interrupting
tool and hold the power tool motionless until
the wheel comes to a complete stop. Never
cut while the wheel is in motion otherwise
kickback may occur. Investigate and take correc-
4. Do not restart the cutting operation in the
workpiece. Let the wheel reach full speed and
carefully re-enter the cut.
the workpiece.
5. Support panels or any oversized workpiece to
minimize the risk of wheel pinching and kick-
back. Large workpieces tend to sag under their
workpiece near the line of cut and near the edge
6. Use extra caution when making a “pocket cut”
into existing walls or other blind areas. The
-
Operations:
1. Be aware that wire bristles are thrown by the
brush even during ordinary operation. Do not
overstress the wires by applying excessive
load to the brush.
2. If the use of a guard is recommended for wire
brushing, do not allow any interference of the
wire wheel or brush with the guard. Wire wheel
and centrifugal forces.

9ENGLISH
Additional Safety Warnings:
1. When using depressed centre grinding wheels,
wheels.
2. NEVER USE Stone Cup type wheels with this
grinder. This grinder is not designed for these
3. Be careful not to damage the X-LOCK holder.
Damage to the parts could result in wheel
breakage.
4. Make sure the wheel is not contacting the
workpiece before the switch is turned on.
5. Before using the tool on an actual workpiece,
let it run for a while. Watch for vibration or
wobbling that could indicate poor installation
or a poorly balanced wheel.
6. -
form the grinding.
7. Do not leave the tool running. Operate the tool
only when hand-held.
8. Do not touch the workpiece immediately after
operation; it may be extremely hot and could
burn your skin.
9. Do not touch accessories immediately after
operation; it may be extremely hot and could
burn your skin.
10. Observe the instructions of the manufacturer
for correct mounting and use of wheels.
Handle and store wheels with care.
11. Do not use separate reducing bushings or
adaptors to adapt large hole abrasive wheels.
12. Check that the workpiece is properly
supported.
13. Pay attention that the wheel continues to
14. If working place is extremely hot and humid,
or badly polluted by conductive dust, use a
short-circuit breaker (30 mA) to assure opera-
tor safety.
15. Do not use the tool on any materials contain-
ing asbestos.
16.
the dust collecting wheel guard required by
domestic regulation.
17. Cutting discs must not be subjected to any
lateral pressure.
18. Do not use cloth work gloves during operation.
19. Before operation, make sure that there is no
buried object such as electric pipe, water pipe
or gas pipe in the workpiece.
cause an electric shock, electrical leakage or gas
leak.
SAVE THESE INSTRUCTIONS.
WARNING: DO NOT let comfort or familiarity
with product (gained from repeated use) replace
strict adherence to safety rules for the subject
product. MISUSE or failure to follow the safety
rules stated in this instruction manual may cause
serious personal injury.
Important safety instructions for
battery cartridge
1. Before using battery cartridge, read all instruc-
tions and cautionary markings on (1) battery
charger, (2) battery, and (3) product using
battery.
2. Do not disassemble or tamper with the battery
cartridge.
or explosion.
3. If operating time has become excessively
shorter, stop operating immediately. It may
result in a risk of overheating, possible burns
and even an explosion.
4. If electrolyte gets into your eyes, rinse them
out with clear water and seek medical atten-
tion right away. It may result in loss of your
eyesight.
5. Do not short the battery cartridge:
Do not touch the terminals with any con-
ductive material.
Avoid storing battery cartridge in a con-
tainer with other metal objects such as
nails, coins, etc.
Do not expose battery cartridge to water
or rain.
A battery short can cause a large current
breakdown.
6. Do not store and use the tool and battery car-
tridge in locations where the temperature may
reach or exceed 50 °C (122 °F).
7. Do not incinerate the battery cartridge even if
it is severely damaged or is completely worn
8. Do not nail, cut, crush, throw, drop the battery
cartridge, or hit against a hard object to the
battery cartridge.
9. Do not use a damaged battery.
10. The contained lithium-ion batteries are subject
to the Dangerous Goods Legislation require-
ments.
-
-
national regulations.
around in the packaging.
11. When disposing the battery cartridge, remove
it from the tool and dispose of it in a safe
place. Follow your local regulations relating to
disposal of battery.
12. Use the batteries only with the products
-

10 ENGLISH
13. If the tool is not used for a long period of time,
the battery must be removed from the tool.
14. During and after use, the battery cartridge may
take on heat which can cause burns or low
temperature burns. Pay attention to the han-
dling of hot battery cartridges.
15. Do not touch the terminal of the tool imme-
diately after use as it may get hot enough to
cause burns.
16. Do not allow chips, dust, or soil stuck into the
terminals, holes, and grooves of the battery
cartridge.
17. Unless the tool supports the use near
high-voltage electrical power lines, do not use
the battery cartridge near high-voltage electri-
cal power lines.
18. Keep the battery away from children.
SAVE THESE INSTRUCTIONS.
CAUTION: Only use genuine Makita batteries.
charger.
Tips for maintaining maximum
battery life
1. Charge the battery cartridge before completely
discharged. Always stop tool operation and
charge the battery cartridge when you notice
less tool power.
2. Never recharge a fully charged battery car-
tridge. Overcharging shortens the battery
service life.
3. Charge the battery cartridge with room tem-
perature at 10 °C - 40 °C (50 °F - 104 °F). Let
a hot battery cartridge cool down before
charging it.
4. When not using the battery cartridge, remove
it from the tool or the charger.
5. Charge the battery cartridge if you do not use
it for a long period (more than six months).
FUNCTIONAL DESCRIPTION
CAUTION: Always be sure that the tool is
before adjusting or checking function on the tool.
Installing or removing battery cartridge
CAUTION:
installing or removing of the battery cartridge.
CAUTION: Hold the tool and the battery car-
cartridge.
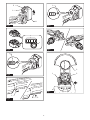
Fig.1: 1. Red indicator 2. Button 3.
CAUTION: Always install the battery cartridge
fully until the red indicator cannot be seen. If not,
CAUTION: Do not install the battery cartridge
forcibly.
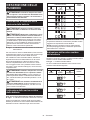
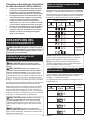
Indicating the remaining battery capacity
Only for battery cartridges with the indicator
Fig.2: 1. Indicator lamps 2.
-
light up for a few seconds.
Indicator lamps Remaining
capacity
Lighted Blinking
75% to 100%
50% to 75%
25% to 50%
0% to 25%
Charge the
malfunctioned.

11 ENGLISH
NOTE: Depending on the conditions of use and the
NOTE:
Indicating the remaining battery
capacity
Fig.3: 1.
-
Battery indicator status Remaining
battery
capacity
On Blinking
50% to 100%
20% to 50%
0% to 20%
Charge the
Tool / battery protection system
-
-
Overload protection
-
tool on to restart.
Overheat protection
On Blinking
tool again.
Overdischarge protection
Releasing protection lock
state.
In this situation, the tool does not start even if turning
On Blinking
Switch action
CAUTION: Before installing the battery car-
tridge into the tool, always check to see that the
switch lever actuates properly and returns to the
"OFF" position when released.
CAUTION: For your safety, this tool is
tool from unintended starting. NEVER use the tool
if it runs when you simply pull the switch trigger
to our authorized service center for proper repairs
BEFORE further usage.
CAUTION: Do not pull the switch lever hard
This can cause
CAUTION: NEVER tape down or defeat pur-
-
tor and then pull the switch lever.
To stop the tool, release the switch lever.
Fig.4: 1.2. Switch lever
Automatic speed change function
Fig.5: 1. Mode indicator
Mode indicator status Operation mode
High speed mode
depending on the work load. When mode indicator
mode.

12 ENGLISH
Accidental re-start preventive function
switch lever, the tool does not start.
Active Feedback sensing
Technology
further rotation of the spindle (it does not prevent
cause of sudden drop in the rotation speed, and then
turn the tool on.
Soft start feature
Soft start feature reduces starting reaction.
Electric brake
the switch still on.
ASSEMBLY
CAUTION: Always be sure that the tool is
before adjusting or checking function on the tool.
Installing side grip (handle)
CAUTION: Always be sure that the side grip is
installed securely before operation.
Fig.6
Installing or removing wheel guard
WARNING: When using a depressed center
wheel or wire wheel brush, the wheel guard must
guard always points toward the operator.
WARNING: Make sure that the wheel guard is
securely locked by the lock lever with one of the
holes on the wheel guard.
WARNING:
/ diamond wheel, be sure to use only the special
For depressed center wheel, wire
diamond wheel
1. While pushing the lock lever, mount the wheel
guard with the protrusions on the wheel guard aligned
Fig.7: 1. Lock lever 2. Notch 3.
2.
Fig.8: 1. Wheel guard 2. Hole
NOTE:
3. While keeping the lock lever and wheel guard
toward C, and then, change the angle of the wheel
guard according to the work.
Fig.9: 1. Wheel guard 2. Hole
NOTE:
To remove wheel guard, follow the installation proce-
dure in reverse.
When using a depressed center wheel
Optional accessory
WARNING: When using a depressed center
so that the closed side of the guard always points
toward the operator.
Fig.10: 1. Depressed center wheel 2. Wheel guard
diamond wheel
Optional accessory
WARNING:
/ diamond wheel, be sure to use only the special
WARNING:
grinding.
Fig.11: 1.
2.
diamond wheel
When using a wire cup brush
Optional accessory
CAUTION: Do not use wire cup brush that is
damaged, or which is out of balance. Use of dam-
Fig.12: 1.

13 ENGLISH
When using a wire wheel brush
Optional accessory
CAUTION: Do not use wire wheel brush that
is damaged, or which is out of balance. Use of
CAUTION: ALWAYS use guard with wire
inside guard. Wheel can shatter during use and
Fig.13: 1.2. Wheel guard
Installing or removing X-LOCK wheel
WARNING: Never actuate the release lever of
the X-LOCK holder during operation. Make sure
that the X-LOCK wheel has stopped completely
when removing it.
CAUTION: Use only original X-LOCK wheels
with the X-LOCK logo. This tool is dedicated to
-
ing, and cause the clamp tool to come loose.
CAUTION: Do not touch the X-LOCK wheel
immediately after operation.
CAUTION: Make sure that the X-LOCK wheel
and holder of the tool are not deformed and are
free from dust or foreign matters.
CAUTION:
holder while installing or removing the X-LOCK
wheel.
CAUTION:
release lever while installing the X-LOCK wheel. It
NOTE:
catches are in the unlocked position.
side, then pull the release lever from B side as
illustrated. The catches are set in the unlocked
position.
Fig.14: 1. Catch 2. Release lever
the holder.
catches snap into the lock position with a click and
Fig.15: 1.2. Holder 3.-
face 4. Catch
than the surface of the holder as shown in the
Fig.16: 1. Surface of the holder 2. Surface of the
B side as illustrated.
Fig.17: 1. Release lever
OPERATION
WARNING: It should never be necessary to
force the tool. The weight of the tool applies ade-
WARNING: ALWAYS replace wheel if tool is
dropped while grinding.
WARNING: NEVER hit the workpiece with the
wheel.
WARNING: Avoid bouncing and snagging
the wheel, especially when working corners,
sharp edges etc. This can cause loss of control and
WARNING: NEVER use tool with wood cutting
blades and other saw blades.
WARNING: Never actuate the release lever of
the X-LOCK holder during operation.
WARNING: Make sure that the X-LOCK wheel
CAUTION: Never switch on the tool when it
is in contact with the workpiece, it may cause an
injury to operator.
CAUTION: Always wear safety goggles or a
face shield during operation.
CAUTION:
the tool and wait until the wheel has come to a
complete stop before putting the tool down.
CAUTION:
one hand on housing and the other on the side
grip (handle).

14 ENGLISH
Grinding operation
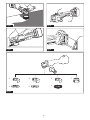
Fig.18
workpiece.
In general, keep the edge of the wheel or disc at an
diamond wheel
Optional accessory
WARNING: Do not "jam" the wheel or apply
excessive pressure. Do not attempt to make an
excessive depth of cut. Overstressing the wheel
WARNING: Do not start the cutting operation
in the workpiece. Let the wheel reach full speed
and carefully enter into the cut moving the tool
forward over the workpiece surface. The wheel
started in the workpiece.
WARNING: During cutting operations, never
change the angle of the wheel.-
-
WARNING: A diamond wheel shall be oper-
ated perpendicular to the material being cut.
wheel
Fig.19
Usage example: operation with diamond wheel
Fig.20
Operation with wire cup brush
Optional accessory
CAUTION: Check operation of brush by run-
ning tool with no load, insuring that no one is in
front of or in line with brush.
NOTICE: Avoid applying too much pressure
which causes over bending of wires when using
the wire cup brush.
Usage example: operation with wire cup brush
Fig.21
Operation with wire wheel brush
Optional accessory
CAUTION: Check operation of wire wheel
brush by running tool with no load, insuring that
no one is in front of or in line with the wire wheel
brush.
NOTICE: Avoid applying too much pressure
which causes over bending of wires when
using wire wheel brush.
Usage example: operation with wire wheel brush
Fig.22
MAINTENANCE
CAUTION: Always be sure that the tool is
before attempting to perform inspection or
maintenance.
NOTICE: Never use gasoline, benzine, thinner,
alcohol or the like. Discoloration, deformation or
cracks may result.
-
using Makita replacement parts.
Air vent cleaning
Fig.23: 1.2. Inhalation vent
Remove the dust cover from inhalation vent and clean it
for smooth air circulation.
Fig.24: 1. Dust cover
NOTICE: Clean out the dust cover when it is
clogged with dust or foreign matters. Continuing
tool.

15 ENGLISH
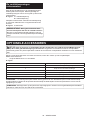
OPTIONAL ACCESSORIES
CAUTION: These accessories or attachments are recommended for use with your Makita tool spec-
Fig.25
1
2
3Depressed center wheel
4
5
6
7
NOTE:
NOTE:

16 FRANÇAIS
FRANÇAIS (Instructions originales)
SPÉCIFICATIONS
Modèle : DGA520
Diamètre de meule
Épaisseur max. de la meule 6 mm
8 500 min-1
Longueur totale 376 mm
Tension nominale 18 V CC
2,4 à 3,0 kg
Batterie et chargeur applicables
Batterie
Chargeur
DC18SH
•
AVERTISSEMENT : N’utilisez que les batteries et les chargeurs répertoriés ci-dessus. L’utilisation
Source d’alimentation connectée par cordon recommandée
• La ou les sources d’alimentation connectées par cordon répertoriées ci-dessus peuvent ne pas être dispo-
•
Utilisations
L’outil est conçu pour le meulage et la coupe de maté-
riaux en métal ou en pierre sans utiliser d’eau.
Bruit
Niveau de pression sonore (L
NOTE :-
rées ont été mesurées conformément à la méthode
de test standard et peuvent être utilisées pour com-
parer les outils entre eux.
NOTE :-
rées peuvent aussi être utilisées pour l’évaluation
préliminaire de l’exposition.
AVERTISSEMENT :
Portez un serre-tête antibruit.
AVERTISSEMENT :
L’émission de bruit lors de
ou des valeurs déclarées, suivant la façon dont l’outil est
utilisé, particulièrement selon le type de pièce usinée.
AVERTISSEMENT :
Les mesures de sécurité à
prendre pour protéger l’utilisateur doivent être basées
sur une estimation de l’exposition dans des condi-
tions réelles d’utilisation (en tenant compte de toutes
les composantes du cycle d’utilisation, comme par
exemple le moment de sa mise hors tension, lorsqu’il
tourne à vide et le moment de son déclenchement).
Vibrations
2
2
2
2

17 FRANÇAIS
NOTE :-
rées ont été mesurées conformément à la méthode
de test standard et peuvent être utilisées pour com-
parer les outils entre eux.
NOTE :-
rées peuvent aussi être utilisées pour l’évaluation
préliminaire de l’exposition.
AVERTISSEMENT : L’émission de vibrations
lors de l’usage réel de l’outil électrique peut être
la façon dont l’outil est utilisé, particulièrement
selon le type de pièce usinée.
AVERTISSEMENT : Les mesures de sécurité
à prendre pour protéger l’utilisateur doivent être
basées sur une estimation de l’exposition dans
des conditions réelles d’utilisation (en tenant
compte de toutes les composantes du cycle
d’utilisation, comme par exemple le moment de
sa mise hors tension, lorsqu’il tourne à vide et le
moment de son déclenchement).
AVERTISSEMENT : La valeur d’émission de
Déclaration de conformité CE
Pour les pays européens uniquement
CONSIGNES DE
SÉCURITÉ
Consignes de sécurité générales
pour outils électriques
AVERTISSEMENT : Veuillez lire les
consignes de sécurité, instructions, illustrations
électrique. Le non-respect de toutes les instructions
-
Conservez toutes les mises en
garde et instructions pour réfé-
rence ultérieure.
-
Consignes de sécurité pour
Consignes de sécurité communes aux travaux de
meulage, brossage métallique ou tronçonnage
abrasif :
1. Cet outil électrique est conçu pour être utilisé
en tant que meuleuse, brosse métallique ou
outil de tronçonnage. Veuillez consulter les
consignes de sécurité, les instructions, les
cet outil électrique. Le non-respect de toutes les
2.
travaux de ponçage ou de polissage avec cet
outil électrique.
-
3. N’utilisez pas d’accessoires qui n’ont pas été
fabricant de l’outil. Même si un accessoire peut
4. La vitesse nominale de l’accessoire doit être
au moins égale à la vitesse maximum inscrite
sur l’outil électrique. Les accessoires tournant
casser et voler en éclats.
5. Le diamètre extérieur et l’épaisseur de l’ac-
cessoire ne doivent pas dépasser la capacité
nominale de l’outil électrique. Les accessoires
de taille incorrecte ne peuvent être protégés ou
6.
correspondre à celui de l’axe de la meuleuse.
Pour les accessoires montés à l’aide de
7. N’utilisez jamais un accessoire endommagé.
Avant chaque utilisation, assurez-vous que
la meule abrasive est exempte de copeaux et
déchirée ou trop usée, ou que la brosse métal-
un accessoire, assurez-vous qu’il n’est pas
endommagé ou bien remplacez l’accessoire
accessoire, assurez-vous que personne, y
compris vous-même, ne se trouve dans la
trajectoire de l’accessoire en rotation et faites
tourner l’outil électrique à vitesse à vide maxi-
male pendant une minute. Les accessoires
de cette période d’essai.

18 FRANÇAIS
8. Portez un équipement de protection indivi-
utilisez un écran facial, des lunettes à coques
ou des lunettes de sécurité. Si nécessaire,
portez un masque anti-poussière, des pro-
tège-tympans, des gants et un tablier de travail
pouvant arrêter les particules abrasives ou les
fragments de pièce. La protection oculaire doit
-
cules générées lors des travaux. Une exposition
-
ner une perte auditive.
9. Assurez-vous que les passants demeurent à
une distance sûre de la zone de travail. Toute
personne pénétrant dans la zone de travail
doit porter un équipement de protection indivi-
duelle. Des fragments de pièce ou un accessoire
-
10.
Tenez l’outil électrique uniquement par ses sur-
faces de prise isolées, lors d’une opération au
cours de laquelle l’outil de coupe peut entrer en
-
11.
Ne déposez jamais l’outil électrique avant que l’ac-
cessoire ne se soit parfaitement arrêté. L’accessoire
12.
Ne transportez pas l’outil électrique tout en le
laissant tourner.
13.
de l’outil électrique. Le ventilateur du moteur
-
14. N’utilisez pas l’outil électrique près de maté-
15. N’utilisez pas d’accessoires nécessitant un
liquide de refroidissement. L’utilisation d’eau
Mises en garde concernant le choc en retour et
autres dangers
-
l’accessoire en rotation se coince ou accroche, il s’ar-
coince dans la pièce, son tranchant introduit au point
-
lisateur ou dans le sens opposé, selon la direction du
mouvement de la meule au point de pincement. Dans
Le choc en retour est le résultat d’une utilisation
des procédures ou conditions d’utilisation. Il peut être
ci-dessous.
1. Maintenez une poigne ferme sur l’outil élec-
trique et placez corps et bras de façon à pou-
voir résister à la force exercée par les chocs
en retour. Utilisez toujours la poignée auxi-
liaire, s’il y en a une, pour avoir une maîtrise
maximale de l’outil en cas de choc en retour
ou de force de réaction exercée au moment du
démarrage.
de réaction ou de choc en retour s’il prend les
2. Ne placez jamais la main près d’un accessoire
en rotation.
votre main en cas de choc en retour.
3. Ne vous placez pas dans la zone vers laquelle
l’outil électrique se déplacera en cas de choc
en retour.
le sens opposé au mouvement de la meule au
4. Soyez tout particulièrement prudent lorsque
vous travaillez sur les coins, les arêtes vives,
etc. Évitez de laisser l’accessoire sautiller ou
accrocher. L’accessoire en rotation a tendance
à accrocher dans les coins, sur les arêtes vives
5.
sculpter le bois ou une lame de scie dentée. De
de meulage et de tronçonnage abrasif :
1. Utilisez exclusivement les types de meule
recommandés pour votre outil électrique, et
pour la meule sélectionnée. Les meules pour
pourront pas être protégées correctement et se
révèleront dangereuses.
2. La surface de meulage des meules à moyeu
déporté doit être montée sous le plan de la
lèvre du carter de protection. Si la meule n’est
carter de protection, celui-ci ne pourra pas assurer
3. Le carter de protection doit être solidement
assurer une sécurité maximale en ne laissant
qu’une partie minimale de la meule exposée
du côté de l’utilisateur. Le carter de protection
permet de protéger l’utilisateur des éclats de
ses vêtements.
4. Les meules ne doivent être utilisées que pour
les applications recommandées. Par exemple
: ne procédez pas au meulage avec le côté de
la meule à tronçonner. Les meules à tronçonner
-

19 FRANÇAIS
5.
en bon état, dont la taille et la forme corres-
pondent à la meule sélectionnée.
6. N’utilisez pas de meules usées provenant
d’outils électriques plus grands. Les meules
ne conviennent pas à la vitesse supérieure d’un
aux travaux de tronçonnage abrasif :
1.
Évitez de « bloquer » la meule à tronçonner ou
d’appliquer une pression excessive. N’essayez pas
de couper trop profondément. Une meule trop sollici-
2.
Ne vous placez pas directement derrière ou
devant la meule en rotation.
cours de fonctionnement, s’écarte de votre corps, le
3. Lorsque la meule se coince ou lorsque vous
interrompez la coupe pour une raison quel-
conque, mettez l’outil électrique hors tension
et maintenez-le immobile jusqu’à ce que la
meule cesse complètement de tourner. Ne
tentez jamais de retirer la meule à tronçonner
de la coupe pendant que la meule tourne,
sous peine de provoquer un choc en retour.
4. Ne reprenez pas la coupe telle quelle dans
la pièce. Attendez que la meule ait atteint sa
pleine vitesse avant de la réintroduire soi-
gneusement dans la ligne de coupe. Si vous
de se coincer, de remonter hors de la ligne de
5.
Soutenez les panneaux ou les pièces de grande
taille pour réduire les risques de coincement
de la meule et de choc en retour. Les pièces de
poids. Il est nécessaire de placer en dessous des
cales à proximité de la ligne de coupe et près du
6.
Redoublez de précaution lorsque vous faites une
« coupe en plongée » dans un mur ou toute autre
surface pouvant cacher des structures. La meule,
en dépassant derrière le mur ou la surface, peut cou-
brossage métallique :
1.
détachent de la brosse même lors de travaux
-
liques à une surcharge en appliquant une
pression excessive sur la brosse.-
2. Si l’utilisation d’un carter de protection est
recommandée pour le brossage métallique,
assurez-vous que la meule ou brosse métal-
lique ne gêne pas le carter de protection. Selon
la charge de travail et l’intensité de la force centri-
peut augmenter.
Consignes de sécurité supplémentaires :
1. Lors de l’utilisation des meules ordinaires à
moyeu déporté, assurez-vous d’utiliser exclu-
verre.
2. N’UTILISEZ JAMAIS une meule boisseau pour
pierre avec cette meuleuse. Cette meuleuse
3. Prenez garde de ne pas endommager le sup-
port X-LOCK. La meule risque de casser si ces
pièces sont endommagées.
4. Assurez-vous que la meule n’entre pas en
contact avec la pièce avant de mettre l’outil
sous tension.
5. Avant d’utiliser l’outil sur une pièce, faites-le
tourner un instant à vide. Soyez attentif aux
vibrations ou sautillements pouvant indiquer
que la meule n’est pas bien posée ou qu’elle
est mal équilibrée.
6.
7. N’abandonnez pas l’outil alors qu’il tourne. Ne
faites fonctionner l’outil qu’une fois que vous
l’avez bien en main.
8. Ne touchez pas la pièce immédiatement après
avoir terminé le travail ; elle peut être très
chaude et vous brûler la peau.
9. Ne touchez pas les accessoires immédiate-
ment après avoir terminé le travail ; ils peuvent
être très chauds et vous brûler la peau.
10. Suivez les instructions du fabricant pour un
montage adéquat et une utilisation appropriée
des meules. Manipulez et rangez les meules
soigneusement.
11. N’utilisez pas de bagues de réduction ou
d’adaptateurs vendus dans le commerce pour
central est grand.
12. Assurez-vous que la pièce à travailler est cor-
rectement soutenue.
13. N’oubliez pas que la meule continue de tour-
ner une fois l’outil éteint.
14. Si le lieu de travail est extrêmement chaud et
humide, ou fortement pollué de poussières
conductrices, utilisez un disjoncteur (30 mA)
pour assurer la sécurité de l’utilisateur.
15. N’utilisez l’outil avec aucun matériau conte-
nant de l’amiante.
16. Lorsque vous utilisez une meule à tronçonner,
travaillez toujours avec le carter de meule de
collecte de la poussière exigé par la réglemen-
tation locale.
17. Aucune pression latérale ne doit être exercée
sur les disques de coupe.
18. N’utilisez pas de gants de travail en tissu
peuvent pénétrer dans l’outil et le casser.

20 FRANÇAIS
19. Avant utilisation, assurez-vous qu’aucun objet
tel que des conduites électriques, des tuyaux
d’eau ou des tuyaux de gaz n’est enterré sous
la zone de travail.
CONSERVEZ CES
INSTRUCTIONS.
AVERTISSEMENT : NE vous laissez PAS
sentiment d’aisance et de familiarité avec le
produit, en négligeant le respect rigoureux des
consignes de sécurité qui accompagnent le pro-
duit en question. La MAUVAISE UTILISATION de
l’outil ou l’ignorance des consignes de sécurité
indiquées dans ce mode d’emploi peut entraîner
de graves blessures.
Consignes de sécurité importantes
pour la batterie
1. Avant d’utiliser la batterie, lisez toutes les
instructions et précautions relatives (1) au
chargeur de batterie, (2) à la batterie, et (3) au
produit utilisant la batterie.
2.
batterie.
chaleur excessive ou une explosion.
3. Cessez immédiatement l’utilisation si le temps
de fonctionnement devient excessivement
voire d’explosion.
4. Si l’électrolyte pénètre dans vos yeux, rin-
cez-les à l’eau claire et consultez immédiate-
ment un médecin. Il y a risque de perte de la
vue.
5. Ne court-circuitez pas la batterie :
Ne touchez les bornes avec aucun maté-
riau conducteur.
Évitez de ranger la batterie dans un
conteneur avec d’autres objets métal-
liques, par exemple des clous, des pièces
de monnaie, etc.
N’exposez pas la batterie à l’eau ou à la
pluie.
Un court-circuit de la batterie peut provoquer
une intensité de courant élevée, une sur-
panne.
6. Ne rangez ni n’utilisez l’outil et la batterie dans
un endroit où la température risque d’atteindre
ou de dépasser 50 °C.
7. Ne jetez pas la batterie au feu même si elle est
sérieusement endommagée ou complètement
épuisée. La batterie peut exploser au contact
du feu.
8. Abstenez-vous de clouer, couper, écraser,
jeter, laisser tomber la batterie, ou de la heur-
ter contre un objet dur.
un incendie, une chaleur excessive ou une
explosion.
9. N’utilisez pas la batterie si elle est
endommagée.
10. Les batteries au lithium-ion contenues sont
soumises aux exigences de la législation sur
les marchandises dangereuses.
Lors du transport commercial par des tierces
parties ou des transitaires par exemple, des exi-
nécessaire de consulter un expert en matériau
plus détaillées.
11. Lors de la mise au rebut de la batterie, reti-
rez-la de l’outil et jetez-la en lieu sûr. Suivez les
réglementations locales en matière de mise au
rebut des batteries.
12. Utilisez les batteries uniquement avec les
L’insertion de
13. Lorsque vous n’utilisez pas l’outil pendant une
période prolongée, la batterie doit être retirée
de l’outil.
14. Pendant et après l’utilisation, la batterie peut
compris en cas de température relativement
basse. Manipulez les batteries chaudes avec
précaution.
15. Ne touchez pas la borne de l’outil immédiate-
ment après utilisation car elle peut être assez
chaude pour provoquer des brûlures.
16. Évitez que des copeaux, de la poussière ou
du sol adhèrent aux bornes, aux trous et aux
rainures de la batterie. Cela pourrait réduire les
17. À moins que l’outil prenne en charge un tel
usage, n’utilisez pas la batterie à proximité de
lignes électriques haute tension. Cela pourrait
18. Conservez la batterie hors de portée des
enfants.
CONSERVEZ CES
INSTRUCTIONS.
ATTENTION : N’utilisez que des batteries
Makita d’origine.
-
-
rels. Cela annulera également la garantie Makita pour
l’outil et le chargeur Makita.
A página está carregando...
A página está carregando...
A página está carregando...
A página está carregando...
A página está carregando...
A página está carregando...
A página está carregando...
A página está carregando...
A página está carregando...
A página está carregando...
A página está carregando...
A página está carregando...
A página está carregando...
A página está carregando...
A página está carregando...
A página está carregando...
A página está carregando...
A página está carregando...
A página está carregando...
A página está carregando...
A página está carregando...
A página está carregando...
A página está carregando...
A página está carregando...
A página está carregando...
A página está carregando...
A página está carregando...
A página está carregando...
A página está carregando...
A página está carregando...
A página está carregando...
A página está carregando...
A página está carregando...
A página está carregando...
A página está carregando...
A página está carregando...
A página está carregando...
A página está carregando...
A página está carregando...
A página está carregando...
A página está carregando...
A página está carregando...
A página está carregando...
A página está carregando...
A página está carregando...
A página está carregando...
A página está carregando...
A página está carregando...
A página está carregando...
A página está carregando...
A página está carregando...
A página está carregando...
A página está carregando...
A página está carregando...
A página está carregando...
A página está carregando...
A página está carregando...
A página está carregando...
A página está carregando...
A página está carregando...
A página está carregando...
A página está carregando...
A página está carregando...
A página está carregando...
A página está carregando...
A página está carregando...
A página está carregando...
A página está carregando...
A página está carregando...
A página está carregando...
A página está carregando...
A página está carregando...
A página está carregando...
A página está carregando...
A página está carregando...
A página está carregando...
A página está carregando...
A página está carregando...
A página está carregando...
A página está carregando...
A página está carregando...
A página está carregando...
A página está carregando...
A página está carregando...
A página está carregando...
A página está carregando...
A página está carregando...
A página está carregando...
A página está carregando...
A página está carregando...
A página está carregando...
A página está carregando...
A página está carregando...
A página está carregando...
A página está carregando...
A página está carregando...
A página está carregando...
A página está carregando...
A página está carregando...
A página está carregando...
A página está carregando...
A página está carregando...
A página está carregando...
A página está carregando...
-
 1
1
-
 2
2
-
 3
3
-
 4
4
-
 5
5
-
 6
6
-
 7
7
-
 8
8
-
 9
9
-
 10
10
-
 11
11
-
 12
12
-
 13
13
-
 14
14
-
 15
15
-
 16
16
-
 17
17
-
 18
18
-
 19
19
-
 20
20
-
 21
21
-
 22
22
-
 23
23
-
 24
24
-
 25
25
-
 26
26
-
 27
27
-
 28
28
-
 29
29
-
 30
30
-
 31
31
-
 32
32
-
 33
33
-
 34
34
-
 35
35
-
 36
36
-
 37
37
-
 38
38
-
 39
39
-
 40
40
-
 41
41
-
 42
42
-
 43
43
-
 44
44
-
 45
45
-
 46
46
-
 47
47
-
 48
48
-
 49
49
-
 50
50
-
 51
51
-
 52
52
-
 53
53
-
 54
54
-
 55
55
-
 56
56
-
 57
57
-
 58
58
-
 59
59
-
 60
60
-
 61
61
-
 62
62
-
 63
63
-
 64
64
-
 65
65
-
 66
66
-
 67
67
-
 68
68
-
 69
69
-
 70
70
-
 71
71
-
 72
72
-
 73
73
-
 74
74
-
 75
75
-
 76
76
-
 77
77
-
 78
78
-
 79
79
-
 80
80
-
 81
81
-
 82
82
-
 83
83
-
 84
84
-
 85
85
-
 86
86
-
 87
87
-
 88
88
-
 89
89
-
 90
90
-
 91
91
-
 92
92
-
 93
93
-
 94
94
-
 95
95
-
 96
96
-
 97
97
-
 98
98
-
 99
99
-
 100
100
-
 101
101
-
 102
102
-
 103
103
-
 104
104
-
 105
105
-
 106
106
-
 107
107
-
 108
108
-
 109
109
-
 110
110
-
 111
111
-
 112
112
-
 113
113
-
 114
114
-
 115
115
-
 116
116
-
 117
117
-
 118
118
-
 119
119
-
 120
120
-
 121
121
-
 122
122
-
 123
123
-
 124
124


Makita DGA520 Manual do usuário
- Categoria
- Rebarbadoras
- Tipo
- Manual do usuário
em outras línguas
- español: Makita DGA520 Manual de usuario
- français: Makita DGA520 Manuel utilisateur
- italiano: Makita DGA520 Manuale utente
- Nederlands: Makita DGA520 Handleiding
- Deutsch: Makita DGA520 Benutzerhandbuch
- dansk: Makita DGA520 Brugermanual
- Türkçe: Makita DGA520 Kullanım kılavuzu
Artigos relacionados
-
Makita DGA521 Manual do usuário
-
Makita GA5030K Manual do proprietário
-
-
Makita DMC300 Manual do usuário
-
Makita GA048G Manual do usuário
-
-
Makita CE001G Manual do usuário
-
-
-
Makita GA5030KSP2 Manual do proprietário