NightStick XPR-5553G Manual do usuário
- Categoria
- Lanternas
- Tipo
- Manual do usuário

Bayco Products, Inc. • 640 South Sanden Blvd. • Wylie, TX 75098 • USA • 1-800-233-2155 • 1-469-326-9400 • www.nightstick.com
3M, Dual-Lock are trademarks of 3M Company. INS-XPR-5553-DL-22 10-06-2022
Instruction Manual
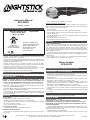
XPR-5553G
US Patent 11,450,934
THE XPR-5553 IS APPROVED FOR USE
-20ºC ≤ Tamb ≤ +40ºC
3.7V/Cell 5562-BATT
ID 4003544
INTRINSICALLY SAFE
SECURITE INTRINSEQUE
Bayco Products, Inc. XPR-5553G
Wylie, TX 75098
640 S. Sanden Blvd.
E 467756
CLASS I DIV 1 GRPS A-D T3C
CLASS II & III GRPS E-G T160ºC
CLASS I ZONE 0 GRP IIC T3
ZONE 20 GRP IIIC T200ºC
WARNINGS - INTRINSICALLY SAFE
yWarning: To prevent ignition of a hazardous atmosphere, the XPR-5553 must only be
charged in an area known to be non-hazardous.
yWarning: Use only the approved Nightstick 5562-BATT Lithium-ion rechargeable battery pack.
yWarning: The approved Nightstick 5562-BATT Lithium-ion rechargeable battery pack must
be replaced by a quali ed technician only.
yWarning: To prevent ignition of a hazardous atmosphere, do not open the battery
compartment or attempt to exchange the battery pack while in the hazardous environment.
This task must ONLY be performed in an area known to be non-hazardous.
yWarning: Open the battery compartment on the XPR-5553 and replace the approved
Nightstick 5562-BATT Lithium-ion rechargeable battery pack in fresh air only.
yWarning: Substitution of components may impair intrinsic safety.
SPECIAL INSTRUCTIONS FOR INTRINSIC SAFETY
For personal safety, always con rm the rating of any known hazardous or potentially
hazardous location where the light is to be used.
CHARGING THE LIGHT
CHARGER INPUT: 5 VDC Max
WARNING: TO PREVENT IGNITION OF A HAZARDOUS ATMOSPHERE, DO NOT
ATTEMPT TO CHARGE THIS PRODUCT IN THE HAZARDOUS ENVIRONMENT. THIS
TASK MUST ONLY BE PERFORMED IN AN AREA KNOWN TO BE NON-HAZARDOUS.
Fully charge the light before the rst use, or if the battery is new or has been unused for
several months. For best performance, charge the light when the headlamp beam starts to dim.
yUse only the supplied Nightstick USB cable.
yLocate the USB port on the back of the headlamp, remove the rubber USB port cover, and
plug the micro USB into the headlamp’s micro USB port.
yThe total time to full charge varies depending on the remaining charge in the battery pack.
yThe charge indicator light located above the charging port will turn red while charging and
green when fully charged.
OPERATION
LIGHTING MODES
ySPOTLIGHT: Press switch one time to turn on the spotlight.
yFLOODLIGHT: Press the switch two times to turn on the oodlight.
yDUAL-LIGHT: Press the switch three times to turn on both the spotlight and the oodlight
at the same time for Dual-Light mode.
yOFF: Press the switch a fourth time to turn off.
TILT ADJUSTMENT FEATURE:
Adjust the tilt angle of the light to illuminate the desired area.
HEADBANDS AND HELMET MOUNT
yUse the elastic non-slip headband for wearing directly on your head or on a soft hat such
as a ball cap.
yUse the heavy-duty rubber headband on any hardhat.
ZERO BAND MOUNTING INSTRUCTIONS
Use the 3M™ Dual-Lock™ Reclosable Fastener (included) to mount the light onto a
hardhat or helmet. Adhere one side to the backplate on the light and the other side onto a
clean, smooth surface on the front of the helmet.
yRemove headband
yEnsure mounting surface is clean and oil-free (use alcohol wipe if needed)
yPrior to installing, determine mounting location that allows headlamp to fully tilt without
interfering with helmet brim.
yRemove adhesive backing from each side of the fastener and adhere to the helmet and
the back of the bracket.
yFirmly press light into place on the helmet.
yNote: adhesive reaches peak strength in 24 hours.
WARRANTY
LIMITED LIFETIME WARRANTY
Bayco Products, Inc. warrants this product to be free from defects in workmanship and
materials for the original purchaser’s lifetime. The Limited Lifetime Warranty includes the
LEDs, housing and lenses. Rechargeable batteries, chargers, switches, electronics and
included accessories are warranted for a period of two years with proof of purchase. Normal
wear and failures which are caused by accidents, misuse, abuse, faulty installation and
lightning damage are excluded.
We will repair or replace this product should we determine it to be defective. This is the
only warranty, expressed or implied, including any warranty of merchantability or tness for a
particular purpose.
For a complete copy of the warranty, go to www.baycoproducts.com/bayco-product-
support/warranties. Retain your receipt for proof of purchase.
Mode d’emploi
XPR-5553G
LA LAMPE XPR-5553 EST APPROUVÉE POUR UTILISATION
AVERTISSEMENTS – SÉCURITÉ INTRINSÈQUE
yAvertissement : Pour éviter l’in ammation d’atmosphère dangereuse, la lampe XPR-5553
doit être uniquement charger dans une zone non dangereuse.
yAvertissement : Utiliser uniquement le bloc-piles approuvé et rechargeable au lithium-ion
Nightstick 5562-BATT.
yAvertissement : Le bloc-piles approuvé et rechargeable au lithium-ion Nightstick 5562-
BATT doit être remplacé uniquement par un technicien quali é.
yAvertissement : Pour éviter l’in ammation d’atmosphère dangereuse, ne pas ouvrir le
compartiment à piles ou essayer d’échanger le bloc-piles dans un endroit dangereux. Cette
tâche doit être effectuée UNIQUEMENT dans une zone non dangereuse.
yAvertissement : Ouvrir le compartiment à piles situé sur la lampe XPR-5553 et remplacer
le bloc-piles approuvé et rechargeable au lithium-ion Nightstick 5562-BATT au grand air
uniquement.
yAvertissement : La substitution de composants peut compromettre la sécurité intrinsèque
de ce produit.
DIRECTIVES PARTICULIÈRES POUR UNE SÉCURITÉ INTRINSÈQUE
Pour votre propre sécurité, toujours con rmer la charge d’une zone dangereuse ou
potentiellement dangereuse quand la lampe de poche est utilisée.
CHARGER LA LAMPE
ENTRÉE CHARGEUR: 5 VDC Max
AVERTISSEMENT : POUR ÉVITER L’INFLAMMATION D’ATMOSPHÈRE
DANGEREUSE, NE PAS ESSAYER DE CHARGER CE PRODUIT DANS UNE ZONE
DANGEREUSE. CETTE TÂCHE DOIT ÊTRE EFFECTUÉE UNIQUEMENT DANS UNE
ZONE NON DANGEREUSE.
Charger complètement la lampe avant la première utilisation ou si la pile est neuve ou n’a
pas été utilisée pendant plusieurs mois. Pour de meilleurs résultats, charger la lampe lorsque
le faisceau de lumière commence à faiblir.
yUtiliser uniquement le cable USB Nightstick.
yLocaliser le port USB à l’arrière de la lampe, retirer le couvercle en caoutchouc du port

Bayco Products, Inc. • 640 South Sanden Blvd. • Wylie, TX 75098 • USA • 1-800-233-2155 • 1-469-326-9400 • www.nightstick.com
3M, Dual-Lock are trademarks of 3M Company. INS-XPR-5553-DL-22 10-06-2022
USB, et brancher le micro USB dans le port-micro USB de la tête de la lampe.
yLa durée totale d’une charge complète de la lampe varie selon la charge restante dans
le bloc-piles.
yLe voyant lumineux de charge, situé au-dessus du port de charge, passera au rouge
lorsque la lampe est en chargement et au vert lorsque la lampe est complètement chargée.
FONCTIONNEMENT
MODES D’ÉCLAIRAGE
yÉCLAIRAGE À FAISCEAU DIRECT : Pour allumer l’éclairage à faisceau direct, appuyer
une seule fois sur le bouton interrupteur au-dessus de la lampe.
yÉCLAIRAGE À FAISCEAU LARGE : Appuyer une seconde fois sur le bouton interrupteur
pour éteindre l’éclairage à faisceau direct et allumer l’éclairage à faisceau large
yMODE D’ÉCLAIRAGE DOUBLE : Appuyer une troisième fois sur le bouton interrupteur
pour allumer à la fois l’éclairage à faisceau direct et l’éclairage à faisceau large pour un
mode d’éclairage double.
yÉTEINDRE : Appuyer sur le bouton interrupteur une quatrième fois pour éteindre tous les
modes d’éclairage.
RÉGLAGE DE L’INCLINAISON
Ajuster simplement l’angle d’inclinaison pour illuminer la partie désirée.
SERRE-TÊTES ET SUPPORTS DE CASQUE
yUtilisez le bandeau élastique antidérapant pour le porter directement sur la tête ou sur un
chapeau souple comme une casquette de baseball.
yPortez le bandeau en caoutchouc robuste sur n’importe quel casque.
INSTRUCTIONS DE MONTAGE SANS BANDEAU
Utilisez l’attache refermable 3M™ Dual-Lock™ (incluse) pour monter la lampe sur un
casque. Fixez un côté à la plaque arrière de la lumière et l’autre côté à une surface propre et
lisse à l’avant du casque.
yRetirer le bandeau
yAssurez-vous que la surface de montage est propre et sans huile (utilisez un chiffon
imbibé d’alcool si nécessaire)
yAvant l’installation, déterminez l’emplacement de montage qui permet à la lampe de
s’incliner complètement sans interférer avec le bord du casque.
yRetirez le support adhésif de chaque côté de l’attache et collez-le sur le casque et l’arrière
du support.
yAppuyez fermement sur la lumière en place sur le casque.
yRemarque : l’adhésif atteint sa force maximale en 24 heures.
GARANTIE
GARANTIE À VIE LIMITÉE
Bayco Products, Inc. garantit que ce produit est exempt de défauts de matériaux et de
fabrication à l’acheteur original durant toute sa vie. La garantie à vie limitée inclut les DEL,
les boîtiers et les lentilles. Les batteries rechargeables, les chargeurs, les interrupteurs, les
électroniques et les accessoires compris sont garantis pour une période de deux ans avec
une preuve d’achat. L’usure normal et les défaillances qui sont causés par des accidents,
une mauvaise utilisation, un abus, une installation défectueuse et un système d’éclairage
endommagé sont exclus.
Ce produit sera réparé ou remplacé si nous déterminons qu’il est défectueux. Ceci est
la seule garantie explicite ou implicite, y compris toute garantie de qualité marchande ou
d’adéquation à un usage particulier.
Pour une copie détaillée de la garantie, vous rendre sur le site www.baycoproducts.com/
bayco-product-support/warranties. Gardez ce reçu comme preuve d’achat.
Manual de Instrucciónes
XPR-5553G
LA XPR-5553 ESTÁ APROBADA PARA SU USO
ADVERTENCIAS - INTRÍNSECAMENTE SEGURA
yAdvertencia: Para evitar la ignición de una atmósfera peligrosa, la XPR-5553 solo debe
utilizarse en una zona que se sabe no peligrosa.
yAdvertencia: Utilice sólo el paquete de PILAS de iones de litio recargables recomendado
para la Nightstick 5553.
yAdvertencia: El paquete de PILAS de iones de litio recargables recomendado para la
Nightstick 5553 debe ser reemplazado solamente por una persona calicada.
yAdvertencia: Para evitar la ignición de una atmósfera peligrosa, no abra el compartimiento
de la pila o intente cambiar la pila mientras esta en un ambiente peligroso. Esta tarea sólo
debe realizarse en un área conocida como no peligrosa.
yAdvertencia: Abra el compartimento de la pila de la XPR-5553 y reemplace el paquete de PILAS
de iones de litio recargables recomendado para la Nightstick 5553 en aire fresco solamente.
yAdvertencia: La sustitución de componentes puede afectar la seguridad intrínseca.
INSTRUCCIONES ESPECIALES PARA LA SEGURIDAD INTRÍNSECA
Por su seguridad personal, siempre conrme la calicación de cualquier ubicación
peligrosa o potencialmente peligrosa conocida donde la luz se va a utilizar.
CARGAR LA LÁMPARA
ENTRADA DE CARGADOR: 5 VDC Máx
ADVERTENCIA: PARA EVITAR LA IGNICIÓN DE UNA ATMÓSFERA PELIGROSA, NO
INTENTE CARGAR ESTE PRODUCTO EN UN AMBIENTE PELIGROSO. ESTA TAREA
SOLAMENTE DEBE REALIZARSE EN UNA ZONA QUE SE SABE NO PELIGROSA.
Cargue completamente la batería antes del primer uso, o si la pila es nueva o no se ha
utilizado durante varios meses. Para un mejor rendimiento, cargue cuando el rayo de luz
comienza a disminuir.
yUse only the supplied Nightstick USB cable.
yUbique el puerto USB en la parte posterior del faro, retire la tapa de goma del puerto USB
y conecte el micro USB en el puerto micro USB del faro.
yEl tiempo total para la carga completa varía según la carga restante en el paquete de
baterías.
yLa luz indicadora de carga ubicada sobre el puerto de carga se volverá roja durante la
carga y verde cuando esté completamente cargada.
FUNCIONAMIENTO
MODOS DE ILUMINACIÓN
yPROYECTOR: Para encender el proyector, presione el interruptor en la parte superior de
la luz una vez.
yREFLECTOR: Al presionar el interruptor una segunda vez, se desactivará el proyector y
se encenderá el reector.
yDOBLE-LUZ: Al presionar el interruptor por tercera vez, se prenderán ambos, el proyector
y el reector al mismo tiempo para el modo Doble-Luz.
yOFF: Al presionar el interruptor por una cuarta vez, todos los modos de iluminación se
apagarán.
FUNCIÓN DE AJUSTE DE INCLINACIÓN
Ajuste el ángulo de inclinación de la luz para iluminar el área deseada.
CINTA DE CABEZA ELÁSTICA ANTIDESLIZANTE
yUse la diadema elástica antideslizante para usar directamente en la cabeza o en un
sombrero suave como una gorra de béisbol.
yUse la diadema de goma resistente en cualquier casco.
UTILIZAR SIN HEADBAND
Utilice el cierre resellable Dual-Lock™ de 3M™ (incluido) para montar la luz en un casco
o casco. Adhiera un lado a la placa trasera de la luz y el otro lado sobre una supercie limpia
y lisa en la parte delantera del casco.
yQuitar la diadema
yAsegúrese de que la supercie de montaje esté limpia y sin aceite (use un paño con
alcohol si es necesario)
yAntes de la instalación, determine la ubicación de montaje que permita que el faro se
incline completamente sin interferir con el borde del casco.
yRetire el respaldo adhesivo de cada lado del sujetador y adhiéralo al casco y la parte
posterior del soporte.
yPresione rmemente la luz en su lugar en el casco.
yNota: el adhesivo alcanza la resistencia máxima en 24 horas.
GARANTÍA
GARANTIA LIMITADA DE POR VIDA
Bayco Products, Inc. garantiza que este producto está libre de defectos de mano de obra
y materiales durante la vida del comprador original. La garantía de por vida limitada incluye
los LED, la carcasa y los lentes. Las pilas recargables, los cargadores, los interruptores, la
electrónica y los accesorios incluidos están garantizados por un período de dos años con un
comprobante de compra. Se excluyen el desgaste y los fallos normales, que son causados por
accidentes, mal uso, abuso, instalación defectuosa y daños por rayos.
Repararemos o reemplazaremos este producto si lo determinamos como defectuoso. Esta
es la única garantía, expresa o implícita, incluyendo cualquier garantía de comerciabilidad o
idoneidad para un propósito particular.
Para obtener una copia completa de la garantía, visite www.baycoproducts.com/bayco-
product-support/warranties. Conserve su recibo para comprobar la compra.
Manual de Instruções
XPR-5553G
A XPR-5553 É APROVADA PARA USO
AVISOS - INTRINSECAMENTE SEGURO
yAviso: Para evitar a ignição de uma atmosfera perigosa, o XPR-5553 só deve ser
carregado em uma área que não seja perigosa.
yAdvertência: Use somente a bateria recarregável de íon de lítio aprovada para o Nightstick
5562-BATT.
yAdvertência: A bateria recarregável de íon de lítio aprovada para o Nightstick 5562-BATT
deve ser substituída apenas por um técnico qualicado.
yAviso: Para evitar a ignição de uma atmosfera perigosa, não abra o compartimento da
bateria ou tente trocar a bateria enquanto estiver em um ambiente perigoso. Esta tarefa
deve ser realizada apenas em uma área conhecida como não perigosa.
yAviso: Abra o compartimento da bateria no XPR-5553 e substitua a bateria recarregável
de íon de lítio aprovada pelo Nightstick 5562-BATT somente em ar fresco.
yAviso: A substituição de componentes pode prejudicar a segurança intrínseca.

Bayco Products, Inc. • 640 South Sanden Blvd. • Wylie, TX 75098 • USA • 1-800-233-2155 • 1-469-326-9400 • www.nightstick.com
3M, Dual-Lock are trademarks of 3M Company. INS-XPR-5553-DL-22 10-06-2022
INSTRUÇÕES ESPECIAIS PARA SEGURANÇA INTRÍNSECA
Para segurança pessoal, sempre conrme a classicação de qualquer local conhecido
como perigoso ou potencialmente perigoso onde a lanterna possa ser usada.
CARREGANDO A LANTERNA
ENTRADA DO CARREGADOR: 5 VDC Max
AVISO: PARA PREVENIR A IGNIÇÃO DE UMA ATMOSFERA PERIGOSA, NÃO TENTE
USAR ESTE PRODUTO EM AMBIENTE PERIGOSO. ESTA TAREFA DEVE SER SOMENTE
REALIZADA EM UMA ÁREA CONHECIDA COMO NÃO-PERIGOSA.
Carregue completamente a lanterna antes do primeiro uso, ou se a bateria for nova ou
não tiver sido utilizada por vários meses. Para obter o melhor desempenho, carregue a bateria
quando a luz da lanterna começa a enfraquecer.
yUse apenas o cabo Nightstick USB fornecido.
yLocalize a porta USB na parte de trás do farol, remova a tampa de borracha da porta USB
e conecte o micro USB à porta micro USB do farol.
yO tempo total para a carga completa varia de acordo com a carga restante da bateria.
yA extremidade USB do cabo inclui um indicador de status de carga LED. O indicador LED
permanecerá vermelho até que a bateria esteja totalmente carregada. Ao carregar totalmente,
o indicador LED cará verde.
OPERAÇÃO
MODOS DE ILUMINAÇÃO
ySPOTLIGHT: Pressione o interruptor uma vez para ligar o holofote.
yFLOODLIGHT: Pressione o botão duas vezes para ligar o holofote.
yDUAL-LIGHT: Pressione o interruptor três vezes para ligar o holofote e o holofote ao
mesmo tempo para o modo Dual-Light.
yDESLIGAR: Pressione o interruptor uma quarta vez para desligar.
O 5453 POSSUI UM RECURSO DE AJUSTE DE INCLINAÇÃO:
Basta ajustar o ângulo de inclinação da luz para iluminar a área desejada.
O 5453 VEM COM DUAS TIARAS:
TIRA DE BORRACHA NÃO ESCORREGADIA
Utilize esta tira diretamente em sua cabeça ou sobre um boné. A característica
antiderrapante irá mantê-la posicionada na cabeça, mesmo durante um movimento vigoroso.
TIRA DE BORRACHA DE ALTA RESISTÊNCIA
Use a tira de borracha para serviços pesados em qualquer capacete de segurança. A
natureza não escorregadia da borracha vai manter a lanterna acoplada mesmo se o capacete
cair ou for utilizado em condições molhadas.
MONTE A LUZ DIRETAMENTE NO CAPACETE
Use o xador recarregável 3M™ Dual-Lock™ (incluído) para montar a luz em um capacete
ou capacete. Cole um lado na placa traseira da luz e o outro lado em uma superfície limpa e
lisa na frente do capacete.
yRemova a faixa de cabeça
yCertique-se de que a superfície de montagem esteja limpa e sem óleo (use algodão
embebido em álcool, se necessário)
yAntes de instalar, determine o local de montagem que permite que o farol se incline
totalmente sem interferir na borda do capacete.
yRemova o adesivo de cada lado do xador e cole no capacete e na parte de trás do suporte.
yPressione a luz com rmeza no capacete.
yNota: o adesivo atinge a força máxima em 24 horas.
GARANTIA
GARANTIA VITALÍCIA LIMITADA
Bayco Products, Inc. garante que este produto está livre de defeitos de fabricação e
materiais por tempo indeterminado ao comprador original. A Garantia Vitalícia Limitada
inclui os LEDs, a caixa e as lentes. As baterias recarregáveis, carregadores, interruptores,
componentes eletrônicos e acessórios incluídos são garantidos por um período de dois anos
com comprovante de compra. O desgaste e falhas normais causados por acidentes, maus-
tratos, abuso, instalação defeituosa e danos por raio são excluídos.
Repararemos ou substituiremos este produto se o determinarmos ser defeituoso. Esta
é a única garantia, expressa ou implícita, incluindo qualquer garantia de comercialização ou
adaptação para um propósito especíco.
Para obter uma cópia completa da garantia, acesse www.baycoproducts.com/bayco-
product-support/warranties. Retenha o seu recibo como comprovante de compra.
Gebrauchsanleitung
XPR-5553G
DIE XPR-5553 STIRNLAMPE IST ZUM GEBRAUCH ZUGELASSEN
WARNHINWEISE - EIGENSICHERHEIT GEWÄHRLEISTET
yWarnhinweis: Um das Zünden einer gefährlichen Atmosphäre zu verhindern, darf der
XPR-5553 nur in einem Bereich betrieben werden, der als ungefährlich bekannt ist.
yWarnhinweis: Verwenden Sie nur den zugelassenen Nightstick 5562-BATT Lithium-
Ionen-Akku.
yWarnhinweis: Der zugelassene Nightstick 5562-BATT Lithium-Ionen-Akku darf nur von
einem qualizierten Techniker ausgetauscht werden.
yWarnhinweis: Öffnen Sie das Batteriefach nicht und versuchen Sie nicht, den Batteriepack
auszutauschen, während Sie sich in einer gefährlichen Umgebung benden, um eine
Entzündung der gefährlichen Atmosphäre zu verhindern. Diese Aufgabe darf NUR in einem
Bereich ausgeführt werden, der als ungefährlich bekannt ist.
yWarnhinweis: Öffnen Sie das Batteriefach des XPR-5562 und ersetzen Sie den
zugelassenen Nightstick 5562-BATT Lithium-Ionen-Akku nur an der frischen Luft.
yWarnhinweis: Der Austausch von Komponenten kann die Eigensicherheit beeinträchtigen.
SPEZIELLE ANLEITUNG ZUR EIGENSICHERHEIT
Für Ihre persönliche Sicherheit überprüfen Sie stets die Einstufung jedes
bekanntlicherweise gefährlichen oder möglicherweise gefährlichen Standortes, an dem die
Taschenlampe verwended werden soll.
AUFLADEN DER LAMPE
LADEGERÄTEINGANG: 5 VDC Max
WARNHINWEIS: UM EINE ENTFLAMMUNG EINER EXPLOSIONS-GEFÄHRDETEN
ATMOSPHÄRE ZU VERHINDERN, VERMEIDEN SIE ES DIESES PRODUKT IN EINEM
GEFÄHRDETEN UMFELD AUFZULADEN. DIESE MASSNAHME SOLLTE LEDIGLICH
IN EINEM UMFELD VORGENOMMEN WERDEN, DAS BEKANNTERWEISE
UNGEFÄHRLICH IST.
Laden Sie die Lampe vor dem erstmaligen Gebrauch komplett auf, oder falls die Batterie
neu ist oder für mehrere Monate nicht verwendet worden ist. Für die beste Leistungsfähigkeit
laden Sie die Batterien auf wenn sich der Taschenlampenstrahl verdunkelt.
yVerwenden Sie nur das mitgelieferte Nightstick-USB-Kabel.
ySuchen Sie den USB-Anschluss auf der Rückseite des Scheinwerfers, entfernen Sie die
Abdeckung des Gummi-USB-Anschlusses und stecken Sie den Micro-USB-Anschluss in
den Micro-USB-Anschluss des Scheinwerfers.
yDie Gesamtzeit bis zum vollständigen Auaden hängt von der verbleibenden
Ladung im Akku ab.
yDas USB-Ende des Kabels enthält eine LED-Ladestatusanzeige. Die LED-Anzeige bleibt
rot bis die Taschenlampe komplett aufgeladen ist. Bei voller Auadung wechselt die LED-
Anzeige auf Grün.
INBETRIEBSETZUNG
LICHTMODI
ySPOTLIGHT: Drücken Sie den Schalter einmal, um den Scheinwerfer einzuschalten.
yFLUTLICHT: Drücken Sie den Schalter zweimal, um das Flutlicht einzuschalten.
yDUAL-LIGHT: Drücken Sie den Schalter dreimal, um sowohl den Scheinwerfer als auch
den Scheinwerfer gleichzeitig für den Dual-Light-Modus einzuschalten.
yAUS: Drücken Sie den Schalter ein viertes Mal, um ihn auszuschalten.
DIE 5453 HAT EINE HÖHENVERSTELLUNGSFUNKTION:
Passen Sie einfach den Winkel der Höhenverstellungsfunktion der Lampe so an, um den
gewünschten Bereich zu beleuchten.
DIE 5453 KOMMT MIT ZWEI KOPFBÄNDERN:
ELASTISCHES NICHT-RUTSCHENDES KOPFBAND
Verwenden Sie dieses Kopfband, um die Stirnlampe direkt an Ihrem Kopf zu tragen, oder
während Sie einen weichen Hut tragen wie etwa eine Baseball-Mütze. Die nicht-rutschende
Funktion sorgt dafür, dass die Lampe am Kopf positioniert bleibt, selbst bei kräftiger Bewegung.
STRAPAZIERFÄHIGES GUMMI-KOPFBAND
Verwenden Sie das strapazierfähige Gummi-Kopfband an jedem Schutzhelm. Der
haftbare Charakter des Bandes sorgt dafür, dass die Lampe befestigt bleibt, selbst wenn der
Helm fallen gelassen wird oder in feuchten Verhältnissen verwendet wird.
MONTAGE LICHT DIREKT AN EINEM HELM
Verwenden Sie den wiederverschließbaren 3M™ Dual-Lock™ -Verschluss (im
Lieferumfang enthalten), um das Licht an einem Helm oder Helm zu befestigen. Kleben
Sie eine Seite auf die Rückplatte des Lichts und die andere Seite auf eine saubere, glatte
Oberäche auf der Vorderseite des Helms.
yStirnband entfernen
yStellen Sie sicher, dass die Montageäche sauber und ölfrei ist (verwenden Sie bei Bedarf
ein Alkoholtupfer).
yBestimmen Sie vor der Installation den Montageort, an dem der Scheinwerfer vollständig
gekippt werden kann, ohne die Helmkrempe zu beeinträchtigen.
yEntfernen Sie den Kleberücken von jeder Seite des Befestigungselements und kleben Sie
ihn am Helm und an der Rückseite der Halterung fest.
yDrücken Sie das Licht fest auf den Helm.
yHinweis: Der Klebestreifen erreicht seine maximale Stärke in 24 Stunden.
GARANTIE
BEFRISTETE LEBENSLÄNGLICHE GARANTIE
Bayco Products, Inc. gewährleistet dem Erstkäufer eine lebenslängliche Garantie dafür,
dass dieses Product keinerlei Bearbeitungs- oder Materialienschäden aufweist. Die befristete
lebenslängliche Garantie beinhaltet LEDs (Leuchtdioden), Gehäuse und Lichtscheiben.
Wiederauadbare Batterien, Ladegeräte, Schalter, Elektronik und enthaltene Zubehör haben
eine Garantie von 2 Jahren mit Kaufbeleg.
Normaler Verschleiß und Fehlfunktionen, die durch Unfälle, Zweckentfremdung,
Missbrauch, fehlerhafte Installation und Blitzschäden verursacht wurden sind hiervon
ausgeschlossen. Wir reparieren oder ersetzen das Produkt sofern ein Defekt festgestellt
wird. Dies ist die einzige Gewährleistung, inklusive jeglicher Gewährleistung der allgemeinen
Gebrauchstauglichkeit und Eignung für den bestimmten Zweck dieses Produktes.
Eine vollständige Kopie der Garantie ist auf www.baycoproducts.com/bayco-product-
support/warranties ersichtbar. Bewahren Sie den Kassenzettel zum Kaufnachweis auf.
-
 1
1
-
 2
2
-
 3
3


NightStick XPR-5553G Manual do usuário
- Categoria
- Lanternas
- Tipo
- Manual do usuário
em outras línguas
- español: NightStick XPR-5553G Manual de usuario
- français: NightStick XPR-5553G Manuel utilisateur
- English: NightStick XPR-5553G User manual
- Deutsch: NightStick XPR-5553G Benutzerhandbuch
Artigos relacionados
-
NightStick XPR-5562GX Manual do usuário
-
NightStick XPR-5568 Manual do usuário
-
-
NightStick XPR-5542 Manual do usuário
-
-
-
NightStick XPP-5452G Manual do usuário
-
-
-