Philips MG7770/15 Manual do usuário
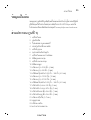
- Categoria
- Aparadores / barbeadores de corpo
- Tipo
- Manual do usuário

MG7770


1MM
2MM
3-7MM
BODY 5MM
BODY 3MM
4MM
9MM
12MM
16MM
9 10
7 8
2
3
1
6
5
1312
1817
2119 20
11
161514
4
22
23
25
24

empty page before TOC


English
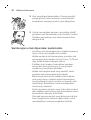
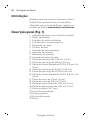
Introduction
Congratulations on your purchase and welcome to
Philips! To fully benefit from the support that
Philips offers, register your product at
www.philips.com/welcome.
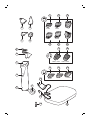
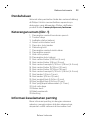
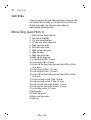
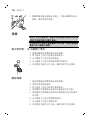
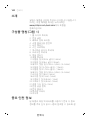
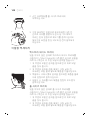
General description (Fig. 1)
1 Full-size hair trimmer
2 On/off button
3 Battery status indicator
4 Socket for small plug
5 Body shaver
6 Skin protector
7 Extra-wide hair trimmer
8 Precision trimmer
9 Precision shaver
10 Nose trimmer
11 Hair comb wide 5/32in. (4mm)
12 Hair comb wide 3/8in. (9mm)
13 Fading hair comb 5/32in.-3/8in. (4-9mm)
14 Hair comb wide 15/32in. (12mm)
15 Hair comb wide 21/32in. (16mm)
16 Fading hair comb 5/32in.-3/8in. (4-9mm)
17 Body comb 1/8in. (3mm)
18 Body comb 3/16in. (5mm)
19 Stubble comb 3/64in. (1mm)
20 Stubble comb 5/64in. (2mm)
21 Adjustable comb (3-7mm)
22 Supply unit
23 Small plug
24 Cleaning brush
25 Pouch
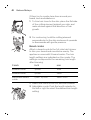
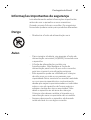
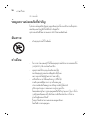
Important safety information
Read this important information carefully before
you use the appliance and its accessories and save
6
English

it for future reference. The accessories supplied
may vary for different products.
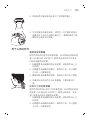
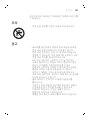
Danger
- Keep the supply unit dry.
Warning
- To charge the battery, only use the detachable
supply unit (HQ8505) provided with the
appliance.
- The supply unit contains a transformer. Do not
cut off the supply unit to replace it with another
plug, as this causes a hazardous situation.
- This appliance can be used by children aged
from 8 years and above and persons with
reduced physical, sensory or mental capabilities
or lack of experience and knowledge if they
have been given supervision or instruction
concerning use of the appliance in a safe way
and understand the hazards involved. Children
shall not play with the appliance. Cleaning and
user maintenance shall not be made by
children without supervision.
- Always unplug the appliance before you clean it
under the tap.
- Always check the appliance before you use it.
Do not use the appliance if it is damaged, as
this may cause injury. Always replace a
damaged part with one of the original type.
- Do not open the appliance to replace the
rechargeable battery.
7
English

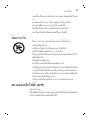
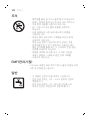
Caution
- Never immerse the charging stand in water and
do not rinse it under the tap.
- Never immerse the appliance in water. Do not
use the appliance in the bath or shower.
- Never use water hotter than 60°C to rinse the
appliance.
- Only use this appliance for its intended purpose
as shown in the user manual.
- For hygienic reasons, the appliance should only
be used by one person.
- Do not use the supply unit in or near wall
sockets that contain an electric air freshener to
prevent irreparable damage to the supply unit.
- Never use compressed air, scouring pads,
abrasive cleaning agents or aggressive liquids
such as petrol or acetone to clean the
appliance.
Electromagnetic fields (EMF)
This Philips appliance complies with all applicable
standards and regulations regarding exposure to
electromagnetic fields.
General
- This appliance can be safely cleaned under the
tap.
- The supply unit is suitable for mains voltages
ranging from 100 to 240 volts.
- The supply unit transforms 100-240 volts to a
safe low voltage of less than 24 volts.
8
English

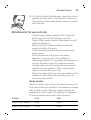
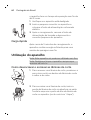
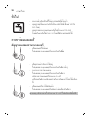
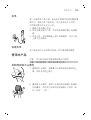
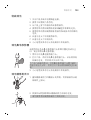
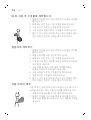
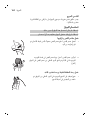
Charging
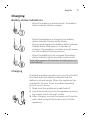
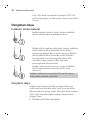
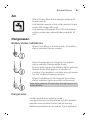
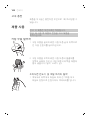
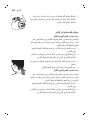
Battery status indications
- When the battery is almost empty, the battery
status indicator flashes orange.
- When the appliance is charging, the battery
status indicator flashes white slowly.
- During quick charge, the battery status indicator
flashes white. After approx. 5 minutes of
charging, the appliance contains enough power
for one cordless trimming session.
- When the battery is fully charged, the battery
status indicator lights up white continuously.
Note: After approx. 30 minutes, the light goes out
automatically.
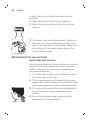
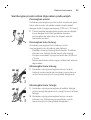
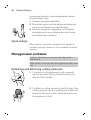
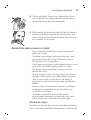
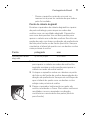
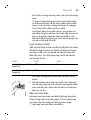
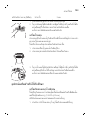
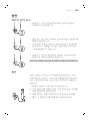
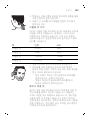
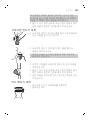
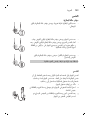
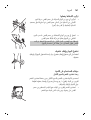
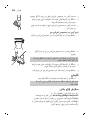
Charging
Charge the appliance before you use it for the first
time and when the display indicates that the
battery is almost empty. When the appliance has
charged for 3 hours, it has a cordless operating
time of up to 5 hours.
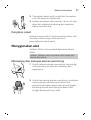
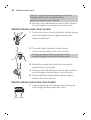
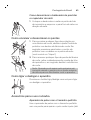
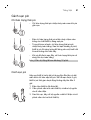
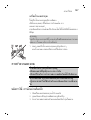
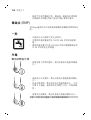
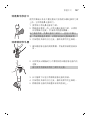
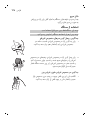
1 Make sure the appliance is switched off.
2
1
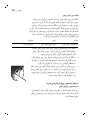
2 Insert the small plug into the appliance and put
the supply unit in the wall socket.
3 After charging, remove the supply unit from the
wall outlet and pull the small plug out of the
appliance.
9
English

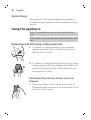
Quick charge
After approx. 5 minutes charging, the appliance
contains enough power for one cordless trimming
session.
Using the appliance
Note: This appliance can only be used without
cord.
Note: Switch off and clean the appliance after each
use.
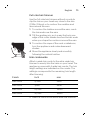
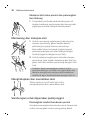
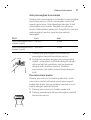
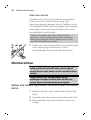
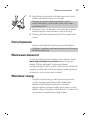
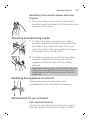
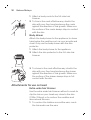
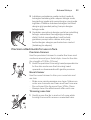
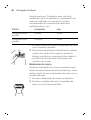
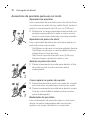
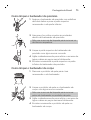
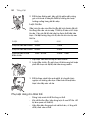
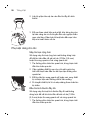
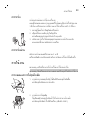
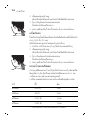
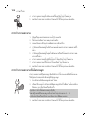
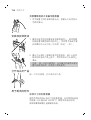
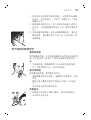
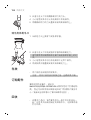
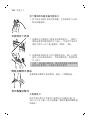
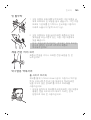
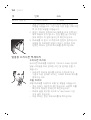
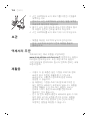
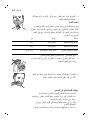
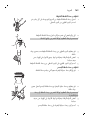
Detaching and attaching cutting elements
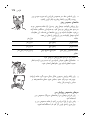
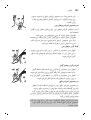
1 To detach a cutting element, push upwards
against the teeth of the cutting element and
take it off the handle.
1
2
2 To attach a cutting element, insert the lug of the
cutting element into the guiding slot at the front
and push the back of the cutting element onto
the appliance ('click').
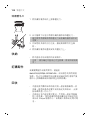
Detaching the precision shaver and nose
trimmer
1 Place your finger on the arrow at the back of
the attachment and push it off the handle in the
direction of the arrow.
10
English

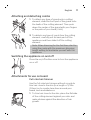
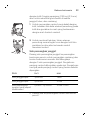
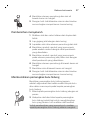
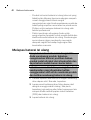
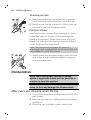
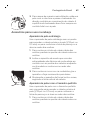
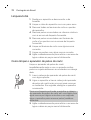
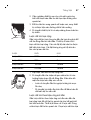
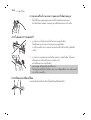
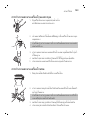
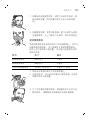
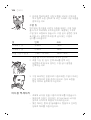
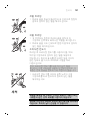
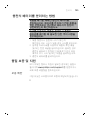
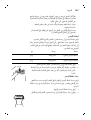
Attaching and detaching combs
1
2
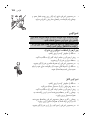
1 To attach any type of guard onto a cutting
element, slide the front part of the guard onto
the teeth of the cutting element. Then push
down the center of the guard with your fingers
or the palm of your hand ('click').
2 To detach any type of comb from the cutting
element, carefully pull its back part off the
appliance and then slide it off the cutting
element.
Note: When trimming for the first time, start by
using the comb with the maximum trimming
length setting to familiarize yourself with the
appliance.
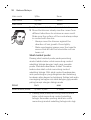
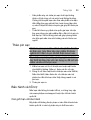
Switching the appliance on and off
Press the on/off button once to turn the appliance
on or off.
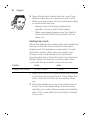
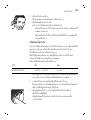
Attachments for use on beard
Full-size hair trimmer
Use the full-size hair trimmer without a comb to
trim hair close to the skin (to a length of 1/32in
(0.5mm) or to create clean lines around your
beard, neck and sideburns.
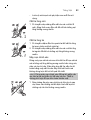
1 To trim hair close to the skin, place the flat side
of the cutting element against your skin and
make strokes against the direction of hair
growth.
11
English

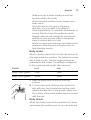
2 For contouring, hold the cutting element
perpendicular to the skin and move it upwards
or downwards with gentle pressure.
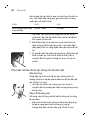
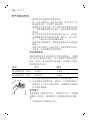
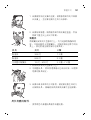
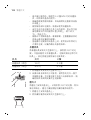
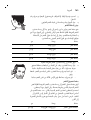
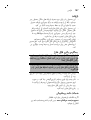
Beard combs
Attach a beard comb to the full-size hair trimmer
to trim your beard and moustache evenly. The
appliance comes with 5 beard combs. The hair
length settings are indicated on the combs. The
settings correspond to the remaining hair length
after trimming.
Comb inch mm
Stubble comb 3/64in. 1mm
Stubble comb 5/64in. 2mm
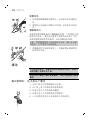
Adjustable beard
comb
1/8in.- 9/32in. 3mm-7mm
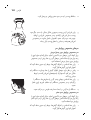
1 Attach the comb to the full-size hair trimmer.
= mm
2 Adjustable comb: Push the length selector to
the left or right to select the desired hair length
setting.
3 To trim the most effective way, move the comb
against the direction of hair growth. Make sure
the surface of the comb always stays in contact
with the skin.
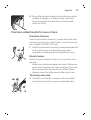
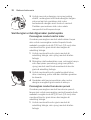
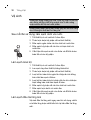
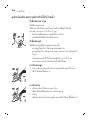
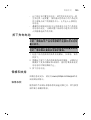
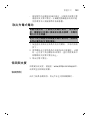
Attachments for use on body
- Use the green body combs to trim body hair.
- When you trim for the first time, use the
5mm/3/16in. body comb to familiarize yourself
with the appliance.
12
English

- Make sure hair is clean and dry as wet hair
tends to stick to the body.
- When trimming sensitive areas, always use a
body comb.
- Since all hairs do not grow in the same
direction, you may want to try different
trimming positions (i.e. upwards, downwards, or
across). Practice is best for optimum results.
- Always make smooth and gentle movements
and be sure the surface of the comb always
stays in contact with your skin.
- When too many hairs have accumulated on the
appliance, blow the hairs out before use, for
best trimming results.
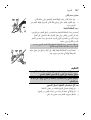
Body combs
Attach a body comb to the full-size hair trimmer to
trim hairs below the neckline. The appliance comes
with 2 body combs. The hair length settings are
indicated on the combs. The settings correspond
to the remaining hair length after trimming.
Comb inch mm
Body comb (green) 1/8in. 3mm
Body comb (green) 3/16in. 5mm
1 Attach a body comb to the full-size hair
trimmer.
2 To trim in the most effective way, stretch the
skin with your free hand and move the comb
against the direction of hair growth. Make sure
the surface of the comb always stays in contact
with the skin.
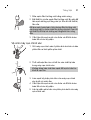
Body shaver
Attach the body shaver to the appliance, to shave
hairs below the neckline such as your armpits and
13
English

chest. Only use the body shaver with the skin
protector.
1 Attach the body shaver to the appliance.
2 Attach the skin protector to the full-size hair
trimmer.
3 To shave in the most effective way, stretch the
skin with your free hand and move the shaver
against the direction of hair growth. Make sure
the surface of the shaver always stays in full
contact with the skin.
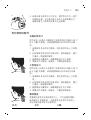
Attachments for use on head
Extra-wide hair trimmer
Use the extra-wide hair trimmer without a comb to
clip the hair on your head very close to the skin
(1/32in (0.5mm) or to contour the neckline and
area around the ears.
1 To contour the hairline around the ears, comb
the hair ends over the ears.
2 Tilt the appliance in such a way that only one
edge of the cutter blades touches the hair ends
when you shape the contours around the ears.
3 To contour the nape of the neck or sideburns,
turn the appliance and make downward
strokes.
4 Move the appliance slowly and smoothly
following the natural hairline.
14
English

Full-size hair trimmer
Use the full-size hair trimmer without a comb to
clip the hair on your head very close to the skin
(1/32in (0.5mm) or to contour the neckline and
area around the ears.
1 To contour the hairline around the ears, comb
the hair ends over the ears.
2 Tilt the appliance in such a way that only one
edge of the cutter blades touches the hair ends
when you shape the contours around the ears.
3 To contour the nape of the neck or sideburns,
turn the appliance and make downward
strokes.
4 Move the appliance slowly and smoothly
following the natural hairline.
Hair combs wide
Attach a wide hair comb to the extra-wide hair
trimmer to evenly trim the hairs on your head. The
appliance comes with 4 wide hair combs. The hair
length settings are indicated on the combs. The
settings correspond to the remaining hair length
after trimming.
Comb inch mm
Hair comb 5/32in. 4mm
Hair comb 3/8in. 9mm
Hair comb 15/32in. 12mm
Hair comb 21/32in. 16mm
1 Attach a comb to the extra-wide hair trimmer.
15
English

2 Move the trimmer slowly over the crown from
different directions to achieve an even result.
Make sure the surface of the comb always stays
in contact with the skin.
-
Always move the trimmer against the
direction of hair growth. Press lightly.
-
Make overlapping passes over the head to
ensure that all hair that should be cut has
been cut.
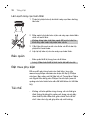
Fading hair comb
Attach the fading hair combs to the extra-wide hair
trimmer to trim the hair around the ears with a
faded result. The appliance comes with 2 combs.
Use both combs to trim hair around both ears.
Choose a hair comb based on the preferred
trimming direction of back to front or front to back.
Always make sure that you hold the side of the
comb with the short teeth closest to your ear.
Comb inch mm
Fading hair combs 5/32in.-3/8in. 4-9mm
1 Attach the comb to the extra-wide hair trimmer
to trim the hair around the ear. Then attach the
other comb to trim the hair around the other
ear.
2 Place the appliance on your hair at the back or
front of your ear, depending on the trimming
direction you prefer. Always make sure that the
side of the comb with the short teeth is closest
to your ear.
16
English

3 Move the trimmer slowly around the ear, while
holding it steady. For best results, move the
trimmer against the direction of hair growth
(back to front).
Precision attachments for use on face
Precision trimmer
Use the precision trimmer to create fine lines and
contours around your facial style, close to the skin
(to a length of 1/32in./0.5mm).
1 Hold the precision trimming head perpendicular
to the skin and move the trimming head
upwards or downwards with gentle pressure.
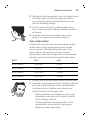
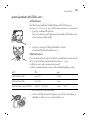
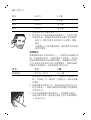
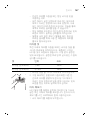
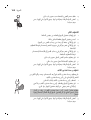
Nose trimmer
Use the nose trimmer to trim your nose hair and
ear hair.
- Make sure nasal passages are clean. Make sure
outer ear channels are clean and free from wax.
- Do not insert the tip more than 3/16in./5mm.
- Always clean the attachment after each use.
Trimming nose hair
1 Gently move the tip in and out of nose while
turning it around to remove unwanted hairs.
17
English

Trimming ear hair
1 Slowly move the tip round the ear to remove
hairs that stick out beyond the rim of the ear.
2 Gently move the tip in and out of the outer ear
channel to remove unwanted hairs.
Precision shaver
Use the precision shaver after trimming, to shave
unwanted hairs on cheeks, chin and along the
beard with precision. Make sure to pre-trim your
beard first, with the full-size hair trimmer without
comb, to obtain the best result.
Note: Use the precision shaver to remove
remaining hairs and detailing your beard style. It is
not suitable for a full face shave.
1 Gently press the precision shaver onto the skin
and shave along contoured edges to remove
any unwanted hairs.
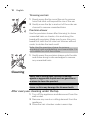
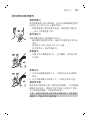
Cleaning
Never use scouring pads, abrasive cleaning
agents or aggressive liquids such as gasoline or
acetone to clean the product.
Never dry the trimmer teeth with a towel or
tissue, as this may damage the trimmer teeth.
After every use: cleaning under the tap
1 Turn off the appliance and disconnect from the
wall socket.
2 Remove any comb or cutting element from the
appliance.
3 Rinse the hair chamber under a warm tap.
18
English

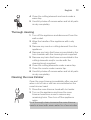
4 Clean the cutting element and comb under a
warm tap.
5 Carefully shake off excess water and let all parts
air dry completely.
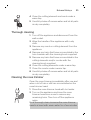
Thorough cleaning
1 Turn off the appliance and disconnect from the
wall socket.
2 Wipe the handle of the appliance with a dry
cloth.
3 Remove any comb or cutting element from the
appliance.
4 Remove any hairs that have accumulated in the
hair chamber with the cleaning brush supplied.
5 Remove any hairs that have accumulated in the
cutting elements and/or combs with the
cleaning brush supplied.
6 Clean the cutting elements under a warm tap.
7 Clean the combs under a warm tap.
8 Carefully shake off excess water and let all parts
air dry completely.
Cleaning the nose trimmer
Clean the nose trimmer immediately after use and
when a lot of hair or dirt has accumulated on the
nose trimmer head.
1 Rinse the nose trimmer head with hot water.
2 Turn on the appliance and rinse the nose
trimmer head once more to remove any
remaining hairs. Then turn off the appliance
again.
For a thorough clean, immerse the nose trimmer
head in a bowl with warm water for a few minutes
19
English

and then turn on the appliance to remove
stubborn hair/debris.
3 Carefully shake off excess water and let all parts
air dry completely.
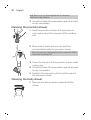
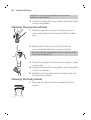
Cleaning the precision shaver
1 Hold the precision shaver at the grooves on
each side and pull the top part off the bottom
part.
2 Blow and/or shake out any hair that has
accumulated inside the precision shaver.
Do not use the cleaning brush to remove hairs
from the shaving foil.
3 Clean the top part of the precision shaver under
a warm tap.
4 Carefully shake off excess water and let all parts
air dry completely.
5 Reattach the top part onto the bottom part of
the precision shaver.
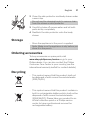
Cleaning the body shaver
1 Remove the skin protector upwards off the
shaver.
20
English
A página está carregando...
A página está carregando...
A página está carregando...
A página está carregando...
A página está carregando...
A página está carregando...
A página está carregando...
A página está carregando...
A página está carregando...
A página está carregando...
A página está carregando...
A página está carregando...
A página está carregando...
A página está carregando...
A página está carregando...
A página está carregando...
A página está carregando...
A página está carregando...
A página está carregando...
A página está carregando...
A página está carregando...
A página está carregando...
A página está carregando...
A página está carregando...
A página está carregando...
A página está carregando...
A página está carregando...
A página está carregando...
A página está carregando...
A página está carregando...
A página está carregando...
A página está carregando...
A página está carregando...
A página está carregando...
A página está carregando...
A página está carregando...
A página está carregando...
A página está carregando...
A página está carregando...
A página está carregando...
A página está carregando...
A página está carregando...
A página está carregando...
A página está carregando...
A página está carregando...
A página está carregando...
A página está carregando...
A página está carregando...
A página está carregando...
A página está carregando...
A página está carregando...
A página está carregando...
A página está carregando...
A página está carregando...
A página está carregando...
A página está carregando...
A página está carregando...
A página está carregando...
A página está carregando...
A página está carregando...
A página está carregando...
A página está carregando...
A página está carregando...
A página está carregando...
A página está carregando...
A página está carregando...
A página está carregando...
A página está carregando...
A página está carregando...
A página está carregando...
A página está carregando...
A página está carregando...
A página está carregando...
A página está carregando...
A página está carregando...
A página está carregando...
A página está carregando...
A página está carregando...
A página está carregando...
A página está carregando...
A página está carregando...
A página está carregando...
A página está carregando...
A página está carregando...
A página está carregando...
A página está carregando...
A página está carregando...
A página está carregando...
A página está carregando...
A página está carregando...
A página está carregando...
A página está carregando...
A página está carregando...
A página está carregando...
A página está carregando...
A página está carregando...
A página está carregando...
A página está carregando...
A página está carregando...
A página está carregando...
A página está carregando...
A página está carregando...
A página está carregando...
A página está carregando...
A página está carregando...
A página está carregando...
A página está carregando...
A página está carregando...
A página está carregando...
A página está carregando...
A página está carregando...
A página está carregando...
A página está carregando...
A página está carregando...
A página está carregando...
A página está carregando...
A página está carregando...
A página está carregando...
A página está carregando...
A página está carregando...
A página está carregando...
A página está carregando...
A página está carregando...
A página está carregando...
A página está carregando...
A página está carregando...
A página está carregando...
A página está carregando...
A página está carregando...
A página está carregando...
A página está carregando...
A página está carregando...
A página está carregando...
A página está carregando...
A página está carregando...
A página está carregando...
A página está carregando...
A página está carregando...
A página está carregando...
A página está carregando...
A página está carregando...
A página está carregando...
A página está carregando...
A página está carregando...
A página está carregando...
A página está carregando...
A página está carregando...
A página está carregando...
A página está carregando...
A página está carregando...
A página está carregando...
A página está carregando...
A página está carregando...
A página está carregando...
A página está carregando...
A página está carregando...
A página está carregando...
A página está carregando...
A página está carregando...
A página está carregando...
A página está carregando...
A página está carregando...
A página está carregando...
A página está carregando...
A página está carregando...
A página está carregando...
A página está carregando...
A página está carregando...
A página está carregando...
A página está carregando...
A página está carregando...
A página está carregando...
-
 1
1
-
 2
2
-
 3
3
-
 4
4
-
 5
5
-
 6
6
-
 7
7
-
 8
8
-
 9
9
-
 10
10
-
 11
11
-
 12
12
-
 13
13
-
 14
14
-
 15
15
-
 16
16
-
 17
17
-
 18
18
-
 19
19
-
 20
20
-
 21
21
-
 22
22
-
 23
23
-
 24
24
-
 25
25
-
 26
26
-
 27
27
-
 28
28
-
 29
29
-
 30
30
-
 31
31
-
 32
32
-
 33
33
-
 34
34
-
 35
35
-
 36
36
-
 37
37
-
 38
38
-
 39
39
-
 40
40
-
 41
41
-
 42
42
-
 43
43
-
 44
44
-
 45
45
-
 46
46
-
 47
47
-
 48
48
-
 49
49
-
 50
50
-
 51
51
-
 52
52
-
 53
53
-
 54
54
-
 55
55
-
 56
56
-
 57
57
-
 58
58
-
 59
59
-
 60
60
-
 61
61
-
 62
62
-
 63
63
-
 64
64
-
 65
65
-
 66
66
-
 67
67
-
 68
68
-
 69
69
-
 70
70
-
 71
71
-
 72
72
-
 73
73
-
 74
74
-
 75
75
-
 76
76
-
 77
77
-
 78
78
-
 79
79
-
 80
80
-
 81
81
-
 82
82
-
 83
83
-
 84
84
-
 85
85
-
 86
86
-
 87
87
-
 88
88
-
 89
89
-
 90
90
-
 91
91
-
 92
92
-
 93
93
-
 94
94
-
 95
95
-
 96
96
-
 97
97
-
 98
98
-
 99
99
-
 100
100
-
 101
101
-
 102
102
-
 103
103
-
 104
104
-
 105
105
-
 106
106
-
 107
107
-
 108
108
-
 109
109
-
 110
110
-
 111
111
-
 112
112
-
 113
113
-
 114
114
-
 115
115
-
 116
116
-
 117
117
-
 118
118
-
 119
119
-
 120
120
-
 121
121
-
 122
122
-
 123
123
-
 124
124
-
 125
125
-
 126
126
-
 127
127
-
 128
128
-
 129
129
-
 130
130
-
 131
131
-
 132
132
-
 133
133
-
 134
134
-
 135
135
-
 136
136
-
 137
137
-
 138
138
-
 139
139
-
 140
140
-
 141
141
-
 142
142
-
 143
143
-
 144
144
-
 145
145
-
 146
146
-
 147
147
-
 148
148
-
 149
149
-
 150
150
-
 151
151
-
 152
152
-
 153
153
-
 154
154
-
 155
155
-
 156
156
-
 157
157
-
 158
158
-
 159
159
-
 160
160
-
 161
161
-
 162
162
-
 163
163
-
 164
164
-
 165
165
-
 166
166
-
 167
167
-
 168
168
-
 169
169
-
 170
170
-
 171
171
-
 172
172
-
 173
173
-
 174
174
-
 175
175
-
 176
176
-
 177
177
-
 178
178
-
 179
179
-
 180
180
-
 181
181
-
 182
182
-
 183
183
-
 184
184
-
 185
185
-
 186
186
-
 187
187
-
 188
188
-
 189
189
-
 190
190
-
 191
191
-
 192
192


Philips MG7770/15 Manual do usuário
- Categoria
- Aparadores / barbeadores de corpo
- Tipo
- Manual do usuário
em outras línguas
- English: Philips MG7770/15 User manual
Artigos relacionados
-
Philips MG5730/13 Manual do usuário
-
Philips MG7710/13 Manual do usuário
-
-
Philips MG7770/15 Manual do usuário
-
Philips MG1100/16 Manual do usuário
-
Philips MG3710/15 Manual do usuário
-
Philips BRE712/00 Informação importante
-
-
Philips BT1216/15 Manual do usuário
-