Indesit MWI 120 GX Guia de usuario
- Categoria
- Microondas
- Tipo
- Guia de usuario
Este manual também é adequado para

1
GB
1
GB
MWI120GX
MWI120GXUK
www.indesit.com

2
GB
Contents
English .......................................................................................3
Français (FR) ...........................................................................14
Italiano (IT) ..............................................................................25
Español (ES) ...........................................................................36
Português (PT) ........................................................................47
Deutsch (DE) ...........................................................................58
Nederlands (NL) ......................................................................69
80...................................................................................(ARϰΑέϋ

3
GB
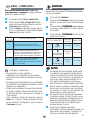
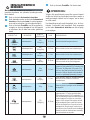
INSTALLATION
IMPORTANT SAFETY INSTRUCTIONS
Read Carefully And Keep For Future Reference
* If material inside / outside the microwave oven ignite or smoke is emitted, keep
microwave oven door closed and turn the microwave oven off. Disconnect
the power or shut off power at the fuse or circuit breaker panel.
* Do not leave the microwave oven unattended, especially when using paper,
plastic or other combustible materials in the cooking process. Paper can char
or burn and some plastics can melt if used when heating foods.
WARNING:
* If the door or door seals are damaged,
the oven must not be operated until
it has been repaired by a competent
person.
WARNING:
* It is hazardous for anyone other than a competent person to carry out any
service or repair operation that involves the removal of a cover which provides
protection against exposure to microwave energy.
WARNING:
* When the appliance is operated in
the combination mode, children
should only use the oven under adult
supervision due to the temperature
generated.
* WARNING: Check the oven for any damage, such
as misaligned or bent door, damaged door seals
and sealing surface, broken or loosed door hin-
ges and latches and dents inside the cavity or on
the door. If there is any damage, do not operate
the oven and contact qualied service person-
nel.
* Make sure that the power supply code is undama-
ged and does not run under the oven or cover any
hot or sharp surface.
* Do not use the oven outdoors.
* Check that the voltage on the rating plate corres-
ponds to the voltage in your home.
* Do not remove the microwave inlet protection
plates located on the side of oven cavity wall. It
prevents grease & food particles from entering the
microwave inlet channels.
* Ensure the oven cavity is empty before mounting.
* Ensure that the appliance is not damaged. Check
that the oven door closes rmly against the door
support and that the internal door seal is not dama-
ged. Empty the oven and clean the interior with a
soft, damp cloth.
* Do not operate this appliance if it has a damaged
mains cord or plug, if it is not working properly, or
if it has been damaged or dropped. Do not immer-
se the mains cord or plug in water. Keep the cord
away from hot surface, electrical shock, re or other
hazards may result.
* Do not use extension cord: if the power supply cord
is too short, have a qualied electrician or service-
man install an outlet near the appliance.
* This microwave oven must be placed on a at, stab-
le surface to hold its weight and the weight of food
to be cooked in the oven.
* Do not place the oven where heat, moisture, or high
humidity are generated, or near combustible mate-
rials.
* Do not operate the oven without turntable and
turntable support in their proper positions.
* The socket must be really accessible so that it can be
easily unplugged in an emergency.
* Do not install this appliance in kitchen cupboards
without the specified 45mm rear chimney. Inade-
quate ventilation could adversely affect the perfor-
mance and life of the appliance.
* Improper use of the grounding plug can result in a
risk of electric shock.
* Consult a qualified electrician or serviceman if the
grounding instructions are not completely un-
derstood, or if you have doubts as to whether the
microwave oven is properly grounded.
* The grounding of this appliance is compulsory. The
manufacturer will accept no responsibility for injury
to persons, animals or damage to objects arising
from the non-observance of this requirement.
* The manufacturers are not liable for any problems
caused by the user‘s failure to observe these instruc-
tions.

4
GB
* The appliance and its accessible parts become hot during using. Care should
be taken to avoid touching heating elements inside the microwave oven.
* Children less than 8 years of age shall be kept away unless continuous
supervision.
* The microwave oven is intended for heating foods and beverages. Drying of
food or clothing and heating of warming pads, slippers, sponges, damp cloth
and similar may lead to risk of injury, ignition or fire.
* This appliance can be used by children aged from 8 years and above and
persons with reduced physical, sensory or mental capabilities or lack of
experience and knowledge if they have been given supervision or instruction
concerning use of the appliance in a safe way and understand the hazards
involved.
* Cleaning and user maintenance shall not be made by children unless they are
aged from 8 years and above and supervised. Children should be supervised
to ensure that they do not play with the appliance. Keep the appliance and its
cord out of reach of children less than 8 years.
* Do not use your microwave oven for cooking or reheating whole eggs with or
without shell since they may explode even after microwave heating has ended.
* This appliance is not intended for use at altitudes above 2000m.
The appliances are not intended to be operated by means of an external
timer or separate remote-control system.Do not leave the microwave oven
unattended if you are using a lot of fat or oil since they can overheat and
cause a fire!
* Do not heat, or use flammable materials in or near the microwave oven.
Fumes can create a fire hazard or explosion.
WARNING:
* Liquids and other foods must not be heated in sealed
containers since they are liable to explode.
* Do not use your microwave oven for drying textiles, paper, spices, herbs, wood,
flowers or other combustible materials. Fire could result.
* Do not use corrosive chemicals or vapors in this appliance. This type of
microwave oven is specifically designed to heat or cook food. It is not designed
for industrial or laboratory use.
* Do not hang or place heavy items on the door as this can damage the
microwave oven‘s opening and hinges. The door handle should not be used
for hanging things on.
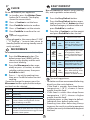
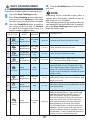
TROUB LE SHOOTING GUIDE
* The Plug is properly inserted in the wall socket.
* The Door is properly closed.
* Check your Fuses and ensure that there is power
available.
* Check that the microwave oven has ample
ventilation.
* Wait for 10 minutes, then try to operate the
microwave oven once more.
* Open and then close the door before you try again.
If the microwave oven does not work, do not make a service call until you have made the following checks:
This is to avoid unnecessary calls for which you
will be charged.
When calling for Service, please give the serial
number and type number of the microwave
oven (see Service label).
Consult your warranty booklet for further
advice.
WARNING:
* Service only to be carried out by a trained service technician.
Do not remove any cover.
If the mains cord needs to be replaced it should be replaced by the original
mains cord, which is available via our service organization. The mains cord must
only be replaced by a trained service technician.

5
GB
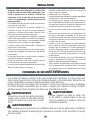
PRECAUTIONS
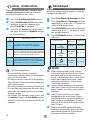
This appliance is intended to be used in household and similar applications such as:
* Staff kitchen areas in shops,offices and other working environments;
* Farm houses;
* By clients in hotels, motels and other residential environments;
* Bed and breakfast type environments.
No other use is permitted (e.g.heating rooms).
GENERAL
* Do not use this product near a kitchen sink, in a wet basement, or near a swimming pool, or
similar area.
* Do not use the cavity for any storage purposes.
* Remove wire twist-ties from paper or plastic bags before placing bag in the microwave oven.
* Do not use your microwave oven for deep-frying, because the oil temperature cannot be
controlled.
* Use hot pads or microwave oven mitts to prevent burns, when touching containers, microwave
oven parts, and pans after cooking.
LIQUIDS
e.g. beverages or water. Overheating the liquid beyond boiling point can occur without
evidence of bubbling. This could result in a sudden boil over of the hot liquid.
To prevent this possibility the following steps should be taken:
* Avoid using straight-sided containers with narrow necks.
* Stir the liquid before placing the container in the microwave oven.
* After heating, allow standing for a short time, stirring again before carefully removing the
container from the microwave oven.
After heating baby food or liquids in a baby bottle or in a baby food jar, always stir and
check the temperature before serving. This will ensure that the heat is evenly distributed
and the risk of scald or burns can be avoided.
CAREFUL
* The packing box may be fully recycled as confirmed by the recycling symbol. Follow local disposal
regulations. Keep potentially hazardous packaging (plastic bags, polystyrene, etc.) out of the reach of
children.
* This appliance is marked according to the European directive 2012/19/EU on Waste Electrical and Elec-
tronic Equipment (WEEE). By ensuring this product is disposed of correctly, you will help prevent
potential negative consequences for the environment and human health, which could otherwise
be caused by inappropriate waste handling of this product.
* The symbol on the product, or on the documents accompanying the product, indicates that this appli-
ance may not be treated as household waste. Instead it shall be handed over to the applicable collection
point for the recycling of electrical and electronic equipment.
* Disposal must be carried out in accordance with local environmental regulations for waste disposal.
* For more detailed information about treatment, recovery and recycling of this product, please con-
tact your local city office, your household waste disposal service or the shop where you purchased
the product.
* Before scrapping, cut off the mains cord so that the appliance cannot be connected to the mains.
ENVIRONMENTAL HINTS
* The appliance should not be operated without food inside of it. Operation in this manner is likely
to damage the appliance.
* The ventilation openings on the microwave oven must not be covered. Blocking the air intake or
exhaust vents may cause damage to the microwave oven and poor cooking results.
* Put a glass of water inside. The water will absorb the microwave energy and the microwave oven
will not be damaged. Never operate with the empty unit.
* Do not store or use this appliance outdoors.

6
GB
* Failure to maintain the microwave oven in a clean condition could lead to deterioration of the
surface that could adversely affect the life of the appliance and possibly result in a hazardous
situation.
* Do not use metal scouring pads, abrasive cleansers, steel-wool pads, gritty washcloths, etc. which
can damage the control panel, and the interior and exterior microwave oven surfaces. Use a cloth
with a mild detergent or a paper towel with spray glass cleaner. Apply spray glass cleaner to a
paper towel.
* Use a soft and damp cloth with mild detergent to clean the interior surfaces, front and rear of the
door and the door opening.
* Do not use steam cleaning appliances when cleaning your microwave oven.
* The microwave oven should be cleaned regularly and any food deposits should be removed.
* At regular intervals, especially if spill overs have occurred, remove the turntable, the turntable
support and wipe the base of the oven clean.
* Cleaning is the only maintenance normally required. It must be carried out with the
microwave oven being disconnected.
* Do not spray directly on the microwave oven.
* This microwave oven is designed to operate cooking cycles with a proper container in
cavity directly.
* Do not allow grease or food particles to build up around the door.
* This product offers an Easy Clean function, which allows for easy cleaning of the micro-
wave cavity. For more details, please refer to the Easy Clean section.
* The Grill element does not need cleaning since the intense heat will burn off any splas-
hes.
* If the Grill is not used regularly, it should be run for 10 minutes a month to burn off any
splashes, in order to reduce the risk of fire.
MAINTENANCE & CLEANING
ACCESSORIES
* There are a number of accessories available on the market. Before you buy, ensure they are suita-
ble for microwave use.
* Metallic containers for food and beverages are not allowed during microwave cooking.
* Ensure that the utensils you use are microwave oven proof and allow microwaves to pass through
them before cooking.
* When you put food and accessories in the microwave oven, ensure that they do not come in
contact with the cavity wall of the microwave oven.
* This is especially important with accessories made of metal or metal parts.
* If accessories containing metal come into contact with the microwave oven interior, while the
microwave oven is in operation, sparking can occur and the microwave oven could be damaged..
* For better cooking performance, it is suggested that you need to put the accessories in the middle
of the inner cavity.
* Below accessories will come with the product, available for the microwave or grill using.
GLASS TURNTABLE
TURNTABLE SUPPORT
WIRE RACK

7
GB
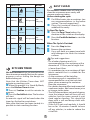
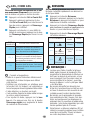
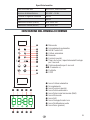
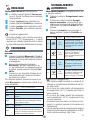
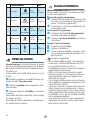
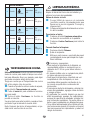
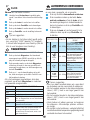
CONTROL PANEL DESCRIPTION
S
STOP
3”3”
3”3”
START
+ 30”
.Easy cooking Icon
3Easy Defrost Icon
$ Special Preparations Icon
/Easy clean Icon
1Microwave power (watt) Icon
4Microwave Icon
2Grill Icon
(Clock/Insert time Icon
,Mute O Icon
"Weight (grams) Icon
.3$/ 1
42(,
"
.
3
$
/
1
4
2
(
,
"
0
#
.Microwave
3Easy Defrost
$Grill and Combi Grill
/Easy Cooking
1Easy Warm / Beverages
4Special Preparations
2Kitchen Timer / Clock Setting by 3
seconds
(Easy Clean / Mute On/O by 3 seconds
,"+/- parameter
0Push&Go
#STOP
Technical Specification
Data Description MWI120GX, MWI120GXUK
Supply Voltage 230-240V~50 Hz
Rated Input Power 1200 W
Grill 1000 W
Outer dimensions (HxWxD) 390 x 594 x 349
Inner dimensions (HxWxD) 210 x 315 x 329

8
GB
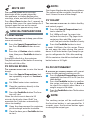
STANDBY MODE
START PROTECTION / CHILD LOCK
THIS AUTOMATIC SAFETY FUNCTION is activated
one minute after the microwave oven has
returned to “Stand-by mode”.
When the safety function is activate the
door must be opened and closed in order
to start the cooking, otherwise the display
will show “door”.
DOOR
The oven is in Stand-by mode when the
clock is displayed (or when the display will
show “:”, in case the clock has not been
set).
ECO STANDYBY: The function is set
in order to have power saving. During
Standby mode, you can press
+ and
-
button for 3 seconds to enter ECO
STANDBY mode.
After cooking end, the display will show
time or “:“ for 10 seconds then go to ECO
STANDBY mode. Press + and - button
again to quit the mode.
PAUSE OR STOP COOKING
ADD / STIR / TURN FOOD
TO PAUSE THE COOKING:
The cooking can be paused to check, add
or turn or stir the food by opening the
door. The setting will be maintained for
5min. The function will be stopped by
pressing STOP button during cooking.
TO CONTINUE COOKING:
Close the door and press the Push&Go
button. The cooking is resumed from where
it was paused.
If you don’t want to continue cooking
you can:
Remove the food, close the door and press
the Stop button.
When the cooking is finished:
The display will show the text “End”. An
acoustic beep will signal once a minute for
2 minutes.
DEPENDING ON THE SELECTED FUNCTION, it could
be needed to add / stir / turn food during
cooking. In these cases the microwave oven
will pause cooking and ask you to perform
the needed action.
When required, you should:
* Open the door.
* Add or Stir or Turn the food (depending
on the required action).
* Close the door and restart by pressing
Push&Go button.
Notes: if the door is not opened within 2
minutes from the request to Stir or Turn
the food, the microwave oven will continue
the cooking process (in this case the final
result may not be the optimal one). If the
door is not opened within 2 minutes from
the request to Add the food, the microwave
oven will go to the Stand-by mode.
i
PUSH&GO
THIS FEATURE ALLOWS YOU to start the micro-
wave oven quickly.
.
Pressing the Push&Go Button, the
Microwave function will start at full
microwave power (800W) for 30 se-
conds.
Tips and suggestions:
• It is possible to change the power level
and the duration time even after the coo-
king process has been already started. To
adjust the power level, simply press the
Microwave button repeatedly.
Press the Push&Go button once to increa-
se the duration time by 30 seconds.The
longest cooking time is 90 minutes.
Please note that reducing or stopping this
programmed cooking cycle will not have
a negative impact on the function of the
product.

9
GB
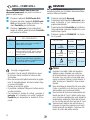
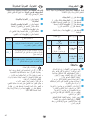
EASY DEFROST
USE THIS FUNCTION to defrost meat, poultry,
sh, and vegetables automatically.
.
Press the Easy Defrost button.
3
Press the Easy Defrost button repea-
tedly or press the +/- button to select
the food category in below table and
press Push&Go to conrm.
$
Press the +/- button to set the weight
and press Push&Go button to start.
FOOD TYPE WEIGHT SUGGESTED USE
p 1
Meat
100 -
2000g
Minced meat,cutlets,
steaks or roasts. After
cooking, allow food to rest
for 5-10min for better re-
sults.
p 2
Veget
-ables
100 -
1000g
Larger, medium and small
cut vegetables. Before
serving, allow food to rest
for 3-5 minutes for better
results.
p 3
Fish
100 -
2000g
Whole steaks or fish fillet.
Allow food to rest for 5-10
minutes for better results.
p 4
Poultry
100 -
2000g
Whole chicken, pieces or
fillets. After cooking, allow
food to rest for 5-10
minutes for better results.
• For better result we recommend defrosting
directly on the cavity bottom.
• If the food is warmer than deep-freeze
temperature (-18°C), choose a lower
weight than the food.
• If the food is colder than deep-freeze
temperature (-18°C), choose a higher
weight than the food.
• Separate pieces as they begin to defrost.
Individual slices defrost more easily.
• Standing time after defrosting always
improves the result since the temperature
will then be evenly distributed throughout
the food.
Tips and suggestions:
CLOCK
3
Press +/- button to set the hour.
$
Press Push&Go button to conrm.
/
Press +/- button to set the minute.
1
Press Push&Go to conrm the set-
ting.
• When plugged in, the screen shows“12:00”
( “12” flashing ), 1 minute later return to
standby (before returning standby can di-
rectly set clock).
Tips and suggestions:
TO SET THE CLOCK of your appliance:
.
In standby, press the Kitchen Timer
button for 3 seconds. The display
shows the current clock.
.
Press the Microwave button. The
defaut power level (800W) will be
shown on the display and the watt
icon starts blinking.
3
Press the Microwave button repe-
atedly or press +/- button, to select
suitable cooking power, then press
Push&Go button.
$
Press + / - to set the cooking time,
then press Push&Go button to start
cooking.
MICROWAVE
TO COOK WITH MICROWAVE POWER individually.
If need to change the power, press the
Microwave button again,the desired po-
wer level can be selected.
POWER
SUGGESTED USE
90W
Softening ice cream, butter and cheeses.
160W
Defrosting.
350W
Simmering stews, melting butter.
500W
More careful cooking e.g. high protein
sauces, cheese and egg dishes and to
finish cooking casseroles.
650W
Cooking dishes, not possible to stir.
800W
Reheating of beverages, water, clear soups,
coffee, tea or other food with a high water
content. If the food contains egg or cream
choose a lower power.

10
GB
G RILL, COMBI GRILL
B EVERAGES
THIS FUNCTION PROVIDES GRILL, AND GRILL WITH
MICROWAVE(COMBI GRILL) heating, allowing
you to cook gratin in less time.
.
Press the Grill&Combi Grill button.
3
Press Grill&Combi Grill button repe-
atedly to select the cooking type,
press Push&Go to confirm.
$
Press the +/- button to set the cook-
ing time, then press Push&Go button
to start cooking.
FOOD
TYPE
SUGGESTED USE
GRIL
Grill toast, hot sandwiches, potato
croquettes, sausages, and vegetables.
CO_1
Combi 1 Seafood, Pudding. After cooking,
it is recommended to allow food to rest for
at least 5 minutes for better results.
CO_2
Combi 2 Meat,whole chicken, pieces, or
fillets. After cooking, it is recommended to
allow food to rest for 5-10 minutes
• Ensure that the utensils used are
microwave safe and heat-resistant when
you use this function.
• Do not use plastic utensils when grilling.
They will melt. Items of wood or paper are
not suitable either.
• Be careful, do not touch the grill element.
• It is possible to change the duration time
even after the cooking process has been
already started.
• To change the duration time, press the
+/- button.Or press the Push&Go button
once to increase the duration time by 30
seconds.
Tips and suggestions:
THE EASY WARM / BEVERAGES FUNCTION PROVIDES
you with an easy way to quickly reheat be-
verage and baby milk.
FOOD TYPE
WEIGHT
AMOUNT
DURATION
p 1
Beverage
1-2cups
1-5 min
p 2
Milk(Room
temp.)
100-200ml
/50ml
0.1--2
min
p 3
Milk
(Refrigeration)
100-200ml
/50ml
0.1-2 min
NOTE:
.
When heating baby‘s milk, always
shake the liquid to even out the tem-
perature and test it on top of your
hand - not the wrist (this is one of the
areas least sensitive to heat) - befo-
re feeding. Milk that‘s „baby-ready“
should be lukewarm.
3
Never re-heat food more than once;
food that’s been in contact with your
baby’s mouth or cutlery may contain
bacteria.
$
Don‘t leave formula out at room
temperature for more than 2 hours.
Harmful bacteria can grow rapidly in
food at room temperature. Discard
formula that‘s been left out for more
than 2 hours.
/
Please select MW applicable baby
bottle, and take away top cover with
teat before reheating. Put bottle at
the centre of the turntable.
.
Press Easy Warm / Beverages button.
3
Press Easy Warm / Beverages button
repeatedly or press the +/- button to
select the desired recipe.
$
Press PUSH&GO button to conrm the
recipe and press +/- button to select
the weight amount.
/
Press PUSH&GO button. The function
will start.

11
GB
P1 KEEP WARM
.
Press the Special Preparations but-
ton. Press Push&Go button to con-
firm
3
Press the +/- Button select suitable
time, then press Push&Go button to
start.
THIS FUNCTION ALLOWS YOU to keep your dishes
warm automatically.
SPECIAL PREPARATIONS
P2 DOUGH RISING
P3 YOGURT
THIS FUNCTION ALLOWS YOU to obtain healthy
and natural yogurt.
.
Press the Special Preparations but-
ton to choose P3.
3
Put 1000g milk and 1g yogurt star-
ter(heat-resistant) or 15g yogurt into
container, then add 50g sugar, mix
well. And put into the middle of cavity.
$
Press the Push&Go button to start
.
Press the Special Preparations but-
ton repeatedly or press +/- button to
choose P2.
3
Put 200ml water into a container.
$
Place the container directly in the
middle of the cavity.
/
Press the Push&Go button.The func-
tion will start.
.
Open the door,remove the container,
put the dough onto the turntable.
3
Close the door, press Push&Go button
to start .
THIS FUNCTION ALLOWS YOU to raise the bread
dough.
When the clock counts down to 30
minutes,the display shows“Add“ (no
operation for 5 minutes automatically
return to standby).
NOTE:
Don‘t open the door during the countdown.
The volume of the container should be at
least 3 times the one of the dough
It needs 5Hr20mins for this recipe. Please
do not open the door during the count-
down. It will taste better if you keep the yo-
gurt in refrigerator for 24hs after cooking.
P4-P8 SOFTEN&MELT
All the container should be sterilized with
boiled water or UV light.
A SELECTION OF AUTOMATIC RECIPES with preset
values to offer optimal cooking results.
.
Press the Special Preparations button
repeatedly to choose P4 to P8 (see the
table below).
3
Press the Push&Go button to confirm
the recipe and press the +/- button
to select the weight when there is a
weight range in the table.
$
Press the Push&Go button.The function
will start.
The cooking recipe will be confirmed if
the function button is not operated for 3
seconds, press the function button again
to change the recipe type.
NOTE:
MUTE OFF
THIS FUNCTION ALLOWS YOU to activate/
deactivate all the sounds played by
the applIance, including button press,
warnings, alarm, and end of the function.
Press Easy Clean button for 3 seconds to
put into mute, press the same button for 3
seconds again to turn on the sound.
This function can operate at any time.
Using MW safe dish as the container
The performance will be better if covering
the dish with lid or lm

12
GB
EASY CLEAN
FOOD TYPE WEIGHT
p 4
Melting
Choco
-late
Room temp.
100 -
500g/50g
p 5
Melting
Cheese
Refrigeration
50 -
500g/50g
p 6
Melting
Marsh
-mallows
Room temp.
100 -
500g/50g
p 7
Soften
Butter
Refrigeration
50 -
500g/50g
p 8
Soften
Ice
Cream
Frozen
100 -
1000g/50g
KITCHEN TIMER
Use this function when you need a kitchen
timer to measure exactly the time for various
purposes such as letting the dough rise
before baking etc.
Note that the Kitchen Timer does NOT
activate any cooking cycle.
. When the product is in Stand-By Mode,
press the Kitchen Timer button.
3 Press +/- button to set the minutes to
measure.
$ Press the Push&Go button. The function
will start.
An acoustic signal will be heard when the
timer has finished to count down.
Note: after the timer has been started, it is
possible to start a cooking function.
THIS AUTOMATIC CLEANING CYCLE will help you
clean the microwave oven cavity and
remove unpleasant odors.
Before starting the cycle:
.
Put 300ml water into a container (see
our recommendations in the below
section “Tips and suggestions”).
3
Place the container directly in the
middle of the cavity.
To Start The Cycle:
.
Press the Easy Clean button, the
duration will be visible on the display.
3
Press the Push&Go button to start the
function.
When The Cycle Is Finished:
.
Press the Stop button.
3
Remove the container.
$
Use a soft cloth or a paper towel with
mild detergent to clean the interior
surfaces.
Tips and suggestions:
• For a better cleaning result, it is
recommended to use a container with a
diameter of 17-20cm, and a height that
is lower than 6.5cm.
• If the Grill is not used regularly, it should
be run for 10 minutes a month to burn
off any splashes, in order to reduce the
risk of fire.
• It is mandatory to use a container of light
plastic material that is suitable for the
microwave.
• As the container will be hot after
the cleaning cycle is completed, it is
recommended to use a heat resistant
glove when removing the container
from the microwave.
• For a better cleaning effect and removal of
unpleasant odors, add some lemon juice
or vinegar to the water.
• The Grill element does not need cleaning
since the intense heat will burn off any
splashes, but the space around it may
need regular cleaning. This should be
done with a soft and damp cloth with
mild detergent.

13
GB
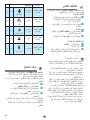
EASY COOKING MENU
A SELECTION OF AUTOMATIC RECIPES with preset
algorithms to offer optimal cooking results.
.
Press the Easy Cooking button.
3
Press Easy Cooking button repeated-
ly or press the +/- button to select the
desired recipe (see the following table)
$
Press the Push&Go button to confirm
the recipe and press the +/- button
to select the weight when there is a
weight range in below table.
NOTE:
According to the selected recipe, after a
certain time, the display would ask you to
add or turn or stir the food.
The cooking recipe will be confirmed once
you leave the function button for 3 seconds,
press the Easy Cooking button again to ch-
ange the recipe type.
/
Press the Push&Go button.The function
will start.
FOOD TYPE
INITIAL
STATE
WEIGHT
AMOUNT
DURATION
PREPARATION
p 1
Homemade
Lasagna
Room
temperature
250-1000g
/50g
10-30 min
Prepare your favorite lasagna recipe
p 2
Soup
Refrigerator
temperature
300-1200g
/300g
3-12 min
Cover the dish, leave an air vent
p 3
Fish fillet
Refrigerator
temperature
200-500g
/50g
4-7 min
Cover the dish and leave a vent
p 4
Hamburger
Room
temperature
100-400g
/100g
22-28 min
Put the hamburger( 100g/each) on the grill
rack. Turn food when oven prompts
p 5
Cupcakes
Room
temperature
300g
(8cups)
5-11 min
Put 125g eggs and 170g sugar into
container then stir for 2-3mins,add 170g
flour,10g baking powder ,100g water,50g
butter, mix well,put food into the cups.
Put the cups around the turntable to make
uniform heat
p 6
Vegetables
Room
temperature
200-500g
/50g
3-6 min
Cut the vegetable into pieces,add 2
tablespoon water, cover the container, and
leave an air vent
p 7
Popcorn
Room
temperature
100g
2-3 min
Place the popcorn on turntable glass in the
microwave oven
p 8
Potatoes
Gratin
Room
temperature
750-1200g
/50g
20-30 min
Ingredients: 750g peeled potatoes ,
100g shredded cheese, 1 egg, white and
yolk blended 200g milk plus cream (15-
20% fat content) 5g salt Preparation:
Use a food processor to cut the potatoes
into 4mm thick slices. Fill the container
with approximately half the amount of
sliced potatoes and cover with half of
the shredded cheese. Add the remaining
potatoes. Mix the eggs, milk-cream and
salt using electrical mixer and pour it over
the potatoes. Finally spread the remaining
cheese evenly on top of the gratin

14
FR
INSTALLATION
CONSIGNES DE SÉCURITÉ IMPORTANTES
Lisez Ces Consignes Attentivement Et Conservez-Les En Lieu Sûr Pour Toute Consultation Ultérieure
* Si un élément à l’intérieur / extérieur du four micro-ondes devait s’enflammer ou si de la fumée était
émise, laissez la porte du four micro-ondes fermée et éteignez le four micro-ondes. Débranchez ou
coupez l’alimentation au niveau du tableau des fusibles ou du disjoncteur.
* Ne laissez pas le four micro-ondes sans surveillance, surtout si vous utilisez du papier, du plastique
ou d'autres matériaux combustibles pour la cuisson. Le papier peut carboniser ou brûler et certains
plastiques peuvent fondre lorsqu'ils sont utilisés pour réchauffer des aliments.
AVERTISSEMENT:
* Si la porte ou les joints de la porte sont endom-
magés, le four ne doit pas être utilisé tant qu'il
n'a pas été réparé par une personne compé-
tente.
AVERTISSEMENT:
* Il est dangereux pour une personne non compétente d'assurer le service après-vente ou d'effectuer
des opérations impliquant le démontage d'un panneau de protection contre l'exposition à l'énergie
des micro-ondes.
AVERTISSEMENT:
* Lorsque l'appareil est utilisé en mode com-
bi, les enfants ne doivent utiliser le four que
sous la surveillance d'un adulte en raison des
températures générées.
* $9(57,66(0(17 9pULÀHU OH UpIULJpUDWHXU SRXU WRXW
GRPPDJHFRPPHSRUWHGpVDOLJQpHRXFRXUEpHMRLQWV
GHSRUWH HWVXUIDFHVGpWDQFKpLWp HQGRPPDJpVFKDU-
QLqUHV HW ORTXHWV EULVpV HW HQWDLOOHV j OLQWpULHXU GX
UpIULJpUDWHXURXVXUODSRUWH1HSDVIDLUHIRQFWLRQQHU
OHIRXUVLOHVWHQGRPPDJp&RQWDFWH]XQSHUVRQQHOGH
UpSDUDWLRQTXDOLÀp
* Assurez-vous que le cordon d'alimentation n'est pas en-
dommagé, ne passe pas sous le four et ne couvre aucune
surface chaude ou coupante.
* N'utilisez pas le four à l'extérieur.
* 9pUL¿H]TXHODWHQVLRQLQGLTXpHVXUODSODTXHVLJQDOpWLTXH
correspond bien à celle de votre habitation.
* Ne démontez pas les plaques de protection contre les
PLFURRQGHVVLWXpHVVXUOHVÀDQFVGHODFDYLWpGXIRXU(O
-
les empêchent la graisse et les particules alimentaires de
pénétrer dans les canaux d'entrée du micro-ondes.
* Assurez-vous que la cavité du four est vide avant le mon-
tage.
* Assurez-vous que l'appareil n'est pas endommagé. Véri-
¿H] TXH OD SRUWH IHUPH FRUUHFWHPHQW HW TXH OH MRLQW GH
l'encadrement intérieur de la porte n'est pas endommagé.
Enlevez les accessoires du four et essuyez l'intérieur avec
un chiffon doux et humide.
* N'utilisez en aucun cas cet appareil si le cordon d'alimenta-
tion ou la prise de courant est endommagé, si l'appareil ne
fonctionne pas correctement ou s'il a été endommagé ou
est tombé. Ne plongez jamais le cordon d'alimentation ou
la prise dans l'eau. Tenez le cordon à l'écart de toute surfa
-
ce chaude, vous risqueriez une électrocution, un incendie
ou autre danger.
* Ne pas utiliser de rallonge: Si le cordon d’alimentation est
trop court, demandez à un électricien ou à un technicien
TXDOL¿pG¶LQVWDOOHUXQHSULVHSUqVGHO¶DSSDUHLO
* Ce four à micro-ondes doit être placé sur une surface plane
HWVWDEOHD¿QGHVXSSRUWHUVRQSRLGVHWFHOXLGHVDOLPHQWV
à cuire dedans.
* Ne pas placer le four dans un endroit chaud ou humide ou
à proximité de matériaux combustibles.
* Ne pas faire fonctionner le four sans son plateau tournant
ou son support dans les positions appropriées.
* /DSULVHGRLWrWUHYUDLPHQWDFFHVVLEOHD¿QGHSRXYRLUrWUH
débranchée facilement en cas d'urgence.
* Ne pas installer cet appareil dans des placards de cuisine
sans la cheminée arrière spécifiée de 45 mm. Une ventila-
tion inadéquate peut nuire aux performances et à la durée
de vie de l'appareil.
* Une utilisation incorrecte de la prise de terre peut entraîner
un risque de choc électrique.
* Consultez un électricien ou un technicien qualifié si les
instructions de mise à la terre ne sont pas entièrement
comprises ou s’il existe un doute quant à savoir si le four
micro-ondes est correctement connecté à terre.
* La mise à la terre de cet appareil est obligatoire. Le fabricant
décline toute responsabilité en cas de blessures infligées à
des personnes, à des animaux, ou de dommages matériels
qui découleraient du non-respect de cette obligation.
* Le fabricant décline toute responsabilité si l'utilisateur ne
respecte pas ces instructions.

15
FR
* L'appareil ainsi que les pièces accessibles, devient chaud en cours d'utilisation. Restez vigilant afin de ne pas
toucher les éléments chauffants à l’intérieur du four micro-ondes.
* Les enfants de moins de 8 ans doivent être surveillés en permanence lors de l'utilisation de l'appareil.
* Le four Micro-ondes est conçu pour chauffer de la nourriture et des boissons. Le séchage d'aliment ou de vête-
ment, le chauffage de coussins, de pantoufles, d'éponges, de tissu humide ou autre peut entraîner des risques
de blessures, d'inflammation ou d'incendie.
* Cet appareil peut être utilisé par des enfants dès l’âge de 8 ans, ainsi que par des personnes aux capacités
physiques, sensorielles ou mentales réduites, ou dont l’expérience ou les connaissances sont insuffisantes, à
condition d’être supervisés ou d’avoir reçu les instructions permettant une utilisation en toute sécurité de l’ap-
pareil et à condition qu’ils aient compris les dangers inhérents à son utilisation.
* Le nettoyage et la maintenance de l’appareil ne doivent pas être confiés à des enfants, sauf s’ils sont âgés de
8 ans ou plus et à condition d’être supervisés. Les enfants doivent être surveillés pour s'assurer qu'ils ne jouent
pas avec l'appareil. Éloignez l'appareil et son cordon d'alimentation de la portée des enfants de moins de 8 ans.
* N'utilisez pas votre four micro-ondes pour cuire ou réchauffer des œufs avec ou sans coquille, car ils peuvent
exploser même si la cuisson est terminée.
* L’appareil n'a pas destiné à être utilisé à des altitudes au-delà de 2000m.
Cet appareil n’est pas conçu pour être utilisé avec un minuteur externe ou un système de télé-
commande séparé. Ne laissez pas le four micro-ondes sans surveillance si vous utilisez beau-
coup d'huile ou de graisse, en cas de surchauffe, ils pourraient déclencher un incendie !
* Veillez à ne pas chauffer ou utiliser de matériaux inflammables à l'intérieur ou à proximité du
four micro-ondes. Les vapeurs dégagées peuvent provoquer un incendie ou une explosion.
AVERTISSEMENT:
* Les liquides et les autres aliments ne doivent pas être chauffés dans des
récipients hermétiques car ils sont susceptibles d'exploser.
*
N'utilisez jamais votre four micro-ondes pour sécher des textiles, du papier, des épices, des
herbes, du bois, des fleurs ou d'autres produits combustibles. Ils pourraient s'enflammer.
* N'utilisez pas de produits chimiques ou de vapeurs corrosifs dans cet appareil. Ce type de
four micro-ondes a été spécialement conçu pour réchauffer ou cuire des aliments. Il n'est pas
prévu pour un usage industriel ou de laboratoire.
* Ne suspendez pas ou ne déposez pas d'objets lourds sur la porte pour ne pas abîmer l'en-
cadrement et les charnières du four micro-ondes. La poignée de la porte ne doit pas servir à
suspendre des objets.
DIAGNOSTIC DES PANNES
* La prise de courant est bien branchée.
* La porte est correctement fermée.
* Les fusibles sont en bon état et la puissance de l'installa-
tion est adaptée.
* Le four micro-ondes est bien ventilé.
* Attendez 10 minutes et essayez à nouveau de faire fonc-
tionner le four micro-ondes.
* Ouvrez et refermez la porte avant d'essayer à nouveau.
6LOHIRXUPLFURRQGHVQHIRQFWLRQQHSDVDYDQWGHFRQWDFWHUYRWUHUHYHQGHXUYHXLOOH]YpULILHUVL
Cela vous évitera peut-être des interventions inutiles
qui vous seraient facturées.
Lorsque vous contactez le Service après-vente, veuil-
lez préciser le modèle et le numéro de série du four
micro-ondes (voir l'étiquette Service).
Consultez le livret de garantie pour de plus amples in-
formations à ce sujet.
AVERTISSEMENT:
* Le service après-vente ne doit être effectué que par des
techniciens spécialisés. Ne démontez aucun panneau.
Si le cordon d'alimentation doit être remplacé, utilisez un cordon d'origine disponible auprès du
Service après-vente. Le cordon d'alimentation doit être remplacé par un technicien spécialisé
du Service après-vente.

16
FR
PRÉCAUTIONS
Cet appareil est destiné à être utilisé dans des applications domestiques et similaires, telles que :
* Coins cuisine destinés au personnel dans des magasins, des bureaux et d'autres environnements
de travail ;
* Fermes ;
* Clients d'hôtels, de motels et d'autres environnements résidentiels ;
* Environnements de type Bed and Breakfast.
Aucune autre utilisation n'est autorisée (par exemple salles de chauffage).
GÉNÉRALITÉS
* N'utilisez pas cet appareil près d'un évier, dans un sous-sol humide, près d'une piscine ou de tout autre empla-
cement de ce type.
* Ne stockez rien dans la cavité.
* Enlevez les fermetures métalliques des sachets en papier ou en plastique avant de les placer dans le four
micro-ondes.
* N'utilisez pas le four micro-ondes pour frire, car il ne permet pas de contrôler la température de l'huile.
* Afin d'éviter de vous brûler, utilisez des gants isolants ou des maniques pour toucher les récipients ou les par-
ties du four micro-ondes après la cuisson.
LIQUIDES
par exemple les boissons ou l'eau. Dans un four à micro-ondes, les liquides peuvent bouillir
sans produire de bulles. Dans ce cas, ils peuvent déborder brusquement.
$¿QGpYLWHUFHWLQFRQYpQLHQWSUHQH]OHVSUpFDXWLRQVVXLYDQWHV
* Évitez d'utiliser des récipients à bord droit et col étroit.
* Remuez le liquide avant de placer le récipient dans le four micro-ondes.
* Après avoir chauffé le liquide, attendez quelques secondes et remuez de nouveau avant de sortir le récipient
du four micro-ondes avec précaution.
Après avoir réchauffé des aliments pour bébé ou des liquides dans des biberons ou des petits
pots, remuez toujours et vérifiez la température avant de servir. Vous assurez ainsi une bonne
répartition de la chaleur et évitez les risques de brûlure ou d'ébouillantage.
ATTENTION
* Les matériaux d'emballage sont entièrement recyclables comme l'indique le symbole de recyclage. Suivez les réglemen-
tations locales en vigueur en matière d'élimination des déchets. Ne laissez pas les éléments d'emballage potentiellement
dangereux (sachets en plastique, éléments en polystyrène, etc.) à la portée des enfants.
* Cet appareil porte le symbole du recyclage conformément à la directive européenne 2012/19/UE relative aux déchets
d'équipements électriques et électroniques (DEEE). En procédant correctement à la mise au rebut de cet appareil, vous
contribuerez à empêcher toute conséquence nuisible pour l'environnement et la santé.
* Le symbole présent sur l'appareil ou sur la documentation qui l'accompagne indique que ce produit ne peut en
aucun cas être traité comme un déchet ménager. Il doit par conséquent être remis à un centre de collecte des
déchets chargé du recyclage des équipements électriques et électroniques.
* La mise au rebut doit être effectuée conformément aux réglementations locales en vigueur en matière de protection de
l'environnement.
* Pour obtenir de plus amples détails au sujet du traitement, de la récupération et du recyclage de cet appareil,
veuillez vous adresser au bureau compétent de votre commune, à la société de collecte des déchets ou direc
-
tement à votre revendeur.
* Avant de vous séparer de l'appareil, rendez- le inutilisable en coupant le cordon d'alimentation, de manière à ne
plus pouvoir raccorder l'appareil au réseau électrique.
INFORMATIONS POUR LE RECYCLAGE
* L’appareil ne doit jamais être utilisé à vide avec. Cela risquerait de l'endommager.
* Les ouvertures de ventilation du four micro-ondes ne doivent pas être recouvertes. Le blocage des arrivées d'air
et des aérations pourrait endommager le four micro-ondes et donner des résultats de cuisson insatisfaisants.
* Mettez un verre d'eau à l’intérieur. L'eau absorbera l'énergie des micro-ondes et le four micro-ondes ne sera pas
endommagé. Ne jamais faire fonctionner à vide.
* N'entreposez pas ou n'utilisez pas cet appareil à l'extérieur.

17
FR
* Si le four micro-ondes n'est pas maintenu propre, cela peut entraîner la détérioration de la surface, affecter la
durée de vie de l'appareil et provoquer une situation dangereuse.
* N'utilisez en aucun cas de tampons à récurer en métal, nettoyants abrasifs, tampons en laine de verre, chif-
fons rugueux, etc., car ils peuvent abîmer le bandeau de commandes, ainsi que les surfaces intérieures et
extérieures du four micro-ondes. Utilisez un chiffon avec un détergent doux ou une serviette en papier avec un
nettoyant pour vitres. Vaporisez le nettoyant pour vitres sur la serviette en papier.
* Utilisez un chiffon doux et humide avec un produit nettoyant doux pour nettoyer l'intérieur du four, les deux
faces de la porte et l'encadrement de la porte.
* N'utilisez pas d'appareil de nettoyage à vapeur pour nettoyer votre four micro-ondes.
* Le four micro-ondes doit être nettoyé régulièrement et tous les résidus d'aliments doivent être éliminés.
* À intervalles réguliers, notamment en cas de débordements, enlevez le plateau tournant, le support du plateau
tournant et essuyez la base du four.
* L'entretien de cet appareil se limite à son nettoyage. Pour nettoyer le four, vous devez d'abord le
débrancher.
* Ne vaporisez pas directement sur le four micro-ondes.
* Ce four micro-ondes est conçu pour effectuer des cycles de cuisson avec un récipient approprié directement
dans une
cavité complètement plane.
* Empêchez que de la graisse ou des particules alimentaires ne s'accumulent autour de la porte.
* Ce produit vient avec une fonction NETTOYAGE AUTOMATIQUE, qui permet de nettoyer facilement la cavité
du four. Pour plus de détails, référez-vous à la section NETTOYAGE AUTOMATIQUE.
* Le gril ne nécessite aucun nettoyage, la chaleur intense brûlant toutes les éclaboussures.
* Si la fonction Gril n'est pas utilisée régulièrement, elle doit être activée au moins 10 minutes par mois pour
brûler toute trace d'éclaboussure et réduire ainsi le risque d'incendie.
MAINTENANCE ET NETTOYAGE
ACCESSOIRES
* De nombreux accessoires sont disponibles sur le marché. Avant de les acheter, assurez-vous qu'ils convien-
nent bien aux micro-ondes.
* Les récipients métalliques pour les aliments et les boissons ne sont pas autorisés pendant la cuisson au mi-
cro-ondes.
* Vérifiez que les ustensiles peuvent être utilisés dans un four micro-ondes et sont perméables aux micro-ondes
avant de les utiliser.
* Lorsque vous placez des aliments et des accessoires dans le four micro-ondes, assurez- vous que ceux-ci ne
sont pas en contact direct avec la paroi de la cavité du four micro-ondes.
* Ceci est particulièrement important pour les accessoires en métal ou avec des parties métalliques.
* Si des accessoires métalliques entrent en contact avec les parois du four micro-ondes pendant son fonctionne-
ment, ils peuvent provoquer des étincelles et endommager le four micro-ondes.
* Pour de meilleures performances de cuisson, il vous est conseillé de mettre les accessoires au milieu de la
cavité intérieure.
* Les accessoires ci-dessous sont fournis avec le produit, disponibles pour l’utilisation du micro-ondes ou du gril.
PLATEAU TOURNANT
EN VERRE
SUPPORT DU PLATEAU TOURNANT
GRILLE MÉTALLIQUE

18
FR
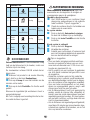
DESCRIPTION DU BANDEAU DE COMMANDES
.Icône Cuisson automatique
3Icône Décongélation
$ Icône des fonctions spéciales
/Icône Nettoyage automatique
1Icône watt (Puissance du four watt)
4Icône des micro-ondes
2Icône Gril
(Icône Horloge/Insérer durée
,Icône Muet éteint
"Icône grams (grammes)
.3$/ 1
42(,
"
.
3
$
/
1
4
2
(
,
"
0
#
.Micro-ondes
3Décongélation Automatique
$Gril et Combi Gril
/Cuisson automatique
1Boissons
4Fonctions spéciales
2Réglage de la minuterie de cuisine / de l’hor-
loge par 3 secondes
(Nettoyage Automatique / Muet Marche/Arrêt
par 3 secondes
,"Paramètre +/-
0Démarrage rapide
#ARRÊT
6SpFLILFDWLRQVWHFKQLTXHV
Description des données MWI120GX, MWI120GXUK
Tension d'alimentation 230-240V~50 Hz
Puissance d'entrée nominale 1200 W
Gril 1000 W
Dimensions externes (HXLXP) 390 x 594 x 349
Dimensions internes (HXLXP) 210 x 315 x 329

19
FR
MODE VEILLE
PROTECTION CONTRE ALLUMAGE /
SÉCURITÉ ENFANTS
CETTE FONCTION DE SÉCURITÉ AUTOMATIQUE est ac-
tivée une minute après le retour du four mi-
cro-ondes en «mode Veille».
Lorsque la fonction de sécurité est activée, ou-
vrez puis refermez la porte pour lancer une
cuisson. Le cas échéant, l'écran affichera
«door»(porte).
door
Le four est en mode veille lorsque l'horloge est
affichée (ou lorsque l'écran affiche «:», dans le
cas où l'horloge n'a pas été réglée).
VEILLE ECO : Cette fonction sert à activer
l'économie d'énergie. En mode Veille, vous pou-
vez appuyer simultanément sur les boutons
+ et
-
pour entrer en mode VEILLE ECO.
Après la fin de la cuisson, l'affichage indique
l'heure ou «:» pendant 10 secondes, puis passe
en mode VEILLE ECO. Appuyez de nouveau sur
les boutons + et - pour quitter le mode.
INTERRUPTION OU ARRÊT DE
LA CUISSON
AJOUTER / REMUER / RE-
TOURNER LES ALIMENTS
POUR METTRE EN PAUSE LA CUISSON:
Ouvrez la porte pour vérifier, ajouter, mélan-
ger ou retourner les aliments. Les réglages sont
conservés pendant 5 min. La fonction s'arrête
en cas d'appui sur le bouton ARRÊT pendant la
cuisson.
POUR POURSUIVRE LA CUISSON:
Fermez la porte et appuyez sur le bouton 'pPDU-
UDJH5DSLGHLa cuisson reprend là où elle a été
interrompue.
6LYRXVQHVRXKDLWH]SDVFRQWLQXHUODFXLVVRQ
Sortez le plat du four, refermez la porte et appuyez
sur le bouton $UUrW.
/RUVTXHODFXLVVRQHVWWHUPLQpH
L'écran affiche le mot «Fin». Un bip audio se ma-
nifeste une fois par minute pendant 2 minutes.
SELON LA FONCTION CHOISIE, il peut être nécessaire
d'ajouter/de remuer/de retourner les aliments en
cours de cuisson. Dans ce cas, le four à micro-on-
des mettra la cuisson sur pause et vous deman-
dera d'effectuer l'action nécessaire.
Vous devrez alors:
* Ouvrir la porte.
* Ajouter, remuer ou retourner les aliments
(selon l'action requise).
* Fermer la porte et redémarrer en appuyant sur
la bouton 'pPDUUDJH5DSLGH
Remarques : si la porte n'est pas ouverte dans
les 2 minutes qui suivent la demande de remuer
ou de retourner les aliments, le four micro-ondes
poursuit la cuisson (dans ce cas, le résultat final
ne sera peut-être pas optimal). Si la porte n'est
pas ouverte dans les 2 minutes qui suivent la de-
mande d'ajouter les aliments, le four à micro-ondes
se mettre en mode Veille.
i
DÉMARRAGE RAPIDE
CETTE FONCTION VOUS PERMET de démarrer
Micro-ondes rapidement le four.
.
En appuyant sur le bouton 'pPDUUDJH5D-
SLGH, la fonction Micro-ondes démarre à
pleine puissance (800W) pendant 30 se-
condes.
Conseils et suggestions:
• Il est possible d'ajuster la puissance et la durée
même lorsque la cuisson a déjà commencé.
Pour ajuster la puissance, appuyez plusieurs
fois sur le bouton 0LFURRQGHV. Pour chan-
ger la durée.
Appuyez une fois sur la bouton 'pPDUUDJH5D-
SLGH pour augmenter le temps de cuisson de 30
secondes. La plus longue durée de cuisson est
de 90 minutes.
Veuillez noter que la réduction ou l'arrêt de ce cyc-
le de refroidissement programmé n'aura pas d'im-
pact négatif sur la fonction du produit.

20
FR
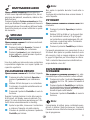
DÉCONGÉLATION
AUTOMATIQUE
UTILISEZ CETTE FONCTION pour décongeler de la viande, des
volailles, du poisson ou des légumes automatiquement.
.
Appuyez sur le bouton 'pFRQJpODWLRQ$XWR-
PDWLTXH.
3
Appuyez plusieurs fois sur le bouton Dé-
FRQJpODWLRQ$XWRPDWLTXHou sur le ERXWRQ
pour sélectionner la catégorie d'aliments dans
le tableau ci-dessous, et appuyez sur 'pPDUUD-
JH5DSLGHSRXUFRQ¿UPHU
$
Appuyez à plusieurs reprises sur le ERXWRQ
D¿QGHUpJOHUOHSRLGVet appuyez sur le bouton
'pPDUUDJH5DSLGHpour démarrer.
TYPE
D'ALIMENTS
POIDS
UTILISATION
CONSEILLÉE
p 1
Viande
100 -
2000g
Viande hachée, côtelettes,
biftecks ou rôtis. Après la
cuisson, laissez reposer les
aliments pendant 5-10 mi-
nutes pour de meilleurs ré-
sultats.
p 2
Légumes
100 -
1000g
Grands, moyens et légumes
en julienne. Avant de servir,
laissez reposer les légumes
pendant 3-5 minutes pour de
meilleurs résultats.
p 3
Poisson
100 -
2000g
Poissons entiers, darnes
ou filets.
Laissez reposer les légumes
pendant 5-10 minutes pour
de meilleurs résultats.
p 4
Volaille
100 -
2000g
Poulet entier, filets ou
morceaux. Après la cuisson,
laissez reposer les aliments
pendant 5-10 minutes pour
de meilleurs résultats.
• Pour de meilleurs résultats, nous vous recomman-
dons de décongeler directement l'aliment sur le pla-
teau tournant en verre.
• Pour les aliments plus chauds que la température de
surgélation (-18 °C), choisissez un poids inférieur à
celui des aliments.
• Pour les aliments plus froids que la température de
surgélation (-18 °C), choisissez un poids supérieur à
celui des aliments.
• Séparez les morceaux dès qu'ils commencent à se
décongeler. Les tranches individuelles se décongèlent
plus facilement.
• Quelques minutes de repos après la décongélati-
on améliorent toujours le résultat, permettant à la
température d'être répartie uniformément dans les
aliments.
Conseils et suggestions:
HORLOGE
3
Appuyez sur le ERXWRQ pour régler les heu-
res.
$
Appuyez sur la touche 'pPDUUDJH5DSLGH
SRXUFRQ¿UPHU
/
Appuyez sur le ERXWRQ pour régler les mi-
nutes.
1
Appuyez sur 'pPDUUDJH5DSLGH
SRXUFRQ¿U-
mer le réglage.
• Au branchement, l'écran affiche «12:00» («12» clig-
notant) et repasse en veille 1 minute après (avant
de retourner en veille, l'horloge peut être réglée di-
rectement).
Conseils et suggestions:
POUR RÉGLER L'HORLOGE de votre four:
.
En mode veille, appuyez sur le bouton 0LQXWHULH
SHQGDQWVHFRQGHV/pFUDQDI¿FKHOKRUORJHDF
-
tuelle.
.
Appuyez sur le bouton 0LFURRQGHV. Le ni-
veau de puissance par défaut (800W) sera af-
fiché sur l'écran et les icônes de Watt cligno-
tent.
3
Appuyez plusieurs fois sur le bouton 0LFURRQ-
GHV ou appuyez sur le bouton pour sélec-
tionner la puissance de cuisson adaptée, puis
appuyez sur le bouton 'pPDUUDJH5DSLGH.
$
$SSX\H]VXUSRXUGp¿QLUOHWHPSVGHFXLV-
son,puis appuyez sur le bouton Démarrage Ra-
pide pour lancer la cuisson.
MICRO-ONDES
POUR CUIRE AVEC LA PUISSANCE MICRO-ONDES indivi-
duellement.
Si vous devez ajuster la puissance, appuyez à
nouveau sur le bouton 0LFURRQGHV, le niveau
de puissance souhaité peut être sélectionné.
PUISSANCE
UTILISATION CONSEILLÉE:
90W
Ramollissement de beurre, de fromages et
de crème glacée.
160W
Décongélation.
350W
Cuisson lente de ragoûts, ramollissement de
beurre.
500W
Cuisson attentive, par ex. des plats préparés
avec de la sauce, du fromage et des œufs
et fin de cuisson des ragoûts.
650W
Cuisson de plats qui ne peuvent pas être
remués.
800 W
Réchauffage de boissons, eau, potages,
café, thé ou autres aliments à haute teneur
en eau. Pour les plats préparés avec des
œufs ou de la crème, choisir une puissance
inférieure.
A página está carregando...
A página está carregando...
A página está carregando...
A página está carregando...
A página está carregando...
A página está carregando...
A página está carregando...
A página está carregando...
A página está carregando...
A página está carregando...
A página está carregando...
A página está carregando...
A página está carregando...
A página está carregando...
A página está carregando...
A página está carregando...
A página está carregando...
A página está carregando...
A página está carregando...
A página está carregando...
A página está carregando...
A página está carregando...
A página está carregando...
A página está carregando...
A página está carregando...
A página está carregando...
A página está carregando...
A página está carregando...
A página está carregando...
A página está carregando...
A página está carregando...
A página está carregando...
A página está carregando...
A página está carregando...
A página está carregando...
A página está carregando...
A página está carregando...
A página está carregando...
A página está carregando...
A página está carregando...
A página está carregando...
A página está carregando...
A página está carregando...
A página está carregando...
A página está carregando...
A página está carregando...
A página está carregando...
A página está carregando...
A página está carregando...
A página está carregando...
A página está carregando...
A página está carregando...
A página está carregando...
A página está carregando...
A página está carregando...
A página está carregando...
A página está carregando...
A página está carregando...
A página está carregando...
A página está carregando...
A página está carregando...
A página está carregando...
A página está carregando...
A página está carregando...
A página está carregando...
A página está carregando...
A página está carregando...
A página está carregando...
A página está carregando...
A página está carregando...
-
 1
1
-
 2
2
-
 3
3
-
 4
4
-
 5
5
-
 6
6
-
 7
7
-
 8
8
-
 9
9
-
 10
10
-
 11
11
-
 12
12
-
 13
13
-
 14
14
-
 15
15
-
 16
16
-
 17
17
-
 18
18
-
 19
19
-
 20
20
-
 21
21
-
 22
22
-
 23
23
-
 24
24
-
 25
25
-
 26
26
-
 27
27
-
 28
28
-
 29
29
-
 30
30
-
 31
31
-
 32
32
-
 33
33
-
 34
34
-
 35
35
-
 36
36
-
 37
37
-
 38
38
-
 39
39
-
 40
40
-
 41
41
-
 42
42
-
 43
43
-
 44
44
-
 45
45
-
 46
46
-
 47
47
-
 48
48
-
 49
49
-
 50
50
-
 51
51
-
 52
52
-
 53
53
-
 54
54
-
 55
55
-
 56
56
-
 57
57
-
 58
58
-
 59
59
-
 60
60
-
 61
61
-
 62
62
-
 63
63
-
 64
64
-
 65
65
-
 66
66
-
 67
67
-
 68
68
-
 69
69
-
 70
70
-
 71
71
-
 72
72
-
 73
73
-
 74
74
-
 75
75
-
 76
76
-
 77
77
-
 78
78
-
 79
79
-
 80
80
-
 81
81
-
 82
82
-
 83
83
-
 84
84
-
 85
85
-
 86
86
-
 87
87
-
 88
88
-
 89
89
-
 90
90


Indesit MWI 120 GX Guia de usuario
- Categoria
- Microondas
- Tipo
- Guia de usuario
- Este manual também é adequado para
em outras línguas
- español: Indesit MWI 120 GX Guía del usuario
- français: Indesit MWI 120 GX Mode d'emploi
- italiano: Indesit MWI 120 GX Guida utente
- English: Indesit MWI 120 GX User guide
- Nederlands: Indesit MWI 120 GX Gebruikershandleiding
- Deutsch: Indesit MWI 120 GX Benutzerhandbuch
Artigos relacionados
Outros documentos
-
HOTPOINT/ARISTON MF20S IX HA Guia de usuario
-
Whirlpool WMF200G Guia de usuario
-
Ignis AMT 200 IX Guia de usuario
-
-
HOTPOINT/ARISTON MF25G IX H Guia de usuario
-
Whirlpool WMF250G Guia de usuario
-
Ariston MF25GUK IX A Guia de usuario
-
Hotpoint MF20G IX H Guia de usuario
-
-
Qilive Q.5256 Especificação