CYBEX Pallas 2-fix Manual do usuário
- Categoria
- Assentos de carro
- Tipo
- Manual do usuário
Este manual também é adequado para

CYBEX SOLUTION X-fi x | ECE R44/04, Gr II/III – ca. 3–12Y (15-36kg/33–79lbs) |
CYBEX PALLAS-fi x | ECE R44/04, Gr I – ca. 9M–4Y (9-18kg/20-40lbs) |
CYBEX Industrial Ltd.
1/F. | Sunning Plaza | 10 Hysan Avenue | Causeway Bay | Hong Kong
/ www.cybex-online.com
DE / EN / FR / SL / HU / IT / ES / PT
CYBEX PALLAS-FIX
USER GUIDE
C223_661-1_01B

DE – Kurzanleitung / EN – Short manual / FR – Instructions sommaires / SL – Kratka navodila
HU – rövid ismertetés / IT – Sommario / ES – Instrucciones abreviadas / PT – instruções abreviadas
DE – Kurzanleitung / EN – Short manual / FR – Instructions sommaires / SL – Kratka navodila
HU – rövid ismertetés / IT – Sommario / ES – Instrucciones abreviadas / PT – instruções abreviadas
DE – Gruppe I (9-18 kg) / EN – Group I (9-18 kg) / FR – Groupe I (9 à 18 kg) / SL – skupina I (9 do 18 kg)
HU – I. korcsoport (9-18 kg) / I T – Gruppo I (9-18 kg) / ES – Grupo I (9-18 Kg.) / PT – Grupo I (9-18 Kg.)
Warnung! Diese Kurzanleitung dient nur der Übersicht. Für maximalen Schutz und Komfort Ihres Kindes ist es unbedingt notwendig, die
gesamte Gebrauchsanleitung aufmerksam zu lesen.
DE
Warning! This short manual serves as an overview only. For maximum protection and best comfort for your child, it is essential to read and
follow the entire instruction manual carefully.
EN
Attention! Ces instructions sommaires sont une synthèse. Afin que votre enfant bénéficie d’un maximum de protection et de confort, il est
essentiel de lire attentivement l’intégralité du manuel d’utilisation.
FR
Opozorilo! Ta kratka navodila služijo le za hiter pregled. Za maksimalno varnost in večje udobje vašega malčka pa je izjemno pomembno,
da skrbno preberete celotna navodila.
SL
Attenzione! Queste istruzioni sono solo un sommario. Per garantire la massima sicurezza e comfort al Vostro bambino è molto importante
leggere attentamente ed interamente il manuale d’istruzioni e seguirne scrupolosamente le indicazioni.
IT
Figyelem! Ez a rövid használati utasítás mindösszesen egy áttekintés. Gyermeke maximális biztonsága és kényelme érdekében fontos,
hogy a teljes használati utasítást figyelmesen elolvassa.
HU
¡Advertencia! Estas instrucciones sólo son un resumen. Para garantizar la máxima seguridad y confort para su hijo, es muy importante leer
de un modo completo y atentamente el manual de instrucciones.
ES
Atenção: Estas instruções são um resumo abreviado. Para garantir segurança e um conforto máximos para sua criança, é muito
importante ler cuidadosamente todo o manual de instruções.
PT
1
2
1
6
2
7
54
10
3
8 9
6 7 8 9 10
1 2 543
DE – Gruppe II / III (15-36 kg) / EN – Group II / III (15-36 kg) / FR – Groupe II /III (15 à 36 kg / SL – skupina II/III (15 do 36 kg)
HU – II / III. korcsoport (15-36 kg) / I T – Gruppo II/III (15-36 kg) / ES – Grupo II/III (15-36 Kg.) / PT – Grupo II/III (15-36 Kg.)
3
4
Sehr geehrte Kundin, sehr geehrter Kunde!
VIELEN DANK, DASS SIE SICH BEI DER WAHL EINES KINDERSITZES FÜR DEN CYBEX PALLAS-FIX ENTSCHIEDEN HABEN.
BEI DER ENTWICKLUNG DES CYBEX PALLAS-FIX KINDERSITZES HABEN SICHERHEIT, KOMFORT UND BEDIENFREUNDLICHKEIT
IM VORDERGRUND GESTANDEN.
Dear Customer!
THANK YOU FOR PURCHASING THE CYBEX PALLAS-FIX.
WE ASSURE YOU THAT IN THE PROCESS OF DEVELOPING THE CYBEX PALLAS-FIX WE FOCUSED ON SAFETY, COMFORT
AND USER FRIENDLINESS. THE PRODUCT IS MANUFACTURED UNDER SPECIAL QUALITY SURVEILLANCE AND COMPLIES
WITH THE STRICTEST SAFETY REQUIREMENTS.
Cher Client
NOUS VOUS REMERCIONS D’AVOIR CHOISI LE SIÈGE PALLAS-FIX DE CYBEX.
LORS DU PROCESSUS DE DÉVELOPPEMENT DU PALLAS-FIX, NOS EFFORTS SE SONT CONCENTRÉS SUR LA SÉCURITÉ, LE
CONFORT, ET LA FACILITÉ D’UTILISATION. LA FABRICATION DE CE PRODUIT EST RÉALISÉE SOUS UN CONTRÔLE QUALITÉ
RIGOUREUX, ET RÉPOND AUX NORMES DE SÉCURITÉ LES PLUS STRICTES.

Hinweis! Bewahren Sie die Anleitung immer griffbereit auf (z. B. unter dem elastischen
Bezug an der Rückseite der Rückenlehne).
Note! Please keep the user guide close by for further references (e.g. under
the elastic cover on the rear side of the backrest).
Warnung! Um den optimalen Schutz für Ihr Kind zu gewährleisten, muss der CYBEX
PALLAS-fix Kindersitz unbedingt so verwendet werden, wie es in der Anleitung be-
schrieben ist.
Warning! For your child’s maximum protection it is essential to use and install the
CYBEX PALLAS-fix according to the instructions in this user guide.
07/2010
KURZANLEITUNG ALTERSGRUPPE I ....................................................................................1
KURZANLEITUNG ALTERSGRUPPE II/III ............................................................................... 2
ZULASSUNG ........................................................................................................................5
DER RICHTIGE PLATZ IM FAHRZEUG ..................................................................................7
BEFESTIGEN DES KINDERSITZES MITTELS ISOFIX-CONNECT SYSTEM ................................. 9
AUSBAU DES CYBEX PALLAS-FIX .....................................................................................11
DEN SITZ INS FAHRZEUG STELLEN .....................................................................................11
ANPASSEN AN DIE KÖRPERGRÖSSE ...............................................................................13
ENTNEHMEN DES SITZERHÖHERS ....................................................................................13
EINSTELLEN DES FANGKÖRPERS – ECE GRUPPE I (9-18 KG) ..........................................13
SITZ- UND LIEGEPOSITION – ECE GRUPPE I (9-18 KG) ....................................................15
NEIGUNGSVERSTELLBARE KOPFSTÜTZE ..........................................................................15
ANSCHNALLEN MITTELS FANGKÖRPER – ECE GRUPPE I (9-18 KG) ...............................17
WECHSEL VON GRUPPE I (9-18 KG) AUF GRUPPE II/III (15-36 KG) ................................17
ISOFIX-CONNECT UMBAU ...............................................................................................19
ANSCHNALLEN OHNE FANGKÖRPER – ECE GRUPPE II/III (15-36 KG) ..........................21
IST IHR KIND RICHTIG GESICHERT? ..................................................................................21
PFLEGE ............................................................................................................................. 23
ENTFERNEN DES BEZUGES ...............................................................................................23
ENTFERNEN DES BEZUGES VON DER SITZLEHNE .............................................................23
REINIGUNG ......................................................................................................................23
VERHALTEN NACH EINEM UNFALL ..................................................................................25
PRODUKTLEBENSDAUER ..................................................................................................25
ENTSORGUNG .................................................................................................................25
GARANTIEBEDINGUNGEN ............................................................................................... 27
SHORT MANUAL GROUP I .................................................................................................1
SHORT MANUAL GROUP II/III .............................................................................................2
HOMOLOGATION ..............................................................................................................5
THE BEST POSITION IN THE CAR ..........................................................................................8
INSTALLING OF THE CHILD SEAT WITH THE ISOFIX-CONNECT SYSTEM ...........................10
REMOVING THE CYBEX PALLAS-FIX ................................................................................12
SECURING THE CHILD ......................................................................................................12
ADJUSTMENT TO THE BODY SIZE ......................................................................................14
REMOVING THE BOOSTER INLAY .....................................................................................14
SAFETY CUSHION ADJUSTMENT – ECE GROUP I (9-18 KG) ............................................14
SITTING AND RECLINING POSITION – ECE GROUP I (9-18 KG) ......................................16
RECLINING HEADREST ......................................................................................................16
SECURING WITH SAFETY CUSHION – ECE GROUP 1 (9-18 KG) ......................................18
SWITCHING FROM GROUP I (9-18kg) TO GROUP II/III (15-36kg) ..................................18
ISOFIX-CONNECT MODIFICATION .................................................................................20
SECURING WITHOUT SAFETY CUSHION – ECE GROUP II/III (15-36 KG) .........................22
IS YOUR CHILD PROPERLY SECURED? ............................................................................22
PRODUCT CARE ............................................................................................................. 24
REMOVING THE COVER ..................................................................................................24
REMOVING THE SEAT COVER FROM THE BACKREST ......................................................24
CLEANING ........................................................................................................................24
WHAT TO DO AFTER AN ACCIDENT ................................................................................26
DURABILITY OF THE PRODUCT ........................................................................................26
DISPOSAL ..........................................................................................................................26
WARRANTY .......................................................................................................................28
5
6
INHALT CONTENTS
CYBEX PALLAS-fix KINDERAUTOSITZ -
Sitzerhöher mit Rückenlehne und Kopfstütze auf einem
verstellbaren Grundrahmen mit tiefenverstellbarem
Fangkörper.
Empfohlen für:
Alter: Ca. 9 Monate bis 4 Jahre
Gewicht: 9-18 kg
Für Fahrzeugsitze mit Dreipunkt Automatik Gurt
Zulassung:
ECE R-44/04,
CYBEX PALLAS-fix - Gruppe I, 9 bis 18 kg
CYBEX SOLUTION X-fix - Gruppe II/III, 15 bis 36 kg
CYBEX PALLAS-fix CHILD RESTRAINT SYSTEM –
Seat Cushion with backrest and headrest on adjustable
main frame with an adjustable crash pillow.
Recommended for:
Age: Approximately 9 months to 4 years
Weight: 9 to 18 kg
For vehicle seats with three-point automatic retractor belt
Homologation:
ECE R-44/04,
CYBEX PALLAS-fix - Group I, 9 to 18 kg
CYBEX SOLUTION X-fix - Group II/III, 15 to 36 kg
DE EN FR
CYBEX PALLAS–FIX SYSTÈME DE RETENUE POUR ENFANT
Siège-auto avec dossier et appuie-tête sur base
réglable et bouclier de protection ajustable.
Recommandé pour:
Âge: d‘environ 9 mois à 4 ans
Poids : de 9 à 18 kg
Pour sièges de voiture équipés d’une ceinture de
sécurité 3-points à enrouleur.
Conformité:
ECE R-44/04
CYBEX PALLAS-fix - Groupe I (9 à 18kg) CYBEX
Solution X-Fix - Groupe II/III (15 à 36 kg)
Note! Merci de toujours conserver le manuel d‘instructions sous la housse elastique
a l‘arriere du dossier du siege, de facon a ce qu‘elle soit toujours a portee de main.
Attention ! Pour une protection optimale de votre enfant, il est essentiel d’installer et
d’utiliser le CYBEX PALLAS-fix conformément aux instructions de ce manuel.
SOMMAIRE
INSTRUCTIONS SOMMAIRES GROUPE I ............................................................................1
INSTRUCTIONS SOMMAIRES GROUPE II/III ........................................................................2
CONFORMITÉ .....................................................................................................................5
POSITION CORRECTE DANS LA VOITURE ..........................................................................8
INSTALLATION DU SIÈGE AVEC LE SYSTÈME ISOFIX-CONNECT ...................................... 10
RETIRER LE CYBEX PALLAS-FIX .......................................................................................... 12
ATTACHER CORRECTEMENT L’ENFANT ............................................................................12
RÉGLAGE SELON LA TAILLE DE L’ENFANT ........................................................................14
RETIRER LE RÉDUCTEUR ....................................................................................................14
RÉGLAGE DU BOUCLIER DE PROTECTION – ECE GROUPE I (9 À 18 KG) ......................14
POSITION ASSISE ET POSITION INCLINÉE (9 À 18 KG) ......................................................16
INCLINAISON DE L‘APPUIE-TETE .......................................................................................16
SÉCURISER AVEC LE BOUCLIER DE PROTECTION ECE GROUPE I (9 À 18 KG) ............... 18
CONVERSION DU GROUPE I (9-18KG) AU GROUP II/III (15-36KG) ................................18
MODIFICATION DU SYSTÈME ISOFIX-CONNECT .............................................................20
SÉCURISER SANS LE BOUCLIER DE PROTECTION - ECE GROUPE II/III (15-36 KG) ..........22
VOTRE ENFANT EST-IL CORRECTEMENT ATTACHÉ? ........................................................22
ENTRETIEN ......................................................................................................................... 24
RETIRER LA HOUSSE .........................................................................................................24
RETIRER LA HOUSSE DU DOSSIER .....................................................................................24
NETTOYAGE ...................................................................................................................... 24
CONDUITE À TENIR APRÈS UN ACCIDENT ....................................................................... 26
DURÉE DE VIE DU PRODUIT ..............................................................................................26
RECYCLAGE .....................................................................................................................26
GARANTIE .........................................................................................................................28

DER RICHTIGE PLATZ IM FAHRZEUG THE BEST POSITION IN THE CAR
DER CYBEX PALLAS-fix ist, ohne ISOFIX-CONNECT-System, auf allen Plätzen
mit Dreipunkt-Automatikgurt verwendbar, die für die Beförderung von er-
wachsenen Personen zugelassen sind.
The CYBEX PALLAS-fix can be used without ISOFIX-CONNECT on all vehicle
seats with a three-point automatic retractor belt, assuming the seat is
approved for adults.
Für die Befestigung mit den ISOFIX-CONNECT Rastarmen (o) besteht eine
„semi-universale“ Genehmigung. Aus diesem Grund kann ISOFIX-CONNECT
nur in bestimmten Fahrzeugen eingesetzt werden. Die zugelassenen Fahr-
zeuge entnehmen Sie bitte der beigelegten Fahrzeugtypenliste. Die aktu-
elle Version erhalten Sie auf www.cybex-online.com.
In Ausnahmefällen kann der Kindersitz auch vorne am Beifahrersitz verwendet wer-
den. Beachten Sie dabei die folgenden Punkte:
When installing the CYBEX PALLAS-fix with ISOFIX-CONNECT system (o), the
child seat falls into the “semi-universal” admission category, i.e. it may only
be used in certain types of vehicles. Please refer to the list of approved cars
to check your vehicle’s compatibility. The list is updated regularly and the
latest version can be accessed online at www.cybexonline. com.
Please note the following exceptions, when the child seat may be used on the
passenger seat:
Gepäckstücke oder andere Gegenstände im Fahrzeug, welche bei einem Unfall
Verletzungen verursachen können, müssen immer gut befestigt werden. Sie können
zu tödlichen Geschossen im Fahrzeug werden.
Luggage or other objects in the vehicle which may cause injuries in an accident must
always be secured properly. Loose parts may turn into deadly projectiles during an
impact.
Hinweis! Bitte lassen Sie Ihr Kind nie unbeaufsichtigt im Fahrzeug zurück.
Note! Please never leave your child unattended in the car.
– Bei Fahrzeugen mit Airbag sollten Sie den Beifahrersitz so weit wie möglich nach
hinten schieben. Beachten Sie jedoch, dass der obere Anlenkpunkt des Fahrzeug-
gurtes hinter der Gurtführung des Kindersitzes bleibt.
– Die Empfehlungen des Fahrzeugherstellers sind unbedingt zu befolgen.
– In cars equipped with an airbag please push the passenger seat as far back
as possible. Please make sure that the upper point of the vehicle seat belt stays
behind the belt guide of the child seat.
– Strictly follow the recommendations of the vehicle manufacturer.
Warnung! Der Sitz ist nicht für die Verwendung mit einem 2-Punkt- oder Beckengurt
geeignet. Wird der Sitz mit einem 2-Punkt-Gurt gesichert, kann es bei einem Unfall zu
schweren oder gar tödlichen Verletzungen des Kindes kommen.
Warning! Do not use the child seat with a two-point belt or a lap belt. When securing
your child with a two-point belt, the child may sustain lethal injuries in an accident.
Warnung! Der Diagonalgurt (f) muss schräg nach hinten verlaufen und darf nie nach
vorn zum oberen Gurtpunkt in Ihrem Fahrzeug führen. Sollte dies nicht einzustellen
sein z.B. durch Vorschieben des Autositzes oder Verwendung auf einem anderen Sitz-
platz, so ist der Kindersitz für dieses Fahrzeug nicht geeignet.
Warning! The seat belt (f) must run diagonally from the back und must never lead
to the front upper belt point of the seat in your vehicle. Should you be unable to
adjust this, for example by pushing the seat to the front or by using the child seat on a
different seat in the car, then the child seat is not suitable for this vehicle.
Warnung! Auf Fahrzeugplätzen, die quer zur Fahrtrichtung angeordnet sind, ist die
Verwendung des Sitzes nicht zulässig. Auf rückwärtsgerichteten Fahrzeugsitzen, wie
z.B. in einem Van oder Minibus, ist die Verwendung zulässig, sofern der Fahrzeugsitz
für die Beförderung eines Erwachsenen zugelassen ist. Zu Beachten ist, dass die Kopf-
stütze bei rückwärtsgerichtetem Einbau nicht entfernt werden darf! Der Kindersitz
muss auch dann, wenn er nicht benutzt wird, immer mit dem Fahrzeuggurt befestigt
sein. Bereits bei einer Notbremsung oder einem geringen Aufprall kann ein unbefe-
stigter Sitz andere Mitfahrer und Sie selbst verletzen.
Warning! For vehicles with seats that are positioned sideways, the use of this child seat
is not permitted. For seats that are positioned backwards, e.g. in a van or minibus, the
use of the child seat is permitted, assuming the seat is approved for adults. Please
ensure that the headrest is not taken off when installing the child seat on a rearward
facing seat! The child seat must have the seat belt fastened even when not in use.
This is necessary to avoid the driver or passenger getting injured by a loose child seat
when making an emergency stop or in case of a crash.
f
7
8
o
POSITION CORRECTE DANS LA VOITURE
Le CYBEX PALLAS-fix peut être utilisé sur tous les sièges de voiture disposant
d’une ceinture de sécurité 3-points à enrouleur.
Avant d‘installer le CYBEX PALLAS-fix avec le système ISOFIX-CONNECT: le
siège appartient à la catégorie „semi-universel“, c.a.d qu‘il ne peut être
utilisé que dans certains types de véhicules. Veuillez vous référer à la liste
des véhicules approuvés pour vérifier la compatbilité du vôtre. La liste est
mise à jour régulièrement et peut être consultée en ligne sur www.cybex-online.com.
Dans certains cas exceptionnels, le siège-auto peut être placé sur le siège passager.
Dans de tels cas, veuillez noter les directives suivantes
Attention ! Vous ne pouvez pas utiliser le siège auto avec une ceinture
2-points ou avec une ceinture ventrale. Une ceinture 2-points risque de causer à
votre enfant de sérieuses blessures en cas d’accident.
Les bagages ou autres objets présents dans l’habitacle peuvent causer des blessures
en cas d’accident, et doivent donc être attachés correctement.
Note importante : Ne laissez jamais votre enfant sans surveillance dans la voiture.
– Pour les véhicules équipés d’un airbag passager, désactivez l’airbag et reculez le
siège passager au maximum. Vérifiez que la partie supérieure de la ceinture de
sécurité du véhicule soit bien derrière le guide-ceinture du siège enfant.
– Suivez toujours les recommandations du constructeur du véhicule.
Attention ! La ceinture de sécurité (f) doit être transversale, et son point le plus
haut (dérouleur) doit toujours être situé derrière le siège. Si, en reculant le siège
au maximum, l’enrouleur de la ceinture ne se trouve pas derrière le siège-auto, il
convient de ne pas utiliser le PALLAS-fix sur ce siège.
Avertissement! L‘usage de ce siège enfant est interdit sur les sièges de véhicules
qui sont positionnés de côté par rapport au sens de la marche. Lorsque le siège est
positionné dos à la route, par exemple dans un monospace ou minibus, l‘usage de
ce produit est autorisé à condition que ledit siège soit approuvé pour le transport
d‘un adulte. Vérifiez que l‘appuie-tête n‘est pas retiré quand le siège enfant est
installé sur un siège dos à la route. Le siège enfant doit être attaché avec la ceinture
de sécurité du véhicule même vide, afin qu‘il ne se transforme pas en projectile en
cas d‘accident.

BEFESTIGEN DES KINDERSITZES MITTELS ISOFIX-CONNECT SYSTEM INSTALLING OF THE CHILD SEAT WITH THE ISOFIX-CONNECT SYSTEM
Mit den ISOFIX-CONNECT System können Sie den CYBEX PALLAS-fix mit dem
Fahrzeug verbinden und so die Sicherheit Ihres Kindes erhöhen. Ihr Kind wird
weiterhin mit dem 3-Punkt-Gurt Ihres Fahrzeuges angeschnallt.
The safety of your child will be increased using the ISOFIX-CONNECT system
linking the CYBEX PALLAS-fix tightly with the vehicle. Your child will still be
buckled up using the car’s three-point belt.
Hinweis! Die ISOFIX-Befestigungspunkte (j) sind zwei Metalllaschen pro Sitzplatz und
befinden sich zwischen Rückenlehne und Sitzfläche des Fahrzeugsitzes. Im Zweifels-
fall nehmen Sie die Bedienungsanleitung Ihres Fahrzeuges zu Hilfe.
Note! The car’s ISOFIX anchorage points (j) are two metal rings per seat, located
between the backrest and the seat cushion of your vehicle seat. If in doubt please
refer to your vehicle owner’s manual.
Hinweis! Achten Sie darauf, dass die beiden grünen Sicherheitsknöpfe (b) an den
Rastarmen (o) nicht herausragen. Entriegeln Sie gegebenenfalls die ISOFIX-
CONNECT Rastarme (o) indem Sie den grünen Sicherheitsknopf (b) drücken und die
rote Entriegelungstaste (y) zurückziehen. Wiederholen Sie den Vorgang gegebenen-
falls auch beim zweiten Rastarm.
Note! Make sure that the two green security buttons (b) of the connectors (o) are not
sticking out. If necessary, release them by pushing and pulling back the red release
button (y). Repeat this procedure with the other connector.
Hinweis! Beachten Sie dazu den Abschnitt „ DEN SITZ INS FAHRZEUG STELLEN“.
Note! For additional information please refer to the section “SECURING THE CHILD”.
– Schieben Sie die beiden Rastarme (o) in die Einführhilfen (u) bis diese mit einem
hörbaren „KLICK“ an den ISOFIX-Befestigungspunkten (j) einrasten.
– Vergewissern Sie sich, dass der Sitz gut hält, indem Sie versuchen ihn aus den Ein-
führhilfen (u) herauszuziehen.
– Die grünen Sicherheitsknöpfe (b) müssen auf beiden Seiten gut sichtbar aus der
roten Entriegelungstaste (y) herausragen.
– Mit dem Verstellgriff (c) am Rahmen (w) des CYBEX PALLAS-fix Kindersitzes können
Sie nun die Position des Sitzes einstellen.
– Push both of the connectors (o) into the ISOFIX-CONNECT guides (u) until you hear
them clicking into the ISOFIX anchorage points (j).
– Make sure that the CYBEX PALLAS-fix is connected properly by trying to pull the
child seat out.
– The green security buttons (b) have to be clearly visible on both sides and must
stick out of the red release buttons (y).
– With the adjusting handle (c), located on the main frame (w) of the CYBEX PALLAS-
fix, you can now adjust the position of the child seat.
– Sie können jetzt Ihr Kind anschnallen; siehe Abschnitt „ANSCHNALLEN MITTELS
FANGKÖRPER“.
– You can now buckle up the child. Please refer to section “SECURING WITH SAFETY
CUSHION”.
– Hängen Sie die mitgelieferten Einführhilfen (u) mit der längeren Lasche nach oben
in den beiden ISOFIX-Befestigungspunkten (j) ein. In manchen Fahrzeugen eignet
sich eine entgegengesetzte Einbaurichtung der Einführhilfen (u) besser.
– Connect the two enclosed ISOFIX-CONNECT guides (u) (longer parts pointing
upward) with the ISOFIX anchorage points (j). An opposite installation (longer parts
pointing downward) is also possible.
– Betätigen Sie den Verstellgriff (c) unter dem Sitzkissen (d), am Rahmen (w) des
CYBEX PALLAS-fix Kindersitzes.
– Ziehen Sie die beiden ISOFIX-CONNECT Rastarme (o) bis zum Endanschlag.
– Drehen Sie nun die ISOFIX-CONNECT Rastarme (o) um 180°, damit diese in Rich-
tung der Einführhilfen (u) zeigen.
– Pull the adjusting handle (c), located under the seat cushion (d) on main frame
(w) of the CYBEX PALLAS-fix.
– Pull the connectors (o) as far out as they will go.
– Rotate the connectors (o) by 180° until they point into the direction of the ISOFIX-
CONNECT guides (u).
9
10
wj
d
c
o
y
b
c
u
INSTALLATION DU SIEGE ENFAN T AVEC LE SYSTEME ISOFIX-CONNECT
La sécurité de votre enfant sera augmentée en utilisant le système ISOFIX-
CONNECT qui solidarise fortement le siège avec le véhicule. Votre enfant
restera attaché utilisant la ceinture trois-points du véhicule.
Note! Les points d‘ancrage ISOFIX du véhicule (j) sont deux anneaux métalliques par
siège, situés entre le dossier et l‘assise du siège du véhicule. En cas de doute, référez-
vous au manuel de votre véhicule.
Attention! Vérifiez que les deux boutons de sécurité verts (b) sur les connecteurs
(o) sont enfoncés. Si nécessaire, réamorcez en poussant et tirant le bouton de
déverrouillage rouge (y). Répétez la procédure avec l‘autre connecteur.
Note! Pour plus d‘information, veuillez vous référer à la section „ATTACHER L‘ENFANT“.
– Poussez les deux connecteurs (o) dans les guides ISOFIX-CONNECT (u) jusqu‘à ce
qu‘ils s‘enclenchent dans les points d‘ancrage ISOFIX (j).
– Assurez vous que le CYBEX PALLAS-fix est bien connecté en tirant dessus.
– Les boutons de sécurité verts ((b) doivent être clairement visibles sur les deux côtés
et doivent ressortir des boutons rouges de déverrouillage (y).
– Avec la poignée d‘ajustement (c), située sur l‘armature (w) du CYBEX PALLAS-fix ,
vous pouvez maintenant ajuster la position du siège enfant.
– Vous pouvez maintenant attacher l‘enfant. Veuillez vous référer à la section
„SECURISER AVEC LE BOUCLIER DE PROTECTION“.
– Connectez les deux guides ISOFIX-CONNECT (u) (parties plus longues vers le haut)
avec les points d‘ancrage ISOFIX (j). Une installation opposée (parties plus longues
vers le bas) est aussi possible.
– Tirez la poignée d‘ajustement (c) située sous l‘assise (d) sur l‘armature (w) du
CYBEX PALLAS-fix. -Tirez les connecteurs (o) aussi loin que possible.
– Tournez les connecteurs (o) de 180° jusqu‘à ce qu‘ils pointent ves les guides ISOFIX-
CONNECT (u)

AUSBAU DES CYBEX PALLAS-FIX REMOVING THE CYBEX PALLAS-FIX
Führen Sie die Einbauschritte in umgekehrter Reihenfolge durch. Perform all installation steps in reverse order.
Hinweis! Durch das Einklappen der Rastarme (o) schonen Sie nicht nur den Fahrzeug-
sitz, sondern schützen auch die Rastarme des ISOFIX-CONNECT Systems vor Verunrei-
nigung und Beschädigung.
Note! By following these steps the vehicle’s seat pad will be protected and the ISOFIX
connectors will be prevented from being stained or damaged. Damages and stains
could obstruct a smooth operation.
– Entriegeln Sie die Rastarme (o) des ISOFIX-CONNECT Systems, indem Sie
die grünen Sicherheitsknöpfe (b) drücken und gleichzeitig die rote Entrie-
gelungstaste (y) zurückziehen.
– Ziehen Sie den Sitz aus den Einführhilfen (u).
– Drehen Sie die Rastarme (o) um 180°.
– Betätigen Sie den Verstellgriff (c) am Rahmen (w) des CYBEX PALLAS-fix Kindersitzes
und schieben Sie die Rastarme (o) bis zum Anschlag hinein.
– Release the connectors (o) by pushing the green security buttons (b) and
pulling back the red release buttons (y).
– Pull the child seat out of the ISOFIX-CONNECT guides (u).
– Rotate the connectors (o) by 180°.
– Pull the adjusting handle (c) located on the main frame (w) of the CYBEX PALLAS-fix
and push the connectors (o) into the child seat until they are completely hidden.
11
12
DEN SITZ INS FAHRZEUG STELLEN
SECURING THE CHILD
Hinweis! An einigen Autositzbezügen aus empfindlichem Material (z.B. Velours, Leder,
etc.) können durch die Benutzung von Kindersitzen Gebrauchspuren auftreten. Um
das zu vermeiden, können Sie z.B. eine Decke oder ein Handtuch unterlegen.
Note! On some car seat covers made of sensitive material (e.g. velour’s, leather etc.)
the use of child seats may lead to traces of wear and tear. To avoid this, put a blanket
or a towel underneath the child seat.
Stellen Sie den Kindersitz auf den entsprechenden Fahrzeugsitz im Auto.
Place the CYBEX PALLAS-fix on the respective seat in the car.
– Achten Sie unbedingt darauf, dass die Rückenlehne (a) des CYBEX PALLAS-fix flä-
chig an der Rückenlehne des Fahrzeugsitzes anliegt, sodass sich der Kindersitz auf
keinen Fall in einer Liegeposition befinden kann.
– Achten Sie bei Benutzung der ISOFIX Befestigungspunkte (j) im Fahrzeug
darauf, dass die Rückenlehne (a) des CYBEX PALLAS-fix vollflächig an der
Rückenlehne des Fahrzeugsitzes aufliegt. Sie können den Abstand mit
dem Verstellgriff (c) am Rahmen (w) des CYBEX PALLAS-fix Kindersitzes
einstellen.
– Sollte die Kopfstütze des Fahrzeuges störend sein, ziehen Sie diese ganz heraus,
drehen Sie sie um oder nehmen Sie diese ganz ab (Ausnahme siehe Abschnitt
„DER RICHTIGE PLATZ IM FAHRZEUG“). Die Rückenlehne (a) passt sich optimal stu-
fenlos nahezu jeder Neigung des Fahrzeugsitzes an.
– Please make sure that the backrest (a) of the CYBEX PALLAS-fix rests flat against
the backrest of the car seat so that the child seat is under no circumstance in a
sleeping position.
– When using the ISOFIX anchorage points (j) in the car, make sure that
the backrest (a) of the CYBEX PALLAS-fix is perfectly aligned and in full
contact with the upright part backrest of the car seat. The position can
be adjusted with the adjusting handle (c) located under the seat cushion
(d) on the main frame (w) of the child seat.
– Should the headrest of the vehicle seat interfere, please pull it out completely, turn
it around or take it off entirely (exceptional case, refer to the section “THE BEST
POSITION IN THE CAR”). The backrest (a) optimally adjusts to almost any inclination
of the vehicle seat.
Warnung! Die Rückenlehne des CYBEX Kindersitzes muss an der Lehne des Fahr-
zeuges flächig aufliegen. Um den größtmöglichen Schutz für das Kind zu gewährlei-
sten, muss sich der Sitz in einer normalen aufrechten Position befinden!
Warning! The backrest of the CYBEX PALLAS-fix should rest flat against backrest of the
car seat. Pushing the booster rearwards the seat should be tightly pressed against
the seat. For the best possible protection of your child, the seat must be in a normal
upright position!
POUR RETIRER LE CYBEX PALLAS-FIX
Procédez à toutes les étapes dans l‘ordre inverse.
Note! En suivant ces étapes, l‘assise du véhicule sera protégée et les connecteurs
ISOFIX ne pourront pas être endommagés, ce qui pourrait empêcher une utilisation
facile.
– Détachez les connecteurs (o) en poussant les boutons de sécurité verts
(b) et en tirant les boutons rouges de déverrouillage (y).
– Tirez le siège enfant hors des guides ISOFIX-CONNECT (u)
– Tournez les connecteurs de 180°.
– Tirez la poignée d‘ajustement (c) située sur l‘armature (w) du CYBEX PALLAS-fix
et repoussez les connecteurs (o) à l‘intérieur du siège enfant jusqu‘à ce qu‘ils
disparaissent complètement.
ATTACHER CORRECTEMENT L’ENFANT
Note! Sur certain siège de voiture en velours, cuirs, alcantara, etc. le siège auto peut
parfois laisser des traces. Pour éviter cela, mettez une serviette ou une couverture
sous le siège enfant.
Placer le CYBEX PALLAS-fix sur le siège choisi.
– Assurez-vous que le dossier (a) du CYBEX PALLAS-fix soit bien adossé contre le
dossier du siège du véhicule, de façon à ce que le siège enfant n‘est pas dans
une position sommeil.
– Quand vous utilisez les points d‘ancrage ISOFIX (j) du véhicule, assurez
vous que le dossier (a) du CYBEX PALLAS-fix est bien aligné et en contact
complet avec le dossier vertical du siège du véhicule. La position peut
être ajustée avec la poignée d‘ajustement (c) située sous l‘assise (d) sur
le chassis (w) du siège enfant.
– Si l‘appui-tête du siège du véhicule gêne, veuillez le tirer en position haute
maximale, le retourner, ou le retirer complètement (cas exceptionnel, veuillez
vous référer à la section „LA MEILLEURE POSITION DANS LE VEHICULE“). Le dossier
(a) s‘ajuste parfaitement à presque toutes les inclinaisons de dossier du siège
véhicule.
Avertissement! Le dossier du CYBEX PALLAS-fix doit être en contact complet avec
le dossier du siège véhicule. Pousser l‘assise du siège vers l‘arrière sur le fauteuil
du véhicule pour que le siège soit fermement pressé contre le fauteuil. Pour une
protection optimale de votre enfant, le siège doit être en position assise droite.

Um den CYBEX PALLAS-fix optimal an die Körpergröße anzupassen ist werkseitig ein
Sitzerhöher (i) mitgeliefert und bereits unter dem Bezug eingelegt.
For a proper height adjustment of the CYBEX PALLAS-fix a booster inlay (i) is included
and already inserted under the seat cover when purchased.
Hinweis! Nur eine in optimaler Höhe eingestellte Schulter- und Kopfstütze (e) bietet
den größtmöglichen Schutz und Komfort für Ihr Kind und gewährleistet außerdem
den optimalen Verlauf des Diagonalgurtes (f). Die Höhenverstellung kann beim
CYBEX PALLAS-fix in 11 Positionen erfolgen. Die Schulterstütze ist mit der Kopfstütze
fest verbunden und muss nicht separat eingestellt werden.
Note! Shoulder and headrest (e) need to be perfectly adjusted in height to provide
the best protection and comfort for your child and to also guarantee the optimal
position of the diagonal belt (f). The height of the shoulder and headrest can be
adjusted in 11 positions. The shoulder part is attached to the headrest and does not
have to be adjusted separately.
ANPASSEN AN DIE KÖRPERGRÖSSE ADJUSTMENT TO THE BODY SIZE
ENTNEHMEN DES SITZERHÖHERS
REMOVING THE BOOSTER INLAY
– Wir empfehlen diesen Sitzerhöher (i) für Kinder vom 9. bis zum 18. Lebensmonat zu
verwenden.
– Ab dem 19. Lebensmonat ist kein Sitzerhöher (i) mehr notwendig.
– Danach ist die Größenanpassung ausschließlich über die verstellbare Kopfstütze
(e) vorzunehmen. Ziehen Sie dazu den Verstellgriff (h) nach oben, um die Schulter-
und Kopfstütze (e) zu entriegeln.
– Die Anpassung hat so zu erfolgen, dass zwischen der unteren Kante der Kopfstütze
(e) und der Schulter des Kindes noch 2 fingerbreit Platz ist.
– It is recommended to use this height adjustment inlay (i) between the age of 9 and
18 months.
– For children over 19 months the height adjustment inlay (i) may be removed.
– Afterwards the height adjustment should be regulated by moving the headrest
(e) into the correct position. Pull the adjustment handle (h) in order to release the
headrest.
– The seat is correctly adjusted if you can fit 2 fingers between the bottom edge of
the headrest (e) and the shoulder of the child. Pull the adjustment handle (h) in
order to unlock the shoulder and headrest.
1. Lösen Sie die vorderen Druckknöpfe des Sitzbezuges vom Sitzkissen (d).
2. Ziehen Sie den Stoffbezug vorne hoch, bis Sie den Sitzerhöher (i) herausziehen kön-
nen.
3. Die Entnahme des Sitzerhöhers (i) hat entsprechend der obigen Altersangabe zu
erfolgen.
4. Bringen Sie den Sitzbezug wieder in den ursprünglichen Zustand und befestigen Sie
diesen anschließend wieder.
1. Open the press buttons at the front of the booster cover.
2. Lift the booster cover until the height adjusting inlay (i) can be easily removed from
the front.
3. Remove the height adjustment inlay (i) according to the above age
recommendation.
4. Put the seat cover back in its original position and fasten the press buttons.
i
h
e
13
14
Durch das gleichzeitige Betätigen der beiden Verstelltasten (z) gleitet der Fangkör-
per (p) automatisch in seine vorderste Position. Durch loslassen der Verstelltasten (z)
wird der Fangkörper (p) in seiner Position fixiert.
Die Seitenteile des Fangkörpers (p) mit den beiden Verstelltasten (z) passen exakt
in die Armlehnen des Sitzkissens (d) und dienen zur Abstützung des Fangkörpers (p)
am Sitz.
Stellen Sie den Fangkörper (p) so ein, dass dieser am Kind anliegt, jedoch ohne dass
der Fangkörper (p) auf den Körper des Kindes drückt.
Warnung! Der Fangkörper (p) darf nur in Verbindung mit dem Rahmen (w) und bis
maximal 18kg verwendet werden.
EINSTELLEN DES FANGKÖRPERS – ECE GRUPPE I (9 - 18 KG)
By pushing the two buttons (z) the safety cushion (p) will slide into the widest position.
By releasing the buttons (z) the safety cushion (p) will be locked in position.
The side parts of the safety cushion (p) fit exactly into the armrest of the booster
cushion. They connect the safety cushion (p) and the booster (d).
The safety cushion (p) should be well adjusted to touch the child’s chest without
exerting any pressure on the child’s body.
Warning! Safety cushion (p) may only be used in conjunction with the main frame (w)
and only up to a maximum weight of 18 kg!
SAFETY CUSHION ADJUSTMENT – ECE GROUP I (9-18 KG)
z
d
p
Pour un réglage correct du CYBEX PALLAS-fix, un réducteur (i) est inclus, et déjà
installé sous le tissu de l‘assise lors de l’achat.
Note! Seul un ajustement optimal de l’appuie-tête (e) et des protections latérales
apportera à votre enfant la meilleure protection et le plus grand confort. Il garantit
également une position optimale de la ceinture diagonale (f). Il existe 11 positions de
réglages possibles en hauteur. La protection latérale est solidaire de l’appuie-tête et
n’a pas besoin d’être ajustée séparément.
RÉGLAGE SELON LA TAILLE DE L’ENFANT
RETIRER LE RÉDUCTEUR
– Il est recommandé d‘utiliser ce réducteur (i) pour les enfants âgés de 9 à 18 mois.
– Le réducteur (i) peut être retiré dès que l‘enfant atteint l‘âge de 19 mois
– Par la suite, le réglage de la taille pourra se faire en ajustant la position de l’appuie-
tête (e). Tirez la réglette (h) pour relâcher l‘appuie-tête.
– L’ajustement doit se faire de façon à vous permettre de placer deux doigts entre le
bas de l’appuie-tête et l’épaule de votre enfant. Saisir la poignée de règlage en
hauteur (h) pour dévérouiller les protèges épaules et repose tête.
1. Détachez les boutons-pressions situés sur la housse de l’assise.
2. Soulevez la housse de l’assise jusqu’à ce que le réducteur (i) puisse être retiré par
l’avant.
3. Retirez le réducteur du siège selon l’âge de l’enfant en suivant les recommandations
ci-dessus.
4. Replacez la housse du siège en position initiale, et refermez les boutons.
En appuyant sur les deux boutons (z), le bouclier de protection (p) coulisse vers
l’avant. Relâchez les boutons (z) pour verrouiller la position du bouclier de protection.
Les parties latérales du bouclier de protection (p) s’adaptent exactement aux
accoudoirs de l’assise. Elles relient le bouclier de protection (p) à l’assise (d).
Le bouclier de protection doit être réglé de façon à toucher la poitrine de l’enfant
sans exercer de pression.
Attention : le bouclier de protection (p) et la base (w) ne peuvent être utilisés
qu’ensemble et uniquement pour les enfants de moins de 18kg.
RÉGLAGE DU BOUCLIER DE PROTECTION – ECE GROUPE I (9 À 18 KG)

Um den CYBEX PALLAS-fix in die Liegeposition zu bringen, muss das fahrzeugeigene
Gurtsystem nicht geöffnet werden.
It is not necessary to open the seat belt, to move the CYBEX PALLAS-fix into a reclining
position.
Der CYBEX PALLAS-fix hat eine neigungsverstellbare Kopfstütze (r), die hilft, dass der
Kopf Ihres Kindes beim Einschlafen nicht so leicht nach vorne fällt. Außerdem trägt
diese verstellbare Kopfstütze zum Komfort ihres Kindes während der Autofahrt bei.
The CYBEX PALLAS-fix has a reclining headrest (r) preventing your child’s head from
falling forward when asleep. Furthermore, this adjustable headrest contributes to the
comfort of your child during the car ride.
Durch leichtes Anheben der Kopfstütze (r) kann deren Neigungswinkel in drei Positi-
onen eingestellt werden.
By slightly lifting the headrest, the inclination of the headrest (r) can be adjusted in
three different positions.
Hinweis! Achten Sie bitte darauf, dass der Kopf des Kindes immer in Kontakt mit der
neigungsverstellbaren Kopfstütze (r) bleibt, da die Kopfstütze nur so ihre optimierte
Seitenaufprall-Schutzfunktion erfüllen kann.
Note! Please ensure that the child’s head always remains in contact with the reclining
headrest since otherwise the headrest cannot fulfill its optimal side-crash protection
function.
Hinweis! Achten Sie darauf, dass der Beckengurt (n) und der Diagonalgurt (f) immer
gut gespannt sind.
Hinweis! Eine Einstellung der Liegeposition ist während der Fahrt durch den Fahrzeug-
lenker zu unterlassen!
Note! Make sure that both lap belt (n) and diagonal belt (f) are always tightly
fastened.
Note! As long the car is in motion, the driver is not allowed to adjust the reclining
position.
Warnung! Achten Sie immer darauf, dass die Verstelltaste (v) in Liege- sowie in Sitz-
position hörbar einrastet. Die Liegeposition steht nur mit dem Fangkörper (p) und
dem Grundrahmen (w) für die ECE Gruppe I (9-18 kg) zur Verfügung.
Warning! Make sure that the handle (v) of the reclining mechanism is always
audibly locked. The reclining position is only approved for ECE Group I (9-18 kg), in
conjunction with the main frame (w) and the safety cushion (p).
Warnung! Auf keinen Fall darf die Einrastvorrichtung (t) mit Gegenständen blockiert
werden! Im Falle eines Unfalls muss die Leichtgängigkeit der Neigungsverstellung
gewährleistet sein, da es sonst eventuell zu Verletzungen Ihres Kindes kommen kann.
Warning! The locking device (t) must never be blocked by any objects! In case of an
accident, the free movement of the reclining mechanism must be guaranteed since
otherwise your child may suffer injuries.
SITZ- UND LIEGEPOSITION (9-18 KG) SITTING AND RECLINING POSITION – ECE GROUP I (9-18 KG)
NEIGUNGSVERSTELLBARE KOPFSTÜTZE
RECLINING HEADREST
– Wenn ihr Kind während der Fahrt einschläft, betätigen Sie die Einstelltaste (v) an
der Unterseite des Sitzkissens (d) und der CYBEX PALLAS-fix gleitet automatisch, mit
Hilfe des Körpergewichtes des Kindes, nach unten.
– Um nach dem Aussteigen des Kindes den Sitz von der Liege- in die aufrechte
Sitzposition zurückzubringen, betätigen Sie erneut die Einstelltaste (v) und führen
Sie den Kindersitz mit einem leichten Druck gegen das Sitzkissen (d) wieder nach
oben.
– When the child is about to fall asleep, pull the handle (v) and the CYBEX PALLAS-fix
slides down automatically.
– When the child is no longer in the seat you can move the seat into an upright
position by pulling the handle (v) again and slightly pressing against the booster
(d).
p
w
v
tr
15
16
v
Il n’est pas nécessaire d’ouvrir le système de ceinture de sécurité pour mettre le
PALLAS-fix en position inclinée.
Note importante: assurez-vous que la ceinture passant à la taille (n) et à l’épaule (f)
soit toujours correctement positionnée et attachée.
Le CYBEX PALLAS-fix est équipé d’un appuie-tête inclinable (r) afin d’éviter que la
tête de l’enfant endormi ne bascule vers l’avant. De plus, cet appuie-tête inclinable
contribue au confort de votre enfant lors des trajets.
APPUIE-TÊTE INCLINABLE
– Une fois l’enfant sorti du véhicule, vous pouvez remettre le siège en position
verticale en actionnant à nouveau la poignée (v) tout en appuyant légèrement
sur l’avant de la base (d).
Note! Si le véhicule est en mouvement, il est interdit au conducteur d‘ajuster
l‘inclinaison du véhicule tout en conduisant.
Note importante ! Assurez-vous que la tête de votre enfant reste toujours en contact
avec l’appuie-tête inclinable, de façon à garantir une sécurité optimale en cas
d’accident.
POSITION ASSISE ET INCLINÉE - ECE GROUP I (9 À 18 KG)
Attention ! Assurez-vous que la poignée (v) du mécanisme d’inclinaison se verrouille
en émettant un « clic » audible quelle que soit sa position. La position inclinée n’est
homologuée que pour les ECE groupe I (9 à 18 kg), avec la base réglable (w) et le
bouclier de protection (p).
– Quand l’enfant s’endort, actionnez la poignée (v). Le siège s’incline
automatiquement.
En soulevant légèrement l’appuie-tête, vous pouvez régler son inclinaison dans 3
positions.
Attention ! Le verrou (t) ne doit jamais être bloqué par un quelconque objet. En cas
d’accident, la liberté de mouvement de l’inclinaison doit être assurée. Dans le cas
contraire, votre enfant risquerait d’être blessé.

ANSCHNALLEN MITTELS FANGKÖRPER – ECE GRUPPE I (9-18 KG) SECURING WITH SAFETY CUSHION – ECE GROUP 1 (9-18 KG)
WECHSEL VON GRUPPE I (9-18 KG) AUF GRUPPE II/III (15-36 KG)
SWITCHING FROM GROUP I (9-18KG) TO GROUP II/III (15- 36KG)
1. Setzen Sie ihr Kind in den CYBEX PALLAS-fix Kindersitz.
2. Legen Sie nun den bereits eingestellten Fangkörper (p) ein. (siehe Abschnitt „EIN-
STELLEN DES FANGKÖRPERS“)
3. Ziehen Sie die gesamte Gurtlänge des Fahrzeug-Dreipunktgurtes heraus. Nehmen
Sie den Beckengurt (n) und legen Sie diesen in die dafür vorgesehene Gurtführung
(x) des Fangkörpers (p) ein.
4. Stecken Sie die Gurtzunge (m) in das Gurtschloss (l). Dieses muss mit einem hör-
baren „KLICK“ einrasten.
5. Spannen Sie den Beckengurt (n) vor, indem Sie am Diagonalgurt (f) ziehen.
6. Führen Sie nun den Diagonalgurt (f) parallel zum Beckengurt (n) in der Gurtführung
(x) zurück.
7. Ziehen Sie den Diagonalgurt (f) straff und achten Sie dabei darauf, dass beide
Gurtteile, über die gesamte Breite des Fangkörpers (p), innerhalb der Gurtführung
(x) verlaufen.
Warnung: Den Gurt auf keinen Fall verdrehen!
1. Place the child in the CYBEX PALLAS-fix child seat.
2. Attach the previously adjusted safety cushion (p) to the child seat. (See chapter
“SAFETY CUSHION ADJUSTMENT”)
3. Pull out the complete vehicle belt length. Take the lap belt (n) and slide it into the
dedicated belt routings (x) (marked red) of the safety cushion (p).
4. Insert the belt tongue (m) into the belt buckle (l). Listen for an audible “CLICK”.
5. Now take the shoulder belt (f) and pull it to tighten lap belt (n).
6. Lead back the shoulder belt (f) parallel to the lap belt (n) into the same belt routing
(x) channel.
7. Pull the belt tight and make sure that the diagonal belt (f) and the lap belt (n) are
running completely inside (over the whole width) of the belt routing (x).
1. Entfernen Sie den Fangkörper (p).
2. Drücken Sie die beiden Entriegelungstasten (q) an der Unterseite des Sitzkissens (d)
und ziehen Sie dieses bis zum ersten Widerstand vom Rahmen (w) weg.
3. Betätigen Sie nun die Einstelltaste (v), die zentral unter dem Sitzkissen (d) liegt, und
ziehen Sie den Sitz komplett vom Rahmen (w) ab.
4. Zum Entfernen der Abstandhalter (s) ziehen Sie den Bezug an der Rückenlehne (a)
hoch, um die Fingeröffnung an der Rückseite der Rückenlehne freizulegen.
5. Betätigen Sie den Entriegelungshaken im Inneren der Rückenlehne (a) und lösen
Sie nun den Abstandhalter (s) von unten ab.
6. Wiederholen Sie den Vorgang ebenfalls auf der gegenüberliegenden Seite.
1. Remove the safety cushion (p).
2. Press the two release buttons (q) on the bottom side of the seat cushion (d) and
simultaneously pull it away from the main frame (w) until you feel a resistance.
3. Now pull the reclining handle (v), situated centrally on the bottom of the seat
cushion (d), and pull off the child seat from the main frame (w).
4. To remove the spacers (s), pull up the backrest cover to reveal the finger hole on
the backside of the backrest (a).
5. Push the release hook inside the finger hole and pull the spacers (s) out of the
backrest (a).
6. Repeat this procedure on the other side of the backrest.
Warning! Never twist the belt!
n
x
f
f
l
f
x
n
l
m
x
q
v
d
w
a
17
18
p
s
4. Insérez l’attache de la ceinture de sécurité (m) dans la boucle (l).Vous devez
distinctement entendre un « clic ».
5. Prenez ensuite la partie haute de la ceinture (f) et tirez-la pour la resserrer au
niveau du bassin (n).
6. Glisser les parties supérieure (f) et inférieure de la ceinture dans le guide du
bouclier de protection (x).
7. Resserrez et assurez-vous que les ceintures (f) et (m) soient entièrement positionnées
dans le guide du bouclier de protection (x) et ce, sur toute leur largeur (x).
ATTACHER L’ENFANT AVEC LE BOUCLIER DE PROTECTION - ECE GROUP I (9 À 18 KG)
Attention ! La ceinture ne doit jamais être vrillée !
1. Placez l’enfant dans le siège CYBEX PALLAS-fix.
2. Fixez au siège le bouclier de protection préalablement ajusté (voir le chapitre «
réglage du bouclier de protection »)
3. Faites passer la partie ventrale (n) de la ceinture dans les guides rouges (x) prévues
à cet effet sur le bouclier de protection.
PASSER DU ECE GROUPE I (9 À 18 KG) AU GROUPE II/III (15 À 36 KG)
1. Retirez le bouclier de protection (p).
2. Appuyez sur les boutons (q) situés sous l’assise de chaque côté, puis dissociez-la
de la base (d) en tirant jusqu’à ce que vous sentiez un blocage.
3. Actionnez ensuite la poignée d’inclinaison (v) située au milieu, sous l’assise, et
détachez complètement l’assise de la base (w).
4. Pour retirer les espaceurs (s) il est recommandé de mettre le siège en position
inclinée.
5. Tirez la housse (a) vers le haut pour faire apparaître un orifice derrière le dossier.
6. Appuyez sur le bouton situé dans l’orifice, et faites sortir les espaceurs (s) du dossier.
7. Répétez l’opération de l’autre côté du dossier.

ISOFIX-CONNECT UMBAU ISOFIX-CONNECT MODIFICATION
7. Betätigen Sie den Verstellgriff (c) am Rahmen (w) und ziehen Sie die beiden ISO-
FIX-CONNECT Rastarme (o) bis zum ersten Widerstand heraus.
8. Halten Sie weiterhin den Verstellgriff (c) und lösen Sie nun nacheinander die bei-
den Schnapphaken (A) an der Unterseite des Sitzkissens (d). Falls erforderlich, neh-
men Sie einen Schraubenzieher zu Hilfe.
7. Press the adjusting handle (c) of the main frame (w) and pull out the ISOFIX
connectors (o) until you feel a resistance.
8. Simultaneously hold the adjusting handle (c) and release the two snap-fits (A) with
your fingers or the aid of a screw driver.
10. Betätigen Sie die Einstelltaste (v) an der Unterseite des Sitzkissens (d) und schie-
ben Sie die Rastarme (o) vollständig hinein.
11. Für den weiteren ordnungsgemäßen Einbau verweisen wir auf den Abschnitt „BE-
FESTIGEN DES KINDERSITZES MITTELS ISOFIX-CONNECT SYSTEM“.
10. Press the handle (v) situated centrally on the bottom of the seat cushion (d) and
push the ISOFIX connectors (o) into the seat cushion until they are completely
hidden.
11. We refer to the section “INSTALLING OF THE CHILD SEAT WITH THE ISOFIX-CONNECT
SYSTEM” for further installation steps.
9. Schieben Sie nun die ISOFIX-CONNECT Rastarme (o) in die dafür vorgesehenen
Öffnungen an der Unterseite des Sitzkissens (d) bis zum ersten Widerstand.
9. Shift the ISOFIX connectors (o) into the designed chamber on the bottom side of
the seat cushion (d) until you feel a resistance.
20
Hinweis! Richtig positioniert lösen sich die ISOFIX-CONNECT Raststangen (o) mittels
Schwerkraft vom Rahmen (w).
Note! In correct position, the ISOFIX connectors (o) release automatically from the
main frame (w), simply by force of gravity.
Hinweis! Bewahren Sie die demontierten Teile gut geschützt und gemeinsam auf. Note! Please keep all spare parts together and store them properly.
Warnung! Es ist auf eine minimale Fallhöhe zu achten, damit Sie weder Bauteile, sich
selbst noch andere Personen in Ihrer näheren Umgebung in Mitleidenschaft ziehen.
Warning! Observe a minimum drop height to avoid damaging parts of the child seat
or hurting yourself or others.
Warnung! Achten sie darauf, dass die Rastarme richtig herum eingebaut werden und
die Verzahnung der Raststangen oben ist wenn Sie sie in den Sitz einführen.
Warning! Please make sure that the adjustment and fixation teeth are on top of the
ISOFIX Connect arms before mounting to the booster seat.
Warnung! Beim Wiederzusammenbau gehen Sie genau in umgekehrter Reihenfolge
vor. Überprüfen Sie zuvor anhand der Anleitung, ob alle Teile vorhanden sind.
Warning! For reassembly please proceed with these steps in reverse order. Check the
user guide in advance to make sure no parts are missing.
o
o
w
v
A
19
c
MODIFICATION ISOFIX-CONNECT
Avertissement! Assurez vous que les dents d‘ajustement et de blocage sont sur le
dessus des bras ISOFIX Connect avant de les monter à la base de l‘assise.
Avertissement! Pour ré-assemblage, suivez ces étapes dans l‘ordre inverse. Vérifiez
le guide d‘utilisation à l‘avance afin de vous assurer qu‘aucune pièce ne manque.
Attention! Observez une hauteur minimum pour éviter d‘endommager des parties du
siège ou vous blesser.
7. Appuyez sur la poignée d‘ajustement (c) du chassis du siège (w) et tirez sur les
connecteurs (o) jusqu‘à sentir une résistance.
8. Simultanément tenez la poignée d‘ajustement (c) et relachez les deux ergots (A)
avec les doigts ou l‘aide d‘un tournevis.
10. Appuyez sur la poignée (v) située au centre du dessous de l‘assise (d) et poussez
les connecteurs ISOFIX (o) dans l‘assise jusqu‘à être complètement cachés.
11. Référez vous à la section „INSTALLATION DU SIEGE AVEC LE SYSTEME ISOFIX-
CONNECT“ pour les étapes d‘installation suivantes.
Note! Dans la position correcte, les connecteurs ISOFIX (o) sortent tous seuls du
chassis (w) par simple gravité.
9. Placez les connecteurs ISOFIX (o) dans le logement adequat sur le dessous de
l‘assise (d) jusqu‘à sentir une résistance.
Note! Merci de conserver toutes les pièces ensemble et rangées.

Warning! The lap belt (n) must, on both sides, run as low across the groin of your child
as possible in order to take optimal effect in case of an accident.
Now lead the diagonal belt (f) through the upper red belt guide (g) in the shoulder
rest (e) until it is inside the belt guide.
Please make sure that the diagonal belt (f) runs between the outer edge of the
shoulder and your child’s neck. If necessary, adjust the running of the belt by adjusting
the height of the headrest. The height of the headrest can still be adjusted in the car.
Warnung! Der Beckengurt (n) muss auf beiden Seiten so tief wie möglich über der
Leistenbeuge Ihres Kindes verlaufen, um im Falle eines Unfalls optimal wirken zu
können.
Nun führen Sie den Diagonalgurt (f) durch die obere Gurtführung (g) in der Schulter-
stütze (e) bis er sich innerhalb der Gurtführung (g) befindet.
Achten Sie darauf, dass der Diagonalgurt (f) zwischen Schulteraußenkante und Hals
Ihres Kindes verläuft. Falls erforderlich, passen Sie durch Verstellen der Kopfstützenhö-
he den Gurtverlauf an. Die Höhe der Kopfstütze (e) kann auch noch im Auto einge-
stellt werden.
ANSCHNALLEN OHNE FANGKÖRPER – ECE GRUPPE II/III (15-36 KG)
Setzen Sie ihr Kind in den Kindersitz. Ziehen Sie den Dreipunktgurt weit heraus und
führen Sie diese vor Ihrem Kind entlang zum Gurtschloss (l).
Warnung! Den Gurt auf keinen Fall verdrehen.
Stecken Sie die Gurtzunge (m) in das Gurtschloss (l). Dieses muss mit einem hörbaren
„KLICK“ einrasten.
Als nächstes legen Sie den Beckengurt (n) in die unteren Gurtführungen (k) des Kin-
dersitzes ein. Ziehen Sie nun kräftig am Diagonalgurt (f), um den Beckengurt (n) zu
straffen. Je enger der Gurt anliegt, desto besser kann er vor Verletzungen schützen.
Auf der Seite des Gurtschlosses (l) müssen der Diagonalgurt (f) und der Beckengurt
(n) zusammen in die untere Gurtführung (k) eingelegt sein.
Warnung! Das Fahrzeuggurtschloss (l) darf keinesfalls in die untere Gurtführung (k)
hineinreichen. Ist die Gurtpeitsche zu lang, ist der Kindersitz für eine Verwendung auf
dieser Position im Fahrzeug nicht geeignet.
Der Beckengurt (n) sollte auf beiden Seiten des Sitzkissens (d) in den unteren Gurt-
führungen (k) liegen.
Hinweis! Bringen Sie Ihrem Kind von Anfang an bei, immer auf eine straffe Gurt-
führung zu achten und bei Bedarf, selbst den Gurt festzuziehen.
SECURING WITHOUT SAFETY CUSHION – ECE GROUP II/III (15-36 KG)
Put your child in the child seat. Pull out the three-point belt and lead it in front of your
child to the buckle (l).
Warning! Never twist the belt!
Insert the belt tongue (m) into the belt buckle (l). If you hear an audible “CLICK” it is
securely locked.
The lap belt (n) should be placed in the bottom belt guides (k) on both sides of the
seat (d).
Note! Teach your child from the beginning to always pay attention to a tight belt and
to pull the belt tight on her/his own if necessary.
Put the lap belt (n) in the bottom belt guides (k) of the child seat. Now pull the lap
belt (n) tight by pulling the diagonal belt (f) until there is no slack. The tighter the belt
the better it can protect from injuries. The diagonal belt (f) and the lap belt (n) should
both be inserted in the bottom belt guide at the side of the belt buckle.
Warning! The belt buckle of the car seat (l) must under no circumstances reach into
the bottom belt guide (k). If the belt strap is too long, the child seat is not suitable
for this vehicle.
Um die bestmögliche Sicherheit Ihres Kindes zu gewährleisten, prüfen Sie bitte immer
vor Beginn der Fahrt, ob …
– der Beckengurt (n) auf beiden Seiten des Sitzkissens (d) in den unteren Gurtführun-
gen (k) verläuft.
– der Diagonalgurt (f) auf der Gurtschlossseite auch in der unteren Gurtführung (k)
des Sitzes verläuft.
– der Diagonalgurt (f) durch die rot markierte Gurtführung (g) der Schulterstütze (e)
verläuft.
– der Diagonalgurt (f) schräg nach hinten verläuft.
– der gesamte Gurt straff ist und nicht verdreht am Körper des Kindes anliegt.
IST IHR KIND RICHTIG GESICHERT?
In order to guarantee the best possible safety for your child, please check prior to
the ride, whether …
– the lap belt (n) runs in the bottom belt guides (k) on both sides of the child seat.
– the diagonal belt (f) also runs in the bottom belt guide (k) of the child seat on the
side of the belt buckle.
– the diagonal belt (f) runs through the belt guide (g) of the shoulder rest (e), marked
red.
– the diagonal belt (f) runs diagonally towards the back.
– the entire belt sits tight and is not twisted.
IS YOUR CHILD PROPERLY SECURED?
21
22
l
l
m
n
n
n
k
k
k
k
f
+
n
f
f
f
g
g
e
d
Attention ! La partie ventrale (n) de la ceinture doit être placée, des deux côtés, au
plus près de l’aine de votre enfant pour une protection optimale en cas d’accident.
Insérez la partie transversale de la ceinture (f) dans le guide rouge (g) situé sur la
protection latérale (e).
Vérifiez bien que la ceinture transversale (f) soit bien placée sur l’épaule de votre
enfant. Si nécessaire, vous pouvez ajuster la position de la ceinture en réglant
la hauteur de l’appuie-tête. Celui-ci peut être toujours être réglé à l’intérieur du
véhicule.
INSTALLATION SANS BOUCLIER DE PROTECTION - ECE GROUP II/III (15-36 KG)
Installez votre enfant dans le siège-auto. Déroulez la ceinture 3-points et placez-la
correctement sur le buste de l’enfant pour atteindre la boucle (l).
Attention ! Le ceinture ne doit jamais être vrillée !
Insérez l’attache de la ceinture de sécurité (m) dans la boucle (l).Vous devez
distinctement entendre un « clic ».
Passez la partie ventrale de la ceinture (n) dans les guides (k) prévus à cet effet sur la
base du siège. Serrez ensuite la ceinture à la taille (n) et à l’épaule (f) pour
éliminer tout jeu. Plus la ceinture est serrée, mieux elle protègera votre enfant en cas
d’accident. Les deux parties de la ceinture doivent être insérées dans le guide situé
sur le côté de la boucle.
Attention ! La boucle de la ceinture du siège-auto (l) ne doit en aucun cas se trouver
dans le guide de la ceinture située sur le bas du siège (k). Si la sangle de la ceinture
est trop longue, le siège-auto ne convient pas à ce véhicule.
La partie ventrale (n) de la ceinture doit être placée dans les guides (k) situés des
deux côtés du siège (d).
Note importante : Apprenez le plus tôt possible à votre enfant qu’il doit veiller à
toujours être correctement attaché, et qu’il doit resserrer lui-même la ceinture si
nécessaire.
Pour garantir le meilleur niveau de sécurité pour votre enfant, veuillez vérifier les
points suivants avant de démarrer :
– La ceinture ventrale (n) est correctement placée à l’intérieur des guides (k) de
chaque côté de l’assise du siège.
– La ceinture transversale (f) est insérée dans les guides (k) du siège, près de la
boucle de la ceinture.
– La ceinture transversale (f) est placée à l’intérieur du guide rouge (g) de la
protection latérale.
– La ceinture (f) est placée en diagonale vers l’arrière.
– La totalité de la ceinture est correctement tendue et n’est pas vrillée.
VOTRE ENFANT EST-IL CORRECTEMENT ATTACHÉ?

Um die größtmögliche Schutzwirkung Ihres Kindersitzes zu gewährleisten, ist es
unbedingt notwendig, dass Sie Folgendes beachten:
PFLEGE
– Alle wichtigen Teile des Kindersitzes sollten regelmäßig auf Beschädigungen kont-
rolliert werden. Die mechanischen Bauteile müssen einwandfrei funktionieren.
– Es ist unbedingt notwendig darauf zu achten, dass der Kindersitz nicht zwischen
harten Teilen wie Fahrzeugtür, Sitzschiene usw. eingeklemmt wird und dadurch
beschädigt werden könnte.
– Der Kindersitz muss z.B. nach einem Sturz unbedingt vom Hersteller überprüft
werden.
1. Ziehen Sie durch Betätigen des Verstellgriffs (h) die Kopfstütze (e) so weit wie mög-
lich heraus.
2. Betätigen Sie den Verstellgriff (h) und ziehen Sie gleichzeitig an der unteren Kante
der obersten Rippe der Sitzlehne (a), um die Kopfstütze (e) zu lösen. Ziehen Sie
diese komplett heraus.
3. Jetzt können Sie den Sitzbezug nach oben hin entfernen.
4. Um die Rückenlehne wieder zusammenzubauen, stecken Sie mit betätigtem Ver-
stellgriff (h) die Kopfstütze (e) in die Rückenstütze (a).
1. Pull the headrest (e) into its top position by using the release handle (h).
2. To release the headrest (e), simultaneously pull the handle (h) and the lower rim
of the upper rib of the backrest (a). Now the headrest (e) can be completely
detached.
3. Now the cover can be removed.
4. To reassemble, pull the adjustment handle (h) and insert the headrest (e) into the
backrest (a).
ENTFERNEN DES BEZUGES
ENTFERNEN DES SITZBEZUGS VON DER SITZLEHNE REMOVING THE SEAT COVER FROM THE BACKREST
Der Bezug besteht aus vier Teilen, die entweder mit Klettband, Druckknöpfen oder
Knopflöchern am Kindersitz befestigt sind. Sobald Sie alle Befestigungen lösen,
können die Einzelteile abgenommen werden.
Um den Bezug wieder zu befestigen, verfahren Sie in umgekehrter Reihenfolge.
Warnung! Der Kindersitz darf keinesfalls ohne Bezug verwendet werden.
Hinweis! Bitte den Bezug vor der ersten Verwendung waschen. Der Bezug darf bei
30°C im Schonwaschgang gewaschen werden. Sollten Sie mit mehr als 30°C wa-
schen, kann es zu Ausfärbungen des Bezugstoffes kommen. Bitte den Bezug geson-
dert von anderer Wäsche waschen und keinesfalls maschinell trocknen! Den Bezug
keinesfalls in der prallen Sonne trocknen! Die Kunststoffteile können mit einem milden
Reinigungsmittel und warmen Wasser gereinigt werden.
Warnung! Bitte auf keinen Fall chemische Reinigungs- oder Bleichmittel verwenden!
REINIGUNG
Es ist darauf zu achten, dass nur ein Original CYBEX Sitzbezüge verwendet wird, da
auch der Bezug ein wesentlicher Bestandteil der Funktion ist. Ersatzbezüge erhalten
Sie im Fachhandel.
In order to guarantee the best possible protection of your child seat, it is necessary
that you take note of the following:
PRODUCT CARE
– All important parts of the child seat should be examined for any damages on a
regular basis. The mechanical parts must function flawlessly.
– It is essential that the child seat does not get jammed between hard objects e.g.
like the door of the car, seat rail etc. causing possible damage to the seat.
– The child seat must be examined by the manufacturer after a fall or similar
situations.
REMOVING THE SEAT COVER
The seat cover consists of four parts which are fixed to the seat either by velcros, press
buttons or button holes. Once you have released all fixations, the cover parts can
be removed.
In order to put the covers back on the seat, proceed in the reversed order as
removing them.
Warning! The child seat must never be used without the cover.
CLEANING
It is important to use only original CYBEX seat cover since the cover is also an essential
part of the function. You may obtain spare covers at your retailer.
Note! Please wash the cover before using it the first time. Seat covers are machine
washable at max. 30°C on delicate cycle. If you wash it at a higher temperature,
the cover fabric may lose colour. Please wash the cover separately and never dry it
mechanically! Do not dry the cover in direct sunlight! You can clean the plastic parts
with a mild detergent and warm water.
Warning! Please do not use chemical detergents or bleaching agents under any
circumstances!
23
24
Afin de garantir la meilleure protection possible à votre enfant, il est nécessaire de
prendre connaissance des indications suivantes :
ENTRETIEN
– Toutes les pièces du siège-auto doivent être examinées régulièrement. Les
éléments mécaniques doivent être en parfait état.
– Il est essentiel de ne pas coincer le siège contre des éléments rigides tels que
portière du véhicule, rails de siège etc. susceptibles d’endommager le siège-auto.
– Le siège-auto doit être examiné par le fabricant après une chute ou tout incident
similaire.
1. Remontez l’appuie-tête (e) au maximum en actionnant la poignée (h).
2. Pour détacher l’appuie-tête (e), actionnez la poignée (h) tout en exerçant une
pression sur le haut de la protection latérale (a). L’appuie-tête peut ensuite être
complètement détaché.
3. La housse peut à présent être retirée.
4. Pour remettre en place l’appuie-tête, actionnez la poignée (h) et insérez l’appuie-
tête dans le dossier (a).
RETIRER LA HOUSSE
RETIRER LA HOUSSE DU DOSSIER
La housse est constituée de cinq éléments fixés par Velcro, boutons-pressions ou
boutons classiques. La housse peut être retirée une fois que chaque élément a été
détaché. Pour remettre la housse en place, inversez l’ordre des étapes.
Attention ! Le siège-auto ne doit jamais être utilisé sans sa housse.
Note! Veuille laver la housse avant de l‘utiliser pour la première fois. Les housses sont
lavables en machine à30°C maximum, cycle délicat. Si vous lavez à température
plus élevée, le tissu peut passer. Veuillez laver la housse séparément et ne jamais
sécher mécaniquement! Ne pas sécher au soleil directement! Les parties plastiques
peuvent être nettoyées au savon doux et à l‘eau tiède.
Attention ! N’utilisez sous aucun prétexte de détergent chimique ou chloré pour le
nettoyage du siège.
NETTOYAGE
Il est important de toujours utiliser la housse originale du siège CYBEX, car elle fait
partie intégrante de ses fonctionnalités. Les pièces détachées peuvent être
obtenues par le biais de votre revendeur CYBEX.

– Wenn das Fahrzeug längere Zeit der prallen Sonne ausgesetzt ist, muss der Kinder-
sitz aus dem Fahrzeug entfernt werden oder mit einem hellen Tuch abgedeckt
werden.
– Prüfen Sie regelmäßig alle Kunststoff- und Metallteile des Sitzes auf Beschädigung
oder Veränderung von Form oder Farbe. Stellen Sie eine Veränderung fest, ist der
Kindersitz unbedingt zu entsorgen oder er muss vom Hersteller geprüft und gege-
benenfalls ausgetauscht werden.
– Veränderungen des Stoffes, insbesondere das Ausbleichen, sind nach jahrelanger
Verwendung in einem Fahrzeug normal und stellen keine Beeinträchtigung dar.
PRODUKTLEBENSDAUER
Aufgrund eines Unfalles können am Kindersitz Beschädigungen auftreten, die mit
bloßem Auge nicht erkennbar sind. Bitte tauschen Sie nach einem Unfall unbedingt
den Sitz aus. Im Zweifelsfall wenden Sie sich bitte an den Händler oder Hersteller.
VERHALTEN NACH EINEM UNFALL
In an accident the seat can sustain damages which are invisible to the eye. Therefore
the seat should be replaced immediately in such cases. If in doubt please contact
your retailer or the manufacturer.
WHAT TO DO AFTER AN ACCIDENT
The CYBEX PALLAS-fix was designed to easily fulfill its purpose for the expected
durability (adding up to 11 years). However, since high fluctuations of temperature
might occur and since there might be unforeseeable exposure to child seats, it is
important to note the following:
– If the car is exposed to direct sunlight for a longer period of time, the child seat
must be taken out of the car or covered with a cloth.
– Examine all plastic and metal parts of the seat for any damages or changes
about their form or colour on a yearly basis. If you notice any changes, you need
to dispose of the child seat or it must be examined by the manufacturer and
replaced if necessary.
– Changes of the fabric, in particular the fading of colour, are normal after yearlong
use in the car and do not constitute a fault.
DURABILITY OF THE PRODUCT
At the end of its life cycle the child seat should be disposed properly. Waste disposal
regulations may vary regionally. In order to guarantee a proper disposal of the child
seat, please contact your communal waste management or administration of your
city. In all cases, please note the waste disposal regulations of your country.
DISPOSAL
Am Ende der Produktlebensdauer des Kindersitzes ist eine sachgemäße Entsorgung
vorzunehmen. Die Abfalltrennung kann kommunal unterschiedlich sein. Um eine
vorschriftsgemäße Entsorgung des Kindersitzes zu gewährleisten, setzen Sie sich mit
Ihrer kommunalen Abfallentsorgung bzw. Verwaltung Ihres Wohnortes in Verbindung.
Beachten Sie auf jeden Fall die Entsorgungsbestimmungen Ihres Landes.
ENTSORGUNG
Der CYBEX PALLAS-fix ist so ausgelegt, dass er für die gesamte maximale
Verwendungszeit von ca. 11 Jahren seine Eigenschaften erfüllt. Da jedoch in
Fahrzeugen sehr große Temperaturschwankungen und unvorhersehbare
Belastungen auftreten können, ist es notwendig folgende Punkte zu beachten:
25
26
KONTAKT:
c/o COLUMBUS Trading-Partners GmbH
Tel.: +49(0)9221 - 973114
Fax.: +49(0)9221 - 973117
Alte Forstlahmer Str. 22
95326 Kulmbach
Germany
UK – AFTER SALES SERVICE:
If you need assistance, spare parts or you are unhappy with any aspect
of the goods please contact Customer Care on: +44 (0)845 268 2000,
or e-mail us at: customer[email protected].
Visit our website at www.mamasandpapas.com for the latest product information.
– Si le véhicule est directement exposé au soleil pour une longue durée, il est
préférable de retirer le siège de l’habitacle ou de le couvrir.
– Une fois par an, examinez attentivement toutes les pièces du siège pour y déceler
d’éventuels dommages ou détérioration de couleurs. En cas de dommage, le
siège doit être vérifié par le fabricant, et remplacé si nécessaire.
– Une altération du tissu, et en particulier l’affadissement des couleurs, sont les
conséquences normales d’une utilisation continue, et ne constituent pas un
défaut de fabrication.
LONGÉVITÉ DU PRODUIT
Lors d‘un accident, même mineur, un siège-auto peut subir des dégâts invisibles à
l‘oeil nu. Il est donc très important de remplacer immédiatement un siège accidenté.
En cas de doute, contactez votre revendeur ou le fabricant.
CONDUITE À TENIR APRÈS UN ACCIDENT DE VOITURE
À la fin de la période d’utilisation du siège-auto, vous devez vous en débarrasser
correctement. Les mesures de recyclage varient d’un pays à l’autre. Afin d’assurer le
recyclage du siège-auto de votre enfant, veuillez contacter l’organisme de gestion
des déchets de votre ville. Dans tous les cas, merci de respecter les consignes de
recyclage.
RECYCLAGE
Le CYBEX PALLAS-fix est conçu pour assurer la sécurité de votre enfant pendant
toute la période pendant laquelle il est utilisé — de l’âge de 9 mois à 12 ans — soit
pendant un peu plus de 11 ans. Toutefois, en raison de fluctuations de températures
et de dommages imprévisibles, il est important de prendre en compte ce qui suit :

Die nachfolgenden Garantiebestimmungen gelten nur in dem Land, in dem dieses
Produkt erstmalig über den Einzelhandel an einen Verbraucher verkauft wurde. Die
Garantie deckt sämtliche Herstellungs- und Materialfehler ab, die im Zeitpunkt des
Kaufs bestanden haben oder die innerhalb von zwei (2) Jahren nach dem Erstver-
kauf dieses Produkts über den Einzelhandel an einen Verbraucher in Erscheinung ge-
treten sind (Herstellergarantie). Tritt während der Garantiezeit ein Herstellungs- und
Materialfehler auf, wird das Produkt kostenlos repariert oder – nach unserem freien
Ermessen – gegen ein neues ausgetauscht. Um Leistungen im Rahmen dieser Garan-
tie in Anspruch nehmen zu können, muss das Produkt an den Einzelhändler zurückge-
geben werden, der es erstmalig verkauft hat und ein Nachweis über den Kauf (Kauf-
beleg oder Rechnung) im Original vorgelegt werden, welcher das Kaufdatum, den
Namen des Händlers sowie die Produktbezeichnung aufzeigt. Der Anspruch aus die-
sem Garantieversprechen besteht nicht, wenn das Produkt an den Hersteller oder
irgendeine andere Person als den Einzelhändler, der es erstmalig verkauft hat, zum
Zweck der Inanspruchnahme der Garantieleistung geschickt wird. Die Garantie gilt
nur, wenn das Produkt nach dem Kauf umgehend auf Vollständigkeit, Herstellungs-
und Materialfehler überprüft wurde. Wurde das Produkt im Versandhandel gekauft,
ist es umgehend nach Erhalt auf Vollständigkeit, Herstellungs- und Materialfehler zu
überprüfen. Falls Schäden vorhanden sind, darf das Produkt nicht mehr benutzt wer-
den und muss umgehend an den Händler, der es erstmalig verkauft hat, zurück ge-
geben werden. Im Garantiefall muss das Produkt in einem vollständigen und saube-
ren Zustand zurückgegeben werden. Bitte lesen Sie vor einer Kontaktaufnahme mit
dem Händler sorgfältig die Gebrauchsanleitung. Die Garantie deckt keine Schäden
ab, die durch Fehlgebrauch, äußere Einflüsse (Wasser, Feuer, Verkehrsunfälle o.ä.)
oder normalen Verschleiß entstanden sind. Die Garantie wird nur gewährt, wenn das
Produkt in Übereinstimmung mit der Gebrauchsanweisung behandelt und benutzt
wurde, Reparaturen oder Veränderungen ausschließlich durch Personen vorgenom-
men wurden, die hierzu befugt waren und stets nur Original Bau- und Zubehörteile
verwendet wurden. Durch diese Garantie werden weder die auf Grundlage der je-
weils anwendbaren Gesetze bestehenden Verbraucherrechte noch Rechte gegen
den Verkäufer wegen der Vertragswidrigkeit des Produkts ausgeschlossen, begrenzt
oder in anderer Weise eingeschränkt.
The following warranty applies solely in the country where this product was initially
sold by a retailer to a customer. The warranty covers all manufacturing and material
defects, existing and appearing, at the date of purchase or appearing within
a term of two (2) years from the date of purchase from the retailer who initially
sold the product to a consumer (manufacturer’s warranty). In the event that a
manufacturing or material defect should appear, we will – at our own discretion –
either repair the product free of charge or replace it with a new product. To obtain
such warranty it is required to take or ship the product to the retailer, who initially
sold this product to a customer and to submit an original proof of purchase (sales
receipt or invoice) that contains the date of purchase, the name of the retailer and
the type designation of this product. This warranty shall not apply in the event that
this product is taken or shipped to the manufacturer or any other person other than
the retailer who initially sold this product to a consumer. Please check the product
with respect to completeness and manufacturing or material defects immediately
at the date of purchase or, in the event that the product was purchased in distance
selling, immediately after receipt. In case of a defect stop using the product and
take or ship it immediately to the retailer who initially sold it. In a warranty case the
product has to be returned in a clean and complete condition. Prior to contacting
the retailer, please read this instruction manual carefully. This warranty does not
cover any damages caused by misuse, environmental influence (water, fire, road
accidents etc.) or normal wear and tear. It does solely apply in the event that the use
of the product was always in compliance with the operating instructions, if any and
all modifications and services were performed by authorized persons and if original
components and accessories were used. This warranty does not exclude, limit or
otherwise affect any statutory consumer rights, including claims in tort and claims
with respect to a breach of contract, which the buyer may have against the seller or
the manufacturer of the product.
GARANTIEBEDINGUNGEN WARRANTY
27
28
La garantie suivante s‘applique uniquement dans le pays où ce produit a été vendu
la première fois par un détaillant à un client. La garantie couvre tous les défauts
matériels et de fabrication, existants ou apparaissants à la date de l‘achat ou dans
un délai de deux (2) ans à compter de la date d‘achat au détaillant qui l‘a vendu
la première fois au consommateur (garantie fabricant). Dans le cas où un défaut de
fabrication ou de matériau apparaîtrait, le produit sera, au choix du fabricant, soit
réparé gratuitement soit remplacé par un produit neuf. Pour obtenir cette garantie
il est nécessaire de retourner le produit au détaillant qui l‘a initialement vendu au
consommateur et produire l‘original de la preuve d‘achat (facture ou reçu) qui
comporte la date d‘achat, le nom du détaillant et la désignation du produit. La
garantie ne s‘appliquera pas dans le cas où le produit est envoyé au fabricant ou
à toute personne autre que le détaillant ayant effectué la première vente de ce
produit.
GARANTIE

29
30
Spoštovani kupec!
ZAHVALJUJEMO SE VAM ZA NAKUP NAŠEGA OTROŠKEGA VARNOSTNEGA SEDEŽA CYBEX PALLAS-FIX.
ZAGOTAVLJAMO VAM, DA SO BILE PRI RAZVOJU CYBEX PALLAS-FIX UPOŠTEVANE PREDNOSTNE ZAHTEVE KOT SO
VARNOST, UDOBJE IN ENOSTAVNA UPORABA. IZDELEK JE BIL SESTAVLJEN POD IZJEMNO STROGO KONTROLO KVALITETE
IN USTREZA NAJSTROŽJIM VARNOSTNIM STANDARDOM.
Kedves Vásárlónk!
KÖSZÖNJÜK, HOGY VÁSÁRLÁSÁHOZ A PALLAS-FIX TERMÉKET VÁLASZTOTTA.
BIZTOSÍTHATJUK, HOGY A CYBEX PALLAS-FIX KIFEJLESZTÉSE SORÁN IS A BIZTONSÁGOT, KÉNYELMET ÉS FELHASZNÁLÓ
BARÁT KEZELÉST TARTOTTUK SZEM ELŐTT. A TERMÉK A LEGSZIGORÚ MINŐSÉGI ELŐÍRÁSOKNAK MEGFELELŐEN KÉSZÜL.

07/2010
31
32
SL HU
OTROŠKI VARNOSTNI AVTO SEDEŽ CYBEX PALLAS-FIX
Sedežna blazina z oporo za hrbet in oporo za glavo
na nastavljivem podnožju z nastavljivo oblazinjeno
lovilno mizico.
PRIPOROČLJIVO ZA:
Starost: od cca 9 mesecev do 4 let
Teža: 9-18 kg
Za avtomobilske sedeže s 3-točkovnim avtomatskim
samozateznim varnostnim pasom.
HOMOLOGACIJA:
ECE R 44/04,
PALLAS-fix - skupina I, 9-18 kg,
SOLUTION X-fix - skupina II/III, 15-36 kg
Nasvet! Imejte navodila za uporabo vedno pri roki (na primer pod elastično prevleko
na zadnji strani opore za hrbet).
Opozorilo! Za optimalno zaščito vašega otroka morate otroški sedež CYBEX PALLAS-
fix uporabljati in montirati v skladu z navodili.
VSEBINA
KRATKA NAVODILA STAROSTNA SKUPINA I .......................................................................1
KRATKA NAVODILA STAROSTNA SKUPINA II/III ..................................................................2
HOMOLOGACIJA ............................................................................................................32
NAJBOLJŠI POLOŽAJ V VOZILU .......................................................................................34
MONTAŽA OTROŠKEGA SEDEŽA S POMOČJO SISTEMA ISOFIX-CONNECT .................36
DEMONTAŽA SEDEŽA PALLAS-FIX .................................................................................... 36
ZAVAROVANJE MALČKA .................................................................................................38
PRILAGODITEV VIŠINE OTROKOVI VELIKOSTI ..................................................................40
ODSTRANITEV DODATNEGA VLOŽKA ZA PRILAGODITEV VIŠINE SEDEŽA ..................... 40
NASTAVITEV OBLAZINJENE LOVILNE MIZICE - ECE SKUPINA I (9-18 KG) ........................40
SEDEČ IN LEŽEČ POLOŽAJ - ECE SKUPINA I (9-18 KG) .................................................... 42
NASTAVLJIVA OPORA ZA GLAVO ....................................................................................42
ZAVAROVANJE MALČKA S POMOČJO LOVILNE MIZICE - ECE SKUPINA I (9-18 KG) ....44
PRETVORBA S SKUPINE I (9-18 kg) V SKUPINO II/III (15-36 kg) ........................................44
PRILAGODITEV ISOFIX PRITRDITVE ...................................................................................46
ZAVAROVANJE BREZ LOVILNE MIZICE - ECE SKUPINA I (9-18 KG) ..................................48
48 JE VAŠ OTROK PRAVILNO ZAVAROVAN? ....................................................................48
NEGA IZDELKA ..................................................................................................................50
ODSTRANITEV SEDEŽNE PREVLEKE ..................................................................................50
ODSTRANITEV SEDEŽNE PREVLEKE Z OPORE ZA HRBET ..................................................50
ČIŠČENJE ..........................................................................................................................50
KAKO RAVNATI PO NESREČI ............................................................................................52
ŽIVLJENJSKA DOBA IZDELKA ...........................................................................................52
ODLAGANJE IZRABLJENEGA IZDELKA ............................................................................52
52 GARANCIJA ................................................................................................................. 54
CYBEX PALLAS-FIX BIZTONSÁGI GYERMEKÜLÉS
Gyermekülés háttámlával és fejvédővel egy állítható
fő váz részen, állítható biztonsági párnával.
AJÁNLOTT:
Kor: kb. 9 hónapos kortól 4 éves korig.
Súly: 9-18 kg.
3-pontos automatia biztonsági övvel felszerelt autós
ülésekhez.
ENGEDÉLYEZÉS:
ECE R44/04,
PALLAS-fix - I. korcsoport, 9-18 kg
SOLUTION X-fix - II/III korcsoport, 15-36 kg
Figyelem! Kérjük tartsa meg ezt a használati utasítást a jövőben is (pl. a háttámla
huzat alatti részben tárolhatja)
Figyelem! Ahhoz, hogy gyermekének a legmagasabb fokú biztonságot nyújtsa, a
CYBEX PALLAS-fix gyermekülést
TARTALOM
RÖVID HASZNÁLATI UTASÍTÁS I. KORCSOPORT .................................................................1
RÖVID HASZNÁLATI UTASÍTÁS II/III. KORCSOPORT ............................................................ 2
ENGEDÉLYEZÉS .................................................................................................................32
A LEGJOBB POZÍCIÓ A KOCSIBAN .................................................................................34
A GYERMEKÜLÉS BESZERELÉSE AZ ISOFIX-KAPCSOLÓDÁSI RENDSZERREL ....................36
A CYBEX PALLAS-FIX ELTÁVOLÍTÁSA ...............................................................................36
A GYERMEK BIZTONSÁGOS RÖGZÍTÉSE ..........................................................................38
TESTMÉRETHEZ IGAZÍTÁS ...................................................................................................40
ÜLÉSBETÉT ELTÁVOLÍTÁSA .................................................................................................40
AZ ÜTKÖZÉS ELLENI VÉDŐPÁRNA VÉDŐPÁRNA BEÁLLÍTÁSA -
ECE CSOPORT I (9-18 KG) ................................................................................................40
ÜLŐ ÉS DÖNTÖTT POZÍCIÓ - ECE CSOPORT I (9-18 KG) .................................................42
FEJTÁMLA DÖNTÉSE .........................................................................................................42
RÖGZÍTÉS ÜTKÖZÉS ELLENI VÉDŐPÁRNÁVAL - ECE I. KORCSOPORT (9-18 KG) ...........44
ÁTALAKÍTÁS AZ I. KORCSOPORTÓL (9-18 KG) A II/III. KORCSOPORTRA (15-36 KG) .....44
ISOFIX-KAPCSOLÓDÁS VÁLTOZTATÁSA ..........................................................................46
ÜTKÖZÉS ELLENI VÉDŐPÁRNA NÉLKÜLI RÖGZÍTÉS ..........................................................48
MEGFELELŐEN VAN-E GYERMEKE RÖGZÍTVE? .............................................................. 48
TERMÉK ÁPOLÁS ...............................................................................................................50
A HUZAT ELTÁVOLÍTÁSA ...................................................................................................50
AZ ÜLÉSHUZAT ELTÁVOLÍTÁSA A HÁTTÁMLÁRÓL ............................................................50
TISZTÍTÁS ............................................................................................................................ 50
MI A TEENDŐ BALESET UTÁN ............................................................................................52
A TERMÉK ÉLETTARTAMA .................................................................................................. 52
RENDELKEZÉS ....................................................................................................................52
GARANCIA ....................................................................................................................... 54

f
33
34
o
NAJBOLJŠI POLOŽAJ V VOZILU
CYBEX PALLAS-fix lahko, brez sistema ISOFIX-CONNECT, uporabljate na
vseh avtomobilskih sedežih, opremljenih s 3-točkovnim avtomatskim
samozateznim varnostnim pasom, ki so primerni za prevoz odraslih.
Pri montaži z ISOFIX-CONNECT zaskočnima ročicama (o) je potrebna
homologacija za „pol-univerzalno“ kategorijo. Zaradi tega lahko ISOFIX-
CONNECT uporabite le v določenih vozilih. Preglejte priloženi seznam vozil,
ki so primerna za ISOFIX pritrditev. Seznam se redno posodablja, najnovejšo
verzijo najdete na spletni strani www.cybex-online.com.
V izjemnih primerih lahko otroški varnostni sedež uporabite na sprednjem,
sopotnikovem sedežu. Pri tem bodite pozorni na sledeče:
Opozorilo! Otroški varnostni sedež ni primeren za uporabo z 2-točkovnim ali ledvenim
varnostnim pasom. Pri zavarovanju z 2-točkovnim varnostnim pasom lahko pride v
primeru trka do težkih ali celo usodnih poškodb otroka.
Prtljaga in drugi predmeti v vozilu, ki lahko v primeru trka poškodujejo potnike v
avtomobilu, morajo biti vedno dobro zavarovani. Nepritrjeni predmeti se lahko v
primeru trka spremenijo v smrtonosne izstrelke.
Opomba! Otroka nikoli ne puščajte v vozilu samega, brez nadzora.
– Pri vozilih, kjer je sprednji sopotnikov sedež opremljen z varnostnim mehom,
premaknite sopotnikov sedež kolikor je mogoče nazaj. Pri tem ne pozabite, da
mora biti zgornja točka avtomobilskega varnostnega pasu za vodilom za pas pri
otroškem sedežu.
– Obvezno sledite priporočilom proizvajalca vozila.
Opozorilo! Avtomobilski varnostni pas mora potekati diagonalno z zadnje strani in
ne sme nikoli voditi k sprednji zgornji točki pasu pri avtomobilskem sedežu. Če tega
ne morete ustrezno prilagoditi, na primer s premikom sedeža naprej ali z uporabo
drugega avtomobilskega sedeža, pomeni, da otroški sedež ni primeren za ta tip
vozila.
Opozorilo! Za vozila, pri katerih so sedeži montirani ob strani, uporaba otroškega
sedeža ni dovoljena. Če so sedeži obrnjeni nazaj, na primer pri kombijih ali minibusih,
je uporaba otroškega sedeža dovoljena, če so sedeži namenjeni za prevažanje
odraslih. Pazite, da pri montaži otroškega sedeža na nazaj obrnjen sedež, ne
odstranite opore za glavo. Otroški varnostni sedež mora biti pritrjen z avtomobilskim
varnostnim pasom tudi takrat, ko v njem ne prevažate malčka. To je potrebno zaradi
tega, da nepritrjen otroški sedež pri zaviranju v sili ali pri trku ne poškoduje voznika
ali drugih potnikov.
A LEGJOBB POZÍCIÓ A KOCSIBAN
A CYBEX PALLAS-fix terméket ISOFIX KAPCSOLÓDÁS nélkül is lehet
használni a gépjármű 3-pontos automatikus biztonsági öves rögzítésével,
feltételezve, hogy az autó ülés használata felnőttek számára
engedélyezett.
Ha a PALLAS-fix gyermekülést ISOFIX KAPCSOLÓDÁSI rendszerrel (o)rögzíti,
a gyermekülés az ún. „szemi-univerzális“ elfogadási kategóriába esik,
ami azt jelenti, hogy a gyermekülés csak bizonyos meghatározott típusú
gépjárművekben használható. Kérjük tanulmányozza az erre vonatkozó listát,
hogy meggyőződjön gépjárműve kompatibilitásáról. A lista rendszeresen frissül, a
legutóbbi verzió megtekinthető a www.cybex-online.com internetes oldalon.
Kérjük vegye figyelembe az alábbi kivételekt, amikor a biztonsági gyermekülést az
anyósülésen is lehet használni:
Figyelem! Soha en használja a biztonsági gyermekülsét 2 pontos biztonsági övvel
vagy derék övvel. Ha 2 pontos biztonsági övvel rögzíti a gyermekülést, gyermeke
komolyabban megsérülhet egy esetleges baleset során.
Az autóban levő csomagok, tárgyak megfelelő rögzítés nélkül egy esetleges baleset
során súlyos sérüléseket okozhatnak. A laza alkatrészek akár halálos kimenetelű
sérüléseket is okozhatnak.
Figyelem! Soha ne hagyja gyermekét őrizetlenül a kocsiban!
– Légzsákkal felszerelt gépjárműveknél az anyósülést húzza hátra amennyire csak
tudja. Bizonyosodjon meg arról, hogy a gépjármü ülés biztonsági övének felső
pontja a biztonsági gyermekülés övvezetője mögött marad.
– Szigorúan kövesse a gépjármű gyártójának utasításait, tanácsait.
Figyelem! A biztonsági övnek (f) a gyerek háta mögül kell indulnia, és soha nem
szabad, hogy az ülés lapja elől vezetődjön. Ha ezt nem tudja megfelelően beállítani
azáltal pl. hogy előre tolja az ülést vagy kipróbálja az autó egy másik ülésén, akkor
ez a biztonsági gyermekülés nem alkalmas az ön gépjárművébe.
Figyelem! Olyan gépjárműveknél, ahol az ülések oldalsó irányba néznek, ott ennek
a biztonsági gyermekülésnek a használata nem megengedett. Hátrafelé néző
ülések esetén, pl. mini busznál ezen gyermekülés használható, feltételezve, hogy a
gépjármű ülése felnőttek számára engedélyezett. Kérjük győződjön meg arról, hogy
a biztonsági gyermekülés hátrafelé néző gépjármű ülésre történő beszerelésekor a
fejtámla nincs eltávolítva. A biztonsági gyermekülést akkor is be kell kötni az autó
biztonsági övével, ha az épp nincs használatban. Ezáltal elkerülhető a vezető, vagy
utas sérülése egy hirtelen fékezés vagy esetleges ütközés következtében.

35
36
wj
d
c
o
y
b
c
u
MONTAŽA OTROŠKEGA SEDEŽA S POMOČJO SISTEMA ISOFIX-CONNECT
S pomočjo sistema ISOFIX-CONNECT lahko otroški sedež CYBEX PALLAS-fix
tesno spojite z vozilom, tako bo vaš malček še varnejši. Otrok bo še naprej
pripet s 3-točkovnim avtomobilskim varnostnim pasom.
Nasvet! ISOFIX-pritrditveni točki (i) sta dva kovinska obročka na posamezen sedež in
se nahajata med oporo za hrbet in sedežno blazino avtomobilskega sedeža. Če ste
v dvomih, si pomagajte z navodili za uporabo vašega vozila.
Opomba! Pazite, da oba zelena varnostna gumba (b) na zaskočnih ročicah (o)
ne štrlita ven. Po potrebi ju sprostite tako, da pritisnete zeleni varnostni gumb (b)
in potegnete nazaj rdeči gumb za sprostitev (y). Postopek ponovite še pri pri drugi
zaskočni ročici.
Opomba! Za dodatne informacije si preberite poglavje „ZAVAROVANJE MALČKA“.
– Obe zaskočni ročici(o) potisnite v ISOFIX-CONNECT vodili (u), dokler ne slišite, da
sta se s klikom zataknili v ISOFIX pritrditveni točki (i).
– Preizkusite, če je sedež CYBEX PALLAS-fix pravilno pritrjen in sicer tako, da ga
poskušate izvleči.
– Na obeh straneh morata biti jasno vidna zelena varnostna gumba, ki morata štrleti
iz rdečih gumbov za sprostitev (y).
– S pomočjo nastavitvene ročice (c) na podnožju sedeža CYBEX PALLAS-fix lahko
sedaj prilagodite položaj otroškega sedeža.
– Sedaj lahko malčka pripnete; glejte poglavje „ZAVAROVANJE MALČKA S
POMOČJO LOVILNE MIZICE“.
– Priloženi ISOFIX-CONNECT vodili (u) (z daljšima deloma obrnjenima navzgor)
vtaknite v obe ISOFIX pritrditveni točki (j). Pri nekaterih vozilih je primernejša
montaža vodil v nasprotni smeri (daljša dela obrnjena navzdol).
– Potegnite nastavitveno ročico (c), ki jo najdete pod sedežno blazino (d) na
podnožju (w) otroškega sedeža CYBEX PALLAS-fix.
– Zaskočni ročici (o) obrnite za 180°, dokler nista obrnjeni v smeri ISOFIX-CONNECT
vodil (u).
A BIZTONSÁGI GYERMEKÜLÉS BESZERELÉSE ISOFIX KAPCSOLÓDÁSI
RENDSZERREL
A CYBEX PALLAS-fix ISOFIX rendszerrel történő szoros rögzítésével gyermeke
biztonsága növelhető az autóban. Gyermekét az autó 3-pontos övével
rögzítse az autóban.
Figyelem! Az autó ISOFIX kapcsolódási pontjai (j) ülésenként két fémy gyűrűből
állnak, amelyek a háttámla és az ülőrész között találhatóak a gépjárműben. Kétség
esetén tanulmányozza az autója használati utasítását.
Figyelem! Bizonyosodjon meg arról, hogy a csatlakozók (o) két zöld gombja (b) nem
áll ki. Ha szükséges, oldja ki őket azáltal hogy megnyomja majd visszahúzza a piros
kioldó gombokat (y). Ismételje meg mindezt a másik csatlakozóval.
Figyelem! További információért tanulmányozza a „GYERMEK RÖGZÍTÉSE“ pontot.
– Nyomja mindkét csatlakozót (o) az ISOFIX kapcsolódási sínekbe (u) mindaddig,
amig nem hallja a csatlakozók (j) kattanását.
– Bizonyosodjon meg arról, hogy a CYBEX PALLAS-fix megfelelően rögzült, úgy, hogy
próbálja meg kifelé húzni a biztonsági gyermekülést.
– A zöld biztonsági gomboknak (b) mindkét oldalon látszódniuk kell, és túl kell
nyúlniuk a piros kioldó gombokon (y).
– Az állító karral, ami a PALLAS-fix fő vázán található, állíthatja be a gyermekülés
pozícióját.
– Most bacsatolhatja a gyermeket. Tanulmányozza az „ÜTKÖZÉS ELLENI VÉDŐPÁRNA
RÖGZÍTÉSE“ fejezetet.
– Csatlakoztassa az ISOFIX KAPCSOLÓDÁSI síneket (u) (felfelé mutató hosszabb
részek) az ISOFIX csatlakozó pontokhoz (j). Ellentétes installáció (lefelé mutató
hosszabb részek) szintén lehetséges.
– Húzza meg az állító fogantyút (c), ami a CYBEX PALLAS-fix ülőrésze alatt található
(d) a fő vázon (w).
– Húzza meg a csatlakozókat (o) amennyire csak tudja.
– Forgassa el 180 ° fokkal a csatlakozókat,amíg azok az ISOFIX kapcsolódási sínek
felé nem mutatnak.
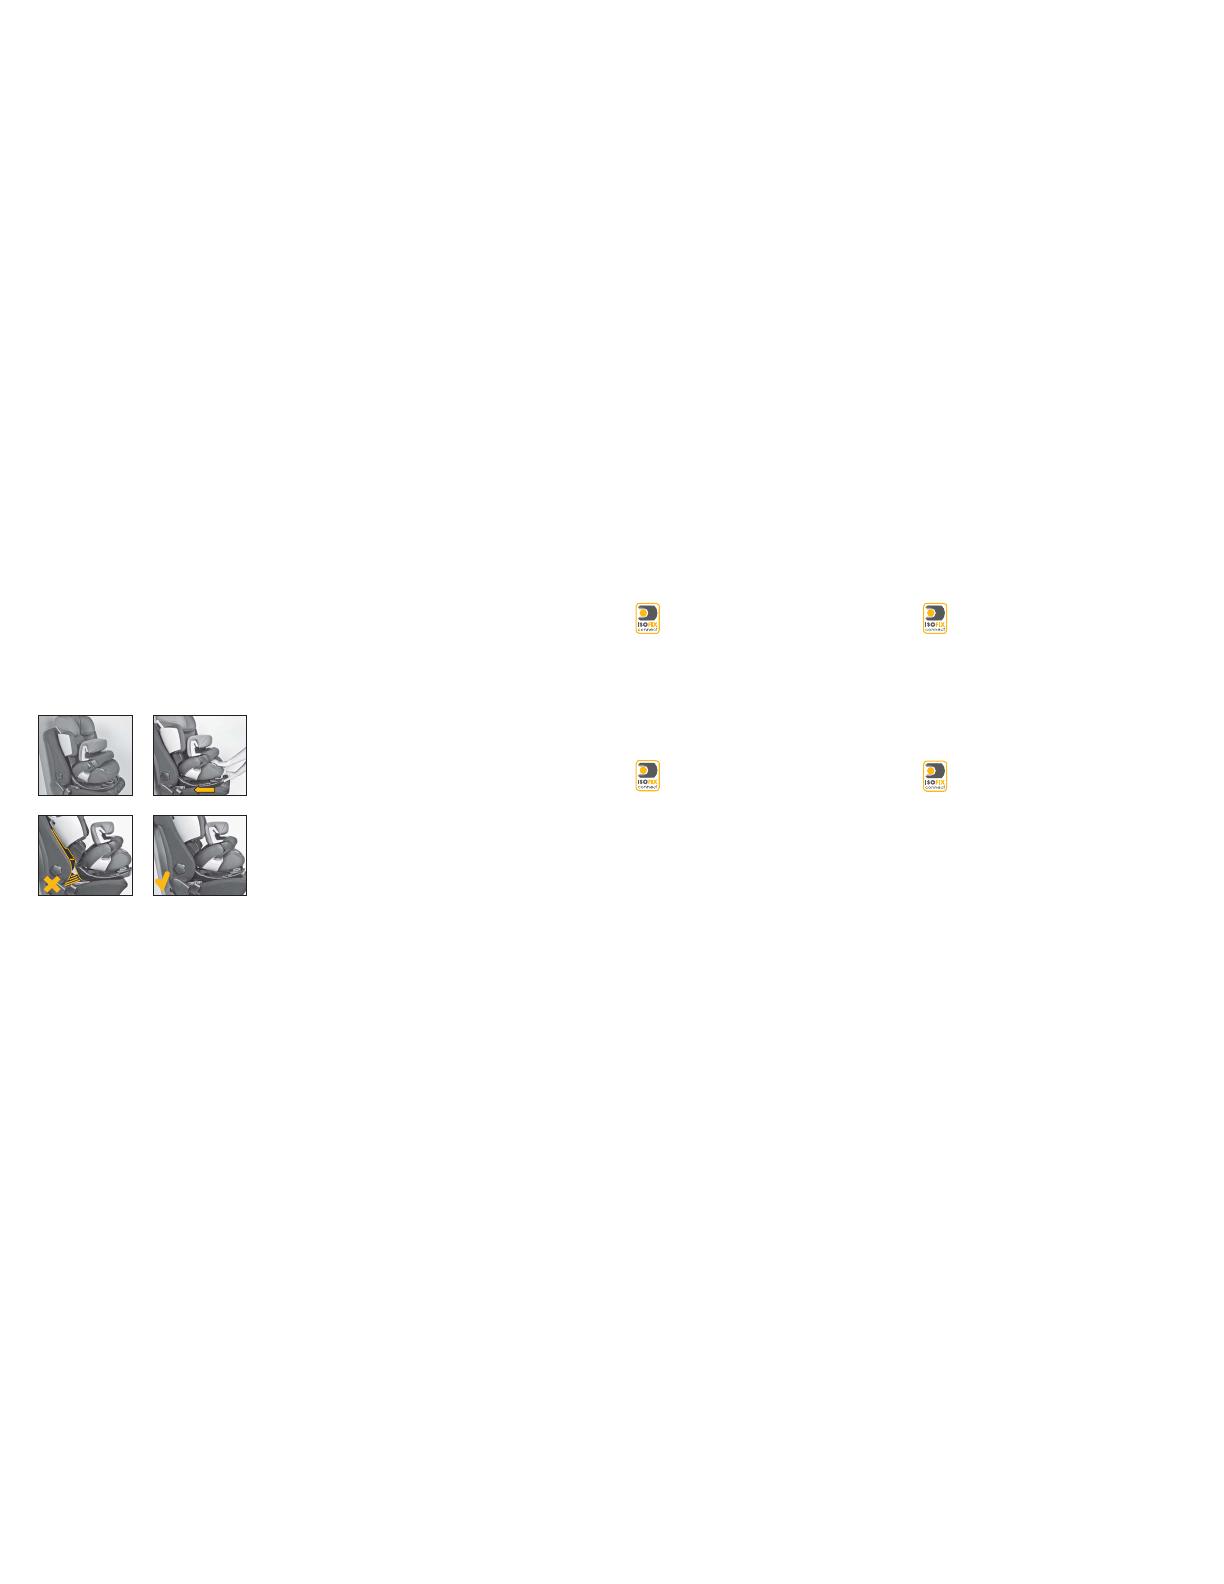
37
38
DEMONTAŽA SEDEŽA CYBEX PALLAS-FIX
Ravnajte v obratnem vrstnem redu kot pri montaži sedeža.
Opomba! Če boste sledili tem korakom, boste s tem zaščitili avtomobilsko sedežno
blazino, ISOFIX zaskočni ročici pa obvarovali pred umazanijo ali poškodbami.
Poškodbe in madeži lahko ovirajo nemoteno delovanje.
– Sprostite zaskočni ročici (o)in sicer tako, da pritisnete zelena varnostna
gumba (b) in potegnete nazaj rdeča gumba za sprostitev (y).
– Potegnite otroški varnostni sedež z ISOFIX-CONNECT vodil (u).
– Obrnite zaskočni ročici za 180°.
– Potegnite nastavitveno ročico (c) na podnožju (w) sedeža CYBEX PALLAS-fix in
potisnite zaskočni ročici (o) v otroški sedež, dokler nista povsem skriti.
ZAVAROVANJE MALČKA
Opomba! Na nekaterih prevlekah avtomobilskih sedežev iz občutljivih materialov
(npr. usnje, velur) se lahko zaradi uporabe otroškega sedeža pojavijo sledi obrabe. Da
bi se izognili tem nevšečnostim, lahko pod otroški sedež podložite odejo ali brisačo.
Otroški sedež CYBEX PALLAS-fix postavite na ustrezen avtomobilski sedež.
– Pazite, da se opora za hrbet (a) otroškega sedeža CYBEX PALLAS-fix tesno prilega
naslonjalu avtomobilskega sedeža, tako da se otroški sedež v nobenem primeru
ne more nagniti.
– Če uporabljate ISOFIX pritrditvene točke (i) v avtomobilu, pazite, da je
opora za hrbet (a) otroškega sedeža CYBEX PALLAS-fix povsem uravnana
in v tesnem stiku z zgornjim delom naslonjala avtomobilskega sedeža.
Položaj opore za hrbet lahko prilagajate s pomočjo nastavitvene ročice
(c), ki jo najdete pod sedežno blazino (d) na podnožju (w) otroškega
sedeža.
– Če je opora za glavo pri avtomobilskem sedežu moteča, jo povsem izvlecite,
obrnite nazaj ali odstranite (izjemen primer, preberite poglavje „ NAJBOLJŠI
POLOŽAJ V VOZILU“). Opora za hrbet (a) se zlahka prilagaja vsem nagibom
avtomobilskega sedeža.
Opozorilo! Opora za hrbet otroškega sedeža CYBEX PALLAS-fix se mora ravno
prilegati naslonjalu avtomobilskega sedeža. Če dodatni vložek potisnete nazaj,
lahko otroški sedež tesno potisnete proti naslonjalu avtomobilskega sedeža. Za
maksimalno zaščito vašega malčka mora biti sedež v običajnem, pokončnem
položaju.
A CYBEX PALLAS-FIX ELTÁVOLÍTÁSA
Végezze el a beszerelési lépéseket fordított sorrendben.
Figyelem! Ha követi ezeket a lépéseket, megvédi az ülést és az ISOFIX csatlakozókat
a károsodástól, rozsdásodástól. A károsodás, rozsda akadályozhatják a termék
megfelelő működését.
– Oldja ki a csatlakozókat (o) azáltal, hogy megnyomja a zöld biztonsági
gombokat (b) és hátrafelé húzza a piros kioldó gombokat (y).
– Húzza ki a gyermekülést az ISOFIX csatlakozó sínekből (u).
– Forgassa el a csatlakozókat (o) 180° fokkal.
– Húzza meg az állító kart (c), ami a CYBEX PALLAS-fix fő vázán található és nyomja
a csatlakozókat (o) a gyermekülésbe, mindaddig, amíg azok el nem tűnnek.
A GYERMEK BIZTONSÁGA
Figyelem! Néhány speciális, érzékenyebb anyagú autós ülésnél (velúr, bőr, stb.)
a biztonsági gyermekülés használata kopást eredményezhet. Ezt elkerülendően
helyezzen takarót vagy törölközőt a gyermekülés alá.
Helyezze a CYBEX PALLAS-fix terméket alkalmas helyre a gépjárműben.
- Kérjük bizonyosodjon meg arról, hogy a CYBEX PALLAS-fix háttámlája megfelelően
illeszkedik az autó üléséhez, a gyermekülés semmi esetre sem lehet alvó
pozícióban.
– A kocsiban az ISOFIX csatlakozási pontokat (j) használva a CYBEX
PALLAS-fix háttámlája (a) teljes mértékben illeszkedik az autó ülésének
függőleges részével. A megfelelő pozíció a fővázon (w) található, ülőrész
(d) alatti fogantyú (c) segítségével állítható be.
– Amennyiben az autó ülésének fejtámlája zavaró, úgy azt teljesen húzza ki, fordítsa
el vagy vegye le teljesen (kivételes eset, tanulmányozza a „LEGJOBB POZÍCIÓ
A KOCSIBAN“ részt. A háttámla (a) optimálisan majdnem minden típusú autós
üléshez megfelelően illeszthető.
Figyelem! A CYBEX PALLAS-fix háttámlájának illeszkednie kell az autós ülés
háttámlájához. Tolja hátrafelé a gyermekülés ülőrészét addig, amíg az nem érinti
szorosan az autó ülését. Gyermeke legjobb védelme érdekében a legjobb, ha a
gyermekülés normál függőleges pozícióban van!
A página está carregando...
A página está carregando...
A página está carregando...
A página está carregando...
A página está carregando...
A página está carregando...
A página está carregando...
A página está carregando...
A página está carregando...
A página está carregando...
A página está carregando...
A página está carregando...
A página está carregando...
A página está carregando...
A página está carregando...
A página está carregando...
A página está carregando...
A página está carregando...
A página está carregando...
A página está carregando...
A página está carregando...
-
 1
1
-
 2
2
-
 3
3
-
 4
4
-
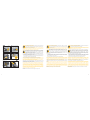 5
5
-
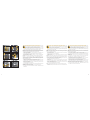 6
6
-
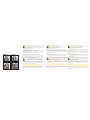 7
7
-
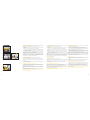 8
8
-
 9
9
-
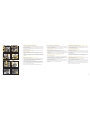 10
10
-
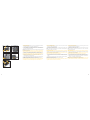 11
11
-
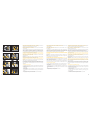 12
12
-
 13
13
-
 14
14
-
 15
15
-
 16
16
-
 17
17
-
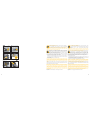 18
18
-
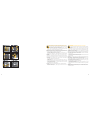 19
19
-
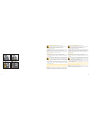 20
20
-
 21
21
-
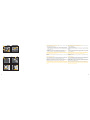 22
22
-
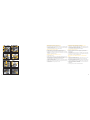 23
23
-
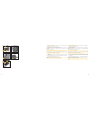 24
24
-
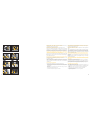 25
25
-
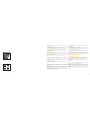 26
26
-
 27
27
-
 28
28
-
 29
29
-
 30
30
-
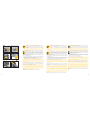 31
31
-
 32
32
-
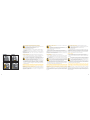 33
33
-
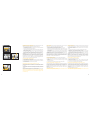 34
34
-
 35
35
-
 36
36
-
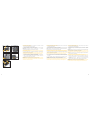 37
37
-
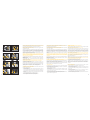 38
38
-
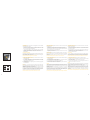 39
39
-
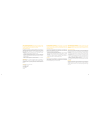 40
40
-
 41
41


CYBEX Pallas 2-fix Manual do usuário
- Categoria
- Assentos de carro
- Tipo
- Manual do usuário
- Este manual também é adequado para
em outras línguas
- español: CYBEX Pallas 2-fix Manual de usuario
- français: CYBEX Pallas 2-fix Manuel utilisateur
- italiano: CYBEX Pallas 2-fix Manuale utente
- English: CYBEX Pallas 2-fix User manual
- Deutsch: CYBEX Pallas 2-fix Benutzerhandbuch
Artigos relacionados
-
CYBEX SOLUTION X-FIX Manual do usuário
-
CYBEX PallaS Guia de usuario
-
CYBEX Solution X2 Manual do usuário
-
-
CYBEX SOLUTION Q2-FIX Manual do usuário
-
CYBEX PALLAS S-FIX Manual do usuário
-
CYBEX SOLUTION X Manual do usuário
-
CYBEX JUNO M-FIX Manual do usuário
-
CYBEX SOLUTION X2-FIX Manual do usuário
-
CYBEX SOLUTION M-FIX Manual do usuário
Outros documentos
-
Brevi Car seat KIMI Isofix tt Manual do proprietário
-
mothercare Recaro Tian 0724186 Manual do proprietário
-
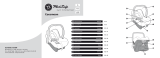 Dr. Schandelmeier MediSafe Cocomoon Manual do usuário
-
Britax Safefix Plus Manual do proprietário
-
 Jole duallo™ Manual do usuário
-
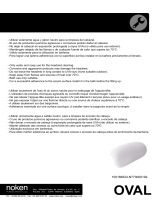 noken 100166524 Guia de instalação
-
Joie C1504ABEMB000 Manual do usuário
-
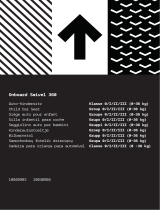 Babify 10040903 Manual do proprietário
-
mothercare BOLD Manual do usuário
-
Britax Kidfix Sict Manual do proprietário


